manuals.online logo
Brands
  1. Home
  2. •
  3. Brands
  4. •
  5. Pfeiffer Vacuum
  6. •
  7. Water Pump
  8. •
  9. Pfeiffer Vacuum TMU 521 P User manual

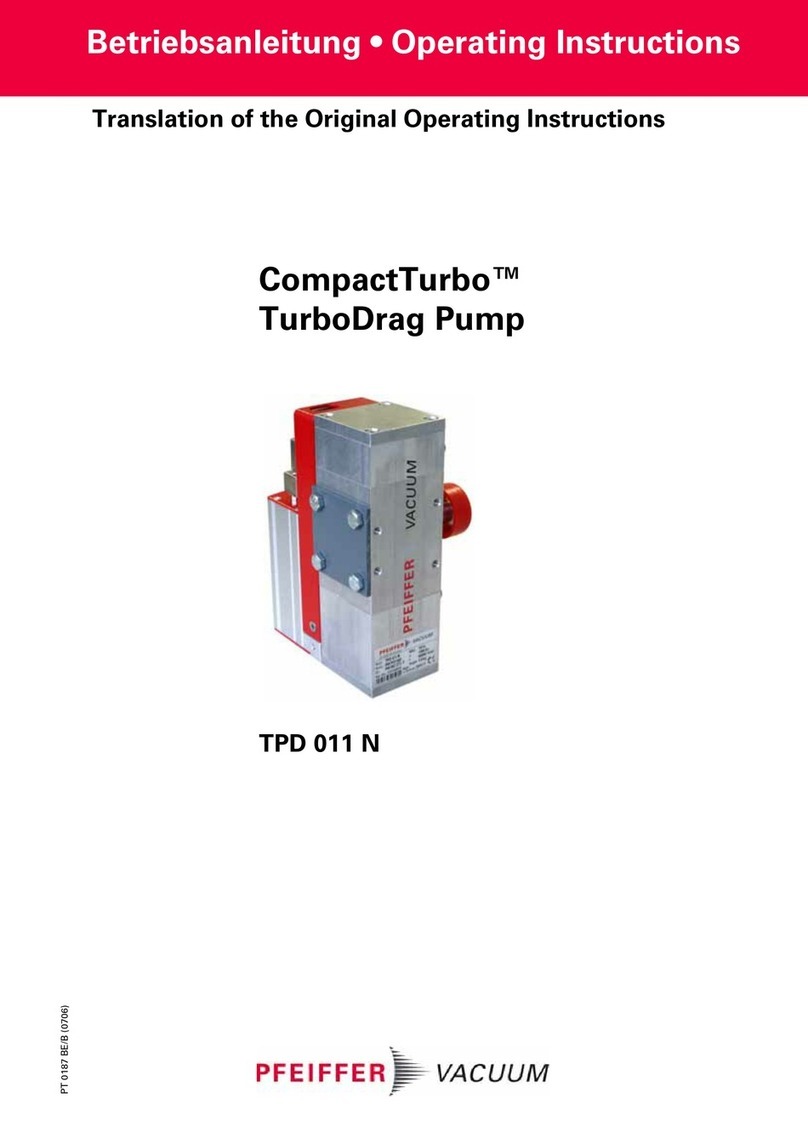
Pfeiffer Vacuum TMU 521 P User manual

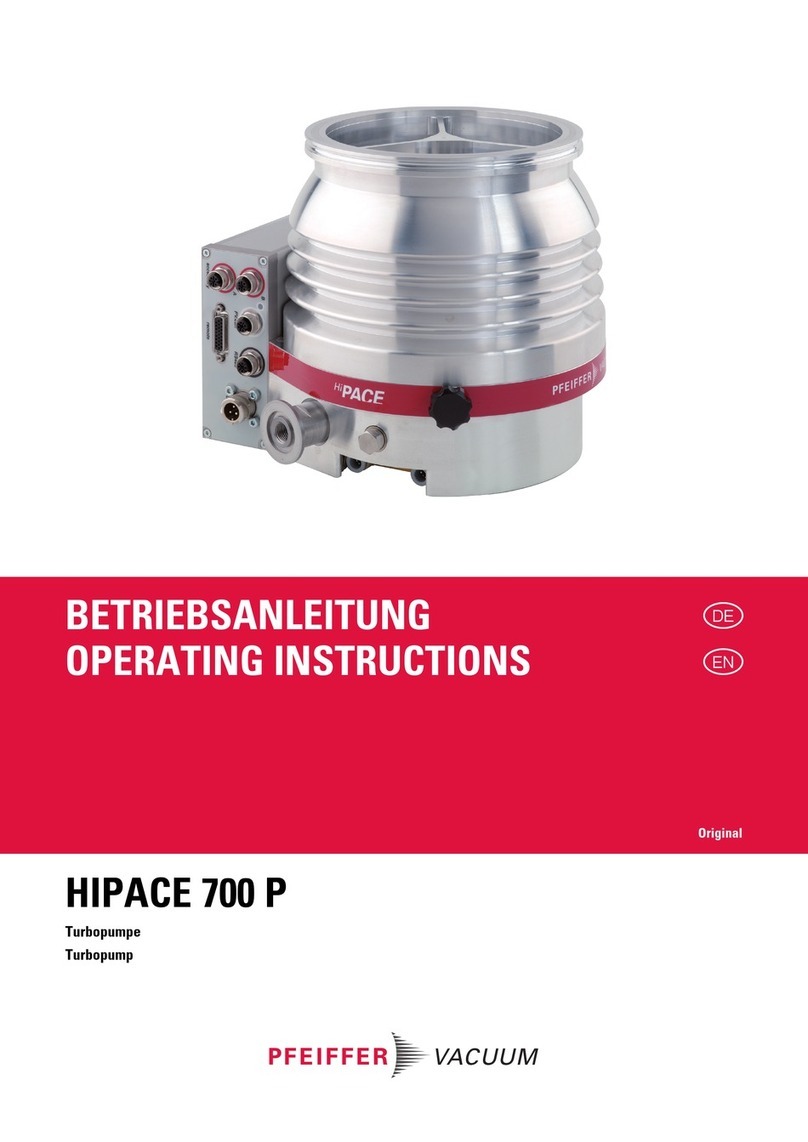
Turbomolecular Drag Pumps
With Electronic Drive Unit TC 600
PM 800 496 BE/F (0210)
TMH 521 P
TMU 521 P
Betriebsanleitung • Operating Instructions
2
Index
Page Page
1. Safety Instructions.................................. 3
1.1. For Your Orientation........................................................... 3
1.2. Pictogram Definitions........................................................ 3
2. Understanding The Pumps
TMH 521 P/TMU 521 P............................. 4
2.1. Main Features..................................................................... 4
Proper Use .......................................................................... 4
Improper Use ...................................................................... 4
2.2. Differences Between The Pump Types.......................... 5
3. Installation............................................... 5
3.1. Preparations For Installation............................................ 5
3.2. Installing The Pump,
Connecting The High Vacuum Side ................................ 5
Fitting The Splinter Shield (Accessory).......................... 6
3.3. Connecting The Fore-Vacuum Side ................................ 6
3.4. Connecting The Cooling Unit............................................ 7
3.5. Connecting The Venting Valve......................................... 7
3.6. Connecting The Casing Heating Unit.............................. 7
3.7. Connecting The Sealing Gas Valve................................. 7
3.8. Connecting The Electronic Drive Unit TC 600................ 8
3.9. Installing The power unit .................................................. 8
3.10. Connecting The Remote Control Unit ............................. 9
3.11. Connecting The Serial Interface RS 485 ...................... 10
Connection ........................................................................ 10
Connecting The RS 485 ................................................... 10
3.12. Connections Diagram...................................................... 11
4. Operations.............................................. 12
4.1. Before Switching ON....................................................... 12
4.2. Switching ON.................................................................... 12
4.3. Switching OFF And Venting............................................ 13
4.4. Gas Type Dependent Operations .................................. 13
4.5. Shutting Down For Longer Periods ............................... 13
4.6. Operations With The DCU 001/DCU 300 ....................... 14
4.7. Operations With The Remote Control Unit................... 14
Venting Release (Optional)............................................. 14
Motor, Turbopump ........................................................... 14
Pumping Station ............................................................... 14
Heating/Reset ................................................................... 14
Standby.............................................................................. 14
Rotation Speed Setting Mode Via
Input PWM ........................................................................ 14
Switching Outputs............................................................ 15
5. Monitoring Operations ......................... 15
5.1. Operations Display Via LED............................................ 15
5.2. Turbopump Temperature Management....................... 15
6. What To Do In Case Of
Breakdowns ? ........................................ 16
7. Maintenance.......................................... 17
7.1. Replacing The Lubricant Reservoir............................... 17
8. Service.................................................... 18
9. Technical Data....................................... 19
9.1. Dimensions Diagram ....................................................... 20
10. Spare Parts............................................. 21
11. Accessories ........................................... 22
Drawings....................................................... 23
Declaration of Contamination..................... 24
Manufacturer’s Declaration .......... (last page)
Please note: Current operating instructions are available via
www.pfeiffer-vacuum.de under ”Infoservice”.
3
Danger of damage to the pump or to the system.
Danger of burns from touching hot parts.
BEWARE
Attention to particularly important information
on the product, handling the product or to a
particular part of the documentation.
☞
PLEASE NOTE
Danger of injury from rotating parts.
Danger of personal injury.
☞Read and follow all instructions in this manual.
☞Inform yourself regarding:
– Hazards which can be caused by the pump;
– Hazards which can be caused by your system.
– Hazards which can be caused by the media being
pumped.
☞Avoid exposing any part of the body to vacuum.
☞Observe the safety and accident prevention regulations.
☞Regularly check that all accident prevention measures are
being complied with.
☞Do not operate the turbopump with open high vacuum
flange.
☞Do not carry out any unauthorised conversions or
alterations to the turbopump with TC 600.
☞When returning the turbopump observe the shipping
instructions.
☞Use at least 4 bracket screws to connect the high vacuum
flange (ISO-flange).
☞The turbopump must be anchored in accordance with the
installation instructions.
☞Do not disconnect the plug between the TC 600 and
accessory components during operations.
☞Disconnect the voltage supply for the TC 600 before
opening the turbopump.
☞When working on the turbopump, the high vacuum flange
should only be opened once the rotor is at rest.
☞When using sealing gas, the pressure in the hose connec-
tion should be limited to 2 bar via the overpressure valve.
☞If a heater is in use temperatures of up to 120 °C can be
present in the area of the high vacuum flange. Take care to
avoid burns !
☞During operations, temperatures of up to 65 °C can arise in
the lower part of the turbopump. Take care to avoid burns !
☞Keep leads and cables well away from hot
surfaces ( > 70 °C).
☞Operate the turbopump with TC 600 only in conjunction
with the relevant power unit (accessory).
☞The unit has been accredited protection class IP 30. When
the unit is operated in environments which require other
protection classes, the necessary measures must be
taken. Protection class IP 54 is afforded by retro-fitting a
cover plate (accessory) to the TC 600.
☞The mains connection must be subject to a safe
connection to the PE (protection class 1).
☞If the turbopump and the TC 600 are operated
independently of each other (only permissible with the
agreement of the manufacturer) the turbopump must be
connected to the PE.
☞The turbopump and the TC 600 must only be disconnected
from each other when the turbopump is completely at rest
and the TCP 600 has been disconnected from the power
supply.
☞The cause of any operating voltage leakage to earth (red
LED flashes) must be eliminated to avoid the danger of an
electric shock.
Modifications reserved.
1. Safety Instructions
1.1. For Your Orientation
On page 47 of this operating manual you will find a drawing
showing the connection options for the power unit and
accessories.
Instruction in the text
➡Working instruction: here, you have to do something.
Symbols used
The following symbols are used throughout in all illustrations.
High vacuum flange
Fore-vacuum flange
Venting connection
Air cooling
Electric connection
Sealing gas connection
Abbreviations used
DCU = Operating and display control unit
TC = Electronic drive unit, turbopump
TPS = Power unit
Position numbers
The same pump and accessory parts have the same position
numbers in all illustrations.
1.2. Pictogram Definitions
4
2.1. Main Features
Turbopumps TMH521 P/TMU 521 P with the TC 600 form an
unit. Voltage is supplied by the power unit (see ”Accessories”).
On delivery the pumps are set up for operations
without the operations and display unit DCU.
Where operations with the DCU are involved,
remote plug 8d should be disconnected
☞
PLEASE NOTE
Cooling
Water cooling or air cooling is required (”Accessories”).
Integrated protective measures against excess temperatures:
The Electronic Drive Unit TC 600 reduces
the rotor rotation speed.
Bearings
High vacuum side: wear free permanent magnetic bearing.
Fore-vacuum side: oil circulatory lubricated ball bearing
with ceramic balls.
2. Understanding The Pumps TMH 521 P/TMU 521 P
Proper use
– The Turbomolecular Pumps TMH 521 P/TMU 521 P may
only be used for the purpose of generating vacuum.
– The turbopumps may only be used to pump those media
against which they are chemically resistant. For other
media the operator is required to qualify the pumps for the
processes involved.
– If the process produces dust, the maintenance intervals
must be specified accordingly and sealing gas must be
used.
– If the pump to be operated with more then 50% of the
permissible gas load, sealing gas must be used.
– The turbopump must be connected to a backing pump in
accordance with Section 3.3.
– Only PFEIFFER power units may be used to operate the
TC 600. The use of other power units requires the express
agreement of the manufacturer and equalisation with the
valid specification.
– The pumps with TC 600 may only be operated providing the
ambient conditions in compliance with Protection Type
IP 30 are observed.
Improper use
The following is regarded, inter alia, as improper:
– The pumping of explosive or corrosive gases.
– Operating the pumps in areas where there is a danger of
explosion.
– The pumping of gases and vapours which attack the mate-
rials of the pumps.
– The pumping of corrosive gases without sealing gas.
– The pumping of condensating vapours.
– Operations involving impermissibly high levels of gas
loads.
– Operations with impermissibly high fore-vacuum pressure.
– Operations with improper gas modes.
– Operations involving too high levels of heat radiation
power (see Section 9. ”Technical Data”).
– Operating the pump in environments which require a pro-
tection class superior to IP 30.
– The use of other power units or accessories which are not
named in this manual or which have not been agreed by
the manufacturer.
– The connection to power units with earthing of a direct
voltage pole.
Improper use will cause all claims for liability and guarantees
to be forfeited.
Turbomolecular Drag Pump TMH 521 P/TMU 521 P
1 High vacuum flange
2 Fore-vacuum flange
4 Venting screw
6 Rubber foot
8 Electronic Drive Unit TC 600
8d Remote plug
1
2
6
8
4
8d
5
3. Installation
3.1. Preparations For Installation
Do not carry out any unauthorised conversions
or alterations to the turbopump.
– The maximum permissible rotor temperature of the pump is
90 °C. If the vacuum chamber or parts in the vacuum
chamber are heated must be fitted if necessary, suitable
shielding in the vacuum chamber before the turbopump
(constructional suggestions available on request).
– Only remove the blank flange from the high and fore-vacu-
um side immediately before connection.
– On Turbopumps TMH 521 P/TMU 521 P the lubricant reser-
voir is already fitted and filled.
– Where magnetic fields of > 5.0 mT are involved suitable
shielding must be provided (available on request).
– If the pump is baked out, the heating sleeve and the body
of the pump must be insulated to prevent burns from
accidental contact.
– In the event of a sudden standstill of the rotor, torques of
up to 2680 Nm can arise and these must be taken up by the
turbopump and frame. Pumps must be anchored as
follows:
– ISO flange with 4 bracket screws, or
– CF flange with the complete set of M8 screws, or
– Underside of the pump with 6 screws M8,
screws quality 8.8. (threaded holes see Section 9.1.
Dimensions Diagram).
– For operating the pump air or water cooling is necessary.
Feature TMH 521 P TMU 521 P
High vacuum flange ISO-K CF-F
High vacuum seal Viton Metal
Attainable final < 1 · 10-8 mbar < 5 · 10-10 mbar
pressure (without baking-out) (with baking-out)
2.2. Differences Between The Pump Types
3.2. Installing The Pump,
Connecting The High Vacuum Side
The utmost cleanliness must be observed when
fitting all high vacuum parts. Unclean
components prolong the pumping time.
Using the splinter shield
The use of a splinter shield in the high vacuum flange
protects the turbopump against foreign bodies coming from
the vacuum chamber but does reduce the volume flow rate of
the pump by approximately 15%.
For fitting splinter shields please refer to “Fitting the splinter
shield”
The high vacuum side can be flanged directly to the vacuum
chamber or via a bellows or a vibration compensator from
PFEIFFER (please see ”Accessories”).
Connecting via a bellows
If the high vacuum side is to be flanged via a bellows, the tur-
bopump must be secured for example via the holes on the
underside of the turbopump must be secured for example via
the holes on the underside of the pump. The fastening must
be able to withstand the torque referred to in Section 3.1.
Connecting via a PFEIFFER vibration compensator
(accessory)
The maximum permissible temperature at the
vibration compensator is 100 °C.
Where a vibration compensator is in use, a freely suspended
turbopump can be flanged onto the vacuum chamber.
Additional fastening is unnecessary.
☞
PLEASE NOTE
Abbreviations on the rating plate of the pump
Suffix ”P”: Pumps with the designation TMH/TMU 521 P
have been designed for the connection
of purge gas (see Section 3.7.).
6
The maximum loading capacity of the high vacu-
um flange is 1000 N (equivalent to 100 kg).
Assymetric loading on the high vacuum flange
must be avoided.
With horizontal pump installation and oil-sealed backing
pumps (e.g. rotary vane pumps) the fore-vacuum flange of the
turbopump must be aligned vertically downwards (maximum
deviation ±20°), otherwise the turbopump could become
dirty.
Installation position with oil-sealed backing pump
11 Vacuum chamber
No forces from the piping system must be
allowed to act on the pump where turbopumps
are anchored.
Suspend or support all pipes to the turbopump.
Directly flanging the pump
The turbopump can be flanged onto the vacuum chamber
vertically (0°) up to an angle of 90° maximum.
The fore-vacuum flange must always point
downwards.
Fitting The Splinter Shield (Accessory)
Insert the splinter shield in the high vacuum flange in such a
way that the corrugation of the strainer points outwards.
➡Bend the clamping lugs slightly outwards so that
subsequently the splinter shield is seated firmly in the high
vacuum flange (to avoid noise).
➡Insert the splinter shield in the high vacuum flange while
pressing the clamping lugs slightly inwards.
➡Press the outer ring of the splinter shield up to the limit
stop point in the high vacuum flange.
12a
12
H
Inserting the splinter shield
12 Splinter shield
12a Clamping lug
3.3. Connecting The Fore-Vacuum Side
Backing pump: Vacuum pressure ≤5 mbar
Recommendation: Oil-Free Diaphragm Pump or Rotary
Vane Vacuum Pumps from the PFEIFFER
range (note installation position,
turbopump, see Section 3.2.).
Connecting the backing pump
All connections of the fore-vacuum line: with the usual small
flange components or hose screw connections.
Be sure to conduct away the exhaust gases
from the backing pump. Do not reduce the free
cross section of the fore-vacuum flange with
following components.
The exhausted process gases and vapours can
represent a health hazard and can also be
environmentally damaging.
Comply with all gas manufacture's safety
instructions.
➡With rigid pipe connections: fit a bellows in the connecting
line to reduce vibration.
➡The electrical connection of the backing pump is made via
a relay box whose control line is connected to ”FV PUMP”
on the TC 600.
Please refer to Operating Instructions PT 800 030 BN for
details on the relay box, backing pump and its installation.
90°
11
C40-915
Permissible installation positions for the turbopump
11 Vacuum chamber
11
7
Connecting the venting valve
8 Electronic Drive Unit TC 600
42 Venting valve TVF 005
42a Control lead venting valve/TC 600
42b Plug
3.4. Connecting The Cooling Unit
The Turbopumps TMH 521 P/TMU 521 P must be water or air
cooled.
Air cooling may only be used where the ambient temperature
is < 35 °C.
Use and installation:
– For water cooling please refer to Operating Instructions
PM 800 546 BN.
– For air cooling please refer to Operating Instructions
PM 800 543 BN.
3.5. Connecting The Venting Valve
The venting valve TVF 005 provides automatic venting in the
event of a power failure and switching off.
Fitting the venting valve
➡Unscrew the venting screw from the venting connection of
the turbopump.
➡Screw in venting valve with seal (USIT ring) on hexagonal
SW 14.
Electrical connection
➡Plug control lead 42a into the connection ”VENT” of the
TC 600 (8) on the turbopump.
The venting mode of the venting valve is selected via the DCU
or Serial Interface RS 485.
The maximum pressure at the venting valve is
1.5 bar absolute.
Please refer to Operating Instructions PM 800 507 BN for
details on Venting Valve TVF 005.
3.6. Connecting The Casing Heating Unit
The attainment of final pressures is accelerated when
turbopumps and vacuum chambers are baked out.
The heating duration is dependent on the degree of dirt and
on the required final pressure level. The heating duration
should be at least 4 hours.
Where casing heating is involved the turbopump
must be water cooled.
High temperatures are generated when
turbopumps and vacuum chambers are baked
out. There is a danger of burns resulting from
touching hot parts, even after the casing heating
has been switched off.
Ideally, the heating sleeve, pump casing and
vacuum chamber should be insulated during
installation. Do not touch the heating sleeve,
pump casing and vacuum chamber during the
baking out process.
Please refer to Operating Instructions PM 800 542 BN for
details on the casing heating unit and its installation.
3.7. Connecting The Sealing Gas Valve
To protect the pump, particularly where corrosive or dust
producing processes are involved, it is necessary to use
sealing gas.
Connection is made via the sealing gas valve (please see
“Accessories”).
BEWARE
☞
PLEASE NOTE
66 66a
15
9
Connecting the sealing gas valve
9 Locking screw sealing gas connection
15 Dichtung
66 Sperrgasventil
66a Dichtung
Please refer to Operating Instructions PM 800 229 BN for
details on installing the sealing gas valve and adjusting the
sealing gas flow.
8
3.9. Installing The power unit
Voltage may only be supplied with the PFEIFFER
power units (Accessory). The use of other
power units requires the express agreement of
the manufacturer and equalization with the valid
specification (power unit specifications
available an request).
Please refer to Operating Instructions PM 800 521 P BN for
details on Power Unit TPS 300.
3.8. Connecting The Electronic Drive Unit TC 600
The turbopump and the Electronic Drive Unit
TC 600 are connected and together form a single
unit.
Connecting cable 8a has to be ordered in
wanted length separately (see ”Accessories”).
➡Unscrew screw with tooth lock 8c from the TC 600 (above
the connection X4).
➡Plug the plug X4 on connecting cable 8a into the connec-
tion X4 on the TC 600 and screw in screw 8b.
➡Secure plug X4 on the TC 600 with a screw and
tooth lock 8c.
➡Connect plug X2 on connecting cable 8a with power unit
TPS 300/DCU 300 (”Accessories”) on connection X2.
➡Using screws and toothlock 8c (two pieces, included with
the cable consigment) secure plug X2 to power unit 105.
Once operations voltage has been supplied, the
TC 600 performs a self test on the supply
voltage. The supply voltage for Turbomolecular
Pumps TMH 521 P/TMU 521 P is 72 V DC ±5% in
accordance with EN 60 742.
If the turbopump is being operated with the Operations And
Display Unit DCU 001/300, remote plug 8d should be
disconnected. Connection should be carried out in accor-
dance with Operating Instructions PM 800 477 BN.
☞
PLEASE NOTE
X4 8
8b
X4
8c
8a
8c
X2
X1
S1
X2
105
8d
Connecting the TC 600 with Power Unit TPS 300/DCU 300
X1 Mains connection
X2 Connection, power unit
X4 Connection TC 600
S1 ON/OFF switch
8 Electronic Drive Unit TC 600
8a Connecting cable, TC 600 – TPS/DCU
8b Screw
8c Screw with tooth lock (3 pieces)
8d Remote plug
105 Power Unit
9
3.10. Connecting The Remote Control Unit
Remote control options for various functions are provided with
the connection "REMOTE" on the TC 600 via the 15-pole D-Sub-
Connector. Shielded cable must be used. Shielding is on the
plug side of the TC 600 connected to the TC casing.
The inputs 2-6 are activated by connecting them to the + 24 V
on pin 1 (active high) (please see ”Connection Diagram”).
Pin occupancy and remote plug functions
(please see following table).
When connecting supply voltage, the turbopump
is started.
On delivery:
Pin 1, Pin 2, Pin 3 and Pin 4 are bridged in the
mating plug.
1
8
9
15
Pin arrangement remote plug
Pin occupancy and remote plug functions
Pin nr. Input open (low) Input closed (high) on + 24V (pin 1)
1 +24 V
2 venting blocked (see Section 3.5.) venting released (see Section 3.5.)
3 motor, turbopump off motor, turbopump on:
the turbopump is driven, current flows through the motor coils
4 pumping station off pumping station on:
the turbopump is driven, backing pump is started via the relay box
5 heating off heating on:
the heating is switched on once the rotation speed switchpoint is attained and off
when the rotation speed switchpoint is unattained
5 reset:
by supplying a pulse (T < 2s) with an amplitude of 24V a malfunction
acknowledgement can be processed
6 standby off standby on:
pump is accelerated to 66% of its nominal rotation speed
7 rotation speed setting mode off the rotation speed can be changed by feeding a PWM signal to this pin or
via Serial Interface RS 485 (see Section 4.7. ”Rotation Speed Setting Mode”)
8Output (low) Output (high)
rotation speed switchpoint not attained rotation speed switchpoint attained; output can be loaded with 24 V/50 mA
9Output (low) Output (high)
Collective malfunction message malfunction-free operations;
output can be loaded with 24 V/50 mA
10 Mass (ground) _________
11 Contact contact1) between pin 11 and pin 12 closed
Output 1: Switchpoint attained if the turbopump is above the switchpoint
12 Contact
Output 1: Switchpoint attained
13 Contact contact1) between pin 13 and pin 14 open in the event of a collective malfunction
Output 2: Collective malfunction message
14 Contact
Output 2: Collective malfunction message
15 Analog output rotation speed proportional output voltage 0 - 10 VDC =
0 - 100 % * fend/load R ≥10 kΩ
1) The following technical data is applicable for the contacts: Umax = 50 VDC
Imax = 1 A
10
3.11. Connecting The Serial Interface RS 485
An external operating component (DCU 001/DCU 300) or an
external computer can be connected via the connection
”RS 485” on the TC 600 with the use of a shielded 8 pole
modular connecting cable contained with the delivery.
All units connected to the bus must have differing serial
interface addresses (parameter 797).
The group address of the TC 600 is 960.
Only SELV may be connected to the Serial
Interface RS 485.
All switched on remote functions have priority over the serial
interface functions.
Please refer to Operating Instructions
PM 800 488 BN for detailed operating
procedures and electrical data in respect of the
Serial Interface RS 485.
Profibus DP Gateway TIC 250 is available (accessory) for
connecting an Electronic Drive Unit TC 600 to a Profibus DP.
Please refer to the respective Operating Instructions
PM 800 599 BN for detailed information on the operation of
the TIC 250.
☞
PLEASE NOTE
Designation Value
Serial interface type: RS 485
Baud rate: 9600 Baud
Data file word length: 8 bit
Parity: no parity
Start bits: 1
Stop bits: 1..2
The electrical connections in the TC 600 are optically
decoupled.
Pin Occupancy
1 not connected
2 + 24 V output (loadable with ≤210 mA)
3 not connected
4 not connected
5 RS 485: D+ (DO / RI)
6 Gnd
7 RS 485: D- (DO / RI)
8 not connected
RS 485
1 ... 8
Connecting The RS 485
Connection to a fixed bus system
➡Connect all units with D+ (pin 5 / RS 485) and D- (pin 7 /
RS 485) to the bus.
➡The bus must be closed at both ends.
The connections should be made in accordance with the
specification of the Serial Interface RS 485.
5:D+, 7:D–
RTRT
PC
Level Converter
TC TC
(View from
the plug side
of the TC 600)
It is possible to connect an RS 232 (e.g. PC) via a
level converter (please see ”Accessories”).
☞
PLEASE NOTE
The serial interface is galvanically and safely separated from
the maximum supply voltage from the TC 600.
Connection
DCU 001 without
power unit
TC 600
RS 485
DCU 300 with
power unit
or
11
TC 600
TC 750
RS 485
REMOTE
11
1
22
2
33
3
44
4
55
5
66
6
77
88
n.c.
+24 VDC*/max. 200 mA (supply voltage, DCU)
n.c.
n.c.
n.c.
RS 485+/ (DO/RI)
GND* (mass connection, DCU)
RS 485- / (DO/RI)
+24 VDC*/max. 50 mA
Venting release
Motor, turbopump
Pumping station
Heating/Reset
Standby
PWM ON (touch relation 25 -75%)
Switching output 1 (24 VDC / max. 50 mA)
Switching output 2 (24 VDC / max. 50 mA)
GND*
HEAT/TMS
VENT
FV PUMP
1
1
1
1
2
2
2
3
3
3
4
4
4
Relay box
Heating
Mains input, heating
115/208/230 VAC
Mains input, pumping station
(115/208/230) VAC
Connection, pumping station
Relay box,
Pumping station (Imax=16A)
HEATING
VENTING VALVE
TVF 005
L
N
PE
PE
N
L’
L
N
PE
PE
N
L’
7
8
9
10
12
13
14
15
11 Contact output 1: switching point
Contact output 2: collective malfunction
Analog output 0-10 VDC = 0-100 % *fend/R ≥10 kΩ
5
6
5
6
FAN
2
3
4
FAN
M
5
6
X4
1
2
34
n.c.
X2
Protection conducter (PE)
Supply voltage TC
GND
PE GY/YE
BK1
BK2
5
6
Contact current max.
6 mA / Contact
1
2
3
n.c.
Mains input
power unit
(90-132/
185-265) VAC
TPS XXX/DCU XXX
3.12. Connections Diagram
12
4. Operations
4.1. Before Switching ON
Sections 4.1. to 4.3. refer only to operating the pump in its
condition on delivery, without the DCU operating unit. The
bridges ”venting release”, ”motor, TMP ON” and ”pumping
station ON” are fitted in the remote control plug.
Turbopump rotors rotate at high speed. When
the high vacuum flange is open there is a dan-
ger of injury and of damage to the pump caused
by objects falling into the pump.
Therefore never operate the pump with open
high vacuum flange.
➡With water cooling: Open cooling water supply and check
flow.
➡With connecting cable 8a (”Accessory”) connect the
TC 600 and Power Unit TPS 300 on X2 (please see
Section 3.8.).
Please note:
The following pre-settings have been programmed:
– Running up time 8 min
– Rotation speed switchpoint 80%
– Automatic venting 50%
These settings can only be altered via Serial Interface RS 485
(DCU or PC); please refer to the respective operating instruc-
tions.
Take care when pumping hazardous gases and
observe the safety precautions of the gas
manufacturer.
Rear panel, TPS 300
S1 ON/OFF switch
X1 Mains connection
X2 Connection TC 600
F1 Fuse
F2 Fuse
F1
F2
S1 X1
X2
4.2. Switching ON
➡Switch on the turbopump with switch S1 on the power unit.
– With air cooling the cooling fan is also switched on via
Electronic Drive Unit TC 600.
– Once the self test has been successfully completed on the
TC 600 (duration approximately 15 seconds), both the
turbopump and the backing pump (if connected) begin
operating.
13
4.3. Switching OFF And Venting
Before coming to rest after switching off, the turbopump must
be vented in order to prevent contamination.
➡Close the fore-vacuum.
➡Switch off both turbopump and backing pump with switch
S1 on the power unit.
➡Venting
There are three possibilities to vent turbopump:
–Manual venting with the use of the venting screw
(status on delivery).
–Venting with the venting valve which is selectable via
the remote control (please see Section 4.7.), or via the
DCU (see Operating Instructions, "Pumping Operations
With The DCU", PM 800 547 BN).
–Venting in two stages when the vacuum chamber
should be vented as quickly as possible. First stage:
venting with a pressure increase rate of 15 mbar/s for
20 seconds. Second stage: venting with an optionally
large venting valve.
The valve cross-section for a venting rate of 15 mbar/s
must be compatible with the size of the vacuum chamber.
Where small vacuum chambers are involved, the
PFEIFFER Venting Valve TVF 005 can be used for first
stage venting.
➡Shut off water supply.
4.4. Gas Type Dependent Operations
Where high level gas loads and rotation speeds are involved,
the resulting friction subjects the rotor to the effect of great
heat. To avoid over-heating, a power rotation speed charac-
teristic line is implemented in the TC 600; this ensures that
where maximum gas loads are involved, the pump will opera-
te at any rotation speed without the danger of damage
arising.
The maximum power is dependent on the type of gas. Two
characteristic lines are available for any type of gas in order
to fully exploit the power potential of the pump:
– "Gas-Mode 0" for gases with molecular mass ≥40 as, for
example, Argon;
– "Gas-Mode 1" for all lighter gases.
➡Set the applicable gas mode on the TC 600 via the DCU
(please refer to Operating Instructions ”Pumping
operations with The DCU” PM 800 547 BN).
Works setting: Gas mode 0
Pumping gases with molecular mass ≥40 with
the incorrect gas mode can cause damage to
the pump.
For the vertex of the power characteristic line please refer to
Section 9. Technical Data.
Maximum power is applied when the pump starts in order to
limit the time required. Once the set rotation speed is
attained, switching to the selected power characteristic line
is automatic.
If the gas dependent maximum power is exceeded, the rotati-
on speed is reduced until equilibrium between the
permissible power and gas friction is attained.
Power
Frequency
DB
C
A
D-C = Gas mode «0»
B-A = Gas mode «1»
Run up
fnom
Gas type characteristic line
The power limitation serves to protect the pump against ther-
mal over-loading. In order to avoid rotation speed fluctuations
it is recommended to set, in rotation speed setting mode, the
equilibrium frequency or a somewhat lower frequency.
There can be types of pump whereby there is no
differentiation between the two ”gas modes”
settings.
☞
PLEASE NOTE
4.5. Shutting Down For Longer Periods
If aggressive or hazardous gases are
pumped there is a danger of personal
injury resulting from coming into contact
with process gases. Before removing a
turbopump from the system, first:
– Vent the turbopump with a neutral gas or dry air.
– Ensure that there is no residual process gas in the
system nor in the feeder lines.
If the turbopump is to be shut down for more than a
year:
➡Remove turbopump from the system.
➡Change the lubricant reservoir (see Section 7.1.).
Please note: Lubricant TL 011 should not be used
when there have been no operations for 2 years.
➡Close the high vacuum flange and evacuate the tur-
bopump via the fore-vacuum flange.
➡Vent turbopump via the venting connection with
nitrogen or dry air.
➡Close fore-vacuum and venting connection by blank
flanging.
➡Place the pump vertically on its rubber feet.
➡In rooms with moist or aggressive atmospheres, the
turbopump must be air-sealed in a plastic bag
together with a bag of dessicant, e.g silicagel.
If the pump has been shut down for
3 years, the bearing must be changed
(please contact PFEIFFER Service).
☞
PLEASE NOTE
14
4.6. Operations With The DCU 001/DCU 300
Operations with the DCU 001 or DCU 300 should be carried out
in accordance with the relevant Operating Instructions
PM 800 477 BN (DCU description) and
PM 800 547 BN (operating the pump with the DCU).
Where operations with the DCU are
involved, the remote plug 8d on the TC 600
(please refer to Section 2.1.) should be
disconnected.
4.7. Operations With The Remote Control Unit
(please refer to the table in Section 3.10.).
Remote control operations can be performed via the connec-
tion with the designation “REMOTE” on the TC 600.
The connection is via a 10 pole screwed connector plug with
the following occupancy:
1 – + 24 V
2 – Input, venting release
3 – Input, turbopump motor
4 – Input, pumping station
5 – Input, heating/reset
6 – Input, standby
7 – Input, PWM
8 – Switching output 1: Rotation speed switchpoint
9 – Switching output 2: Collective malfunction message
10 – Mass
Inputs 2 - 6 are activated if they are connected with the 24 V
on pin 1 (active high).
On delivery there is a bridge between Pin 1,
Pin 2, Pin 3 and Pin 4 on the TC 600 mating
plug.
Once operating voltage has been supplied and
on successful completion of the self-test on the
TC 600, the turbopump and any possible connected backing
pump is started.
Venting Release (Optional)
Automatic venting:
On the turbopump or pumping station being switched off and
when the venting frequency of 50% of the final rotation speed
(415 Hz) is no longer attained, the venting valve is opened for
3,600 seconds (1 hour).
In the event of a mains power failure the venting valve opens
if the venting frequency falls below 50% of the final rotation
speed and shuts when 25% of the final rotation speed is attai-
ned. When mains power is restored the venting process is
interrupted.
Venting blocked:
Venting does not take place.
Other venting modes:
Other venting modes can be selected via the DCU.
☞
PLEASE NOTE
Motor, Turbopump
When the pumping station is switched on and once the self
test has been successfully completed (duration approximate-
ly 15 seconds), the turbopump is set in operation.
During operations, the turbopump can be switched on and off
while the pumping station is switched on.
Pumping Station
Any connected pumping station components are started up
(e.g. backing pump, venting valve, air cooling) and with simul-
taneous activation of the input ”motor, turbopump” the turbo-
pump is set in operation once the self test has been
successfully completed (duration approximately 15 seconds).
Heating/Reset
Heating (optional)
Once the rotation speed switchpoint is attained the heating
unit is switched on; when the rotation speed switchpoint is
fallen below the heating unit is switched off.
Reset
The heating input has two functions (please see
Section 3.10., point 5 ”Reset”).
Standby
The pump can be operated optionally at 66% of its nominal
rotation speed (standby ON) or at its nominal rotation speed
(standby OFF).
Rotation Speed Setting Mode Via Input PWM
The supply of pulse width modulated signals (PWM) with a
ground frequency of 100 Hz ±20% with an amplitude of maxi-
mum 24 V and a key ratio of 25-75% enables the rotation
speed to be set in the range 20-100% of the nominal rotation
speed.
T
0
U20%*f 100%*f
end
max. +33V
min. +13V
max. +7V
min. -33V
TT
PWM
*25% *75%
T
= 10ms (1±20%)
f=100Hz (1±20%)
end
PWM
PWM
PWM
If no signal is present the pump accelerates up to its final
rotation speed. A PWM adapter box for rotation speed setting
operations for the turbopump is available as an option (please
see ”Accessories”).
15
5. Monitoring Operations
5.1. Operations Display Via LED
Certain operations modes of the turbopump and the TC 600
can be ascertained via the two integrated LEDs located on
the front panel of the TC 600.
The following operations modes are displayed:
5.2. Turbopump Temperature Management
Where impermissible motor temperatures are involved or the
temperature of the TC 600 casing is too high, the motor
current is reduced. This can lead to dipping below the set
rotation speed switchpoint and results in the turbomolecular
pump being switched off.
LED on the TC 600 glows red: Collective malfunction.
LED Cause
Glows green – Power unit OK
– Function ”pumping station ON”
carried out
Flashes green – Power unit OK
– Pumping station OFF
Blinks green – Mains power supply failure
Glows red – Collective malfunction
(for example, run-up time error,
over-temperature, turbopump
or TC 600)
– Switching output 2 active (low)
Blinks red – Warning
(e.g. supply voltage short
circuit to earth, mains
power supply failure)
Differentiated malfunction and warning signals
are only possible with the use of the DCU.
☞
PLEASE NOTE
Switching Outputs
Switching outputs 1 and 2 can be loaded with a maximum
24 V / 50 mA per output. The following functions are assigned
to the switching outputs:
Switching output 1: Active high when the rotation speed
switchpoint is attained. The switchpoint
for the turbopump is set at 80% of the
nominal rotation speed. It can be used,
for example, for a message ”pump
ready to operate”.
Switching output 2: Active low with a malfunction -
collective malfunction message
The connection of a relay is made between pin 10 (mass) and
the respective switching output pin 8 or pin 9 (see Section
3.12. Connections Diagram).
16
6. What To Do In Case Of Breakdowns?
Problem Possible Causes Remedy
Pump doesn't start; • Power supply interrupted • Check fuse in the power unit
None of the integrated LEDs • Check plug contacts on the power unit
glow on the TC 600 • Check power unit feeder line
• Check voltage on the power unit
(72 V DC) at connection X2
• Incorrect operations voltage supplied • Supply correct operations voltage
• Pins 1-3 and 1-4 on the remote • Connect pins 1-3 and 1-4 on the
plug not connected remote plug
• No supply of operations voltage • Check plug contacts on the power
pack unit
• Defect TC 600 • Inform PFEIFFER Service of need for repair
• Reduction in the voltage in the cable • Use suitable cable
Pump doesn't attain nominal • Fore-vacuum pressure too high • Check backing pump function
rotation speed within the set • Leak or too much gas • Check seals
run-up time • Seek leak and repair
Pump cuts out during operations • Reduce supply of process gas
• Rotor sluggish caused by • Check bearing (noises?): Inform
defective bearing PFEIFFER Service
• TC run-up time too short • Set longer start-up time with the DCU or PC
• Thermal overloading caused by
– Water flow insufficient • Ensure free flow
– Insufficient air supply • Ensure adequate air supply
– Fore-vacuum pressure too high • Reduce fore-vacuum pressure
– Ambient temperature too high • Reduce ambient temperature
Pump doesn't attain final pressure • Pump dirty • Bake out pump
• If seriously contaminated: Request
PFEIFFER Service to clean
• Leak in vacuum chamber, • Seek leak starting with vacuum chamber
lines or pump • Repair leak
Unusual operating noises • Bearing damaged • Inform PFEIFFER Service of need for repair
• Rotor damaged • Inform PFEIFFER Service of need for repair
• Splinter shield (if fitted) • Check seat of splinter shield
not seated firmly (see Section 3.2.)
Red LED on the TC 600 glows • Collective malfunction • Reset via mains OFF/ON or remote pin 5
• Different malfunction display with the
DCU possible1)
Red LED on the TC 600 flashes • Warning through: • Different warning message with
the DCU possible1)
– Mains power failure • Check power unit voltage
• Check power unit mains
– Supply voltage short connection
circuit to earth • Check power unit voltage for short
circuit to earth
1) Without a DCU inform PFEIFFER Service to check the
cause of trouble.
17
7. Maintenance
No liability for personal injury nor material
damage will be accepted for damages and ope-
rational interruptions which have been caused
by improper maintenance; in addition, all
guarantees become invalid.
– You can change the lubricant reservoir yourself (please
see Section 7.1.).
For all other maintenance and repair work please get in touch
with your local PFEIFFER-Service Center.
Apply no mechanical stress to the TC 600.
7.1. Replacing The Lubricant Reservoir
The lubricant reservoir should be replaced at least once a
year.
Where extreme operating conditions or unclean processes
are involved, the replacement interval should be checked
with your PFEIFFER Service Center.
➡Switch off the turbopump, vent to atmospheric pressure
(see Section 4.3.) and allow to cool as necessary.
➡If necessary, remove the turbopump from the system.
➡Unscrew locking cover 90 on the underside of the pump
with a big screwdriver; take care with the O-ring 91.
➡Lever out the lubricant reservoir 92 with the help of two
screwdrivers.
Lubricant reservoir can contain toxic
substances from the medium pumped. Lubricant
must be disposed of in accordance with the res-
pective regulations.
Safety instructions data sheet for the lubricant
on request.
☞
PLEASE NOTE
90
91
92 92
H H
93
➡Clean off any dirt on the pump and locking cover with a
clean, fluff-free cloth.
➡Insert new lubricant reservoir 92 which is already filled
with Lubricant TL 011 up to the O-ring 93 in the pump.
➡Screw in locking cover 90 with O-ring 91. The lubricant
reservoir is brought into the correct axial position with the
locking cover.
Remove locking cover and extract lubricant reservoir
90 Locking cover
91 O-ring
92 Lubricant reservoir
93 O-ring
18
8. Service
Do Make Use Of Our Service Facilities
In the event that repairs are necessary a number of options
are available to you to ensure any system down time is kept to
a minimum:
– Have the pump repaired on the spot by our PFEIFFER
Service Engineers;
– Return the pump to the manufacturer for repairs;
– Replace the pump.
Local PFEIFFER representatives can provide full details.
Please take into account that where PFEIFFER
Service replacement service is involved the
standard operating parameters are always
present. If your application requires different
parameters, please modify accordingly.
The turbopump and the Electronic Drive Unit
TC 600 form a single unit and must therefore be
returned complete for repair purposes. Before
returning the unit it should be ensured that the
power unit is not the cause of the malfunction
(checking the power unit).
Before Returning:
➡Dismantle all accessories.
➡Please attach a clearly visible notice "Free of harmful
substances" (both on the unit and also on the delivery note
and any accompanying letters).
"Harmful substances" are substances and preparations as
defined in the current, local, dangerous substances regulati-
ons; in the U.S.A. as
"materials in accordance with the Code of Federal
Regulations (CFR) 49 Part 173.240 Definition and Preparation".
We will carry out the decontamination and invoice this work
to you if you have not attached this note. This also applies
where the operator does not have the facilities to carry out
the decontamination work. Units which are contaminated
microbiologically, explosively or radioactively cannot be
accepted as a matter of principle.
Fill Out The Declaration Of Contamination
➡In every case the "Declaration of Contamination" must be
completed diligently and truthfully.
➡A copy of the completed declaration must accompany the
unit; any additional copies must be sent to your local
PFEIFFER Service Center.
Please get in touch with your local PFEIFFER representatives
if there are any questions regarding contamination.
☞
PLEASE NOTE
Decontaminate units before returning or
possible disposal. Do not return any units which
are microbiologically, explosively or
radioactively contaminated.
Returning Contaminated Units
If contaminated have to be returned for maintenance/repair,
the following instructions concerning shipping must be
followed:
➡Neutralise the pump by flushing with nitrogen or dry air.
➡Seal all openings to the air.
➡Seal pump or unit in suitable protective foil.
➡Ship units only in appropriate transport containers.
Repair orders are carried out according to our
general conditions of sale and supply.
If repairs are necessary, please send the pump together with
a short damage description to your nearest PFEIFFER Service
Center.
Contact Addresses And Telephone Hotline
Contact addresses and telephone numbers can be found on
the back cover of these operating instructions.
☞
PLEASE NOTE
19
Feature Unit TMH 521 P TMH 521 P
TMU 521 P TMU 521 P
Connection nominal diameter
Inlet DN 100 ISO-K DN 160 ISO-K
DN 100 CF-F DN 160 CF-F
Outlet DN 25 ISO-KF/G 1/4“
Venting connection G 1/8”
Nominal rotation speed 1/min 50 000
Standby rotation speed 1/min 33 000
Start-up time min 5,5
Noise level dB (A) < 50
Final pressure, backing pump mbar < 5
Max. permissible rotor temperature °C 90
Permissible heat radiation power W 14
Volume flow rate for
Nitrogen N2l/s 300 500
Helium He l/s 400 500
Hydrogen H2l/s 400 480
Compression ratio for
N2> 1012
He 5 · 107
H25 · 106
Maximum fore-vacuum pressure for
N2mbar 16
He mbar 14
H2mbar 7
Maximum gas throughput1)
With water cooling N2mbar l/s 3
He mbar l/s 4
Vertex power characteristics line2)
A W / Hz 185 / 833
B W / Hz 260 / 485
C W / Hz 160 / 833
D W / Hz 260 / 435
Final pressure3)
With rotary vane pumps mbar < 5 · 10-10
With diaphragm pumps mbar < 1 · 10-8
Lubricant TL 011
Cooling water consumption
with water at 15 ˚C4) l/h 100
Cooling water temperature ˚C 5 - 25
Permissible ambient temperature
with air cooling ˚C 0 - 35
Heating power consumption W 100
Weight kg 13 13.5
Permissible magnetic field mT 5.0
Operating voltage VDC 72 ± 5%
Duration4)- / max. current consumption A 3.2 / 4.2
Duration4)- / max. power W 230 / 300
Protection class5) IP 30
Relative humidity % 5 - 85 non condensing
9. Technical Data
1) Measured with a rotary vane pump 1.5 m3/h;
higher throughputs with reduced rotation speed.
2) For gas characteristics line please refer to Section 4.4.
3) In accordance with German Industrial Standard 28428 the
final pressure which is attained in a measuring dome
48 hours after baking out.
4) At maximum gas throughput
5) Protection class IP 54 is afforded for the Electronic Drive Unit
TC 600 by refro-fitting a cover plate.
20
9.1. Dimensions Diagram
32
39
88
110
106
126
121
139
166
184
123
53.5
99.5
120
224
242
DN 160 ISO-K
DN 100 ISO-K
DN 160 CF-F
DN 100 CF-F
97.1
147.5
158
2xM8
58
100
148.5
95
86.5
144
120
30°
ø85
4xM8
67
45°
40°
Ø170
Ø208
160
DN 25 ISO-KF
TMH 521 P/TMU 521 P

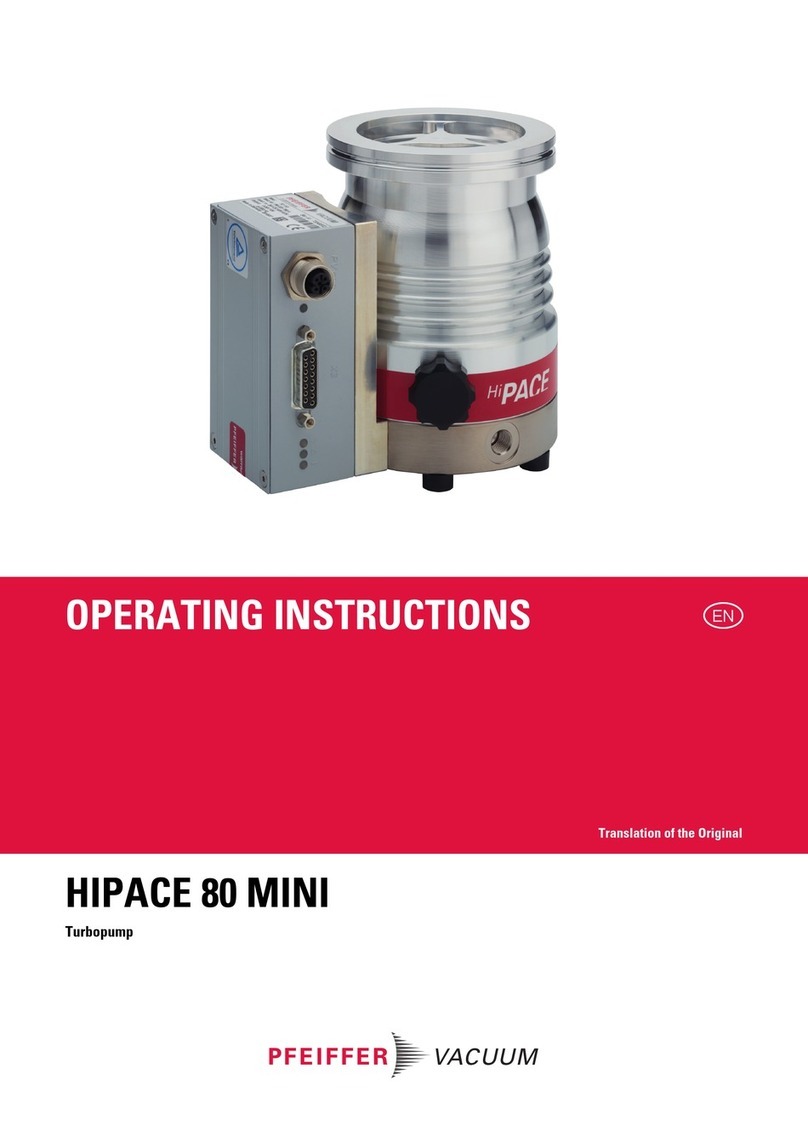
This manual suits for next models

1

Other Pfeiffer Vacuum Water Pump manuals
Pfeiffer Vacuum HiPace 1800 User manual

Pfeiffer Vacuum

Pfeiffer Vacuum HiPace 1800 User manual

Pfeiffer Vacuum HIPACE 450 User manual

Pfeiffer Vacuum

Pfeiffer Vacuum HIPACE 450 User manual

Pfeiffer Vacuum HIPACE 300 H User manual

Pfeiffer Vacuum

Pfeiffer Vacuum HIPACE 300 H User manual

Pfeiffer Vacuum HISCROLL 6 User manual

Pfeiffer Vacuum

Pfeiffer Vacuum HISCROLL 6 User manual

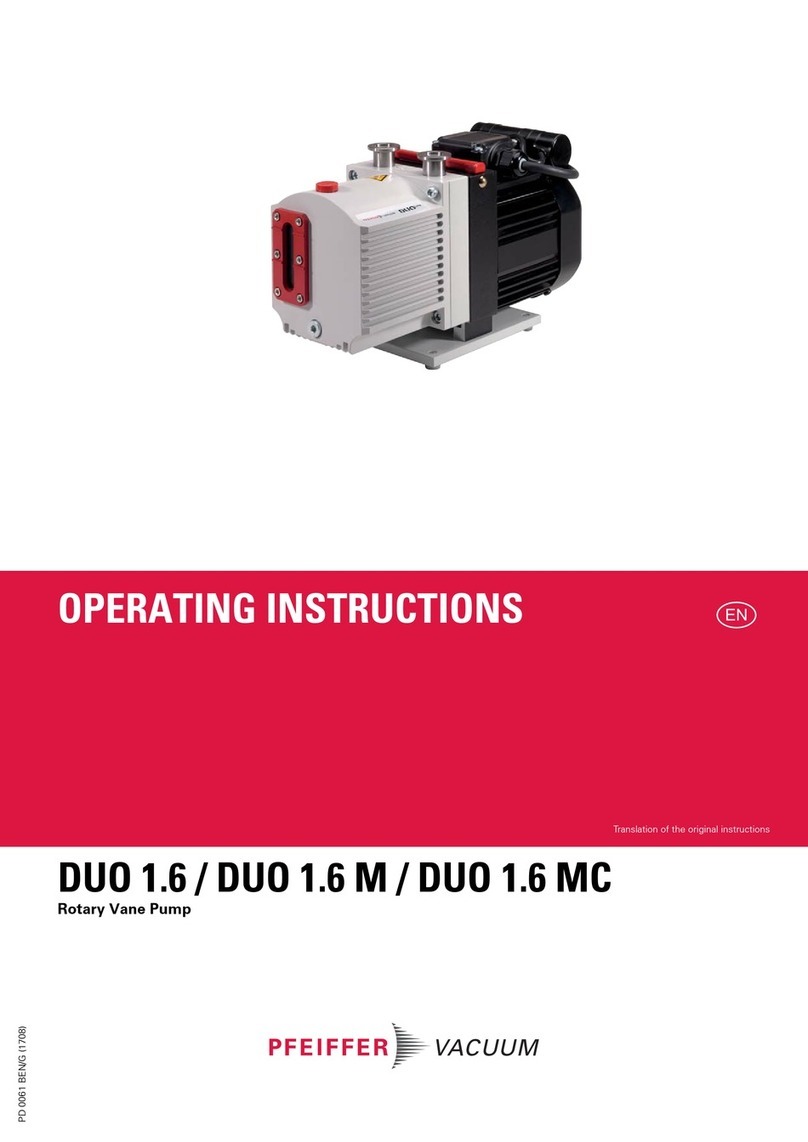
Pfeiffer Vacuum DUO 1.6 User manual

Pfeiffer Vacuum

Pfeiffer Vacuum DUO 1.6 User manual

Pfeiffer Vacuum HIPACE 80 MINI User manual

Pfeiffer Vacuum

Pfeiffer Vacuum HIPACE 80 MINI User manual

Pfeiffer Vacuum HEPTA 950 L User manual

Pfeiffer Vacuum

Pfeiffer Vacuum HEPTA 950 L User manual

Pfeiffer Vacuum ATH 1603 M User manual

Pfeiffer Vacuum

Pfeiffer Vacuum ATH 1603 M User manual

Pfeiffer Vacuum HiPace 30 User manual

Pfeiffer Vacuum

Pfeiffer Vacuum HiPace 30 User manual

Pfeiffer Vacuum HIPACE 80 NEO User manual

Pfeiffer Vacuum

Pfeiffer Vacuum HIPACE 80 NEO User manual

Pfeiffer Vacuum MVP 040-2 User manual

Pfeiffer Vacuum

Pfeiffer Vacuum MVP 040-2 User manual

Pfeiffer Vacuum Hena 26 User manual

Pfeiffer Vacuum

Pfeiffer Vacuum Hena 26 User manual
Pfeiffer Vacuum DUO 20 MC User manual

Pfeiffer Vacuum

Pfeiffer Vacuum DUO 20 MC User manual

Pfeiffer Vacuum MVP 015-2 User manual

Pfeiffer Vacuum

Pfeiffer Vacuum MVP 015-2 User manual

Pfeiffer Vacuum A3P Series User manual

Pfeiffer Vacuum

Pfeiffer Vacuum A3P Series User manual

Pfeiffer Vacuum HENA 201 R User manual

Pfeiffer Vacuum

Pfeiffer Vacuum HENA 201 R User manual

Pfeiffer Vacuum HiPace 60 P User manual

Pfeiffer Vacuum

Pfeiffer Vacuum HiPace 60 P User manual

Pfeiffer Vacuum MVP 160-3 User manual

Pfeiffer Vacuum

Pfeiffer Vacuum MVP 160-3 User manual

Pfeiffer Vacuum HISCROLL 12 User manual

Pfeiffer Vacuum

Pfeiffer Vacuum HISCROLL 12 User manual

Pfeiffer Vacuum DUO 255 User manual

Pfeiffer Vacuum

Pfeiffer Vacuum DUO 255 User manual

Pfeiffer Vacuum HiPace 2300 User manual

Pfeiffer Vacuum

Pfeiffer Vacuum HiPace 2300 User manual

Pfeiffer Vacuum DUO 6 M User manual

Pfeiffer Vacuum

Pfeiffer Vacuum DUO 6 M User manual

Pfeiffer Vacuum OKTA 4000 User manual

Pfeiffer Vacuum

Pfeiffer Vacuum OKTA 4000 User manual

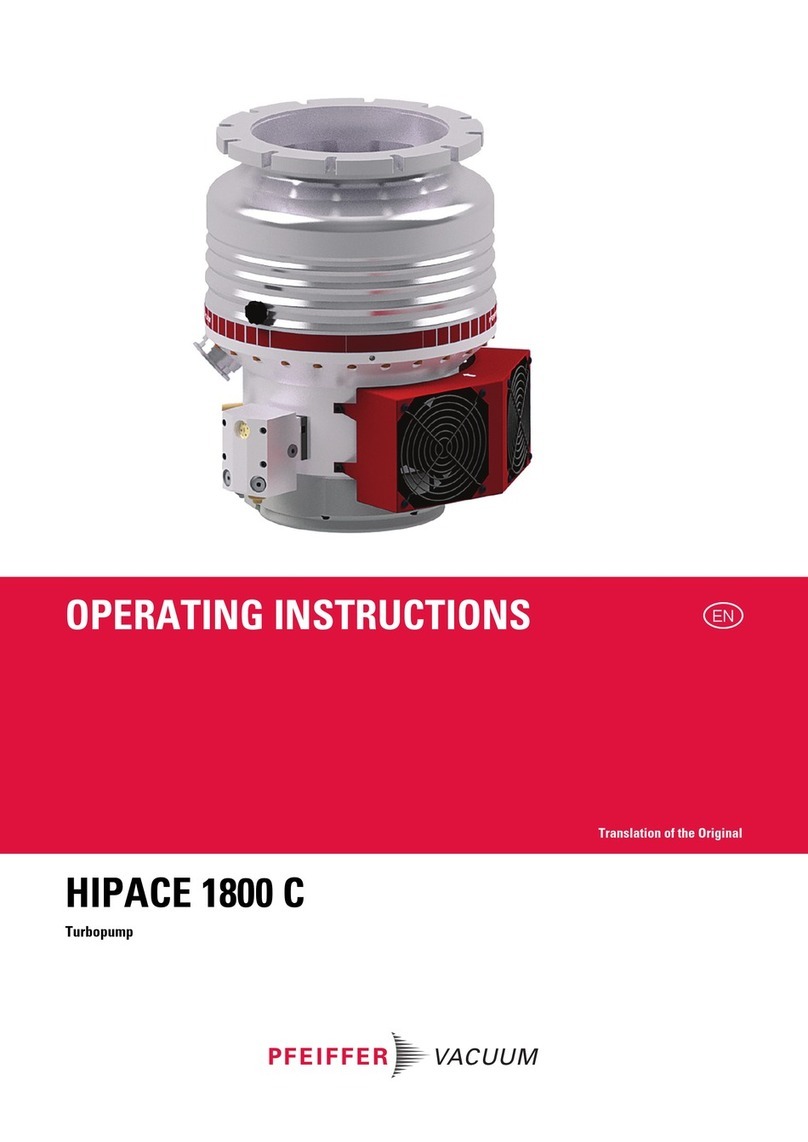
Pfeiffer Vacuum HIPACE 1800 C User manual

Pfeiffer Vacuum

Pfeiffer Vacuum HIPACE 1800 C User manual

Popular Water Pump manuals by other brands

Oase ProMax Garden Automatic 3500 operating instructions

Oase

Oase ProMax Garden Automatic 3500 operating instructions

GORMAN-RUPP PUMPS SUPER T T6A60S-4045T Series Installation, operation, and maintenance manual with parts list

GORMAN-RUPP PUMPS

GORMAN-RUPP PUMPS SUPER T T6A60S-4045T Series Installation, operation, and maintenance manual with parts list

Bestway AlwayzAire P3153 owner's manual

Bestway

Bestway AlwayzAire P3153 owner's manual

Atlas Copco DZS 065V Instruction book

Atlas Copco

Atlas Copco DZS 065V Instruction book

Westward 5NUD9 Operating instructions and parts manual

Westward

Westward 5NUD9 Operating instructions and parts manual

Barnant Company PK15 operating manual

Barnant Company

Barnant Company PK15 operating manual

Neptun Blue Line NPGP 4100 Original operating instructions

Neptun

Neptun Blue Line NPGP 4100 Original operating instructions

Desmi GP user manual

Desmi

Desmi GP user manual

sauermann Si-61 quick start guide

sauermann

sauermann Si-61 quick start guide

Glentronics PHCC 2400 Pro Series instruction manual

Glentronics

Glentronics PHCC 2400 Pro Series instruction manual

Graco Series A Repair manual

Graco

Graco Series A Repair manual

pumpa BLUE LINE PMC1004P.1 manual

pumpa

pumpa BLUE LINE PMC1004P.1 manual

Groz PRP/02 instruction manual

Groz

Groz PRP/02 instruction manual

Pentair Hydromatic SKV50 Installation and service manual

Pentair Hydromatic

Pentair Hydromatic SKV50 Installation and service manual

ADEO Services 04010G03 instruction manual

ADEO Services

ADEO Services 04010G03 instruction manual

Wiha Zai Hause DHT0010 instruction manual

Wiha

Wiha Zai Hause DHT0010 instruction manual

SCOPREGA BRAVO 100 instruction manual

SCOPREGA

SCOPREGA BRAVO 100 instruction manual

Orion 21205 user manual

Orion

Orion 21205 user manual

manuals.online logo
manuals.online logoBrands
  • About & Mission
  • Contact us
  • Privacy Policy
  • Terms and Conditions

Copyright 2025 Manuals.Online. All Rights Reserved.