manuals.online logo
Brands
  1. Home
  2. •
  3. Brands
  4. •
  5. Philips
  6. •
  7. Accessories
  8. •
  9. Philips EasySense SNH210 MC User manual

Philips EasySense SNH210 MC User manual

Philips EasySense
Outboard-Mount for High Bay
Quick Installation Guide
PLt-17265QG 04/21 philips.com/lighting page 1 of 4
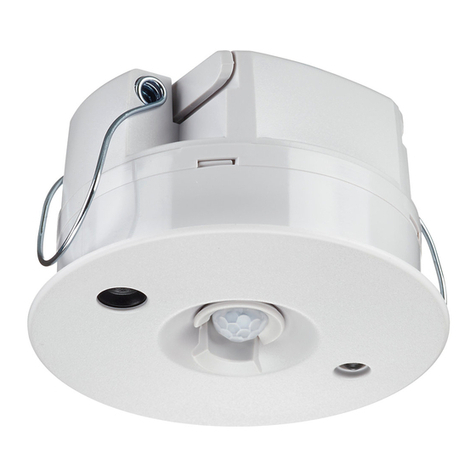
Philips EasySense SNH210 MC is a DLC-qualied network lighting control
(NLC) solution for industrial high bay applications that connects with the
Philips Advance Xitanium SR LED Drivers and works with the updated
Philips eld app MC.
Outboard-Mount
for High Bay
Sensors
EasySense
EasySense quick guide
Wiring requirements
PLt-17265QG 04/21 philips.com/lighting page 2 of 4
Note: Above depicts connecting wires from sensor to Xitanium SR
drivers that include connectors. For connection to Xitanium SR drivers
that include leads, use wirenuts suitable for 18AWG solid wire.
Wire to wire connection
SNH200 includes 18AWG wires, 60cm in length with 8mm strip length.
A wire to wire connection can be made with connectors or wirenuts
suitable for 18AWG solid wire.
The wire strip length in case of a wire to wire connection is connector
dependent.
Wire to driver connection
A connection between the sensor and the driver should be made
according to local practices. The SR input wires of the EasySense for
High Bay are not polarized for xtures using one driver and one sensor,
and therefore can be connected, without taking care of polarity, to the
SR output of the driver – SR+ and SR- terminals. It is recommended to
keep wire distance from sensor to driver less than 50 feet. Polarity must
be maintained when connecting multiple drivers to one sensor.
The wire strip length in case of sensor to driver connection is ~8mm.
XITANIUM SR
LED DRIVER
EASYSENSE LED+
LED+
LED-
LED-
RSET2
SGND
NFC ANTENNA
SR-
Connectors
SR+
SR
SR
LINE
NEUTRAL
GROUND NC
(2) 18AWG wires, non-polarized
Overall length 60cm
Strip length 8mm
DA-
DA+
Sensor Dimensions, mm [in] Mounting in a Luminaire
EasySense for High Bay is intended to be mounted to a standard ½"
knockout available on the luminaire itself or a junction box. A nut
is included with the sensor for this purpose. An OEM can develop
custom brackets to attach to the top surface of the sensor in case the
sensor needs to be mounted to a curved/non-flat surface. Mounting
screws are provided with the sensor for this purpose. These screws are
matched to the thickness of the plastic sensor housing and are the only
screws approved for use. Also make sure that the view of the sensor is
not blocked anywhere by the luminaire or the bracket to avoid loss of
functionality.
SNS210 MC is commissioned using the Philips field app MC, available on
both Android and iOS smartphones.
1 43.8 [521 32]
115-0
1
+41732-0
0
+
[]
1 .5 [ 11 6 ]
43.25-0
1
+1
4564
-0
0
+
[]
60 [ 238]
40 [1
58
]
1 8.5 [ 34]
30
.1 [1
316
]
63 [ 212]
15.7 [
58
]
[ 1 /2"] Straight pipe thread
Ø
Ø
EasySense quick guide
PLt-17265QG 04/21 philips.com/lighting page 3 of 4
Occupancy Sensing Detection Pattern
The plots below show the top and side view of the occupancy coverage based on NEMA test, an industry
standard. In the side view, it is visible that coverage ration of height:diameter is 1:1. For example if the
mounting height is 12m, the diameter coverage is also 12m.
Disclaimer:
1. In these plots, the white areas are blind spots and the detection is based on subject’s motion.
An idle subject may not continue to trigger occupancy detection once the hold time collapses.
2. As PIR based sensing works on temperature dierence between the subject and the ground level,
the occupancy detection could vary due to clothing and size of humans.
Special Note: Ensure heat radiating devices are outside of the monitoring cone.
Avoid drafts (e.g. from ventilators or heating systems).
Max.height –16m
Maxcoverage–16m
Mounting Height(m)
Horizontalposition(m)
Daylight Sensor
The light sensor measures the total amount of light with an opening angle of 10 degrees whereas the PIR has an
angle of 30 degrees, all calculated from normal. The following aspects should be observed during installation:
• Minimum distance from the window: see graph below
• Prevent light reections from outside entering the sensor (for example sunlight reection on a car bonnet)
as this will lead to incorrect light regulation.
As a guideline the formula 0.174 x H can be used to calculate the minimum distance between the window and
sensor whereby H is the height from the bottom of the window to the ceiling.
Photosensor spatial response Minimum distance from window vs. mounting height
Sensor mounting height with respect to window [m]
Note: Restrictions only for daylight regulation. No
restrictions for skylights.
0.0
0.5
1.0
1.5
2.0
2.5
3.0
0246810 12 14 16 18 20
SensorDistancefromWindow[m]
SensorMountingHeightwithRespecttoWindow[m]
MinimumDistancefromWindowvs.MountingHeight
Window
Wall
Sensor height with
respect to window
Sensor distance
to window
Floor
SNH200
SNH210 MC
EasySense quick guide
Note: EasySense parameters can be congured via Philips eld app
MC which is available for both Apple and Android smart phones.
You must rst download the Philips eld app MC from either the
Google Play store or App store, then register to receive a username
and password. Refer to www.philips.com/easysense for details,
including applicable phones and user manuals.
FCC and IC Statement This device complies with part 15 of the FCC
rules for the United States and Industry Canada (IC) license-exempt
RSS standard(s). Operation is subject to the following two conditions:
(1) This device may not cause harmful interference, and (2) this device
must accept any interference received, including interference that may
cause undesired operation. Any changes or modications not expressly
approved by Philips could void the user’s authority to operate this
equipment. This product is intended for commercial use only.
This equipment should be installed and operated with a minimum
distance of 20cm between the radiator and your body.
Déclaration De Conformité À La Fcc/Ic Ce dispositif est conforme
à la partie 15 des règles de la Federal Communications Commission
(FCC) des États-Unis et d’Industrie Canada (IC) exempts de licence
RSS norme(s). Son fonctionnement est assujetti aux deux conditions
suivantes: (1) Ce dispositif ne doit pas provoquer de brouillage
préjudiciable, et (2) il doit accepter tout brouillage reçu, y compris
le brouillage pouvant entraîner un mauvais fonctionnement. Tous
les changements ou modications non expressément approuvés
par Philips, sont susceptibles d’annuler le droit de l’utilisateur à se
servir de cet équipement. Ce produit est exclusivement destiné à
un usage commercial.
Cet équipement doit être installé et utilisé avec une distance minimale
de 20 cm entre le radiateur et votre corps.
The EasySense SNH210 MC is compatible with Xitanium SR drivers. To
nd the SR driver that ts your needs and for product specications,
please visit www.philips.com/xitanium/na
Conguration via Mobile App
Commercial Product Name Order Code
EasySense Outboard-Mount for High Bay SNH210 MC
Sensor part number
Compatible LED drivers
PLt-17265QG 04/21 philips.com/lighting page 4 of 4
Signify North America Corporation
200 Franklin Square Drive,
Somerset, NJ 08873
Telephone 855-486-2216
Signify Canada Ltd.
281 Hillmount Road,
Markham, ON, Canada L6C 2S3
Telephone 800-668-9008
Philips and the Philips Shield Emblem are registered
trademarks of Koninklijke Philips N.V. All other trademarks
are owned by Signify Holding or their respective owners.
© 2021 Signify Holding. All rights reserved. The information provided
herein is subject to change, without notice. Signify does not give any
representation or warranty as to the accuracy or completeness of
the information included herein and shall not be liable for any action
in reliance thereon. The information presented in this document
is not intended as any commercial oer and does not form part
of any≈quotation or contract, unless otherwise agreed by Signify.

Other Philips Accessories manuals

Philips CRP350 User manual

Philips

Philips CRP350 User manual

Philips HF3470 User manual

Philips

Philips HF3470 User manual

Philips ActiLume G2 User manual

Philips

Philips ActiLume G2 User manual

Philips SPF1002N User manual

Philips

Philips SPF1002N User manual

Philips CRP155 User manual

Philips

Philips CRP155 User manual

Philips CRP385 User manual

Philips

Philips CRP385 User manual

Philips Sonicare AirFloss User manual

Philips

Philips Sonicare AirFloss User manual

Philips CRP331 User manual

Philips

Philips CRP331 User manual

Philips GoGear HDD1420 User manual

Philips

Philips GoGear HDD1420 User manual

Philips 22PP3000 User manual

Philips

Philips 22PP3000 User manual

Philips CRP380 User manual

Philips

Philips CRP380 User manual

Philips SVC2340/10 User manual

Philips

Philips SVC2340/10 User manual

Philips SDW5004GN User manual

Philips

Philips SDW5004GN User manual

Philips CRP321 User manual

Philips

Philips CRP321 User manual

Philips SBCAC250 User manual

Philips

Philips SBCAC250 User manual

Philips 6834 User manual

Philips

Philips 6834 User manual

Philips DLA63068 User manual

Philips

Philips DLA63068 User manual

Philips CRP338 User manual

Philips

Philips CRP338 User manual

Philips HF3485/60 User manual

Philips

Philips HF3485/60 User manual

Philips RQ1050 with charger User manual

Philips

Philips RQ1050 with charger User manual

Philips CRP388 User manual

Philips

Philips CRP388 User manual

Philips SCF160 User manual

Philips

Philips SCF160 User manual

Philips ARMBAND CASE SJM2003 User manual

Philips

Philips ARMBAND CASE SJM2003 User manual

Philips 21193-8 User manual

Philips

Philips 21193-8 User manual

Popular Accessories manuals by other brands

Quincy lab 140AE-1 operating manual

Quincy lab

Quincy lab 140AE-1 operating manual

HomePro ZIR000 user manual

HomePro

HomePro ZIR000 user manual

DOL 20SCR Technical user guide

DOL

DOL 20SCR Technical user guide

RAB Smart Task installation manual

RAB

RAB Smart Task installation manual

Kemppi KMS 300 quick guide

Kemppi

Kemppi KMS 300 quick guide

Stearns 57,500 Series Installation and service instructions

Stearns

Stearns 57,500 Series Installation and service instructions

iGuzzini TWILIGHT COPENAGHEN manual

iGuzzini

iGuzzini TWILIGHT COPENAGHEN manual

Adelaide Annexe & Canvas Avan Deluxe installation guide

Adelaide Annexe & Canvas

Adelaide Annexe & Canvas Avan Deluxe installation guide

OHAUS 5000 instruction manual

OHAUS

OHAUS 5000 instruction manual

HOME8 WLS1300 quick start guide

HOME8

HOME8 WLS1300 quick start guide

MAXBOTIX MaxSonar quick start guide

MAXBOTIX

MAXBOTIX MaxSonar quick start guide

ioSmart iSmart56 Installation and user guide

ioSmart

ioSmart iSmart56 Installation and user guide

Focusrite Scarlett 18i8 user guide

Focusrite

Focusrite Scarlett 18i8 user guide

Velleman ED38105 user manual

Velleman

Velleman ED38105 user manual

JumpSport SkyBounce user manual

JumpSport

JumpSport SkyBounce user manual

Prima-Temp PRIYA Instructions for use

Prima-Temp

Prima-Temp PRIYA Instructions for use

Tefcold BC85I-BC85I W user manual

Tefcold

Tefcold BC85I-BC85I W user manual

Vaisala WMS302 user guide

Vaisala

Vaisala WMS302 user guide

manuals.online logo
manuals.online logoBrands
  • About & Mission
  • Contact us
  • Privacy Policy
  • Terms and Conditions

Copyright 2025 Manuals.Online. All Rights Reserved.