English
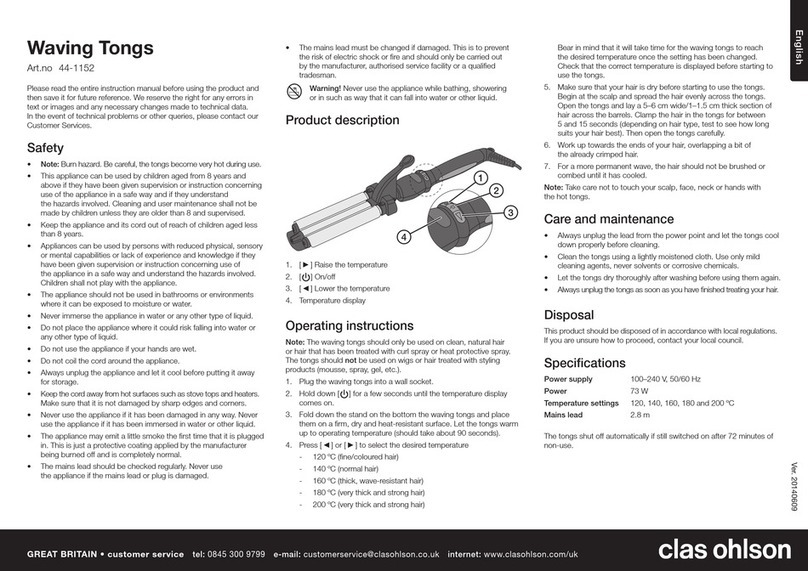
Congratulations on your purchase, and welcome to Philips!To fully
EHQHÀWIURPWKHVXSSRUWWKDW3KLOLSVRIIHUVUHJLVWHU\RXUSURGXFWDW
www.philips.com/welcome.
1 Important
Read this user manual carefully before you use the appliance and keep it
for future reference.
WARNING: Do not use this appliance
near water.
When the appliance is used in a
bathroom, unplug it after use since
the proximity of water presents a risk,
even when the appliance is switched
off.
WARNING: Do not use
this appliance near bathtubs,
showers, basins or other
vessels containing water.
Always unplug the appliance after use.
If the mains cord is damaged, you
must have it replaced by Philips, a
service centre authorised by Philips or
VLPLODUO\TXDOLÀHGSHUVRQVLQRUGHUWR
avoid a hazard.
This appliance can be used by
children aged from 8 years and above
and persons with reduced physical,
sensory or mental capabilities or
lack of experience and knowledge
if they have been given supervision
or instruction concerning use of
the appliance in a safe way and
understand the hazards involved.
Children shall not play with the
appliance. Cleaning and user
maintenance shall not be made by
children without supervision.
Before you connect the appliance,
ensure that the voltage indicated on
the appliance corresponds to the local
power voltage.
Do not use the appliance for any
other purpose than described in this
manual.
When the appliance is connected to
the power, never leave it unattended.
Never use any accessories or
parts from other manufacturers
RUWKDW3KLOLSVGRHVQRWVSHFLÀFDOO\
recommend. If you use such
accessories or parts, your guarantee
becomes invalid.
Do not wind the mains cord round
the appliance.
Wait until the appliance has cooled
down before you store it.
Pay full attention when using the
appliance since it could be extremely
hot. Only hold the handle as other
parts are hot and avoid contact with
the skin.
Always place the appliance with the
VWDQGRQDKHDWUHVLVWDQWVWDEOHÁDW
surface.The hot heating plates/barrel
should never touch the surface or
RWKHUÁDPPDEOHPDWHULDO
Avoid the mains cord from coming
into contact with the hot parts of the
appliance.
Keep the appliance away from
ÁDPPDEOHREMHFWVDQGPDWHULDOZKHQ
it is switched on.
Never cover the appliance with
anything (e.g. a towel or clothing)
when it is hot.
Only use the appliance on dry hair. Do
not operate the appliance with wet
hands.
Keep the heating plates/barrel clean
and free of dust and styling products
such as mousse, spray and gel.
The heating plates/barrel has coating.
This coating might slowly wear
away over time. However, this does
not affect the performance of the
appliance.
If the appliance is used on color-
treated hair, the heating plates/barrel
may be stained. Before using it on
DUWLÀFLDOKDLUDOZD\VFRQVXOWWKHLU
distributor.
Always return the appliance to a
service centre authorized by Philips
for examination or repair. Repair by
XQTXDOLÀHGSHRSOHFRXOGUHVXOWLQDQ
extremely hazardous situation for the
user.
'RQRWLQVHUWPHWDOREMHFWVLQWR
openings to avoid electric shock.
(OHFWURPDJQHWLFÀHOGV(0)
This Philips appliance complies with all applicable standards and
UHJXODWLRQVUHJDUGLQJH[SRVXUHWRHOHFWURPDJQHWLFÀHOGV
Environment
Do not throw away the appliance with the normal household
ZDVWHDWWKHHQGRILWVOLIHEXWKDQGLWLQDQRIÀFLDOFROOHFWLRQ
point for recycling. By doing this, you help to preserve the
environment.
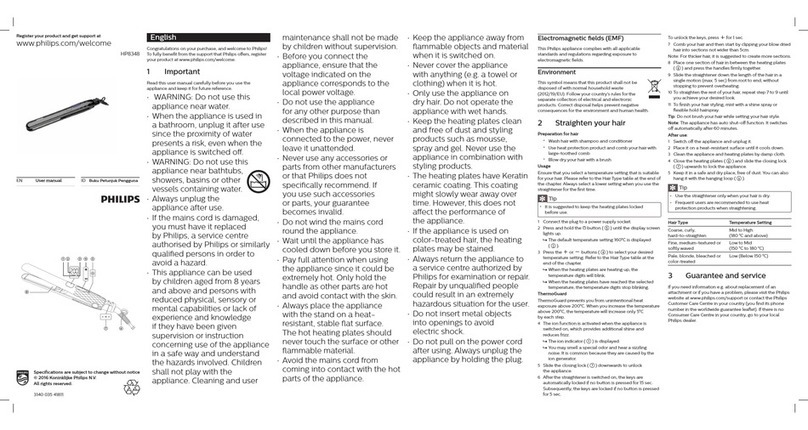
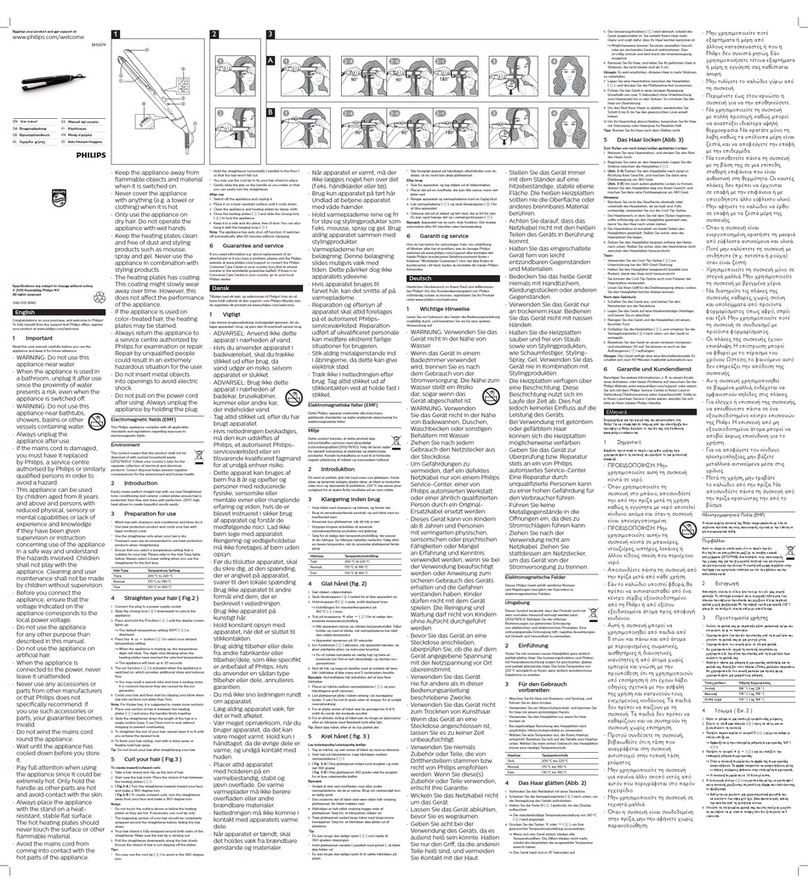
2 Style your hair
Note: Do not change the attachments or styler when the appliance is
heating up or when it is hot. Let the appliance heat up for 3-5 minutes
IRUSHUIHFWVW\OLQJUHVXOWV:KHQXQZLQGLQJWKHVHFWLRQRIWKHKDLU
DIWHUFXUOLQJGRQRWSXOODWWKHKDLUDVLWZRXOGVWUDLJKWHQWKHFXUO
Select a suitable attachment and styler for the hairstyle you want.
Hairstyle Attachment
Tight curls Small curling attachment ( )
Waves Small curling attachment ( ) and Slide-on brush
( )
Crimps Crimping/straightening attachment ( ) with
curved surfaces ( ) facing towards each other
Straight sleek
VW\OHDQGÁLFNV Crimping/straightening attachment ( ZLWKÁDW
surfaces ( ) facing towards each other
Before you style your hair:
1 Ensure arrow on the ring is pointing at unlock icon on the handle
( ).
2 Slide a suitable attachment onto the metal tube ( ) of the handle
( ) and turn the ring to the right/anti-clockwise to lock it ( ).
To remove the attachment, turn the ring to the left/clockwise to
unlock ( ) and pull it off.
3 Connect the plug to a power supply socket.
4 Slide the on/off switch ( ) to Ito switch on the appliance.
» The power-on indicator ( ) lights up and starts blinking.
» When the appliance is ready for use, the indicator stops blinking.
5 Place the appliance with the support ( ) on a heat-resistant
surface.
6 Comb your hair and divide your hair into small sections that are not
wider than 2-4cm.
&UHDWHFXUOVRUULQJOHWV)LJ
1 Select small curling attachment ( ) for styling tight curls and
ringlets.
2 Press the lever ( ) to open the clip ( ) and place a section of
hair between the clip and barrel ( ).
3 Release the lever and slide the barrel to the hair tip.
4 Hold the end of the cool tip ( ) and the handle ( ).Then wind
the section of hair round the barrel from end to root.
5 Hold the barrel in the position for max. 10 seconds.Then unwind the
section of hair until you can open the clip again with the lever.
6 To style the rest of your hair, repeat steps 2 to 5.
&UHDWHZDYHV)LJ
1 Select the small curling attachment ( ).Then slide the Slide-on
brush ( ) onto barrel.
2 Wind a section of hair round the brush.
3 Hold the barrel in the position for max.10 seconds.Then unwind the
section of hair to remove the Slide-on brush ( ) from your hair.
4 To style the rest of your hair, repeat steps 2-3.
&UHDWHFULPSV)LJ
1 Select crimping/straightening attachment ( ).Make sure that the
curved surfaces ( ) are facing each other.
To remove the the crimping/straightening plates, grab each
protruded side of the plate ( ) and pull it off.
2 Press the lever ( ) to open the attachment and place a section of
hair between the crimping plates.
3 Release the lever and keep the plates together for 5 to 10 seconds.
4 Press the lever to open the plates and place the next section of hair
between the plates. Make sure there is an overlap.
5 Repeat this process until you have reached the hair tip.
6 To style the rest of your hair, repeat steps 2 to 5.
&UHDWHVWUDLJKWVOHHNVW\OHDQGÁLFNV)LJ
1 0DNHVXUHWKDWWKHÁDWVXUIDFHV ) are facing each other. Press
the lever ( ) to open the attachment and place a section of hair
between the straightening plates.
2 Slide down slowly the length of the hair in a single motion from root
to end, without stopping to prevent overheating.
7RFUHDWH\RXUGHVLUHGW\SHRIÁLFNWXUQWKHVW\OHUKDOIFLUFOH
inwards (or outwards) when it reaches the last 3-5 cm of the hair
tip. Hold in that position for 2 to 3 seconds, and then release it.
3 To style the rest of your hair, repeat steps 1 to 2.
After use:
1 Switch off the appliance and unplug it.
2 Place it on a heat-resistant surface until it cools down.
3 Remove hairs and dust from the appliance and attachments.
4 Clean the appliance and attachments by damp cloth.
5 Keep the appliance in a safe and dry place, free of dust.You can also
hang it with the hanging loop ( ) or store it in the supplied heat
resistant pouch ( ).
*XDUDQWHHDQGVHUYLFH
If you need information e.g. about replacement of an attachment or if
you have a problem, please visit the Philips website at www.philips.com
RUFRQWDFWWKH3KLOLSV&XVWRPHU&DUH&HQWUHLQ\RXUFRXQWU\\RXÀQG
LWVSKRQHQXPEHULQWKHZRUOGZLGHJXDUDQWHHOHDÁHW,IWKHUHLVQR
Consumer Care Centre in your country, go to your local Philips dealer.
%DKDVD0HOD\X
Tahniah atas pembelian anda dan selamat menggunakan Philips! Untuk
memanfaatkan sepenuhnya daripada sokongan yang ditawarkan oleh
Philips, daftar produk anda di www.philips.com/welcome.
1 Penting
Baca dan teliti manual pengguna ini sebelum anda menggunakan
SHUNDNDVGDQVLPSDQXQWXNUXMXNDQPDVDGHSDQ
AMARAN: Jangan gunakan perkakas
ini dekat dengan air.
Apabila anda menggunakan perkakas
ini dalam bilik mandi, cabut plagnya
setelah digunakan kerana
NHKDPSLUDQQ\DGHQJDQDLUMXJDDGDODK
risiko, walaupun setelah perkakas
dimatikan.
AMARAN: Jangan gunakan perkakas
ini berhampiran dengan tab
mandi, pancur air, sinki atau
bekas lain yang mengandungi
air.
Cabut plag perkakas setiap kali selepas
digunakan.
Jika kord sesalur kuasa rosak, ia mesti
diganti oleh Philips, pusat servis yang
dibenarkan oleh Philips ataupun pihak
lain seumpamanya yang layak bagi
mengelakkan bahaya.
Perkakas ini boleh digunakan oleh
kanak-kanak berumur 8 tahun dan
ke atas dan orang yang kurang
NHXSD\DDQÀ]LNDOGHULDDWDXPHQWDO
atau kekurangan pengalaman dan
SHQJHWDKXDQMLNDPHUHNDGLEHUL
pengawasan dan arahan berkaitan
penggunaan perkakas secara selamat
dan memahami bahaya yang mungkin
berlaku. Kanak-kanak tidak sepatutnya
bermain dengan perkakas ini.
Pembersihan dan penyenggaraan oleh
pengguna tidak sepatutnya dilakukan
oleh kanak-kanak tanpa pengawasan.
Sebelum anda menyambungkan
perkakas ini, pastikan voltan yang
dinyatakan pada perkakas selaras
dengan voltan kuasa tempatan anda.
Jangan gunakan perkakas untuk
VHEDUDQJWXMXDQODLQVHODLQGDULSDGD
yang diterangkan dalam buku panduan
ini.
Apabila perkakas telah disambungkan
NHSDGDNXDVDMDQJDQVHNDOLNDOL
dibiarkan tanpa diawasi.
Jangan sekali-kali gunakan sebarang
perkakas atau bahagian dari mana-
mana pengilang atau yang tidak
disyorkan secara khusus oleh Philips.
Jika anda menggunakan aksesori atau
EDKDJLDQ\DQJVHGHPLNLDQMDPLQDQ
DQGDPHQMDGLWLGDNVDK
Jangan lilit kord sesalur mengelilingi
perkakas.
7XQJJXVHKLQJJDSHUNDNDVVHMXN
sebelum menyimpannya.
Beri perhatian penuh semasa
menggunakan perkakas kerana ia
EROHKPHQMDGLVDQJDWSDQDV3HJDQJ
SHPHJDQJVDKDMDNHUDQDEDKDJLDQODLQ
panas dan elakkan dari bersentuhan
dengan kulit anda.
Sentiasa letakkan perkakas dengan
diriannya di atas permukaan rata yang
tahan panas dan stabil . Plat pemanas/
cerompong yang panas ini hendaklah
tidak sekali-kali menyentuh permukaan
atau bahan mudah terbakar yang lain.
Jauhkan kord sesalur kuasa dari
tersentuh pada bahagian panas
perkakas.
-DXKNDQSHUNDNDVGDULSDGDREMHNGDQ
bahan yang mudah terbakar apabila ia
dihidupkan.
Jangan sekali-kali tutup perkakas
dengan apa-apa (contohnya tuala atau
kain) apabila ia panas.
Gunakan perkakas hanya pada
rambut yang kering. Jangan kendalikan
perkakas dengan tangan yang basah.
Pastikan plat pemanas/cerompong
sentiasa bersih dan bebas daripada
habuk dan produk pendandan seperti
mus, semburan dan gel.
Plat pemanas/cerompong mempunyai
salutan. Salutan ini mungkin akan haus
perlahan-lahan dari masa ke semasa.
%DJDLPDQDSXQLQLWLGDNPHQMHMDVNDQ
prestasi perkakas.
Jika perkakas digunakan pada rambut
yang dirawat warna, plat pemanas/
FHURPSRQJPXQJNLQPHQMDGLNRWRU
Sebelum menggunakannya pada
UDPEXWSDOVXVHQWLDVDODKPHUXMXN
kepada pengedarnya.
Kembalikan perkakas ke pusat servis
yang dibenarkan oleh Philips setiap
kali anda hendak mendapatkan
pemeriksaan atau pembaikan.
Pembaikan oleh orang yang tidak
berkelayakan boleh menyebabkan
situasi yang amat berbahaya kepada
pengguna.
-DQJDQPDVXNNDQREMHNORJDPNH
dalam bukaan untuk mengelakkan
NHMXWDQHOHNWULN
0HGDQHOHNWURPDJQHW(0)
Perkakas Philips mematuhi semua piawaian dan peraturan berkaitan
dengan pendedahan kepada medan elektromagnet.
Alam sekitar
Jangan buang perkakas ini dengan sampah rumah biasa di akhir
hayatnya, sebaliknya bawa ke pusat pungutan rasmi untuk dikitar
semula. Dengan melakukan ini, anda membantu memelihara
alam sekitar.
*D\DNDQUDPEXWDQGD
Perhatian: Jangan tukar alat tambahan atau penggaya semasa perkakas
VHGDQJPHPDQDVDWDXNHWLNDLDSDQDV%LDUNDQSHUNDNDVPHPDQDV
VHODPDPLQLWXQWXNPHQGDSDWKDVLOSHQGDQGDQDQ\DQJVHPSXUQD
Semasa membuka lilitan bahagian rambut selepas mengeriting, jangan
tarik rambut kerana ia akan meluruskan keriting berkenaan.
Pilih alat tambahan dan penggaya yang sesuai bagi gaya rambut yang
anda kehendaki.
Gaya Rambut Alat tambahan
Keriting ketat Alat tambahan pengeriting kecil ( )
Ketak Alat tambahan pengeriting kecil ( ) dan berus
Luncur atas ( )
Ketak Alat tambahan pengetak/pelurus ( ) dengan
permukaan melengkung ( ) menghadap ke arah
satu sama lain
Gaya lurus licin
dan selakan Alat tambahan pengetak/pelurus ( ) dengan
permukaan rata ( ) menghadap ke arah satu
sama lain
6HEHOXPDQGDPHQJJD\DNDQUDPEXWDQGD
1 Pastikan anak panah di gelang menghala ikon buka kunci pada
pemegang ( ).
2 Luncurkan alat tambahan yang sesuai ke atas tiub logam ( )
pemegang ( GDQSXWDUJHJHODQJNHNDQDQPHODZDQDUDKMDP
untuk menguncinya ( ).
Untuk menanggalkan alat tambahan, putar gegelang ke kiri/
PHQJLNXWDUDKMDPXQWXNPHPEXNDNXQFL ) dan tarik ke luar.
3 Sambungkan plag kepada soket bekalan kuasa.
4 Luncurkan suis hidup/mati ( ) ke Iuntuk menghidupkan perkakas.
» 3HQXQMXNKLGXSNXDVD ) bernyala dan mula berkelip.
» $SDELODSHUNDNDVVHGLDGLJXQDNDQSHQXQMXNEHUKHQWLEHUNHOLS
5 Letakkan perkakas dengan penyokongnya ( ) pada permukaan
tahan haba.
6 Sikat rambut anda dan bahagikan rambut anda kepada bahagian-
bahagian kecil yang tidak lebih daripada 2-4 sm lebarnya.
0HPEXDWNHULWLQJDWDXJHOXQJMXUDL5DMDK
1 Pilih alat tambahan pengeriting kecil ( ) untuk pendandanan
NHULWLQJKDOXVGDQJHOXQJMXUDL
2 Tekan tuil ( ) untuk membuka klip ( ) dan letakkan satu
bahagian rambut di antara klip dan cerompong ( ).
3 /HSDVNDQWXLOGDQOXQFXUNDQFHURPSRQJNHKXMXQJUDPEXW
4 3HJDQJKXMXQJ\DQJVHMXN ) dan pemegang ( ). Kemudian
OLOLWNDQEDKDJLDQUDPEXWGLVHNHOLOLQJFHURPSRQJGDULKXMXQJNH
akarnya.
5 Tahan cerompong pada kedudukan itu untuk maksimum 10 saat.
Kemudian buka lilitan bahagian rambut tersebut sehingga anda boleh
membuka klip sekali lagi dengan tuil.
6 Untuk menggayakan baki rambut anda, ulangi langkah 2 hingga 5.
0HPEXDWDOXQ5DMDK
1 Pilih alat tambahan pengeriting kecil ( ). Kemudian luncurkan berus
Luncur ( ) pada cerompong.
2 Lilitkan satu bahagian rambut di sekeliling berus.
3 Tahan cerompong pada kedudukan itu untuk maksimum 10 saat.
Kemudian buka lilitan bahagian rambut itu untuk menanggalkan berus
( ) daripada rambut anda.
4 Untuk menggayakan baki rambut anda, ulangi langkah 2-3.
0HPEXDWNHWDN5DMDK
1 Pilih alat tambahan pengetak/pelurus ( ).Pastikan bahawa
permukaan melengkung ( ) menghadap satu sama lain.
Untuk menanggalkan plat pengetak/pelurus, capai setiap bahagian
MXOXUDQSODW ) dan tarik ke luar.
2 Tekan tuil ( ) untuk membuka alat tambahan dan letakkan satu
bahagian rambut di antara plat pengetak.
3 Lepaskan tuil dan kekalkan plat bersama-sama selama 5 hingga 10
saat.
4 Tekan tuil untuk membuka plat dan letakkan bahagian rambut yang
seterusnya di antara plat. Pastikan terdapat pertindihan.
5 8ODQJLSURVHVLQLVHKLQJJDDQGDVDPSDLNHKXMXQJUDPEXW
6 Untuk menggayakan baki rambut anda, ulangi langkah 2 hingga 5.
0HPEXDWJD\DOXUXVOLFLQGDQVHODNDQ5DMDK
1 Pastikan bahawa permukaan rata ( ) menghadap satu sama lain.
Tekan tuil ( ) untuk membuka alat tambahan dan letakkan satu
bahagian rambut di antara plat pelurus.
2 /XQFXUNDQVHSDQMDQJKHODLDQUDPEXWGDODPVDWXJHUDNDQGDULSDQJNDO
NHKXMXQJUDPEXWWDQSDEHUKHQWLXQWXNPHQJHODNNDQNHSDQDVDQ
melampau.
8QWXNPHQGDSDWNDQMHQLVVHODNDQ\DQJDQGDNHKHQGDNLSXWDU
penggaya setengah bulatan arah ke dalam (atau ke luar) apabila
PHQFDSDLVPWHUDNKLUKXMXQJUDPEXW7DKDQSDGDNHGXGXNDQ
itu selama 2 hingga 3 saat, dan kemudian lepaskan.
3 Untuk menggayakan baki rambut anda, ulangi langkah 1 hingga 2.
6HOHSDVGLJXQDNDQ
1 Matikan perkakas dan cabut plagnya.
2 Letakkannya di atas permukaan yang tahan panas sehingga ia
PHQ\HMXN
3 Buang rambut dan habuk daripada perkakas dan alat tambahan.
4 Bersihkan perkakas dan alat tambahan dengan kain lembap.
5 Simpan perkakas di tempat yang selamat dan kering, yang bebas
GDULSDGDKDEXN$QGDEROHKMXJDPHQJJDQWXQJNDQQ\DGHQJDQJHOXQJ
gantung ( ), atau menyimpannya di dalam kantung tahan haba yang
dibekalkan ( ).
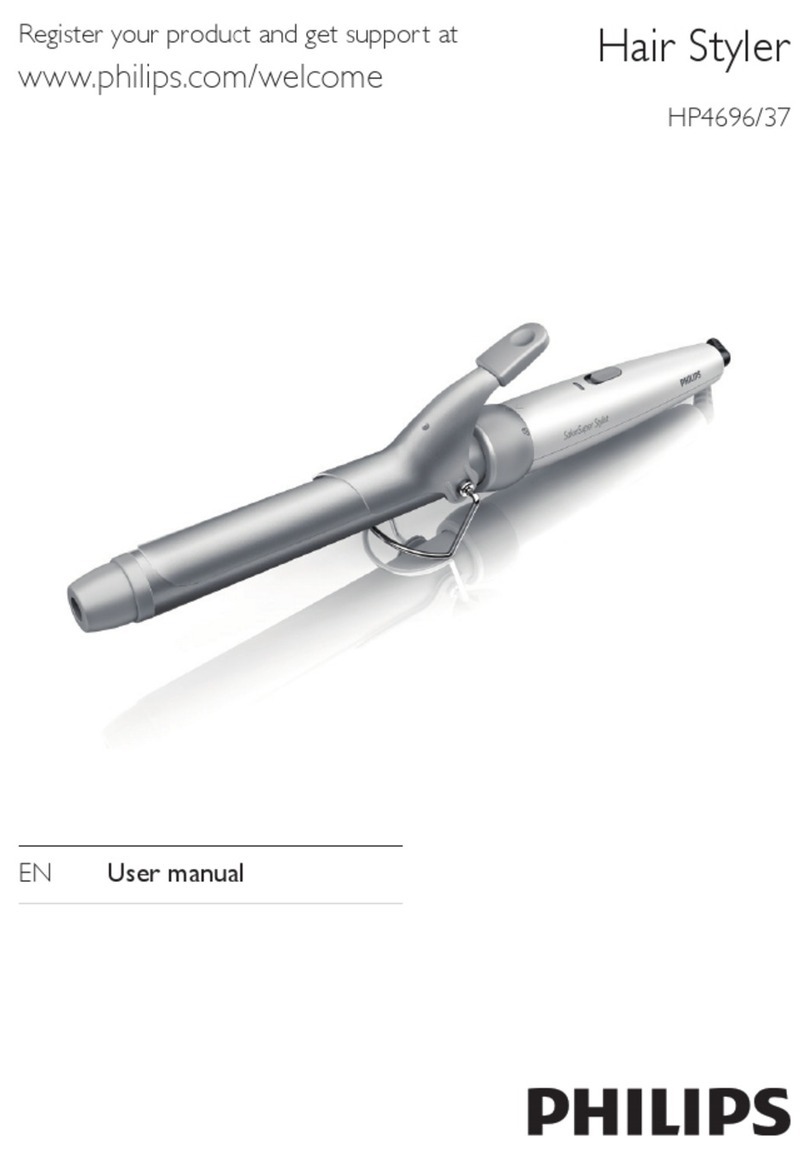
Register your product and get support at
www.philips.com/welcome
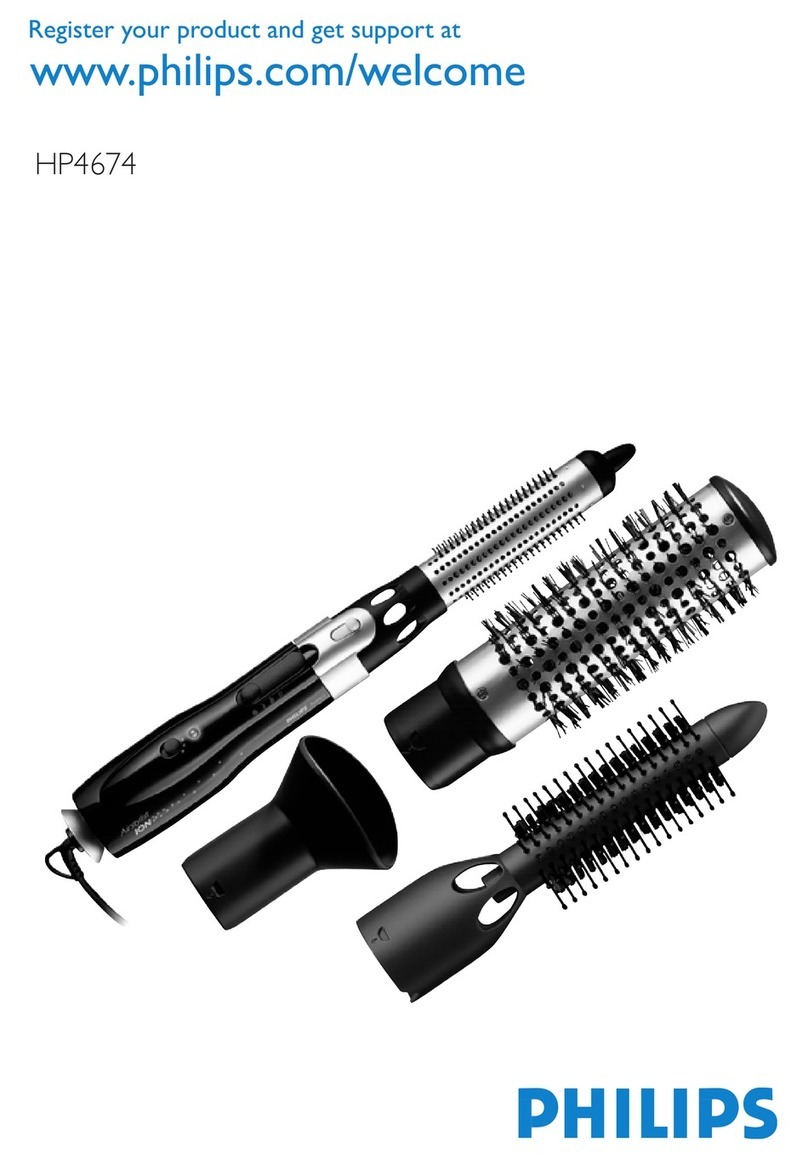
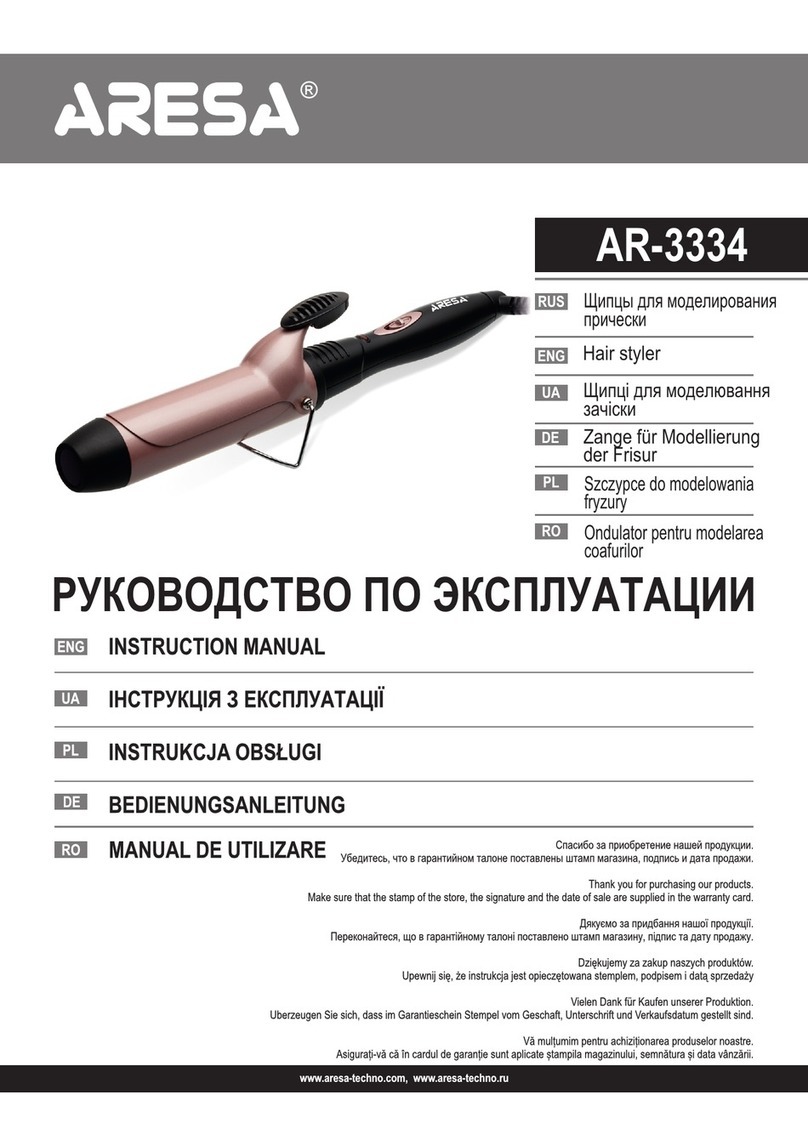
HP8698
EN User manual
MS-MY 0DQXDOSHQJJXQD
PT-BR 0DQXDOGR8VXiULR
ZH-CN Ⴌ߀൱Ҭ
ZH-HK Ԛʹ˫
AR
FA
5
24
3
7~10
sec .
6
7
4
7~10
sec.
a
d
e
c
b
f
g
h
i
j
k
l
m
o
p
q
r
s
tu
n
Salon
v
-DPLQDQGDQSHUNKLGPDWDQ
Sekiranya anda memerlukan maklumat mengenai penggantian alat
WDPEDKDQDWDXMLNDDQGDPHPSXQ\DLPDVDODKVLODOD\DULODPDQZHE
Philips di www.philips.com atau hubungi Pusat Layanan Pelanggan Philips
di negara anda (anda boleh mendapatkan nombor telefonnya di dalam
ULVDODKMDPLQDQVHUDWDGXQLD-LNDWLDGD3XVDW/D\DQDQ3HODQJJDQGL
QHJDUDDQGDSHUJLNHSHQMXDO3KLOLSVWHPSDWDQDQGD
Português
3DUDEpQVSHODDTXLVLomRHVHMDEHPYLQGRj3KLOLSV3DUDDSURYHLWDU
todos os benefícios oferecidos pelo suporte da Philips, registre seu
produto no site www.philips.com/welcome.
1 Importante
Leia este manual atentamente antes de usar o aparelho e guarde-o para
consultas futuras.
AVISO: não use este aparelho
SUy[LPRjiJXD
Quando usar o aparelho no banheiro,
tire-o da tomada após o uso, pois
DSUR[LPLGDGHGDiJXDpXPULVFR
mesmo com o aparelho desligado.
AVISO: não use este aparelho
próximo a banheiras,
chuveiros, pias ou outros
recipientes que contenham
iJXD
Sempre desconecte o aparelho da
tomada após o uso.
Se o cabo de energia estiver
GDQLÀFDGRGHYHUiVHUVXEVWLWXtGR
pela Philips, por uma das assistências
técnicas autorizadas da Philips ou por
WpFQLFRVLJXDOPHQWHTXDOLÀFDGRVSDUD
evitar situações de risco.
Este aparelho pode ser usado por
crianças a partir de 8 anos e pessoas
com capacidades físicas, mentais
ou sensoriais reduzidas ou com
pouca experiência e conhecimento,
GHVGHTXHVHMDPVXSHUYLVLRQDGDVRX
instruídas sobre o uso e os riscos.
Não deixe o aparelho ao alcance
de crianças. Crianças não devem
realizar limpeza ou manutenção sem a
supervisão de um adulto.
$QWHVGHFRQHFWDURDSDUHOKRj
WRPDGDHOpWULFDYHULÀTXHVHDWHQVmR
LQGLFDGDQRDSDUHOKRFRUUHVSRQGHj
tensão da rede elétrica local.
Não use o aparelho para nenhum
RXWURÀPDQmRVHURGHVFULWRQHVWH
manual.
Quando o aparelho estiver conectado
jWRPDGDHOpWULFDQXQFDGHL[HRVHP
vigilância.
Nunca use acessórios ou peças de
RXWURVIDEULFDQWHVRXTXHQmRVHMDP
HVSHFLÀFDPHQWHUHFRPHQGDGRVSHOD
3KLOLSV&DVRFRQWUiULRDJDUDQWLDVHUi
anulada.
Não enrole o cabo de energia em
volta do aparelho.
'HL[HRHVIULDUDQWHVGHJXDUGiOR
Tenha muito cuidado ao usar
o aparelho, pois ele pode estar
extremamente quente. Segure
VRPHQWHDDOoDMiTXHDVRXWUDVSDUWHV
estão quentes e evite o contato com
a pele.
Sempre coloque o aparelho com o
suporte em uma superfície plana e
resistente a calor. Não deixe que o
cilindro/as placas de aquecimento
entrem em contato com a superfície
RXRXWURPDWHULDOLQÁDPiYHO
Não deixe que o cabo de energia
entre em contato com as partes
quentes do aparelho.
Quando o aparelho estiver ligado,
PDQWHQKDRORQJHGHREMHWRVH
PDWHULDLVLQÁDPiYHLV
Nunca cubra o aparelho (por
exemplo, com toalhas ou roupas)
enquanto ele estiver quente.
Só utilize o aparelho em cabelos
secos. Não use o aparelho com as
mãos molhadas.
Mantenha o cilindro/as placas de
aquecimento limpas e sem resíduos
de produtos modeladores, como
mousse, gel e spray.
O cilindro/as placas de aquecimento
possuem revestimento. O
revestimento desgasta lentamente
conforme o uso. Isso não afeta o
desempenho do aparelho.
Se o aparelho for usado em
cabelos tingidos, o cilindro/as placas
GHDTXHFLPHQWRSRGHUmRÀFDU
manchadas. Antes de usar o aparelho
HPFDEHORVDUWLÀFLDLVFRQVXOWHR
distribuidor do produto.
3DUDDYDOLDo}HVRXFRQVHUWRVGLULMD
se a uma das assistências técnicas
autorizadas da Philips. O conserto
UHDOL]DGRSRUSHVVRDVQmRTXDOLÀFDGDV
SRGHUiFDXVDUVLWXDo}HVGHULVFR
Specifications are subject to change without notice
© 2014 Koninklijke Philips N.V.
$OOULJKWVUHVHUYHG
3140 035 37033


