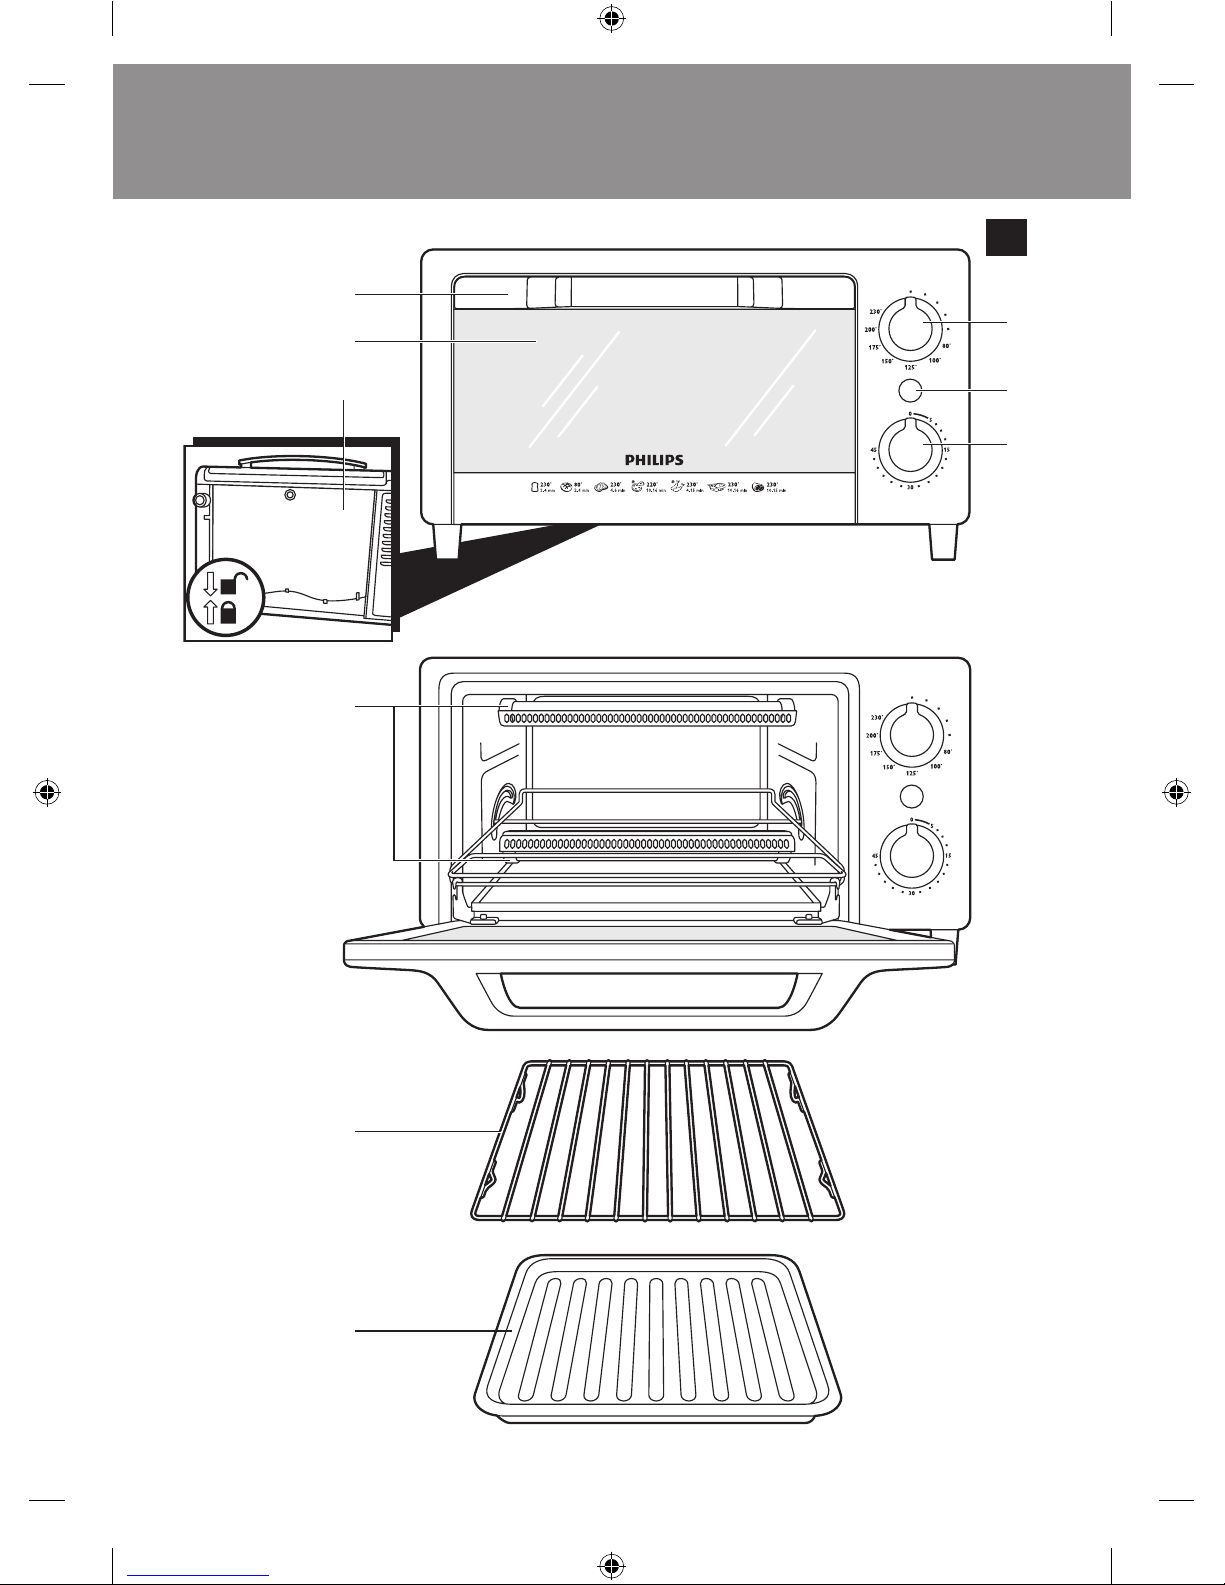
For cooking times, see the cooking guide at the end of this user manual.
The maximum cooking time that can be set is 30 minutes for type HD4494 and 45 minutes for type
HD4496.
,The power-on light goes on (Fig. 8).
Note: To set a cooking time of less than 5 minutes, turn the timer knob past the 5-minute indication (1)
and then turn it back to the required time (2). (Fig. 9)
,When the set cooking time has elapsed, you hear a bell and the appliance switches off
automatically (Fig. 10).
9 If you want to remove food from the toaster oven or if you want to stop cooking before the
end of the preset cooking time, turn the timer knob to 0 to switch off the appliance (Fig. 3).
If there is still food in the toaster oven that needs to be cooked, turn the timer knob to the required
cooking time again.
Be careful: the wire rack and/or the baking tray and the cooked food are hot! Use oven gloves or
a thick dry cloth to remove the hot food and the hot wire rack or baking tray from the toaster
oven.
See section ‘How to use the toaster oven’.
Note: It is not necessary to preheat the toaster oven.
1 Place the slices of bread side by side on the wire rack. To toast a single slice, place it in the
centre of the wire rack (Fig. 11).
The toaster oven can toast up to 4 slices of bread at a time. Use the wire rack for toasting bread.
2 Set the temperature selector to the required temperature. (Fig. 6)
For cooking temperatures, see the cooking guide at the end of this user manual.
If you want to warm up pastries, select a low temperature.
3 Set the timer knob to the required cooking time (Fig. 7).
For cooking times, see the cooking guide at the end of this user manual.
Note: During toasting, some condensation may form on the glass window of the door. This is normal and
is caused by moisture in the food. It does not affect the toasting process.
See section ‘How to use the toaster oven’.
Note: It is not necessary to preheat the toaster oven.
1 If you want to brown or crisp food toppings such as cheese and breadcrumbs to cook a
gratin, put the food in suitable cookware or on the baking tray.
2 Place the cookware or the baking tray on the wire rack in the toaster oven.
3 Set the temperature selector to the required temperature. (Fig. 6)
For cooking temperatures, see the cooking guide at the end of this user manual.
4 Set the timer knob to the required cooking time. (Fig. 7)
For cooking times, see the cooking guide at the end of this user manual.
Note: Keep an eye on the food to make sure that it does not get overcooked.
5 When the result is satisfactory, turn the timer knob to 0 and remove the food.
See section ‘How to use the toaster oven’.
8
4222.200.0342.2.indd 8 09-12-09 11:45