For detailed specifications, product tutorials and more, please visit www.photoflex.com
MulDome Family Instrucons | Items: 870601 (MD-2M293) and 870604 (MD-3L293)
MulDome
Before assembling your MulDome sobox, make sure all components
are present. You will need:
• MulDome sobox
• Circle face mask
• Connector for your specic light (not included)
• Four rods
• Inner bae (medium, large, and x-large only)
• Front diuser
• Set of two Silver/Gold reversible panels for short sides
• Set of two Silver/Gold reversible panels for long sides
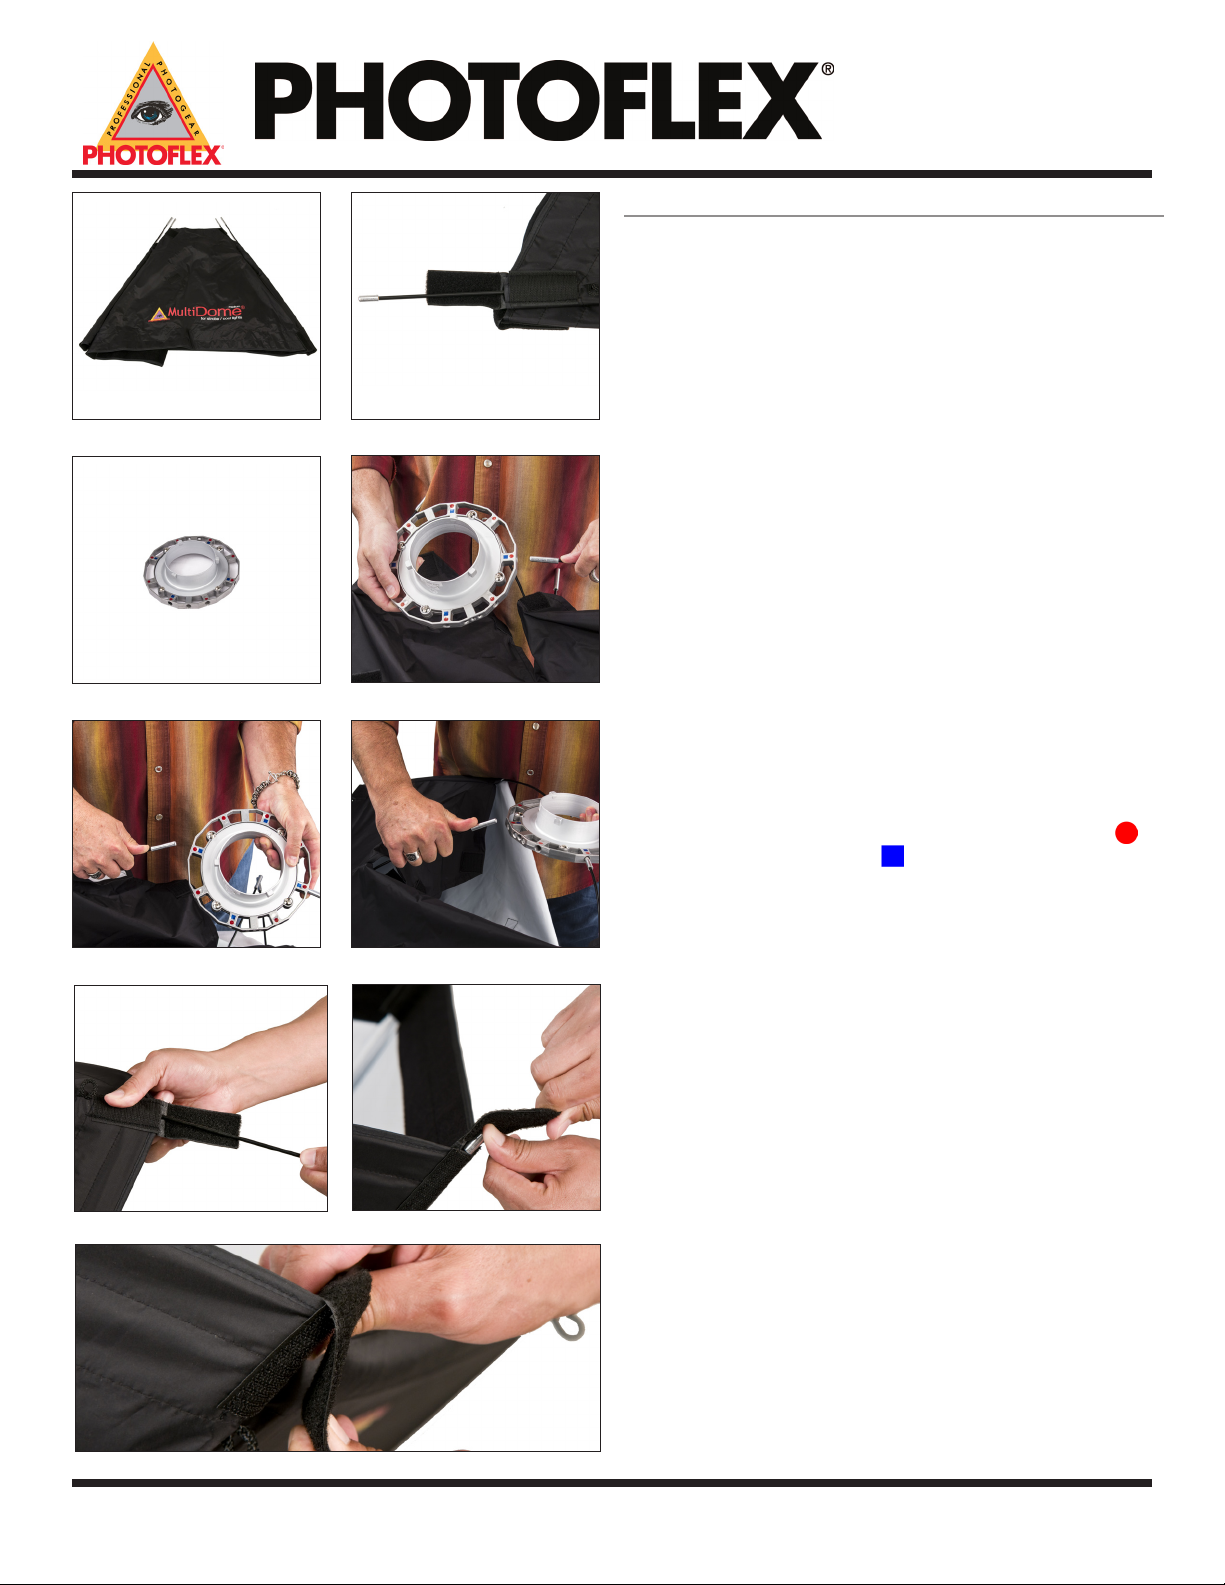
Assemble the Sobox to the Connector (Figures 1-9)
1. Place softbox with all four rods into their sleeves on a flat,
clean surface.
2. If closed, open all four Quick Release Corners (QRC).Pull Velcro® tab
open at each corner so that rods extend freely. (not available on Small
MulDome.)
3. Noce that the connector has nine receptacle holes, three of which are
“tapped” (except with the extra small LiteDome which comes
with a four hole Basic Connector). The small, medium, large and
extra large LiteDome only use four of the eight octoconnector rod holes.
(The remaining four holes are for use with the OctoDome®, Photoex’s
eight rod sobox.) Current model OctoConnectors use circle icons ( ) for
OctoDomes and squares icons ( ) for rectangular Softboxes.
4. Posion connector at the center of the sobox. Insert the rst rod into
one of the rod receptacle holes).
NOTE: If you are planning on using the ShoeMount hardware (AC-B222SM)
with this assembly, make sure that one of the large tapped holes is
centered between two inserted rods.
5. Insert the second rod into the hole diagonally opposite the rst hole.
6. Insert the third and fourth rods.
7/8. Use one hand to pull QRC ap over rod p while pushing the rod into
place with your thumb
9. Secure ap to its Velcro counterpart. Repeat this process for the
remaining corners.
Figure 2.Figure 1.
Figure 3.
Figure 6.
Figure 4.
Figure 5.
Figure 7. Figure 8.
Figure 9.


