For detailed specifications, product tutorial videos and more, please visit www.photoflex®.com
StarLite® QL | Instrucon • Items: 870334 (FV-BSL3200) / 870337 (FV-BSLE3200)
StarLite QL
The StarLite QL features a quick locking design for quick secure set up
and tear down.
The StarLite QL comes with:
• StarLite QL LampFixture
• Swivel Stand Mount
• Power cord with 20 amp industrial switch
Note: Lamps for the Starlite are sold separately, available in 120 and
220 voltage at 500 or 1000 was with a mogul base size to match
the Starlite. A step-down adapter to convert the mogul base to a
standard Edison base is available and the part number is FV-SKT.
Safety Precauons
• The StarLite is designed for use with a high heat resistant SoBox
such as the Photoex SilverDome® NXT, OctoDome® NXT or
MovieDome®. Be sure the SoBox you are using is rated for use
with hot lights as you could create a hazardous situaon.
• Do not operate the StarLite QL in moist or wet condions as this
will create a hazardous situaon.
• Always turn o power and unplug the power cable before
changing lamps.
NOTE: We recommend that you assemble the SoBox to the StarLite
OctoConnector. For instrucons on assembly of your parcular
SoBox, refer to the instrucons included with your SoBox or
go to www.Photoex.com for further details.
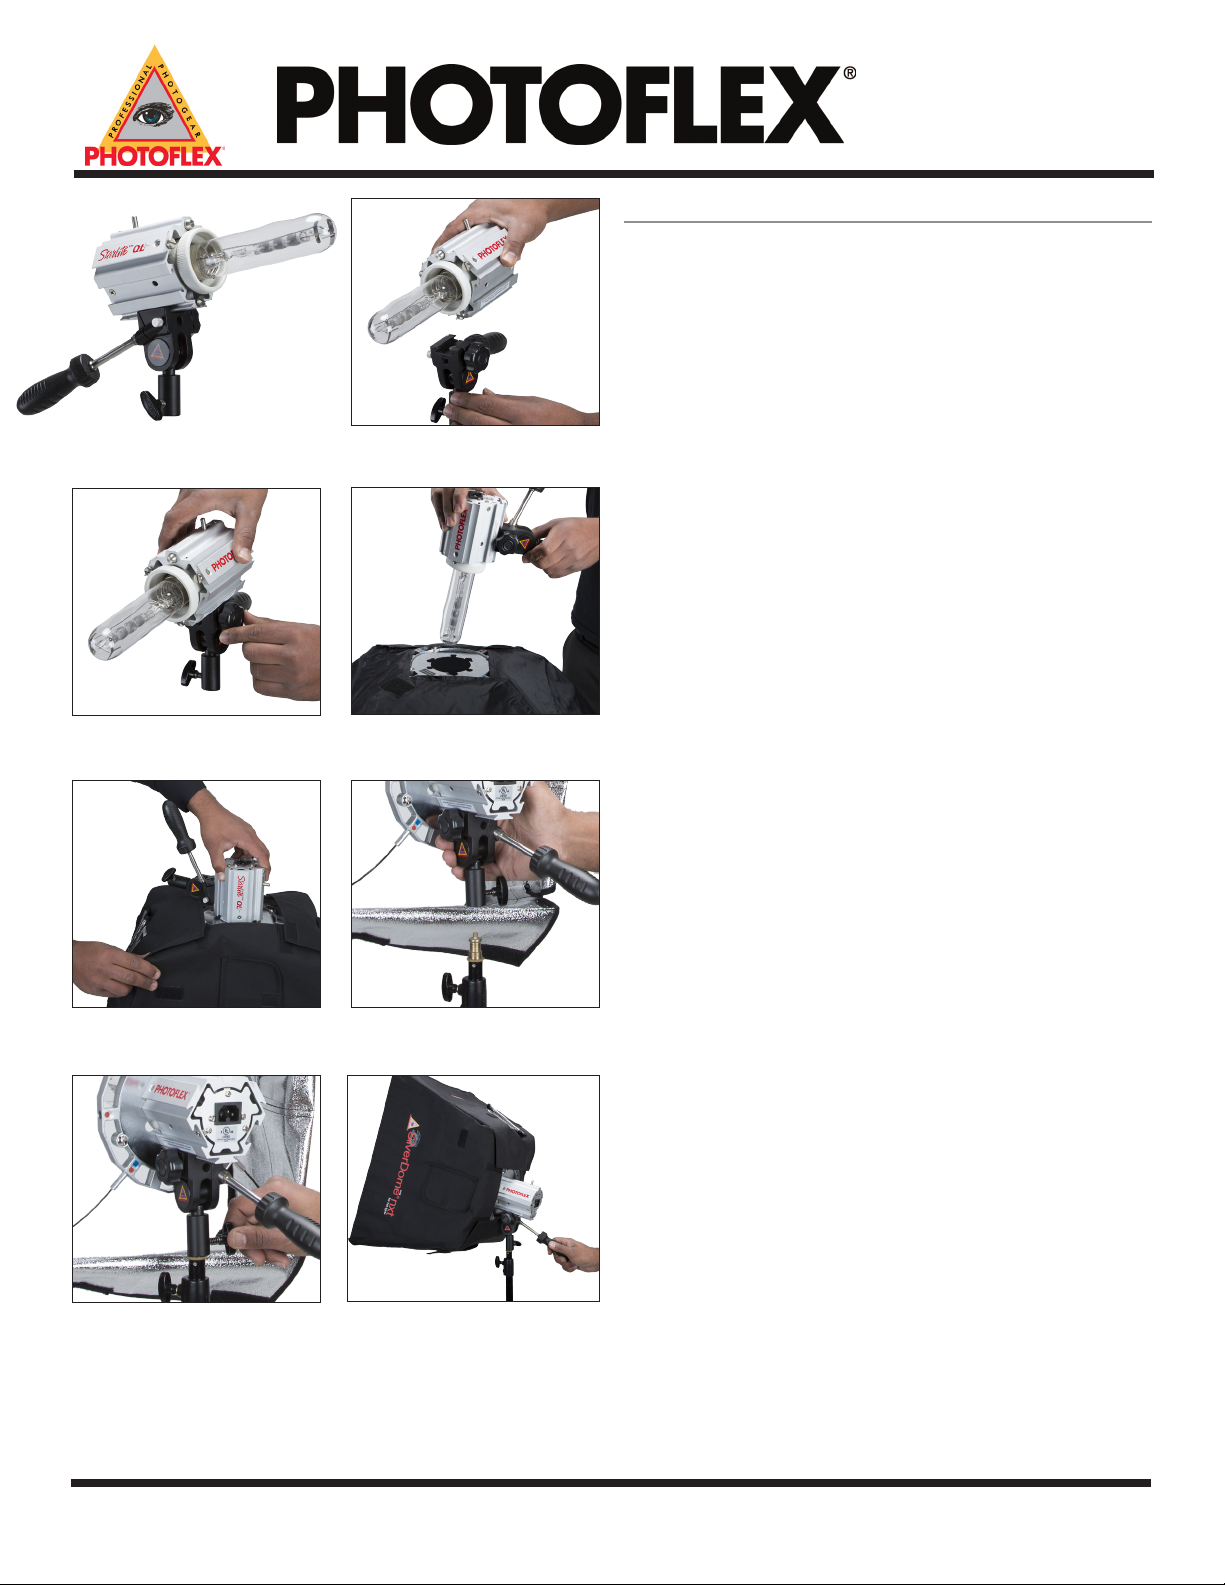
Assembly of the StarLite Head to the Swivel Stand Mount
1. Slide the boom of the StarLite® head onto the receiving channel
of the swivel stand mount.
2. Securely ghten the set screw on the swivel to lock it in place.
Locking the StarLite Head and Swivel Assembly to the StarLite
OctoConnector
3. With the SoBox assembled and face down on a clean at
surface; place the StarLite head over the connector, matching
the three metal posts on the head with the three corresponding
key holes.
4. Insert the StarLite head into the SoBox connector and turn the
head clockwise to lock it in place.
Note: The locking pin will click into place through the plate, conrming
you have the unit correctly assembled together.
Placing the StarLite & SoBox Assembly Onto Your LiteStand
5. With the StarLite head securely aached to the Swivel and the
SoBox, li the assembly and place the 5/8 inch receiver over the
top stud of your LiteStand
6. Set the receiver onto the stud making sure that it drops all the
way down and then ghten the set screw to properly secure it.
7. Make sure that the twist lock handle is ghtened securely to
prevent unwanted lt before leng go of the assembly on
the LiteStand.
Figure 1StarLite® QL
Figure 2
Figure 5
Figure 3
Figure 4
Figure 6 Figure 7


