For detailed specifications, product tutorials and more, please visit www.photoflex.com
Figure 12.
Figure 11.Figure 10.
Figure 13.
Figure 15.
Figure 17.
Figure 14.
Figure 16.
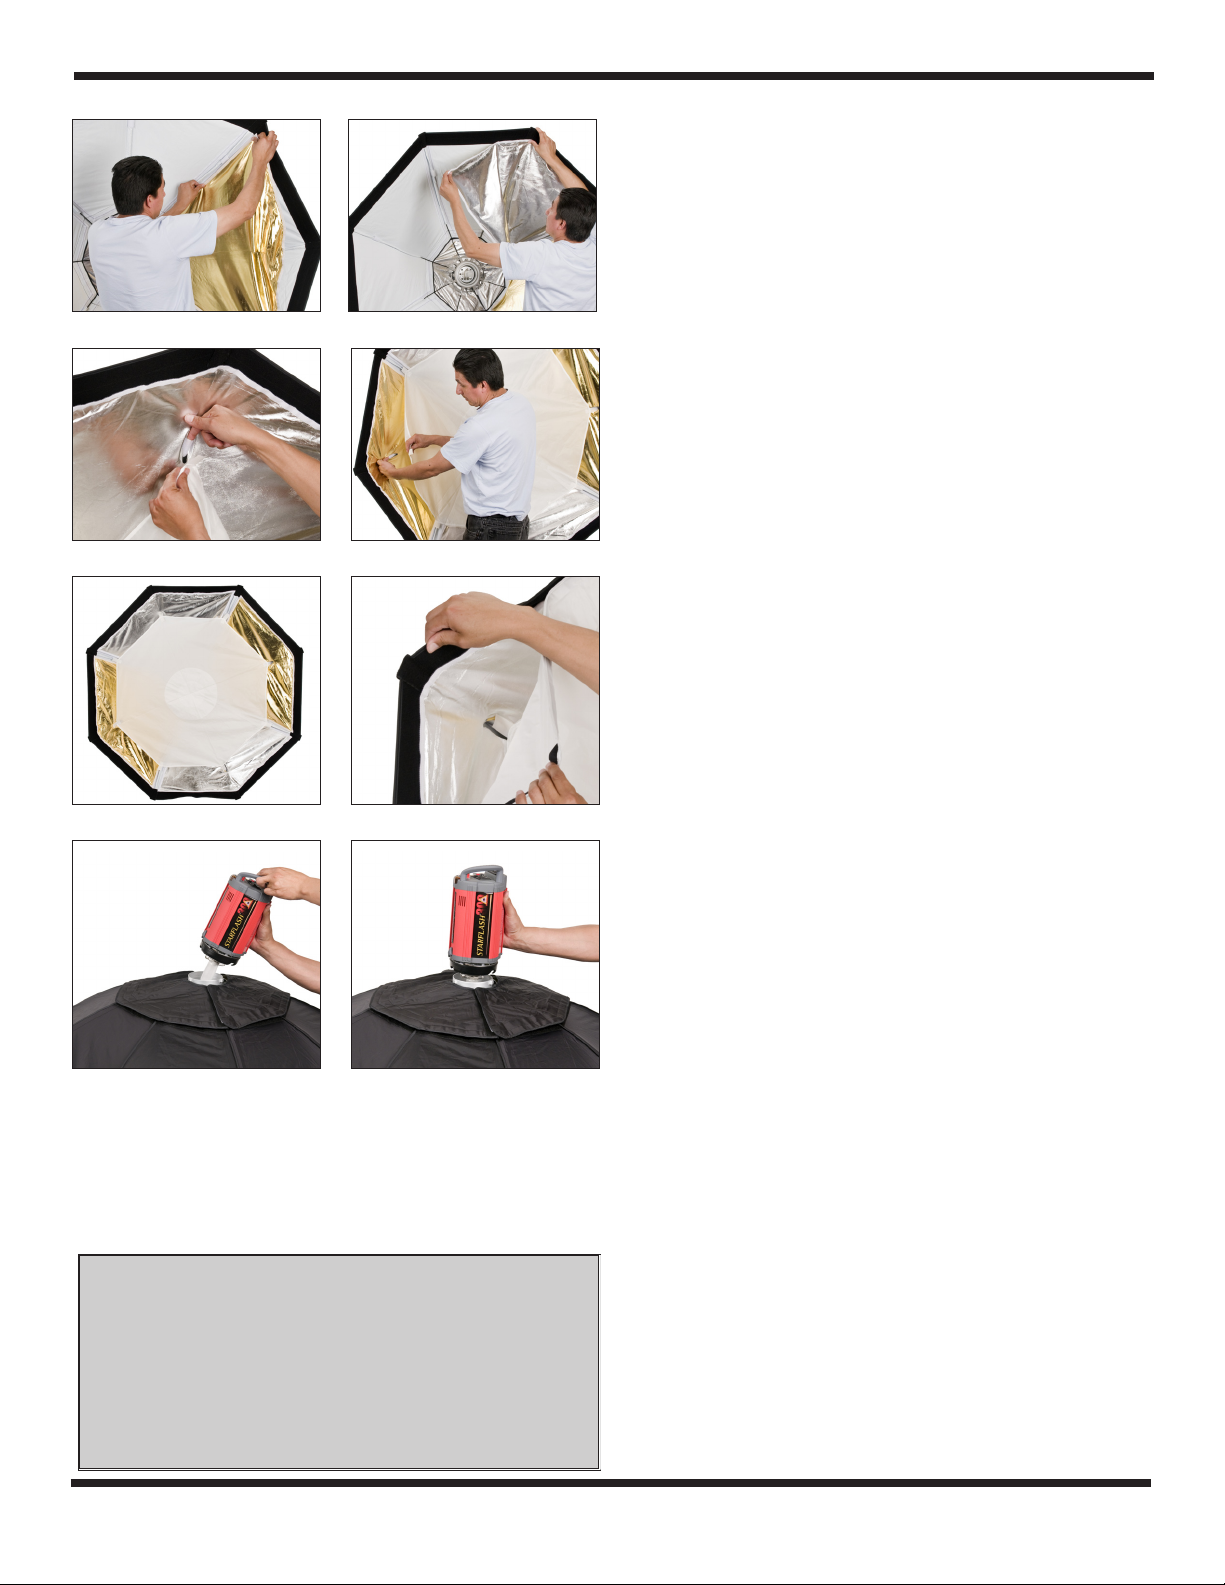
Installing the Gold/Silver Panels
Note: Gold/Silver panels are oponal. These can be used in any combinaon
to modify the color and contrast of the light.
10. The OctoDome comes with four Gold/Silver reversible panels
that can be aached inside the sobox with Velcro fasteners.
Each insert will span the inside of two of the eight sides of the
so box. Posion the panel so that its side covers the length of
the white Velcro near a seam. Press rod into place.
Note: Noce the seams that run from the front of the sobox to the
rear. On both sides of four of the seams is a length of white Velcro.
The reversible Gold/Silver panels will aach to this Velcro.
11. Press the long edge of the panel along the inner edge of the 3”
black Velcro from one corner to the next. Press the third edge
into place along the white Velcro by the so box seam. Repeat
this process to install the remaining panels.
Installing the Inner Bae and Front Diusion Face
12 The inner bae has Velcro tabs at each corner. These tabs
connect to the Velcro loops on each inner seam of the OctoDome.
Note: The inner tabs will poke through holes cut in the Gold/Silver panels
in 4 places to facilitate aaching the bae.
13 Connect each corner of the inner bae to each Velcro loop
inside the OctoDome.
14 Fig. 14 shows the bae installed.
15 The face diuser is rimmed with Velcro material that aaches to
its counterpart that lines the front of the OctoDome. Find a
corner of the diuser and line it up with the corner of the
OctoDome face. Starng at one corner, press the face diuser in
place. Work your way around the rim of the sobox unl the
diuser is in place Your sobox is now fully constructed.
Note: The face should be aached at a 1” recess to allow aachments of
an oponal grid accessory (sold separately).
16/17 The sobox is built and ready to aach to your light head. Place
the dome face down on the oor with the connector facing up;
then securely lock the light onto the connector. It also helps to
raise the LiteStand to your approximate height before liing the
light and dome assembly onto the stand. Make sure to always
ghten the light xtures set screw to the stud on the LiteStand.
Note: Reecve fabrics should not be stored in the plasc bag for long
periods of me and should be opened completely periodically to
prevent scking together.
PHOTOFLEX® WARRANTY
• Warranties only cover manufacturer’s defects and workmanship.
• We reserve the right to inspect all merchandise returned (end
users and dealers) for warranty fulfillment.
• All returns must be pre-approved with Return Manufacturers
Authorization obtained from Photoflex/PromarkBRANDS.
• A receipt showing date of purchase will be required for all returns.
• Freight must be paid by the customer or dealer.
• Warranties are valid only from date of Original Purchase.
Customer Support (831) 786-1370
Photoflex is a division of PromarkBRANDS, Bartlett, IL USA.
©2016 ALL RIGHTS RESERVED. OctoDome®, QRC®, Photoflex® and the Photoflex logo are
trademarks or registered trademarks of Photoflex and/or its affiliates in the U.S. and
other countries.


