Decoder Startup (delivered condition)
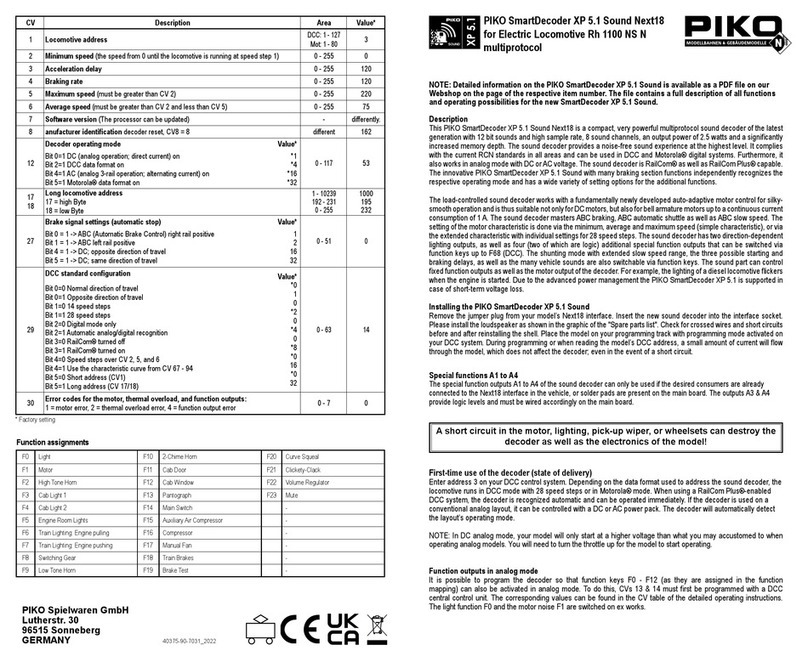
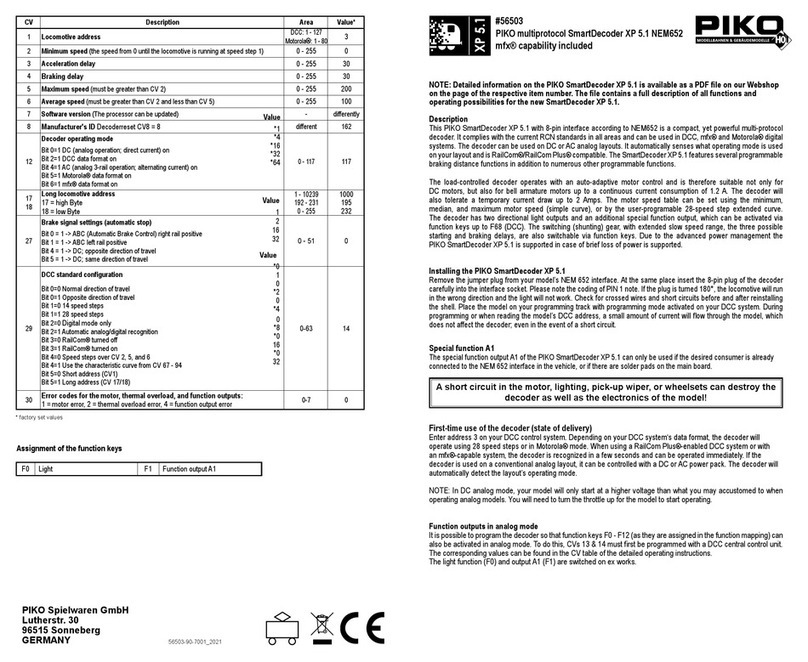
Enter address 3 into the control unit. The decoder operates depending on the data format used in DCC-Operation with 28
speeds or in Motorola operation. With a RailCom Plus®capable digital center, the decoder is up and running within a few
seconds and can be operated immediately. If the decoder is used on conventional systems, it can be controlled with a DC or
AC drive unit. The operating mode is automatically recognized by the decoder. The status of functions F0 - F12 can be set
for analog operation via CVs 13 and 14.
Analog Operation with AC or DC Voltage
The locomotive decoder is suitable for analogue operation with DC or AC voltage, which is self-detected.
NOTE: In DC operation, your vehicle will only start up at higher voltage (speed controller turned up further) than you might
have been used to in operation with analogue vehicles.
Function outputs in analog operation
It is possible to set the decoder in such a way that the function key F0, as assigned in Function Mapping, can also be switched
on in analog mode. For this purpose, CVs 13 & 14 must rst be programmed with a digital control unit. The corresponding
values can be found in the CV table.
Congurations-CVs
Besides the decoder address, the conguration CVs of a locomotive decoder are certainly the most important CVs. These
are the CVs 29,50 and 51 of the PIKO SmartDecoder 4.1, and a conguration CV usually contains different settings of
a decoder, which are displayed in a maximum of 8 bits (0 - 7). The value to be entered for a CV is calculated from the
respective CV table by adding the values of the desired functions. The following table shows you the meaning and content
of the conguration CVs, as well as an example calculation of the value:
Example (CV 29):
Normal driving direction Value = 0
28 Speed steps Value = 2
Auto. Analog/Digital detection Value = 4
RailCom®off/on Value = 8
Speed steps using CV 2, 5, 6 Value = 0
Short address Value = 0
The sum of all the values is 14.
This value is set to CV29 as factory default value.
Bit Conguration CV50 Value
0Motorola 2. address not use
Motorola 2. address use
0
1
1Motorola 3. address not use
Motorola 3. address use
0
2
2light output not switch
light output switch
0
4
3Frequenzy Light, A1 to A2 = 156Hz
Frequenzy Light, A1 to A2 = 24KHz
0
8
4FSUSI = SUSI
SUSI = A3/A4 Logic level
0
16
5KSUSI = SUSI
SUSI DATA = Input 1, CLK = Input 2
0
32
RailCom®, RailCom Plus®
The RailCom®technology developed by LENZ®is based on the transmission of data from the decoder into the specially
prepared (CutOut) DCC digital signal on the track. Detectors must be located on the track to evaluate this decoder data
and, if necessary, forward it to the control center. The decoder sends, depending on the setting, the decoder address and,
when read out via the main track programming, CV values which can be displayed by the digital control panel (depending
on the detector and control panel). The CV29 RailCom®can be switched on or off in the decoder via bit 3 of the CV29
RailCom®. Further RailCom®settings can be made in CV 28. There, for example, RailCom Plus®is also switched on via
bit 7. If RailCom Plus®is switched on, the decoder will automatically log on to a RailCom Plus®capable control unit (e. g.
PIKO SmartControl) with its locomotive symbol, decoder name and special function symbols within a few seconds. Thanks
to this RailCom Plus®technology, there is no need to store locomotive data in the central control unit and no locomotive
addresses have to be programmed into the decoder.
Bit Conguration CV29 default
0normal direction
reversed travel
0
1
114 / 27 speed steps
28 / 128 speed steps
0
2
2only digital operation
automatic analogue / digital switching
0
4
3RailCom
®
switched off
RailCom
®
switched on
0
8
4speed steps from CV2, 5 and 6
speed characteristics from CV67 to 94
0
16
5short address (CV1)
long address (CV 17/18)
0
32
Braking Behavior
Märklin Braking Track
The decoder reacts to a Märklin braking distance (brakes with analogue DC voltage on the track) when CV29 bit 2 and
CV27 bit 4 or bit 5 are set to 1 (factory setting 1 and 0).
CV27 Bit 4 = 1 -> DC with opposite direction of travel.
CV27 Bit 5 = 1 -> DC with direction of travel.
ABC - Brakes
If the decoder detects a lower amplitude of the digital voltage on one side of the track, a braking process begins.
On which side of the rail the digital voltage should be more positive in order to activate the braking process can be set via
CV27:
CV27 = 1, brake when right rail is more positive
CV27 = 2, brake when left rail is more positive
CV27 = 3, brake irrespective of which rail is more positive
The voltage difference can be set in CV97. The desired difference corresponds to the CV value * 0.12V.
If an ABC slow speed signal is detected according to a Lenz BM2 module, the decoder brakes to the internal speed range
(0 - 255) which can be set in CV98.
Constant Braking Distance in cm
The decoder offers the possibility of two adjustable, constant braking distances in centimeters, true to scale.
The constant braking distances can be triggered by various events. These include the ABC brake signal, the brake signal of
a DCC brake generator, the brake signal of a DC braking section, as well as speed 0. When braking with speed 0
(e. g. manual operation) it is possible to enter a speed step threshold above which the constant braking distance is only carried
out. If the internal speed step of the locomotive decoder is lower than the entered speed step threshold, the vehicle stops at
nominal speed 0 with the set brake delay from CV4, or CV145, or CV147.
CV138 = 1 - 255 -> Current speed step above which braking is carried out with a constant braking distance when the nominal
speed is set to zero.
CV139 = Braking distance in cm
CV140 = alternative braking distance, can be activated via the CROSS bit (see "Advanced Function Mapping")
CV141 = maximum speed of the model locomotive in cm/s
CV142 = If the value determined for CV141 exceeds 255, the remainder is entered in CV142 (possibly track 1 IIm (G).
CV143 = Activation of the constant braking distance by:
Bit 0 = 1 -> reference speed = 0, with current internal speed according to CV138 and higher
Bit 1 = 1 -> ABC Brakes
Bit 2 = 1 -> DC Brakes
Bit 3 = 1 -> DCC Brake signal
CV143 = 0 -> No constant brake distance
If braking is initiated with a constant braking distance, the decoder does not react to driving commands again until the loco-
motive has come to a standstill. This process can be interrupted by switching on the shunting gear.
Determining the maximum speed of the model locomotive.
Program the CV of the maximum speed in the decoder to the maximum possible value (CV5 = 63, or when using the extended
gear stage characteristic CV94 = 255)
Mark a starting point on a sufciently long, straight track section from which the vehicle can drive for approx. 2 seconds without
hindrance at the possible maximum speed. Lay down a folding rule (inch rule) at the selected starting point. Now enter this
section at maximum speed, e.g. the speed governor is set to the highest speed. When you reach the starting point, start the
time measurement for 2 seconds. After these 2 seconds have elapsed, note the position of the vehicle on the yardstick and
read the value in cm. Divide this value by 2 and you will get the speed in cm/s. This value is now entered in CV141. In the
track widths 1 and IIm (G) for very fast vehicles, the determined value may possibly exceed 255. In this case, please enter
the value 255 in CV141 and the rest of the determined value in CV142.
After this measurement, the CV for maximum speed (CV5 or CV94) can be set to the desired maximum speed for driving.
Function Outputs
Simple Function Mapping
The following settings of the decoder are only possible with simple function mapping (CV 96 = 0).
In the simple function mapping, the assignments of switching tasks such as lighting, special function outputs, shunting gear
and switchable starting and braking delay can be freely assigned to the function keys F0 to F12 of the digital control center.
The value that is written to a CV of the function mapping determines the functions that can be switched using a function key
assigned to the CV. The CVs 33 to 46 serve this purpose according to the following scheme.
Assignment of Function keys to the CVs Default Assignment of the Bits Value
CV 33 Light function key F0 forwards 1 Bit 0 Light function key front 1
CV 34 Light function key F0 backwards 2 Bit 1 Light function key back 2
Bit 6 Shunting 64
Bit 7 Starting-/brake delay 128
Example 1: The rear light output should only be switched with the function key F5.
The CV to be programmed is CV39 for function key F5, in which the value 2 (rear light output) is programmed. So that the rear
light output is no longer switched backwards in the direction of travel via function key F0, CV34 must also be programmed
for function key F0 in the direction of travel backwards to the value 0.
Example 2: The function output A1 and the shunting gear are to be switched together with the function key F10.
The CV to be programmed is CV44 for function key F10, in which the value 4 (function output A1) plus 64 (shunting gear) is
programmed, e.g. the value 68. So that the function output A1 is no longer switched via function key F1 and the shunting gear
no longer via function key F5, CVs 35 for function key F1 and 39 for function key F5 must also be programmed to the value 0.
Simple and extended Function Mapping
The following settings of the decoder are possible for simple (CV96 = 0) and extended (CV96 = 1) function mapping.
Dimming of Light-Outputs
The Light-Outputs can be set to any dimming level. These settings are stored in CVs 116 (Light).
Softly fade in and out Light-Outputs
If the output is switched on or off, it is softly faded in or out.
In CV186, you can specify which output should receive this dazzle function.
CV186: Value
Bit 0 Light output with dazzle function 1
A combination (total of the single values) is individually possible.
The setting of the CV187 determines how fast the glare function should work. The step size is CV value * 1ms.
Blinking of the Light-Outputs
The locomotive decoder has a ashing generator which can be assigned to the outputs. Both the switch-on and switch-off
time of the ashing generator can be set separately from each other.
In CV109, you can specify which output is to use the ash generator. In addition, the CV110 can be used to determine
which output is to use the blinking generator with 180° phase rotation. For example, a variable asher can be implement-
ed.
CV 109: Value CV 110: Value
Bit 0
Light output w/ ashing generator
1 Bit 0
Light output w/ ashing generator
180° 1
A combination (total of the single values) is individually possible.
In CV111 the switch-on time can be set in steps of 100ms and in CV112 the switch-off time in steps of 100ms.
Turn-on Effect of a Neon Tube / Fluorescent Tube
The switch-on effect of a defective uorescent lamp can also be output at the Light-Outputs. This effect consists of an
adjustable, maximum number of ashes (accidentally a ash up to a maximum number of ashes) and an adjustable ash
time, e.g. how fast the ashes should follow each other.
CV 188: Value
Bit 0
Light output w/ uorescent lamp effect
1
A combination (sum of the single values) is of course also possible here.
The ash time is set in 5ms increments via CV 189. The maximum number of ashes in CV 190.
Energy-saving lamp effect when switching on the Light-Outputs
When an energy-saving lamp is switched on, it rst produces a basic brightness before it slowly reaches its maximum
brightness. This effect can be assigned to the outputs of the decoder as follows.
CV 183: Value
Bit 0
Light output as energy-saving lamp
1
A combination (total of the single values) is of course again possible here.
The basic brightness can be adjusted via CV184. The setting of CV185 determines how fast the nal brightness value
(PWM1 in CVs 116 - 120) should be reached. The step size is CV value * 5ms. The basic brightness can be adjusted via
CV184.


