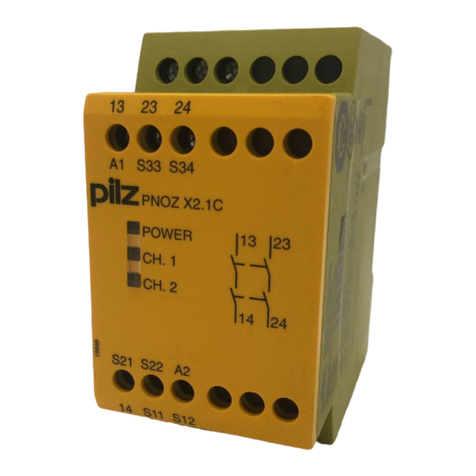
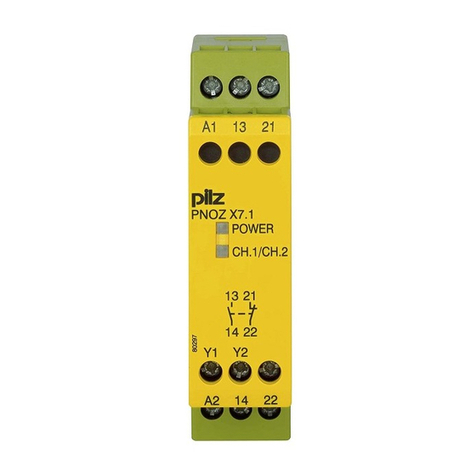
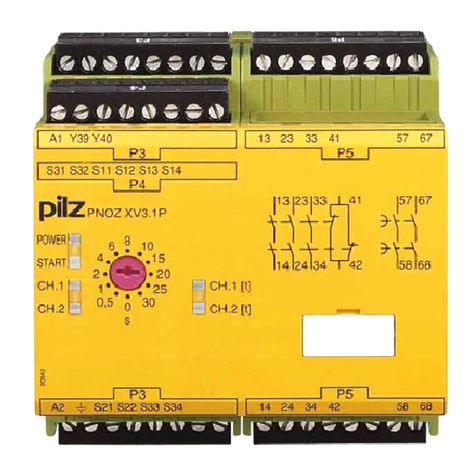
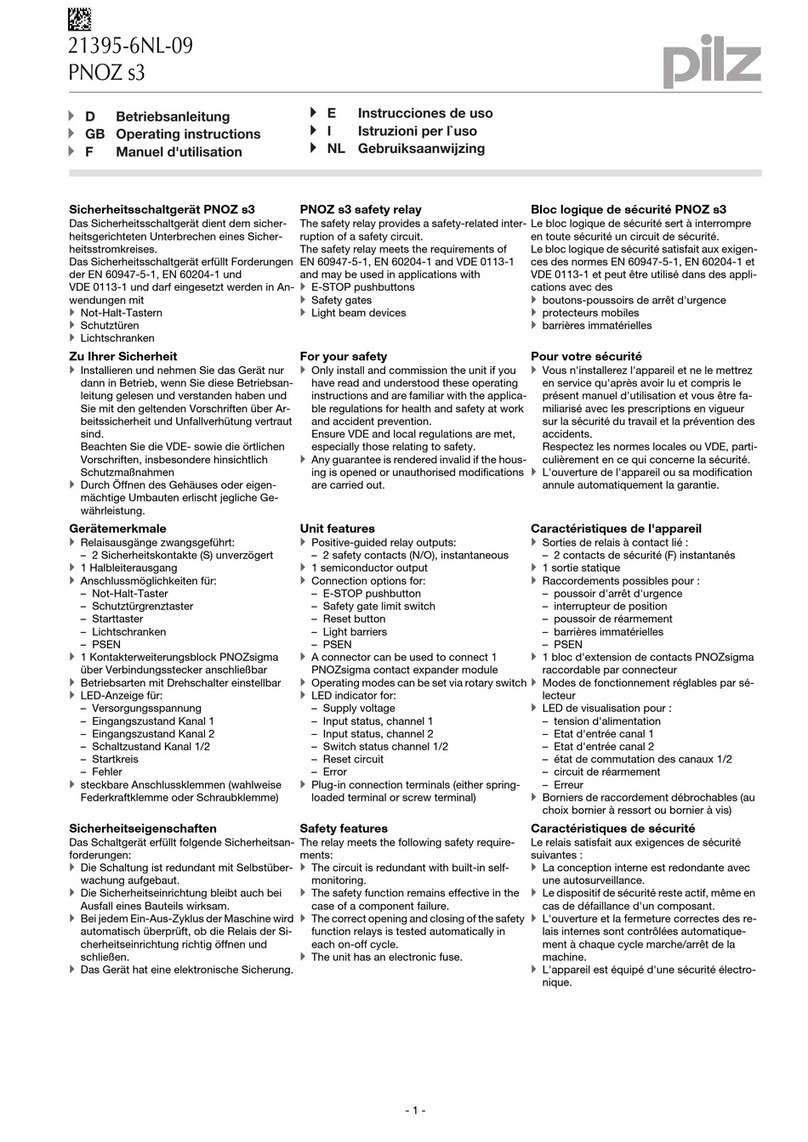
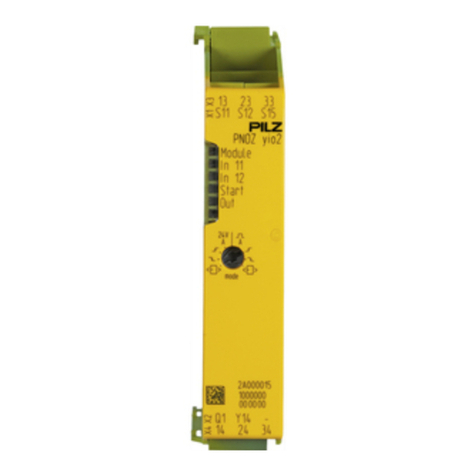
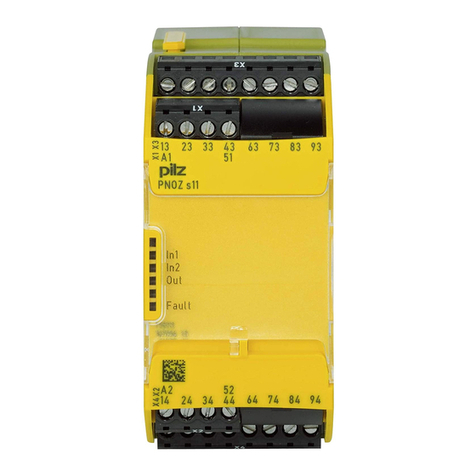
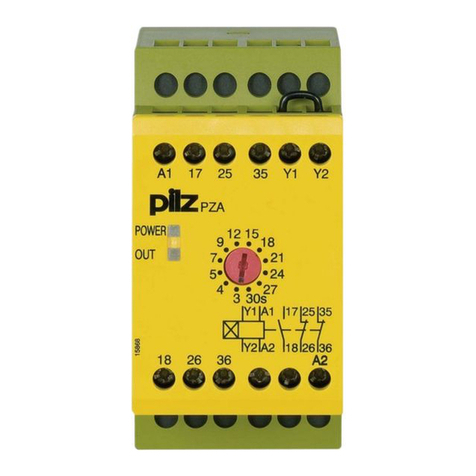
Pilz PNOZ X Series User manual

- 1 -
Sicherheitsbestimmungen
• Das Gerät darf nur von Personen instal-
liert und in Betrieb genommen werden,
die mit dieser Betriebsanleitung und den
geltenden Vorschriften über Arbeitssi-
cherheit und Unfallverhütung vertraut
sind. Beachten Sie die VDE- sowie die
örtlichen Vorschriften, insbesondere hin-
sichtlich der Schutzmaßnahmen.
• Halten Sie beim Transport, bei der Lage-
rung und im Betrieb die Bedingungen
nach EN 60068-2-6 ein (siehe techni-
sche Daten).
• Durch Öffnen des Gehäuses oder eigen-
mächtige Umbauten erlischt die Gewähr-
leistung.
• Montieren Sie das Gerät in einen Schalt-
schrank; Staub und Feuchtigkeit können
sonst zu Beeinträchtigungen der Funktio-
nen führen.
• Sorgen Sie an allen Ausgangskontakten
bei kapazitiven und induktiven Lasten für
eine ausreichende Schutzbeschaltung.
Bestimmungsgemäße Verwendung
Der Kontaktblock PZE X4.1P erfüllt die For-
derungen der EN 60204-1 und IEC 60204-
1. Das Gerät dient als Erweiterungsgerät
zur Kontaktverstärkung und Kontakt-
vervielfachung für ein Grundgerät. Grund-
geräte sind alle
• Sicherheitsschaltgeräte mit Rückführ-
kreis
• Sicherheitssteuerungen mit Rückführ-
kreis
• Geräte mit OSSD-Halbleiterausgängen
mit Rückführkreis
Die zu realisierende Kategorie nach
EN 954-1 ist abhängig von der Kategorie
des Grundgeräts. Sie kann vom Kontakt-
erweiterungsblock nicht überschritten wer-
den.
Gerätebeschreibung
Der Kontaktblock ist in einem S-99-Gehäu-
se untergebracht. Die Versorgungs-
spannung beträgt 24 V DC.
Merkmale:
• Relaisausgänge: 4 Sicherheitskontakte
(S), zwangsgeführt
• sichere Trennung der Sicherheits-
kontakte 13-14, 23-24, 33-34 von den
Eingangskreisen K1-U-K2 und dem
Rückführkreis Y1-Y2
• Anschluss für Rückführkreis
• Statusanzeige für Ausgangsrelais und
Versorgungsspannung
• wahlweise Schraubklemmen oder
Federkraftklemmen
Die Sicherheitseinrichtung bleibt auch nach
Ausfall eines Bauteils wirksam.
21061-04
PZE X4.1P
4D Betriebsanleitung
4GB Operating instructions
4F Manuel d'utilisation
4E Instrucciones de uso
4I Istruzioni per l`uso
4NL Gebruiksaan ijzing
Safety regulations
• The unit may only be installed and
commissioned by personnel who are
familiar with both these instructions and
the current regulations for health and
safety at work and accident prevention.
Ensure VDE and local regulations are
met, especially those relating to safety.
• Transport, storage and operating
conditions should all conform to
EN 60068-2-6 (see “Technical details”).
• The guarantee is rendered invalid if the
housing is opened or unauthorised
modifications are carried out.
• The unit should be panel mounted,
otherwise dust and moisture could
adversely affect its function.
• Sufficient fuse protection must be
provided on all output contacts with
capacitive and inductive loads.
Intended use
The contact block PZE X4.1P conforms to
the requirements of EN 60204-1 and
IEC 60204-1. The unit is an expander
module for increasing the number of
contacts available for a base unit. Base
units are all
• Safety relays with feedback loop
• Programmable safety systems with
feedback loop
• Units with OSSD semiconductor outputs
and feedback loop
The category to be implemented in
accordance with EN 954-1 depends on the
category of the base module. It cannot be
exceeded by the expander module.
Unitdescription
The contact block is enclosed in an S-99
housing. Supply voltage is 24 VDC.
Features:
• Relay outputs: 4 safety contacts (N/O),
positive guided
• Safe separation of safety contacts 13-
14, 23-24, 33-34 from input circuits K1-
U-K2 and feedback loop Y1-Y2
• Connection for feedback loop
• Status indicator for output relay and
supply voltage
• Screw terminals or spring-loaded
terminals
The safety function remains effective even
after a component failure.
Consignes de sécurité
•
L’installation et la mise en service de l’ap-
pareil doivent être effectuées par une per-
sonne qui s’est familiarisée avec le pré-
sent manuel d’utilisation et avec les
prescriptions relatives à la sécurité du tra-
vail et à la prévention d’accidents. Tenez
compte des normes locales ou VDE appli-
cables, notamment en ce qui concerne les
mesures de protection.
•
Pour le transport, le stockage et l’utilisa-
tion, respectez les exigences de la norme
EN 60068-2-6 (voir caractéristiques tech-
niques).
• L’ouverture du boîtier ou toutes modifi-
cations faites par l’utilisateur rendent la
garantie caduque.
• L’humidité et la poussière pouvant en-
traîner des dysfonctionnements,
l’appareil doit être monté dans une
armoire.
• Veillez à ce que tous les contacts de
sortie disposent d’un circuit de
protection suffisant en cas de charges
capacitives et inductives.
Utilisation conforme aux prescrip-
tions
Le bloc de contacts PZE X4.1P satisfait
aux exigences de l’EN 60204-1 et de
l’IEC 60204-1. L’appareil sert de module
d’extension pour l’augmentation et la
multiplication du nombre de contacts d’un
appareil de base. Les appareils de base
sont tous
• des blocs logiques de sécurité équipés
d’une boucle de retour
• des systèmes de sécurité équipés d’une
boucle de retour
• des appareils équipés de sorties
statiques OSSD avec boucle de retour
La catégorie à réaliser selon l’EN 954-1
dépend de la catégorie de l’appareil de
base. Elle ne peut pas être dépassée par
le bloc d’extension de contacts.
Description de l’appareil
Le bloc de contacts est logé dans un
boîtier S-99. Sa tension d’alimentation est
de 24 V DC.
Caractéristiques :
• Sorties à relais : 4 contacts de sécurité
(F) à contacts liés
•
séparation galvanique entre les contacts
de sécurité 13-14, 23-24, 33-34 et les
circuits d’entrée K1-U-K2 et la boucle de
retour
Y1-Y2
• Raccord pour la boucle de retour
• Affichage de l’état du relais de sortie et
de la tension d’alimentation
• au choix borniers à vis ou borniers à res-
sort
Le dispositif de sécurité reste actif, même
en cas de défaillance d’un composant.

- 2 -
Funktionsbeschreibung
Der Kontaktblock PZE X4.1P dient der Er-
weiterung eines Sicherheitsstromkreises.
Der Kontaktblock wird von einem Grund-
gerät angesteuert.
Nach Anlegen der Versorgungsspannung
leuchtet die LED "POWER".
Sobald die Eingangskreise K1-U-K2 ge-
schlossen sind, gehen die beiden Aus-
gangsrelais in Arbeitsstellung. Die
Sicherheitskontakte 13-14, 23-24, 33-34
und 43-44 schließen, der Rückführkreis
Y1-Y2 ist offen. Die LEDs “CH. 1” und “CH.
2” leuchten.
Wird einer oder beide Eingangskreise geöff-
net, fallen die Relais ab, die Sicherheits-
kontakte 13-14, 23-24, 33-34 und 43-44
öffnen und der Rückführkreis Y1-Y2 wird
geschlossen. Die LEDs “CH. 1” und “CH. 2”
gehen aus.
Sicherheitsfunktionen
Der Kontaktblock erweitert einen bestehen-
den Sicherheitsstromkreis. Da die Aus-
gangsrelais durch den Rückführkreis des
Grundgeräts überwacht werden, übertra-
gen sich die Sicherheitsfunktionen des be-
stehenden Stromkreises auf den Kontakt-
block.
=
=
Po er
K1
Input
A1 A2 13 23 33Y1
14 24 34
Y2
43
44
K2
K1 U K2
Fig. 1: Schematisches Schaltbild/
Wiring diagram/Schéma
Betriebsart
• Einkanalige Ansteuerung: ein Eingangs-
kreis wirkt auf beide Ausgangsrelais
• Zweikanalige Ansteuerung: zwei redun-
dante Eingangskreise wirken auf je ein
Ausgangsrelais; Querschlusserkennung
nur mit getakteten Eingängen
Montage
Das Gerät muss in einen Schaltschrank
mit einer Schutzart von mindestens IP54
eingebaut werden. Zur Befestigung auf ei-
ner Normschiene hat das Gerät ein Rast-
element auf der Rückseite. Sichern Sie das
Gerät bei Montage auf einer senkrechten
Tragschiene (35 mm) durch ein Halte-
element wie z. B. Endhalter oder
Endwinkel.
*Sichere Trennung nach EN60947-1, 6 kV/*Safe separation in accordance with EN60947-1, 6 kV/
*Séparation galvanique selon EN60947-1, 6 kV
*
Functiondescription
The contact block PZE X4.1P is used to
expand a safety circuit. The contact block
is driven from a base unit.
When operating voltage is supplied the
“POWER” LED is lit.
As soon as input circuits K1-U-K2 are
closed, both output relays switch to their
operating position. Safety contacts 13-14,
23-24, 33-34 and 43-44 close, feedback
loop Y1-Y2 is open. The LEDs “CH. 1” and
“CH. 2” are lit.
If one or both of the input circuits are
opened the relays de-energise, safety
contacts 13-14, 23-24, 33-34 and 43-44
open and feedback loop Y1-Y2 is closed.
The LEDs “CH. 1” and “CH. 2” go out.
Safety functions
The contact block expands an existing
safety circuit. As the output relays are
monitored via the base unit’s feedback loop,
the safety functions on the existing circuit
are transferred to the contact block.
Mode
• Single-channel operation: one input
circuit affects both output relays
• Dual-channel operation: two redundant
input circuits each affect one output relay;
detection of shorts across contacts only
with pulsed inputs
Installation
The unit must be installed in a control
cabinet with a minimum protection type of
IP54. The unit has a notch on the back for
DIN rail attachment. If you are installing the
unit on to a vertical DIN rail (35 mm) ensure
that it is mounted securely by using a
retaining bracket or an end angle.
Description du fonctionnement
Le bloc de contacts PZE X4.1P sert à l’ex-
tension d’un circuit de sécurité. Le bloc de
contacts est commandé par un appareil de
base.
Après l’application de la tension d’alimenta-
tion, la LED "POWER" s’allume.
Dès que les circuits d’entrée K1-U-K2 sont
fermés, les deux relais de sortie passent en
position de travail. Les contacts de sécurité
13-14, 23-24, 33-34 et 43-44 se ferment, la
boucle de retour Y1-Y2 est ouverte. Les
LED "CH. 1" et "CH. 2" s’allument.
Si l’un des deux circuits ou les deux circuits
d’entrée est/sont ouvert(s), les relais retom-
bent, les contacts de sécurité 13-14, 23-24,
33-34 et 43-44 s’ouvrent et la boucle de retour
Y1-Y2 se ferme. Les LED "CH. 1" et "CH. 2"
s’éteignent.
Fonctions de sécurité
Le bloc de contacts permet d’étendre un
circuit de sécurité existant. Puisque les
relais de sortie sont surveillés par la boucle
de retour, les fonctions de sécurité du
circuit de sécurité existant sont
transférées au bloc de contacts.
Mode de fonctionnement
• Commande monocanale : un circuit d’en-
trée s’applique aux deux relais de sortie
• Commande à deux canaux : deux circuits
d’entrée redondants s’appliquent à un
relais de sortie ; détection des court-cir-
cuits seulement avec des entrées
impulsionnelles
Montage
L’appareil doit être installé dans une ar-
moire ayant un indice de protection IP54
minimum. Un élément d’encliquetage sur sa
face arrière permet de le monter sur rail
DIN. Lors du montage, bloquez l’appareil
sur un profilé support vertical (35 mm) à
l’aide d’un élément de maintien comme par
ex. un support ou une équerre terminale.

- 3 -
Inbetriebnahme
Beachten Sie bei der Inbetriebnahme:
•Vor die Ausgangskontakte eine
Sicherung (s. techn. Daten) schalten,
um das Verschweißen der Kontakte zu
verhindern.
• Berechnung der max. Leitungslänge Imax
am Eingangs-, Start und Rückführkreis:
R
lmax
R
l
/ km
I
max
=
Rlmax = max. Gesamtleitungs-
widerstand (s. technische Daten)
Rl/km = Leitungswiderstand/km
•Keine kleinen Ströme mit Kontakten
schalten, über die zuvor große Ströme
geführt wurden.
• Leitungsmaterial aus Kupferdraht mit einer
Temperaturbeständigkeit von 60/75 °C
verwenden
• Angaben im Kapitel "Technische Daten"
unbedingt einhalten.
Anschluss mit externer Versorgungs-
spannung
• Versorgungsspannung an Klemmen A1 (+)
und A2 (-) anschließen.
• Eingangskreis
- einkanalig:
Sicherheitskontakt an K1 und U an-
schließen; Brücke zwischen K1-K2.
- zweikanalig:
Sicherheitskontakte zwischen K1-U und
K2-U anschließen.
• Rückführkreis
Klemmen Y1 und Y2 mit dem Rückführ-
kreis des Grundgeräts verbinden.
Versorgungsspannung/
Supply voltage/Tension d’alimentation
Eingangskreis/
Input circuit/
Circuit d’entrée
Einkanalig/
Single-channel/
Commande par 1 canal
A1 L+
L-
A2
Zweikanalig/
Dual-channel/
Commande par 2 canaux
U
K2
K1
PZE
U
K2
K1
PZE
Commissioning
When commissioning, please note the
following:
•To prevent contact welding, a fuse
should be connected before the
output contacts (see technical
details).
• Calculating the max. cable runs Imax at the
input, reset and feedback circuit:
R
lmax
R
l
/ km
I
max
=
Rlmax = max. overall cable
resistance (see Technical details)
Rl/km = cable resistance/km
•Do not switch low currents using
contacts that have been used
previously with high currents.
• Use copper wire that can withstand
60/75 °C.
• Information given in the “Technical
details” must be followed.
Connection with external supply voltage
• Connect the supply voltage to terminals
A1 (+) and A2 (-).
• Input circuit
- Single-channel:
Connect safety contact to K1 and U;
link K1-K2.
- Dual-channel:
Connect safety contacts between K1-
U and K2-U.
• Feedback loop
Connect terminals Y1 and Y2 to the
feedback loop on the base unit.
Mise en service
Pour la mise en service, respectez les
consignes suivantes :
•Raccordez un fusible (voir les caracté-
ristiques techniques) avant les con-
tacts de sortie afin d’éviter leur soudage.
• Calcul de la longueur maximale de
conducteur Imax sur le circuit d’entrée, le
circuit de réarmement et la boucle de
retour :
R
lmax
R
l
/ km
I
max
=
Rlmax = résistance max. totale du câble
(voir les caractéristiques techniques)
Rl/km = résistance du câble/km
•Ne commutez pas de courants de fai-
ble intensité avec des contacts ayant
servi à des courants de forte intensité.
• Utilisez des fils de cablâge en cuivre sup-
portant des températures de 60/75 °C.
• Respecter impérativement les données
indiquées dans le chapitre "Caractéristi-
ques techniques".
Raccordement avec tension d’alimenta-
tion externe
• Appliquez la tension d’alimentation aux
bornes A1 (+) et A2 (-).
• Circuit d’entrée
- commande par 1 canal :
raccorder le contact de sécurité sur K1
et U ; pontage entre K1 et K2.
- commande par 2 canaux :
raccorder les contacts de sécurité entre
K1-U et K2-U.
• Boucle de retour
Connecter les bornes Y1 et Y2 sur la
boucle de retour de l’appareil de base.
Rückführkreis/
Feedback loop/
Boucle de retour
Grundgerät: Sicherheitsschaltgerät/
Base unit: Safety relay/
L’appareil de base: Bloc logique de sécurité
Y1
Y2
PZE
Y1
Y2

- 4 -
Anschluss ohne externe Versorgungs-
spannung
Das Schaltelement am Eingangskreis liefert
gleichzeitig die Versorgungsspannung
• Eingangskreis
- einkanalig:
Sicherheitsausgang (24 V DC) an K1,
L- (0 V) an A2 anschließen; Brücke
zwischen K1 - K2
- zweikanalig:
Sicherheitsausgänge (24 V DC) an K1
und K2, L- (0 V) an A2 anschließen.
• Rückführkreis
Klemmen Y1 und Y2 mit dem Rückführ-
kreis des Grundgeräts verbinden.
Eingangskreis/
Input circuit/
Circuit d’entrée
Einkanalig/
Single-channel/
Commande par 1 canal
Zweikanalig/
Dual-channel/
Commande par 2 canaux
U
K2
K1
PZE
O1
L-
0 V A2
U
K2
K1
PZE
O1
O2
L-
0 V A2
Ablauf
Das Gerät ist eingeschaltet, wenn
• die Versorgungsspannung anliegt und die
LED "POWER" leuchtet
oder
• 24 V DC an den Eingangskreisen anliegt
(LED "POWER" leuchtet nicht).
Wenn die Eingangskreise geschlossen
sind, leuchten die LEDs “CH. 1” und “CH.
2”; die Sicherheitskontakte 13-14, 23-24,
33-34, 43-44 sind geschlossen.
Wird der Eingangskreis geöffnet, öffnen die
Sicherheitskontakte 13-14, 23-24, 33-34,
43-44.
Wieder aktivieren
Eingangskreis schließen
Fehler - Störungen
Durch Schließen bzw. Unterbrechen des
Eingangskreises kann überprüft werden,
ob das Gerät ordnungsgemäß ein- bzw.
ausschaltet.
Das Gerät kann aus Sicherheitsgründen
bei folgenden Fehlern nicht gestartet wer-
den:
• Fehlfunktion der Kontakte:
Da der Kontaktblock mit einem Grund-
gerät verschaltet wird, ist bei ver-
schweißten Kontakten nach Öffnen des
Eingangskreises keine neue Aktivierung
möglich.
• Leitungsunterbrechung, Kurz- oder
Erdschluss (z. B. im Eingangskreis)
Connection without ext. supply voltage
The switching element on the input circuit
provides the supply voltage simultaneously
• Input circuit
- Single-channel:
Connect safety output (24 VDC) to K1,
L- (0 V) to A2; link K1 - K2
- Dual-channel:
Connect safety outputs (24 VDC) to K1
and K2, , L- (0 V) to A2.
• Feedback loop
Connect terminals Y1 and Y2 to the
feedback loop on the base unit.
Sequence
The unit is switched on when:
• Supply voltage is applied and the “PO-
WER” LED is lit.
or
• 24 VDC is present at the input circuits
(“POWER” LED is not lit).
If the input circuits are closed, the LEDs
“CH. 1” and “CH. 2” will light; safety contacts
13-14, 23-24, 33-34, 43-44 are closed.
If the input circuit is opened, safety contacts
13-14, 23-24, 33-34, 43-44 will open.
Reactivate
Close the input circuit
Faults
By closing/interrupting the input circuit, the
correct de-energisation/energisation of the
unit can be tested.
For safety reasons, the unit cannot be
activated if the following faults are present:
• Faulty contact functions:
As the contact block is wired to a base
unit, in the case of welded contacts no
further activation is possible following an
opening of the input circuit.
• Cable break, short-circuit or earth fault
(e.g. in the input circuit).
Raccord sans tension d’alimentation
externe
L’élément de commutation du circuit d’en-
trée fournit également la tension d’alimenta-
tion
• Circuit d’entrée
- monocanal :
raccorder la sortie de sécurité
(24 V DC) sur K1, L- (0 V) sur A2 ;
pontage entre K1 et K2.
- à deux canaux :
raccorder les sorties de sécurité
(24 V DC) à K1 et K2, L- (0 V) sur A2.
• Boucle de retour
Connecter les bornes Y1 et Y2 sur la
boucle de retour de l’appareil de base.
Procédure
L’appareil est enclenché lorsque
• la tension d'alimentation est appliquée et
la LED "POWER" s’allume
ou
• lorsqu’une tension de 24 V DC est appli-
quée sur les circuits d’entrée (la LED
"POWER" ne s’allume pas).
Lorsque les circuits d’entrée sont fermés,
les LED "CH. 1" et "CH. 2" s’allument ; les
contacts de sécurité 13-14, 23-24, 33-34,
43-44 sont fermés.
Si le circuit d’entrée est ouvert, les contacts
de sécurité 13-14, 23-24, 33-34, 43-44
s’ouvrent.
Réactivation
Fermer le circuit d’entrée
Erreurs - Défaillances
Le bon fonctionnement du relais peut être
vérifié en ouvrant et en refermant les
canaux d'entrée.
Pour garantir la fonction de sécurité, le
relais n'est pas réarmé en cas des défauts
suivants:
• Défaillance d'un contact interne :
En cas de soudage d'un contact interne,
un nouvel réarmement du relais est
impossible (le relais doit être relié à un
appareil de base).
• Coupure d'un canal d'entrée, court-
circuit ou défaut de masse dans les
canaux d'entrée sont détectés.
Y1
Y2
PZE
Input
24 V DC
Grundgerät: Sicherheitssteuerung oder PNOZmulti/
Base unit: Programmable safety system or PNOZmulti/
L’appareil de base: Système de sécurité ou PNOZmulti
Rückführkreis/
Feedback loop/
Boucle de retour

- 5 -
DC: 24 V
- 15/+10%
2,5 W
20 %
24 V DC, 35 mA
4
240 V/0,01 ... 6 A/1500 VA
24 V/0,01 ... 6 A/150 W
230 V/3 A
24 V/ 4 A
AgCuNi + 0,2 µm Au
6 A
4 A
24 V AC/DC: 4 A
30 Ohm
60 Ohm
PL e (Cat. 4)
Cat. 4
SIL CL 3
2,31E-09
SIL 3
2,03E-06
20
typ.: 13 ms; max.: 20 ms
typ.: 16 ms; max.: 30 ms
typ.: 10 ms, max.: 20 ms
typ.: 58 ms, max.: 80 ms
20 ms
2,5 ms
EN 60947-5-1,
EN 61000-6-2,
EN 61000-6-4
10 - 55 Hz
0,35 mm
EN 60068-2-78
2
III
250 V
6,0 kV
-10 - 55 °C
-40 - 85 °C
Electrical data
Supply voltage UB
Voltage tolerance
Power consumption at UBDC
Residual ripple DC
Voltage and current at
Input circuit
Number of output contacts
Safety contacts (N/O)
Utilisation category
in accordance with EN 60947-4-1
AC1 safety contacts
DC1 safety contacts
Utilisation category
in accordance with EN 60947-5-1
AC15 safety contacts
DC13 safety contacts
(DC13: 6 cycles/min.)
Contact material
External contact fuse protection
(EN 60947-5-1)
Blow-out fuse, quick
Blow-out fuse, slow
Circuit breaker
characteristic B/C
Max. overall cable resistance
R
lmax
input and feedback circuit
Single-channel
Dual-channel
Safety-related characteristics of
the safety outputs
PL in accordance with
EN ISO 13849-1
Category in accordance with
EN 954-1
SIL CL in accordance with
EN IEC 62061
PFH in accordance with
EN IEC 62061
SIL in accordance with IEC 61511
PFD in accordance with IEC 61511
tM in years
Times
Switch-on delay
Automatic reset
Automatic reset after Power-On
Delay-on de-energisation
After E-STOP
After power failure
Supply interruption
at UBbefore de-energisation
Supply interruption
at the input circuits before de-
energisation
Environmental data
EMC
Vibration to EN 60068-2-6
Frequency
Amplitude
Climatic suitability
Airgap creepage in accordance
with EN 60947-1
Pollution degree
Overvoltage category
Rated insulation voltage
Rated impulse withstand voltage
Ambient temperature
Storage temperature
Elektrische Daten
Versorgungsspannung UB
Spannungstoleranz
Leistungsaufnahme bei UBDC
Restwelligkeit DC
Spannung und Strom an
Eingangskreis
Anzahl der Ausgangskontakte
Sicherheitskontakte (S)
Gebrauchskategorie
nach EN 60947-4-1
AC1 Sicherheitskontakte
DC1 Sicherheitskontakte
Gebrauchskategorie
nach EN 60947-5-1
AC15 Sicherheitskontakte
DC13 Sicherheitskontakte
(DC13: 6 Schaltspiele/Min.)
Kontaktmaterial
Kontaktabsicherung, extern
(EN 60947-5-1)
Schmelzsicherung flink
Schmelzsicherung träge
Sicherungsautomat
Charakteristik B/C
Max. Gesamtleitungswiderstand
R
lmax
Eingangs- und Rückführkreis
einkanalig
zweikanalig
Sicherheitstechnische Kenn-
daten der Sicherheitsausgänge
PL nach EN ISO 13849-1
Kategorie nach EN 954-1
SIL CL nach EN IEC 62061
PFH nach EN IEC 62061
SIL nach IEC 61511
PFD nach IEC 61511
tMin Jahren
Zeiten
Einschaltverzögerung
Automatischer Start
Automatischer Start nach Netz-Ein
Rückfallverzögerung
nach NOT-AUS
nach Netzausfall
Überbrückung bei
Spannungseinbrüchen von UB
Überbrückung bei
Spannungseinbrüchen an den
Eingangskreisen
Umweltdaten
EMV
Schwingungen nach EN 60068-2-6
Frequenz
Amplitude
Klimabeanspruchung
Luft- und Kriechstrecken nach
EN 60947-1
Verschmutzungsgrad
Überspannungskategorie
Bemessungsisloationsspannung
Bemessungsstoßspannungs-
festigkeit
Umgebungstemperatur
Lagertemperatur
Données électriques
Tension d’alimentation UB
Plage de la tension d’alimentation
Consommation pour UBDC
Ondulation résiduelle DC
Tension et courant au
circuit d’entrée
Nombre de contacts de sortie
contacts de sécurité (F)
Catégorie d’utilisation
selon EN 60947-4-1
Contacts de sécurité AC1
Contacts de sécurité DC1
Catégorie d’utilisation
selon EN 60947-5-1
Contacts de sécurité AC15
Contacts de sécurité DC13
(DC13 : 6 manœuvres/min)
Matériau des contacts
Protection contacts, externe
(EN 60947-5-1)
Fusible rapide
Fusible retardé
Disjoncteur
Caractéristique B/C
Résistance de câblage totale max.
R
lmax
circuit d’entrée et boucle de retour
monocanal
à deux canaux
Caractéristiques techniques de
sécurité des sorties de sécurité
PL selon EN ISO 13849-1
Catégorie selon EN 954-1
SIL CL selon EN IEC 62061
PFH selon EN IEC 62061
SIL selon IEC 61511
PFD selon IEC 61511
tM en années
Temporisations
Temporisation d’enclenchement
Réarmement automatique
Réarmement automatique après
mise sous tension
Temporisation à la retombée
après l’arrêt d’urgence
après une coupure du secteur
Tenue aux
micro-coupures de UB
Tenue aux micro-coupures
au niveau des circuits
d’entrée
Données sur l'environnement
CEM
Vibrations selon EN 60068-2-6
Fréquence
Amplitude
Sollicitations climatiques
Cheminement et claquage selon
EN 60947-1
Niveau d'encrassement
Catégorie de surtensions
Tension assignée d'isolement
Tension assignée de tenue aux
chocs
Température d’utilisation
Température de stockage
Technische Daten Technical details Caractéristiques techniques

- 6 -
Schutzart
Einbauraum (z. B. Schaltschrank)
Gehäuse
Klemmenbereich
Mechanische Daten
Gehäusematerial
Front
Gehäuse
Querschnitt des Außenleiters
(Schraubklemmen)
1 Leiter flexibel
2 Leiter gleichen Querschnitts
flexibel mit Aderendhülse ohne
Kunststoffhülse
flexibel ohne Aderendhülse oder
mit TWIN-Aderendhülse
Querschnitt des Außenleiters
(Federkraftklemmen)
Anzugsdrehmoment für
Schraubklemmen
Gehäuse mit Federkraftklemmen
Abisolierlänge
Klemmstellen pro Anschluss
Abmessungen (Schraubklemmen)
H x B x T
Abmessungen (Federkraftklemmen)
H x B x T
Gewicht
Protection type
Mounting (e.g. control cabinet)
Housing
Terminals
Mechanical data
Housing material
Front
Housing
Cable cross section (screw
terminals)
1 core flexible
2 core, same cross section
flexible with crimp connectors,
without insulating sleeve
felxible, without crimp connectors or
with TWIN crimp connectors
Cable cross section (spring-loaded
terminals)
Torque setting for screw terminals
Housing with spring-loaded terminals
Stripping length
Termination points per connection
Dimensions H x W x D (screw
terminals)
Dimensions (spring-loaded terminals)
H x W x D
Weight
Indice de protection
Lieu d’implantation (p. ex. armoire)
Boîtier
Borniers
Données mécaniques
Matériau du boîtier
face avant
boîtier
Capacité de raccordement (borniers
à vis)
1 conducteur souple
2 conducteurs de même section,
souples avec embout sans
chapeau plastique
souples sans embout ou
avec embout TWIN
Capacité de raccordement (borniers
à ressort)
Couples de serrage des
borniers à vis
Boîtier avec borniers à ressort
Longueur de dénudage
bornes par raccordement
Dimensions (borniers à vis)
H x P x L
Dimensions (borniers à ressort)
H x L x P
Poids
IP54
IP40
IP20
ABS UL 94 V0
PPO UL 94 V0
0,25 - 2,5 mm2, 24 - 12 AWG
0,25 - 1,0 mm2 , 24 - 16 AWG
0,20 - 1,5 mm2, 24 - 16 AWG
0,5 Nm
8 mm
2
94 x 22,5 x 121 mm
101 x 22,5 x 121 mm
185 g
Es gelten die 2008-12 aktuellen Ausgaben
der Normen.
The version of the standards current at
2008-12 shall apply.
Se référer à la version des normes en
vigeur au 2008-12.
KonventionellerthermischerStrombei gleichzeitiger BelastungmehrererKontakte/Conventionalthermal
current while loading several contacts/Courant thermique conventionnel en cas de charge sur plusieurs
contacts
Anzahl der Kontakte/number of contacts/nombre des contacts 4 3 2 1
Ith 3,5 4,5 6 6
Abmessungen in mm (")/Dimensions in mm (")/Dimensions en mm (")
75 (2.95")
94 (3.70")
121 (4.76")
22,5
(0.88")
87 (3.42")
75 (2.95")
101 (3.98")
121 (4.76")
22,5
(0.88")
87 (3.42")
Gehäuse mit steckbaren Schraubklemmen/
Housing with plug-in screw terminals/
Boîtier avec borniers à vis débrochables
Gehäuse mit steckbaren Federkraftklemmen/
Housing with plug-in spring-loaded terminals/
Boîtier avec borniers à ressorts débrochables

- 7 -
L+
13 23 33
PZE X4.1P
43
A2 Y1 Y2
14 24 34 44
A1 U K1 K2
I0
A1 O0 O1
L-
A2
PNOZmulti
Anschlussbeispiel
Zweikanalige Ansteuerung durch PNOZmulti
O0, O1: Halbleiterausgänge
I0: Rückführkreiseingang
Connection example
Dual-channel, driven via PNOZmulti
O0, O1: Semiconductor outputs
I0: Feedback loop input
Exemple de raccordement
Commande à deux canaux par PNOZmulti
O0, O1 : Sorties statiques
I0 : Entrée de boucle de retour
SteckbareKlemmenabziehen
Schraubendreher in Gehäuseaussparung
hinter der Klemme ansetzen und Klemme
heraushebeln.
Klemmen nicht an den Kabeln abziehen!
Abziehen der Klemmen am Beispiel einer
Schraubklemme
Remove plug-in terminals
Insert screwdriver into the cut-out of the
housing behind the terminal and lever the
terminal.
Do not remove the terminals by pulling the
cables!
How to remove the terminals using a screw
terminal as an example
Démonterles borniers
débrochables
Placer un tournevis derrière les bornes et
sortir le bornier.
Ne pas retirer les borniers en tirant sur les
câbles !
Démontage d’un bornier à vis
EG-Konformitätserklärung:
Diese(s) Produkt(e) erfüllen die Anforde-
rungen der Richtlinie 2006/42/EG über Ma-
schinen des europäischen Parlaments und
des Rates.
Die vollständige EG-Konformitätserklärung
finden Sie im Internet unter www.pilz.com
Bevollmächtigter: Norbert Fröhlich,
Pilz GmbH & Co. KG, Felix-Wankel-Str. 2,
73760 Ostfildern, Deutschland
EC Declaration of Conformity:
This (these) product(s) comply with the
requirements of Directive 2006/42/EC of
the European Parliament and of the Council
on machinery.
The complete EC Declaration of Conformity
is available on the Internet at www.pilz.com
Authorised representative: Norbert Fröh-
lich, Pilz GmbH & Co. KG, Felix-Wankel-
Str. 2, 73760 Ostfildern, Germany
Déclaration de conformité CE :
Ce(s) produit(s) satisfait (satisfont) aux
exigences de la directive 2006/42/CE rela-
tive aux machines du Parlement Européen
et du Conseil.
Vous trouverez la déclaration de
conformité CE complète sur notre site
internet www.pilz.com
Représentant : Norbert Fröhlich,
Pilz GmbH & Co. KG, Felix-Wankel-Str. 2,
73760 Ostfildern, Allemagne

- 8 -
Originalbetriebsanleitung/Original instructions/Notice originale
21 061-04-2010-01 Printed in Germany
A Pilz Ges.m.b.H., ✆01 7986263-0, Fax: 01 7986264, E-Mail: [email protected] AUS Pilz Australia, ✆03 95446300, Fax: 03 95446311, E-Mail:
[email protected] B L Pilz Belgium, ✆09 3217570, Fax: 09 3217571, E-Mail: [email protected] BR Pilz do Brasil, ✆11 4337-1241, Fax: 11 4337-1242,
E-Mail: pilz@pilzbr.com.br CH Pilz lndustrieelektronik GmbH, ✆062 88979-30, Fax: 062 88979-40, E-Mail: [email protected] DK Pilz Skandinavien K/S,
✆74436332, Fax: 74436342, E-Mail: [email protected] E Pilz lndustrieelektronik S.L., ✆938497433, Fax: 938497544, E-Mail: [email protected] F Pilz France
Electronic, ✆03 88104000, Fax: 03 88108000, E-Mail: [email protected] FIN Pilz Skandinavien K/S, ✆09 27093700, Fax: 09 27093709, E-Mail:
pilz.f[email protected] GB Pilz Automation Technology, ✆01536 460766, Fax: 01536 460866, E-Mail: [email protected].uk I Pilz ltalia Srl, ✆031 789511,
Fax: 031 789555, E-Mail: [email protected] IRL Pilz Ireland Industrial Automation, ✆021 4346535, Fax: 021 4804994, E-Mail: [email protected] J Pilz Japan Co.,
Ltd., ✆045 471-2281, Fax: 045 471-2283, E-Mail: [email protected].jp MEX Pilz de Mexico, S. de R.L. de C.V., ✆55 5572 1300, Fax: 55 5572 4194, E-Mail:
[email protected] NL Pilz Nederland, ✆0347 320477, Fax: 0347 320485, E-Mail: [email protected] NZ Pilz New Zealand, ✆09- 6345-350, Fax: 09-6345-
352, E-Mail: [email protected] P Pilz Industrieelektronik S.L., ✆229407594, Fax: 229407595, E-Mail: [email protected] PRC Pilz China Representative
Office, ✆021 62494658, Fax: 021 62491300,
ROK Pilz Korea, ✆031 8159541, Fax: 031 8159542, E-Mail: info@pilzkorea.co.kr
SE Pilz Skandinavien K/S, ✆0300 13990, Fax: 0300 30740, E-Mail: [email protected] TR Pilz Elektronik Güvenlik Ürünleri ve Hizmetleri Tic. Ltd. ¸Sti.,
✆0224 2360180, Fax: 0224 2360184, E-Mail: [email protected] USA Pilz Automation Safety L.P., ✆734 354-0272, Fax: 734 354-3355, E-Mail:
www www.pilz.com
D Pilz GmbH & Co. KG, Sichere Automation, Felix-Wankel-Straße 2, 73760 Ostfildern, Deutschland, ✆+49 711 3409-0, Fax: +49 711 3409-133,
E-Mail: [email protected]

- 9 -
21061-04
PZE X4.1P
4E Instrucciones de uso
4I Istruzioni per l`uso
4NL Gebruiksaanwijzing
Prescripciones de seguridad
•
El dispositivo tiene que ser instalado y
puesto en funcionamiento exclusivamente
por personas que estén familiarizadas,
tanto con estas instrucciones de uso
como con las prescripciones vigentes rela-
tivas a la seguridad en el trabajo y a la
prevención de accidentes. Hay que obser-
var tanto las prescripciones VDE como las
prescripciones locales, especialmente en
lo que se refiere a las medidas de protec-
ción.
• Durante el transporte, el almacenaje y el
funcionamiento hay que atenerse a las
condiciones expresadas en EN 60068-2-
6 (véanse datos técnicos).
• Se pierde toda garantía en caso de que
se abra la carcasa o se lleven a cabo
modificaciones por cuenta propia.
• Montar el dispositivo dentro de un
armario de distribución; en caso
contrario es posible que el polvo y la
suciedad puedan afectar al
funcionamiento.
• Hay que cuidar de que haya un conexio-
nado de seguridad suficiente en todos
los contactos de salida con cargas
capacitivas e inductivas.
Campo de aplicación adecuado
El bloque de contactos PZE X4.1P
satisface los requerimientos según
EN 60204-1 y IEC 60204-1. Este
dispositivo sirve como dispositivo de
ampliación para el reforzamiento y la
multiplicación de contactos para un
dispositivo básico. Los dispositivos
básicos son todos los
• dispositivos de seguridad con circuito de
realimentación
• sistemas programables de seguridad
con circuito de realimentación
• dispositivos con salidas por
semiconductor OSSD con circuito de
realimentación
La categoría a realizar según EN 954-1
depende de la categoría del dispositivo
base. No puede superar la categoría del
bloque de ampliación de contactos.
Descripción del dispositivo
El bloque de contactos se encuentra mon-
tado dentro de una carcasa S-99. La
tensión de alimentación es de 24 V DC.
Características:
• Salidas de relé: 4 contactos de seguridad
(NA), de guiado mecánico
• Separación segura de los contactos de
seguridad 13-14, 23-24, 33-34 de los
circuitos de entrada K1-U-K2 y del
circuito de realimentación Y1-Y2
• Conexión para circuito de realimentación
• Indicador de estado para el relé de salida
y la tensión de alimentación
• Bornes de tornillo o de muelle
La instalación de seguridad permanece
activa aún cuando falle uno de los
componentes.
Norme di sicurezza
• Il dispositivo può venire installato e mes-
so in funzione solo da persone che
hanno acquisito familiarità con le
presenti istruzioni per l’uso e le
disposizioni vigenti in materia di
sicurezza di lavoro e antinfortunistica.
Osservare le disposizioni della VDE
nonché le norme locali, soprattutto per
quanto riguarda le misure preventive di
protezione.
• Durante il trasporto, l’immagazzinamento
e il funzionamento attenersi alle condi-
zioni prescritte dalla norma EN 60068-2-
6 (v. Dati tecnici).
• Se viene aperta la custodia oppure se
vengono apportate delle modifiche in
proprio decade qualsiasi diritto di garan-
zia.
• Montare il dispositivo in un armadio elet-
trico; altrimenti la polvere e l’umidità pos-
sono pregiudicare le funzioni.
• Dotare tutti i contatti di uscita dei carichi
capacitivi e induttivi con un circuito di
protezione adeguato.
Uso previsto
Il modulo contatti PZE X4.1P è conforme
alle norme EN 60204-1 e IEC 60204-1.
Questo dispositivo funge da modulo di
espansione per l’aumento della portata e
del numero dei contatti per unmodulo base.
I moduli base sono tutti
• moduli di sicurezza con circuito di
retroazione
• sistemi di sicurezza con circuito di
retroazione
• dispositivi con uscite per semiconduttore
OSSD con circuito di retroazione
La categoria da realizzare secondo la
norma EN 954-1dipende dalla categoria del
dispositivo base. Essa non può essere
superata dal modulo di espansione contatti.
Descrizione
Il modulo contatti è inserito in una custodia
S-99. La tensione di alimentazione è di
24 V DC.
Caratteristiche:
• Uscite relè: 4 contatti di sicurezza (NA),
a conduzione forzata
• separazione sicura dei contatti di
sicurezza 13-14, 23-24, 33-34 dei
circuiti di ingresso K1-U-K2 e del circuito
di retroazione Y1-Y2
• collegamento per circuito di retroazione
• visualizzazione di stato per il relè di
uscita e la tensione di alimentazione
• a scelta con morsetti con gabbia a molla
oppure con morsetti a vite
Il dispositivo di sicurezza mantiene la fun-
zione di sicurezza anche in caso di guasto
di uno dei suoi componenti.
Veiligheidsvoorschriften
• Het apparaat mag uitsluitend worden
geïnstalleerd en in bedrijf genomen door
personen die vertrouwd zijn met deze
gebruiksaanwijzing en met de geldende
voorschriften op het gebied van arbeids-
veiligheid en ongevallenpreventie. Neem
de van toepassing zijnde Europese richt-
lijnen en de plaatselijke voorschriften in
acht, in het bijzonder m.b.t. de veilig-
heidsmaatregelen.
• Neem bij transport, bij opslag en in
bedrijf de richtlijnen volgens EN 60068-
2-6 in acht (zie technische gegevens).
• Het openen van de behuizing of het
eigenmachtig veranderen van de
schakeling heeft verlies van de garantie
tot gevolg.
• Monteer het apparaat in een
schakelkast. Stof en vochtigheid kunnen
anders de werking nadelig beïnvloeden.
• Zorg bij capacitieve of inductieve belas-
ting van de uitgangscontacten voor ade-
quate contactbeschermingsmaatregelen.
Gebruik volgens de voorschriften
Het contactblok PZE X4.1P voldoet aan de
eisen van EN 60204-1 en IEC 60204-1.
Het apparaat dient als uitbreidingsrelais
voor contactversterking en -vermeerdering
voor een basisrelais. Basisrelais zijn alle
• veiligheidsrelais met terugkoppelcircuit
• veiligheidsbesturingen met terugkoppel-
circuit
• relais met OSSD-halfgeleideruitgangen
met terugkoppelcircuit
De te realiseren categorie volgens EN 954-
1 is afhankelijk van de categorie van het
basisrelais. De categorie kan door het
contactuitbreidingsrelais niet overschreden
worden.
Apparaatbeschrijving
Het contactblok is in een S-99-behuizing
ondergebracht. De voedingsspanning
bedraagt 24 V DC.
Kenmerken:
• Relaisuitgangen: 4 veiligheidscontacten
(M), mechanisch gedwongen
• Veilige scheiding van de veiligheids-
contacten 13-14, 23-24, 33-34 van de
ingangscircuits K1-U-K2 en het terug-
koppelcircuit Y1-Y2.
• Aansluiting voor terugkoppelcircuit
• Statusweergave voor uitgangsrelais en
voedingsspanning
• Naar keuze schroefklemmen of
veerkrachtklemmen
Ook na uitvallen van een component blijft
de veiligheidsschakeling werken.

- 10 -
=
=
Power
K1
Input
A1 A 13 3 33Y1
14 4 34
Y
43
44
K
K1 U K
Fig. 1: Plano de conexiones esquemático/
Schema di collegamento/Intern schema
*Separación segura conforme a EN60947-1, 6 kV/*Separazione sicura secondo EN60947-1, 6 kV/*Veilige scheiding volgens EN60947-1, 6 kV
*
Descripción del funcionamiento
El bloque de contactos PZE X4.1P sirve
para la ampliación de un circuito de seguri-
dad. El bloque de contactos es controlado
por un dispositivo básico.
El LED "POWER" se ilumina cuando se apli-
ca la tensión de alimentación.
En cuanto se cierran los circuitos de entra-
da K1-U-K2, ambos relés de salida pasan a
la posición de trabajo. Los contactos de se-
guridad 13-14, 23-24, 33-34 y 43-44 se cie-
rran y el circuito de realimentación Y1-Y2
está abierto. Los LEDs "CH. 1" y "CH. 2" se
iluminan.
Si se abre un circuito de entrada o ambos, se
desactivan los relés, se abren los contactos
de seguridad 13-14, 23-24, 33-34 y 43-44, y
se cierra el circuito de realimentación Y1-Y2.
Los LEDs "CH. 1" y "CH. 2" se apagan.
Funciones de seguridad
El bloque de contactos amplia un circuito de
seguridad ya existente. Dado que los relés
de salida son supervisados por el circuito de
realimentación del dispositivo básico, las
funciones de seguridad del circuito existente
se transmiten al bloque de contactos.
Modo de funcionamiento
• Excitación monocanal: un circuito de
entrada actúa sobre ambos relés de sa-
lida.
• Excitación bicanal: dos circuitos de entra-
da redundantes actúan sobre cada uno
de los relés de salida; detección de
derivaciones sólo con entradas
sincronizadas.
Montaje
El dispositivo tiene que ser montado en un
armario de distribución con un grado de
protección de IP54 como mínimo. El dispo-
sitivo dispone en su parte trasera de un
elemento de encaje para la fijación a una
guía normalizada. Al montarlo en una guía
normalizada vertical (35 mm) hay que
asegurar el dispositivo por medio de un
elemento de soporte, tal como un soporte
o un ángulo final.
Descrizione del funzionamento
Il modulo contatti PZE X4.1P serve al-
l’espansione di un circuito elettrico di sicu-
rezza. Il modulo contatti viene controllato
da un modulo base.
Dopo l’immissione della tensione di alimen-
tazione il LED "POWER" si accende.
Non appena i circuiti di ingresso K1-U-K2
sono chiusi, entrambi i relè di uscita passa-
no in posizione di lavoro. I contatti di sicu-
rezza 13-14, 23-24, 33-34 e 43-44 si chiu-
dono, il circuito di retroazione Y1-Y2 è aper-
to. I LED "CH. 1" e "CH. 2" si accendono.
Se uno o entrambi i circuiti di ingresso ven-
gono aperti, i relè si diseccitano, i contatti di
sicurezza 13-14, 23-24, 33-34 e 43-44 si
aprono e il circuito di retroazione Y1-Y2 si
chiude. I LED "CH. 1" e "CH. 2" si spengono
.
Funzioni di sicurezza
Il modulo contatti espande un determinato
circuito di sicurezza. Poiché i relè di uscita
sono controllati tramite il circuito di
retroazione del modulo base, essi trasmet-
tono le funzioni di sicurezza del circuito elet-
trico esistente sul modulo contatti.
Modo operativo
• Comando a singolo canale: un circuito di
ingresso agisce su entrambi i relè di uscita
• Comando a due canali: due circuiti di in-
gresso ridondanti agiscono ognuno su un
relè di uscita; riconoscimento del
cortocircuito solo con ingressi di trigger.
Montaggio
Il dispositivo deve essere montato in un
armadio elettrico con un grado di protezione
almeno di IP54. Per il fissaggio su di una
barra DIN il dispositivo è dotato di un
elemento a scatto sul retro. Per il montaggio
fissare il dispositivo su una guida verticale
(35 mm) a mezzo di un supporto quale
p. es. staffa di fissaggio o supporto angola-
re.
Functiebeschrijving
Het contactblok PZE X4.1P dient voor het
uitbreiden van een veiligheidscircuit. Het
contactblok wordt aangestuurd door een
basisrelais.
Na het inschakelen van de voedings-
spanning licht de LED "POWER" op.
Zodra het ingangscircuit K1-U-K2 is geslo-
ten, gaan de beide uitgangsrelais in werk-
stand. De veiligheidscontacten 13-14, 23-24,
33-34 en 43-44 sluiten; het terugkoppel-
circuit Y1-Y2 is open. De LED’s "CH. 1" en
"CH. 2" lichten op.
Als een of beide ingangscircuits wordt geo-
pend, vallen de relais af, openen de
veiligheidscontacten 13-14, 23-24, 33-34 en
43-44 en wordt het terugkoppelcircuit Y1-Y2
gesloten. De LED’s "CH. 1" en "CH. 2 gaan
uit.
Veiligheidsfuncties
Het contactblok is een uitbreiding op een
bestaand veiligheidscircuit. Omdat het
uitgangsrelais door het terugkoppelcircuit
van het basisrelais wordt bewaakt, worden
de veiligheidsfuncties van het bestaande
circuit op het contactblok overgedragen.
Bedrijfsmodus
• Eenkanalige aansturing: één ingangs-
circuit werkt op beide uitgangsrelais
• Tweekanalige aansturing: twee
redundante ingangscircuits werken elk op
één uitgangsrelais; detectie van onder-
linge sluiting uitsluitend bij ingangen met
testpulssignaal.
Montage
Het relais moet worden ingebouwd in een
schakelkast die minimaal voldoet aan
beschermingsgraad IP 54. Bevestiging op
een DIN-rail is mogelijk via de daarvoor be-
stemde relaisvoet op de achterzijde van het
apparaat. Bij montage op een verticale
draagrail (35 mm) moet het apparaat wor-
den vastgezet met een eindsteun.

- 11 -
Tensión de alimentación/
Tensione di alimentazione/
Voedingsspanning
Circuito de entrada/
Circuito d’ingresso/
Ingangscircuit
Monocanal/
Monocanale/
Eenkanalig
A1 L+
L-
A
Bicanal/
Bicanale/
Tweekanalig
U
K2
K1
PZE
U
K2
K1
PZE
Puesta en marcha
Al poner en marcha el dispositivo hay que
tener en cuenta los siguientes aspectos:
•Se debe poner un fusible antes
de los contactos de salida (véanse da-
tos técnicos) para evitar que se
fundan.
• Cálculo de la longitud máxima de línea Imáx
en el circuito de entrada, de rearme y de
realimentación:
R
lmax
R
l
/ km
I
max
=
RImáx = resistencia máx. del total de la
línea (véanse datos técnicos)
Rl/km = resistencia de línea/km
•No conectar corrientes pequeñas a
contactos a través de los cuales se
han conducido anteriormente grandes
corrientes.
• Utilizar para las líneas material de alam-
bre de cobre con una resistencia a la
temperatura de 60/75 °C.
• Respete sin falta las indicaciones del
capítulo "Datos técnicos".
Conexión con tensión de alimentación
externa
• Conectar la tensión de alimentación en
los bornes A1 (+) y A2 (-).
• Circuito de entrada
- monocanal:
Conectar el contacto de seguridad en
K1 y U; puente entre K1-K2.
- bicanal:
Conectar los contactos de seguridad
entre K1-U y K2-U.
• Circuito de realimentación
Conectar los bornes Y1 y Y2 con el circuito
de realimentación del dispositivo básico.
Messa in funzione
Alla messa in funzione occorre
considerare quanto segue:
•A monte dei contatti di uscita
collegare un fusibile (v. Dati Tecnici)
per evitare la saldatura dei contatti.
• Calcolo lunghezza massima del conduttore
Imax sui circuiti d’ingresso, di start e di
retroazione:
R
lmax
R
l
/ km
I
max
=
Rlmax = resistenza max. totale del
conduttore (v. Dati tecnici)
Rl/km = resistenza del conduttore/km
•Non commutare piccole potenze con
contatti attraverso i quali sono state
commutate in precedenza alte potenze.
• Per i conduttori utilizzare materiale in filo
di rame con una resistenza termica intor-
no ai 60/75 °C
• Attenersi assolutamente alle indicazioni
riportate al capitolo "Dati tecnici".
Collegamento con tensione di alimenta-
zione esterna
• Collegare la tensione di alimentazione ai
morsetti A1 (+) e A2 (-).
• Circuito di ingresso
- monocanale:
collegare il contatto di sicurezza a K1 e
U; ponticello tra K1-K2.
- bicanale:
collegare i contatti di sicurezza tra K1-
U e K2-U.
• Circuito di retroazione
Collegare i morsetti Y1 e Y2 al circuito di
retroazione modulo base.
Ingebruikneming
Neem bij ingebruikneming het volgende in
acht:
•Uitgangscontacten afzekeren
(zie technische gegevens) om het ver-
kleven van de contacten te voorkomen.
• Berekening van de max. kabellengte Imax
op het ingangs-, start- en terugkoppel-
circuit:
R
lmax
R
l
/ km
I
max
=
Rlmax = max. weerstand
totale kabel (zie technische gegevens)
Rl/km = kabelweerstand/km
•Geen geringe stroomsterkten via con-
tacten schakelen die tevoren grote
stroomsterkten verwerkt hebben.
• Kabelmateriaal van koperdraad met een
temperatuurbestendigheid van 60/75 °C
gebruiken.
• Aanwijzingen in het hoofdstuk "Techni-
sche gegevens" beslist volgen.
Aansluiting met externe voedings-
spanning
• Voedingsspanning op klemmen A1 (+) en
A2 (-) aansluiten.
• Ingangscircuit
- eenkanalig:
Veiligheidscontact op K1 en U aanslui-
ten; brug tussen K1-K2.
- tweekanalig:
Veiligheidscontacten tussen K1-U en
K2-U aansluiten.
• Terugkoppelcircuit
Klemmen Y1 en Y2 met het terugkoppel-
circuit van het basisrelais verbinden.
Circuito de realimentación/
Circuito di retroazione/
Terugkoppelcircuit
Dispositivo base: Dispositivo de seguridad/
Modulo base: Modulo di sicurezza/
Basisrelais: Veiligheidsrelais
Y1
Y2
PZE
Y1
Y2

- 12 -
Circuito de entrada/
Circuito d’ingresso/
Ingangscircuit
Monocanal/
Monocanale/
Eenkanalig
Bicanal/
Bicanale/
Tweekanalig
U
K2
K1
PZE
O1
L-
0 V A2
U
K2
K1
PZE
O1
O2
L-
0 V A2
Conexión sin tensión de alimentación
externa
El elemento de conmutación del circuito de
entrada suministra simultáneamente la
tensión de alimentación.
• Circuito de entrada
- Monocanal:
Conectar la salida de seguridad
(24 V DC) en K1, L- (0 V) en A2;
puente entre K1 - K2.
- Bicanal:
Conectar las salidas de seguridad
(24 V DC) en K1 y K2, L- (0 V) en A2.
• Circuito de realimentación
Conectar los bornes Y1 y Y2 con el circuito
de realimentación del dispositivo básico.
Procedimiento
El dispositivo está conectado cuando
• se conecta la tensión de alimentación y el
LED "POWER" se ilumina
o bien
• cuando existe una tensión de 24 V DC
en los circuitos de entrada (el LED
"Power" no se ilumina).
Cuando los circuitos de entrada están cerra-
dos, los LEDs "CH. 1" y "CH. 2" se iluminan;
los contactos de seguridad 13-14, 23-24,
33-34 y 43-44 están cerrados.
Si se abre el circuito de entrada, entonces
se abren los contactos de seguridad 13-14,
23-24, 33-34, 43-44.
Activar de nuevo
Cerrar el circuito de entrada
Errores - Fallos
Cerrando o interrumpiendo los circuito de
entrada puede comprobarse si el dispositivo
conecta o desconecta correctamente.
Por motivos de seguridad, el dispositivo no
se puede arrancar cuando se presentan los
fallos siguientes:
•
Funcionamiento defectuoso de los contac-
tos:
Como el bloque de contactos está conec-
tado a un dispositivo base, en caso de
contactos fusionados, no se puede activar
nuevamente después de haberse abierto
el circuito de entrada.
• Interrupción de línea, cortocircuito o con-
tacto a tierra (p. ej. en el circuito de
entrada)
Collegamento senza tensione di ali-
mentazione esterna
L’elemento di commutazione sul circuito
d’ingresso fornisce contemporaneamente la
tensione di alimentazione
• Circuito di ingresso
- monocanale:
collegare l’uscita di sicurezza
(24 V DC) a K1, L- (0 V) a A2;
ponticello tra K1-K2.
- bicanale:
collegare le uscite di sicurezza
(24 V DC) a K1 e K2, L- (0 V) a A2.
• Circuito di retroazione
Collegare i morsetti Y1 e Y2 al circuito di
retroazione modulo base.
Procedura
Il dispositivo è attivato quando:
• è presente la tensione di alimentazione e
il LED "POWER" è acceso
oppure
• sui circuiti d’ingresso è presente una ten-
sione di 24 V DC (il LED "POWER" non è
acceso).
Quando i circuiti d’ingresso sono chiusi, si
accendono i LED "CH. 1" e "CH. 2"; i contatti
di sicurezza 13-14, 23-24, 33-34, 43-44
sono chiusi.
Se si apre il circuito d’ingresso, si aprono i
contatti di sicurezza 13-14, 23-24, 33-34,
43-44.
Riattivazione
Chiudere il circuito d’ingresso
Errori - Guasti
Chiudendo o interrompendo i circuito di
ingresso, è possibile verificare se il dispo-
sitivo si accende e spegne correttamente.
Per ragioni di sicurezza il dispositivo non
può essere attivato in presenza dei
seguenti problemi:
• mancato funzionamento dei contatti:
poichè il modulo contatti viene cablato
con un modulo base, in caso di saldatura
dei contatti, dopo l’apertura del circuito di
ingresso non è più possibile effettuare
nessuna nuova attivazione.
• rottura di cavi, cortocircuito o guasto a
terra (p. es. nel circuito di ingresso)
Aansluiting zonder externe voedings-
spanning
Het schakelelement aan het ingangscircuit
levert tegelijkertijd de voedingsspanning
• Ingangscircuit
- eenkanalig:
Veiligheidsuitgang (24 V DC) op K1, L-
(0 V) op A2 aansluiten; brug tussen K1-
K2.
- tweekanalig:
Veiligheidsuitgangen (24 V DC) op K1
en K2, L- (0 V) op A2 aansluiten.
• Terugkoppelcircuit
Klemmen Y1 en Y2 met het terugkoppel-
circuit van het basisrelais verbinden.
Procedure
Het relais is ingeschakeld als
• de voedingsspanning ingeschakeld is en
de LED "POWER" oplicht
of
• 24 V DC op het ingangscircuit staat (LED
"POWER" licht niet op).
Als de ingangscircuits gesloten zijn, lichten
de LED’s "CH. 1" en "CH. 2" op; de
veiligheidscontacten 13-14, 23-24, 33-34 en
43-44 zijn gesloten.
Als het ingangscircuit geopend wordt, gaan
de veiligheidscontacten 13-14, 23-24, 33-34
en 43-44 open.
Opnieuw activeren
Ingangscircuit sluiten
Fouten - Storingen
Door het sluiten of onderbreken van de
ingangscircuit kan gecontroleerd worden,
of het relais correct in- of uitschakelt.
Het apparaat kan om veiligheidsredenen bij
de volgende fouten niet gestart worden:
• Contactfout:
Omdat het contactblok op een
basisrelais aangesloten is, is er bij
verkleefde contacten na het openen van
het ingangscircuit geen nieuwe
activering mogelijk.
• Kabelbreuk, kort- of aardsluiting (b.v. in
het ingangscircuit)
Dispositivo base: Sistema programable de seguridad bien PNOZmulti/
Modulo base: Sistema di sicurezza oppure PNOZmulti/
Basisrelais: Veiligheidsbesturingen of PNOZmulti
Y1
Y2
PZE
Input
24 V DC
Circuito de realimentación/
Circuito di retroazione/
Terugkoppelcircuit

- 13 -
DC: 24 V
- 15/+10%
2,5 W
20 %
24 V DC, 35 mA
4
240 V/0,01 ... 6 A/1500 VA
24 V/0,01 ... 6 A/150 W
230 V/3 A
24 V/ 4 A
AgCuNi + 0,2 µm Au
6 A
4 A
24 V AC/DC: 4 A
30 Ohm
60 Ohm
PL e (Cat. 4)
Cat. 4
SIL CL 3
2,31E-09
SIL 3
2,03E-06
20
typ.: 13 ms, max.: 20 ms
typ.: 16 ms, max.: 30 ms
typ.: 10 ms, max.: 20 ms
typ.: 58 ms, max.: 80 ms
20 ms
2,5 ms
EN 60947-5-1,
EN 61000-6-2,
EN 61000-6-4
10 - 55 Hz
0,35 mm
EN 60068-2-78
2
III
250 V
6,0 kV
-10 - 55 °C
-40 - 85 °C
Datos técnicos
Datos eléctricos
Tensión de alimentación UB
Tolerancia de tensión
Consumo de energía con UBDC
Ondulación residual DC
Tensión y corriente en
el circuito de entrada
Número de contactos de salida
contactos de seguridad (NA)
Categoría de uso
según EN 60947-4-1
Contactos de seguridad AC1
Contactos de seguridad DC1
Categoría de uso
según EN 60947-5-1
Contactos de seguridad AC15
Contactos de seguridad DC13
(CC13: 6 ciclos/min.)
Material de los contactos
Protección externa de los
contactos (EN 60947-5-1)
Fusible de acción rápida
Fusible de acción lenta
Fusible automático
Característica B/C
Resistenciamáx.deltotaldela línea
R
lmáx
circuito de entrada y de
realimentación
monocanal
bicanal
Datos característicos de técnica
de seguridad
PL según EN ISO 13849-1
Categoría según EN 954-1
SIL CL según EN IEC 62061
PFH según EN IEC 62061
SIL según IEC 61511
PFD según IEC 61511
tMen años
Tiempos
Retardo a la conexión
rearme automático
rearme automático tras conexión
Retardo a la desconexión
tras PARADA DE EMERGENCIA
tras fallo de red
Inmunidad a cortes de tensión de UB
Inmunidad a cortes de tensión en
los circuitos de entrada
Medio ambiente
CEM
Oscilaciones según EN 60068-2-6
frecuencia
amplitud
Condiciones ambientales
Distancias de fuga y dispersión
superficial según EN 60947-1
Grado de suciedad
Categoría de sobretensión
Tensión de aislamiento de
dimensionado
Resistencia tensión transitoria de
dimensionado
Temperatura ambiente
Temperatura de almacenaje
Dati tecnici
Dati elettrici
Tensione di alimentazione UB
Tolleranza di tensione
Potenza assorbita per UBDC
Ondulazione residua DC
Tensione e corrente su
circuito d’ingresso
Numero dei contatti di uscita
Contatti di sicurezza (NA)
Categoria d’uso secondo
norma EN 60947-4-1
AC1 contatti di sicurezza
DC1 contatti di sicurezza
Categoria d’uso secondo
norma EN 60947-5-1
AC15 contatti di sicurezza
DC13 contatti di sicurezza
(DC13: 6
cicli di commutazione/min)
Materiale di contatto
Fusibile dei contatti, esterno
(EN 60947-5-1)
Fusibile rapido
Fusibile ritardato
Interruttore automatico
caratteristica B/C
Resistenzamax.totaledelconduttore
R
lmax
Circuito d’ingresso e di
retroazione
monocanale
bicanale
Dati tecnici di sicurezza
PL secondo EN ISO 13849-1
Categoria secondo EN 954-1
SIL CL secondo EN IEC 62061
PFH secondo EN IEC 62061
SIL secondo IEC 61511
PFD secondo IEC 61511
tMin anni
Tempi
Ritardo all’eccitazione
Start automatico
Start automatico dopo attivazione
dell'alimentazione di rete
Ritardo di sgancio
dopo arresto di emergenza
dopo perdita di alimentazione
Ininfluenza mancanza tensionei UB
Ininfluenza mancanza tensione
nei circuiti d’ingresso
Dati ambientali
CEM
Vibrazioni secondo EN 60068-2-6
Frequenza
Ampiezza
Sollecitazione climatica
Caratteristiche dielettriche e vie di
dispersione secondo EN 60947-1
Grado di contaminazione
Categoria di sovratensione
Tensione nominale di isolamento
Tensione di tenuta agli urti
Temperatura ambiente
Temperatura di immagazzinaggio
Technische gegevens
Elektrische gegevens
Voedingsspanning UB
Spanningstolerantie
Opgenomen vermogen bij UBDC
Rimpelspanning DC
Spanning en stroom op
Ingangscircuit
Aantal uitgangscontacten
Veiligheidscontacten (M)
Gebruikscategorie
volgens EN 60947-4-1
AC1 veiligheidscontacten
DC1 veiligheidscontacten
Gebruikscategorie
volgens EN 60947-5-1
AC15 veiligheidscontacten
DC13 veiligheidscontacten
(DC13: 6 schakelingen/min.)
Contactmateriaal
Contactafzekering, extern
(EN 60947-5-1)
Smeltzekering snel
Smeltzekering traag
Zekeringautomaat
Karakteristiek B/C
Max.weerstandtotalekabel
R
lmax
ingangs- en terugkoppelcircuit
eenkanalig
tweekanalig
Veiligheidstechnische
kengegevens
PL volgens EN ISO 13849-1
Categorie volgens EN 954-1
SIL CL volgens EN IEC 62061
PFH volgens EN IEC 62061
SIL volgens IEC 61511
PFD volgens IEC 61511
tMin jaren
Tijden
Inschakelvertraging
Automatische start
Automatische start na
netinschakeling
Afvalvertraging
Na noodstop
Na uitvallen van de spanning
Overbrugging bij
spanningsonderbrekingen van UB
Overbrugging bij spanningsonder-
brekingen op de ingangscircuits
Omgevingscondities
EMC
Trillingen naar EN 60068-2-6
Frequentie
Amplitude
Klimaatcondities
Lucht- en kruipwegen naar
EN 60947-1
Vervuilingsgraad
Oversturingscategorie
Nominale isolatiespanning
Nominale
stootspanningbestendigheid
Omgevingstemperatuur
Opslagtemperatuur

- 14 -
Grado de protección
Lugar de montaje (p.ej. armario
de distribución)
Carcasa
Zona de bornes
Datos mecánicos
Material de la carcasa
Frente
Carcasa
Sección del conductor externo
(bornes de tornillo)
1 conductor flexible
2 conductores de la misma sección
flexible con terminal, sin
revestimiento de plástico
flexible sin terminal o con terminal
TWIN
Sección del conductor externo
(bornes de muelle)
flexible sin terminal
Par de apriete para los bornes de
tornillo
Carcasa con bornes enchufables de
muelle
Longitud para la eliminación del
aislamiento
Número de bornes por conector/
Dimensiones (bornes de tornillo)
Al x An x Pr
Dimensiones (bornes de muelle)
Al x An x Pr
Peso
Grado di protezione
Spazio di montaggio (p.es. quadro
elettrico ad armadio)
Custodia
Zona morsetti
Dati meccanici
Materiale usato per la custodia
Parte frontale
Custodia
Sezione del cavo esterno
(morsetti a vite)
1 conduttore flessibile
2 conduttori con lo stesso diametro
flessibile con capocorda senza
manicotto in plastica
flessibili senza capocorda o con
capocorda TWIN
Sezione del cavo esterno
(morsetti a molla)
flessibile senza capocorda
Coppia di serraggio per i morsetti a
vite
Custodia con morsetti estraibili a
molla
Distanza di spelatura
Blocchi morsetti per il collegamento
Misure (morsetti a vite)
altezza x larghezza x profondità
Misure (morsetti a molla)
altezza x larghezza x profondità
Peso
Beschermingsgraad
Inbouwruimte
(b.v. schakelkast)
Behuizing
Aansluitklemmen
Mechanische gegevens
Behuizingsmateriaal
Front
Behuizing
Doorsnede van de aansluitkabels
(schroefklemmen)
1 draad flexibel
2 draden met dezelfde doorsnede
Flexibel met adereindhuls zonder
kunststofhuls
Flexibel zonder adereindhuls of
met TWIN-adereindhuls
Doorsnede van de aansluitkabels
(veerkrachtklemmen)
Flexibel zonder adereindhuls
Aanhaalmoment voor
schroefklemmen
Behuizing met steekbare
veerkrachtklemmen
striplengte
Aansluitklemmen per aansluiting
AAfmetingen (schroefklemmen)
h x b x d
Afmetingen (veerkrachtklemmen)
h x b x d
Gewicht
IP54
IP40
IP20
ABS UL 94 V0
PPO UL 94 V0
0,25 - 2,5 mm2, 24 - 12 AWG
0,25 - 1,0 mm2 , 24 - 16 AWG
0,20 - 1,5 mm2, 24 - 16 AWG
0,20 ... 1,5 mm2, 24 - 16 AWG
0,5 Nm
8 mm
2
94 x 22,5 x 121 mm
101 x 22,5 x 121 mm
185 g
Corriente térmica convencional de los contactos de seguridad/Corrente termica convenzionale dei contatti di
sicurezza/Conventionelethermischestroomvande veiligheidscontacten
Dimensiones en mm (")/Dimensioni in mm (")/Afmetingen in mm (")
75 (2.95")
94 (3.70")
121 (4.76")
22,5
(0.88")
87 (3.42")
75 (2.95")
101 (3.98")
121 (4.76")
22,5
(0.88")
87 (3.42")
Carcasa con bornes de tornillo insertables/
Custodia con morsetti a vite a innesto/
Behuizing met steekbare schroefklemmen
Carcasa con bornes insertables de muelles de tracción de
jaula/Custodia con morsetti con molla a gabbia/Behuizing met
steekbare veerkrachtklemmen
Número de contactos/Numero dei contatti/ Aantal contacten 4 3 2 1
lth con UBCC/Imax per UBDC/Imax bij UBDC 3,5 4,5 6 6
Sono valide le versioni aggiornate
all’2008-12 delle norme
Se aplica la edición vigente de las normas a
2008-12
De per 2008-12 actuele uitgaven van de
normen zijn van toepassing

- 15 -
L+
13 23 33
PZE X4.1P
43
A2 Y1 Y2
14 24 34 44
A1 U K1 K2
I0
A1 O0 O1
L-
A2
PNOZmulti
Ejemplo de conexión
Excitación bicanal mediante PNOZmulti
O0, O1: salidas por semiconductor
I0: entrada del circuito de realimentación
Esempio di collegamento
Comando bicanale tramite PNOZmulti
O0, O1: uscite a semiconduttore
I0: ingresso del circuito di retroazione
Aansluitvoorbeeld
Tweekanalige aansturing via PNOZmulti
O0, O1: Halfgeleideruitgangen
I0: Terugkoppelcircuitingang
Extraerlasbornasenchufables
Colocar un destornillador en el hueco de la
carcasa tras la borna y hacer palanca:
¡ No tirar de las bornas por el cable !
Ejemplo de extracción en una borna de
tornillo
Rimozione dei morsetti estraibili
Inserire il cacciavite nell’incavo dietro il
connettore e fare leva:
Non estrarre il connettore tirandolo per i cavi!
Esempio di come estrarre un connettore
usando un cacciavite
Steekbareklemmenuitnemen
Plaats de schroevendraaier in de uitsparing
achter de klemmen en druk de klemmen naar
buiten. De klemmen verwijderen door aan de
kabels te trekken!
Als voorbeeld ziet u het verwijderen van
schroefklemmen.
Declaración CE de conformidad:
Estos productos cumplen los requisitos de
la Directiva de Máquinas 2006/42/CE del
Parlamento Europeo y del Consejo.
La declaración CE de conformidad
completa pueden encontrarla en la página
web de Internet www.pilz.com
Apoderado: Norbert Fröhlich,
Pilz GmbH & Co. KG, Felix-Wankel-Str. 2,
73760 Ostfildern, Deutschland
Dichiarazione di conformità CE:
Questo(i) prodotto(i) soddisfa i requisiti
della Direttiva 2006/42/CE del Parlamento e
del Consiglio Europeo sulle macchine.
Il testo integrale della Dichiarazione di
conformità CE è disponibile in Internet
all’indirizzo www.pilz.com
Mandatario: Norbert Fröhlich,
Pilz GmbH & Co. KG, Felix-Wankel-Str. 2,
73760 Ostfildern, Germania
EG-conformiteitsverklaring:
Deze produkten voldoen aan de eisen van
de Europese Machinerichtlijn 2006/42/EG.
De volledige EG-conformiteitsverklaring
vindt u op wwww.pilz.com
Gevolmachtige: Norbert Fröhlich,
Pilz GmbH & Co. KG, Felix-Wankel-Str. 2,
73760 Ostfildern, Duitsland

- 16 -
A Pilz Ges.m.b.H., ✆01 7986263-0, Fax: 01 7986264, E-Mail: [email protected] AUS Pilz Australia, ✆03 95446300, Fax: 03 95446311, E-Mail:
[email protected] B L Pilz Belgium, ✆09 3217570, Fax: 09 3217571, E-Mail: [email protected] BR Pilz do Brasil, ✆11 4337-1241, Fax: 11 4337-1242,
E-Mail: pilz@pilzbr.com.br CH Pilz lndustrieelektronik GmbH, ✆062 88979-30, Fax: 062 88979-40, E-Mail: [email protected] DK Pilz Skandinavien K/S,
✆74436332, Fax: 74436342, E-Mail: [email protected] E Pilz lndustrieelektronik S.L., ✆938497433, Fax: 938497544, E-Mail: [email protected] F Pilz France
Electronic, ✆03 88104000, Fax: 03 88108000, E-Mail: [email protected] FIN Pilz Skandinavien K/S, ✆09 27093700, Fax: 09 27093709, E-Mail:
pilz.f[email protected] GB Pilz Automation Technology, ✆01536 460766, Fax: 01536 460866, E-Mail: [email protected] I Pilz ltalia Srl, ✆031 789511,
Fax: 031 789555, E-Mail: [email protected] IRL Pilz Ireland Industrial Automation, ✆021 4346535, Fax: 021 4804994, E-Mail: [email protected] J Pilz Japan Co.,
Ltd., ✆045 471-2281, Fax: 045 471-2283, E-Mail: [email protected].jp MEX Pilz de Mexico, S. de R.L. de C.V., ✆55 5572 1300, Fax: 55 5572 4194, E-Mail:
[email protected] NL Pilz Nederland, ✆0347 320477, Fax: 0347 320485, E-Mail: [email protected] NZ Pilz New Zealand, ✆09- 6345-350, Fax: 09-6345-
352, E-Mail: [email protected] P Pilz Industrieelektronik S.L., ✆229407594, Fax: 229407595, E-Mail: [email protected] PRC Pilz China Representative
Office, ✆021 62494658, Fax: 021 62491300,
ROK Pilz Korea, ✆031 8159541, Fax: 031 8159542, E-Mail: info@pilzkorea.co.kr
SE Pilz Skandinavien K/S, ✆0300 13990, Fax: 0300 30740, E-Mail: [email protected] TR Pilz Elektronik Güvenlik Ürünleri ve Hizmetleri Tic. Ltd. ¸Sti.,
✆0224 2360180, Fax: 0224 2360184, E-Mail: [email protected] USA Pilz Automation Safety L.P., ✆734 354-0272, Fax: 734 354-3355, E-Mail:
www www.pilz.com
D Pilz GmbH & Co. KG, Sichere Automation, Felix-Wankel-Straße 2, 73760 Ostfildern, Deutschland, ✆+49 711 3409-0, Fax: +49 711 3409-133,
E-Mail: [email protected]
Manual de Instrucciones original/Istruzioni originali/Originele bedrijfshandleiding
21 061-04-2010-01 Printed in Germany
Other manuals for PNOZ X Series
7
This manual suits for next models
2
Table of contents
Other Pilz Relay manuals

Pilz
Pilz PNOZSIGMA Series User manual

Pilz
Pilz PNOZ 10 Owner's manual

Pilz
Pilz PNOZ s6 User manual

Pilz
Pilz S1MO User manual

Pilz
Pilz P1HZ X1 User manual

Pilz
Pilz PNOZ X Series User manual

Pilz
Pilz PNOZ X2.1VP User manual

Pilz
Pilz PNOZX4 User manual

Pilz
Pilz PNOZ e4.1p User manual

Pilz
Pilz PNOZ pps1p User manual
Popular Relay manuals by other brands

Chenzhu
Chenzhu CZ3055 user manual

Microelettrica Scientifica
Microelettrica Scientifica MC2-30V Operation manual

GE
GE 750 Guide

Schweitzer Engineering Laboratories
Schweitzer Engineering Laboratories SEL-351-5 instruction manual

DAITEM
DAITEM SH701AX installation manual

AJAX Systems
AJAX Systems Relay user manual