manuals.online logo
Brands
  1. Home
  2. •
  3. Brands
  4. •
  5. Pioneer
  6. •
  7. Recording Equipment
  8. •
  9. Pioneer H-R99 KCU User manual

Pioneer H-R99 KCU User manual

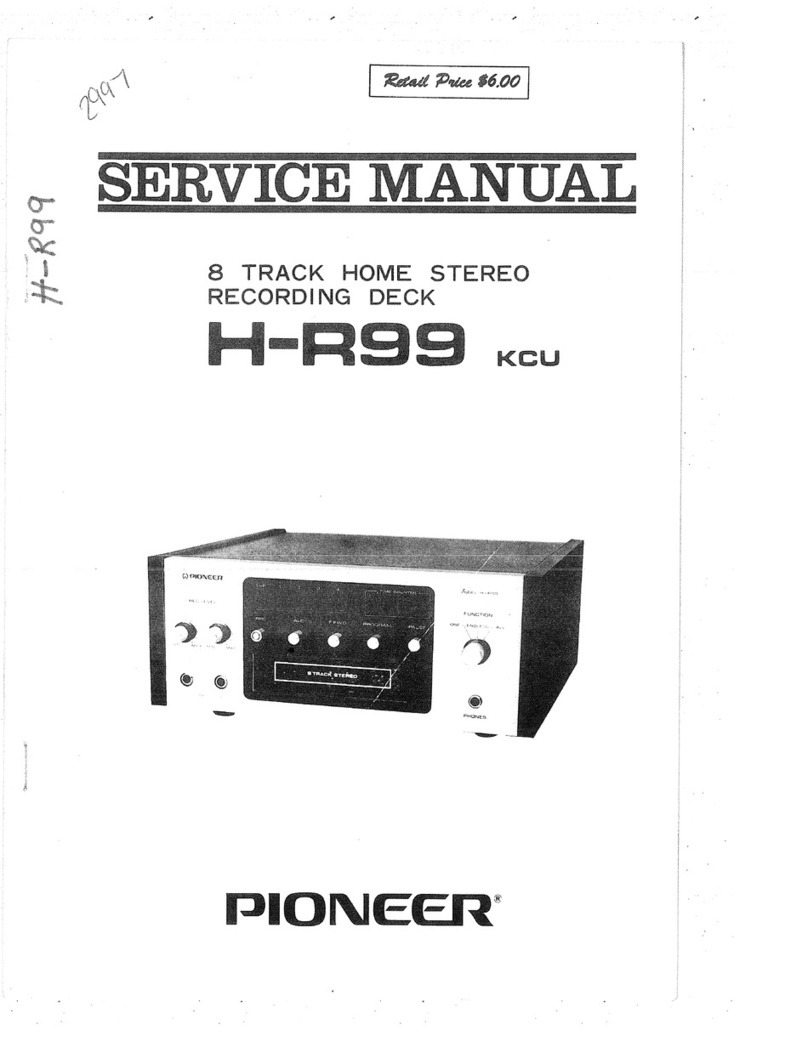
OWNERS MANUAL
8 TRACK HOME
STEREO RECORDING
DECK MODEL
H-R99
KCU
PIONEER ELECTRONIC CORPORATION
15-5, 4 CHOME,OHMOR NISHI, HOTA KU, TOKYO, JAPAN
PIONEER ELECTRONIC CORPORATION
15-5, 4 CHOME,OHMOR NISHI, HOTA KU, TOKYO, JAPAN
WARRANTY
Pioneer warrants each new product as follows: 1 year all parts,
90 days labor, in all cases from date of purchase. (In the case of
car stereos, the purchaser is responsible for its removal and
reinstallation). THE PURCHASER MUST RETAIN THE
DATED PURCHASE RECEIPT WHICH SHOWS PROOF OF
PURCHASE AND OWNERSHIP.
This warranty does not provide free labor for service rendered at
any location other than Pioneer Authorized Service Stations, and
does not apply to any Pioneer product damaged by accident,
misuse, abuse, improper line voltage, fire, flood, lightning, or
other acts of God, or altered or repaired by anyone other than
Pioneer or one of its Authorized Service Stations. This warranty
does not cover cartons, antennas, broken or marred cabinets,
carrying cases, batteries, or any other accessory used in
connection with the product, and applies only to products
purchased and used in the United States of America.
Authorized Service Station Listing
For the name and address of your nearest Authorized Service
Station, CALL WESTERN UNION OPERATOR 25 BY
DIALING, TOLL FREE, THE FOLLOWING NUMBER 800-
851-3360 OR FROM WITHIN THE STATE OF ILLINOIS,
THE NUMBER 800-642-3372. (This service is not currently
available in Alaska or Hawaii. In these states, contact your local
dealer.)
- KEEP YOUR SALES SLIP -
PIONEER ELECTRONICS OF AMERICA
155 East Del Amo Blvd. Carson
,
Calif. 90746
PIONEER ELECTRONICS (EUROPE) N.V.
Meir Center
,
Veir 21
,
2000 Antwer
p,
Bel
g
ium
< CRB-054-A >
Printed in Japan
< 73J03T52O >
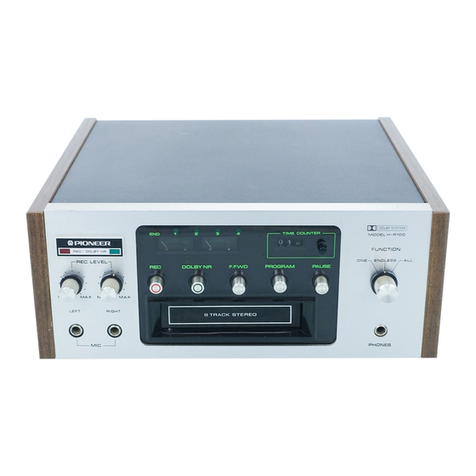
PIONEER Model H-R99 8 Track Home Stereo Recording
Deck is especially designed as a component for use with your
existing stereo receiver or amplifier.
The component is provided with REC LEVEL controls and
meters, so that you can not only enjoy recording of your
choise but also automatic recording by means of ALC
(Automatic Level Control) circuit which operate
automatically.
As preparations before recording, set the tape to the starting
position by FAST FORWARDING mechanism,
FUNCTIONAL mechanism and END indicator lamp (this
lamp lights up upon completion of mode selection by the
functional mechanism.) Use PAUSE button when you wish
to stop the tape temporarily. The tape need not be pulled out
every time you want to do so.
TIME COUNTER indicates the time of recording or
playback. TIME COUNTER can be reset by pressing the
button on its right.
No doubt you are now aware of the wide range of its
applications. We wish you the best of recording and listening
FEATURES
1. INSTALLATION
The unit should be placed on a horizontal surface in a
location which will not interfered with free air circulation
around the sides and rear of the unit. Avoid locations in
direct sunlight or in areas of excessive heat or humidity, to
prevent damage to the cabinet or components.
2. CARTRIDGE STORAGE
Cartridge should not be stored at places where it is likely
to be subjected to direct sunlight, high humidity, and
particularly strong magnetic fields (eg. Motor driven tools,
television sets, radios, etc.). Do not touch the tape with
bare hands and protect it from dust and dirt.
3. MAINTENANCE
Dust and dirt easily adheres to head, capstan shaft and
contact piece. Moisten a cotton applicator in alcohol and
rub gently until all traces of dirt are removed.
Reproduction will be improved and at the same time
steady tape travel speed will be assured.
CARE & MAINTENANCE
CONNECTION
OPERATION RECORD LEVEL METER
IDEAL
RECORDING
LEVEL
RECORDING
LEVEL
TOO LOW
RECORDING
LEVEL
TOO HIGH
TIME COUNTER
This counter indicates the
passed times of recording
and playback.
PROGRAM INDICATOR
LAMPS
These indicator lamps
indicate program numbers.
RECORD LEVEL
CONTROLS
Adjust these controls for
adequate recording levels.
END INDICATOR LAMP
This indicator lamp indicates
that playback or recording is
finished.
FUNCTION SELECTOR
ONE: Playback and
recording will be stopped at
the end of each program
and the END indicator lamp
will be lit up.
ALL: When program 4 is
finished, operation will stop
and the END indicator lamp
will be lit up.
ENDLESS: Operation will
continue automatically.
PHONES JACK
To listen with a headphone,
insert the plug into this jack.
PAUSE BUTTON
To stop operation of
recording or tape playback
temporarily, press this
button.
PROGRAM BUTTON
To change programs
manually, press this button.
FAST FORWARD
BUTTON
To skip a selection or rapidly
advance the tape, press this
button.
COUNTER RESET
BUTTON
To reset the time counter
press this button.
ALC BUTTON
(AUTOMATIC LEVEL
CONTROL)
To control the record level
automatically press this
button.
RECORD BUTTON
To record, keeping the
cartridge inserting, press this
button.
MIC JACKS
Plug microphones into these
jacks
4. CABINET & METER CLEANING
Cleaning cabinet with a mild soap solution and a soft damp
cloth. Do not wipe the meter with a dry cloth. This will
create a static charge on meter cases that will cause the
needles to stick. To correct this condition, wipe the meter
faces with a cloth dampened in a detergent solution (in
water). Allow meters to air dry, rather than wiping with a
dry cloth.
5. IN CASE OF TROUBLE
When the unit does not function properly, contact your
dealer or the nearest authorized PIONEER Service Station.
CARE & MAINTENANCE (CONTINUED)
SEMI-CONDUCTORS ..................................27 transistors, 19 diodes and 1 thyristor
POWER SOURCE ......................................... AC 120v, 50/60 Hz
POWER CONSUMPTION............................. Less than 20W
TAPE SPEED................................................. 9.5cm/sec (3-3/4 in./sec)
WOW AND FLUTTER..................................Less than 0.15% (WRMS)
PROGRAM SELECTION SYSTEM ............. Automatic and manual selection system
FAST FORWARD TIME...............................Approx. 2.5 times
FREQUENCY RESPONSE............................30~12,000 Hz
TOTAL HARMONIC DISTORTION............Less then 2%
CHANNEL SEPARATION............................More than 40dB
CROSSTALK................................................. More than 45dB
SIGNAL TO NOISE RATIO..........................More than 45dB
OUTPUT IMPEDANCE ................................ Line : Less then 3 kΩ
........................................................................ Headphone : 8Ω
OVER-ALL FREQUENCY RESPONSE....... 40~10,000 Hz
RECORDING SECTION
ERASING RATIO.......................................... More than 50 dB
INPUT LEVEL............................................... 200mV
OUTPUT LEVEL........................................... 775mV
DIMENSIONS (W x H x D)........................... 295 x 116 x 275 mm (11-5/8 x 4-5/8 x 10-7/8 in.)
WEIGHT ........................................................ 5.5 kg (12.1 lbs)
SPECIFICATIONS

Other manuals for H-R99 KCU

2

Other Pioneer Recording Equipment manuals

Pioneer SG-750 User manual

Pioneer

Pioneer SG-750 User manual

Pioneer GR-777 User manual

Pioneer

Pioneer GR-777 User manual

Pioneer PDR-509 Quick start guide

Pioneer

Pioneer PDR-509 Quick start guide

Pioneer RG-2 User manual

Pioneer

Pioneer RG-2 User manual

Pioneer DEQ-P9 User manual

Pioneer

Pioneer DEQ-P9 User manual

Pioneer RG-9 User manual

Pioneer

Pioneer RG-9 User manual

Pioneer TORAIZ SP-16 User manual

Pioneer

Pioneer TORAIZ SP-16 User manual

Pioneer PDR-W839 User manual

Pioneer

Pioneer PDR-W839 User manual

Pioneer DC-777Z User manual

Pioneer

Pioneer DC-777Z User manual

Pioneer DVR-RT502-S User manual

Pioneer

Pioneer DVR-RT502-S User manual

Pioneer AXM-P7650 User manual

Pioneer

Pioneer AXM-P7650 User manual

Pioneer PDR-L77 User manual

Pioneer

Pioneer PDR-L77 User manual

Pioneer PDR-W739 User manual

Pioneer

Pioneer PDR-W739 User manual

Pioneer PDR-04 User manual

Pioneer

Pioneer PDR-04 User manual

Pioneer PDR-19RW User manual

Pioneer

Pioneer PDR-19RW User manual

Pioneer SG-90 User manual

Pioneer

Pioneer SG-90 User manual

Pioneer H-R100 User manual

Pioneer

Pioneer H-R100 User manual

Pioneer PDR-609 User manual

Pioneer

Pioneer PDR-609 User manual

Pioneer GR-470 User manual

Pioneer

Pioneer GR-470 User manual

Pioneer DEQ-P800 - Equalizer / Crossover User manual

Pioneer

Pioneer DEQ-P800 - Equalizer / Crossover User manual

Pioneer PD-R555RW User manual

Pioneer

Pioneer PD-R555RW User manual

Pioneer PDR-W37 Elite User manual

Pioneer

Pioneer PDR-W37 Elite User manual

Pioneer AXM-P7050 User manual

Pioneer

Pioneer AXM-P7050 User manual

Pioneer H-R99 KCU User manual

Pioneer

Pioneer H-R99 KCU User manual

Popular Recording Equipment manuals by other brands

ALLEN & HEATH WZ20:8:2 Service manual

ALLEN & HEATH

ALLEN & HEATH WZ20:8:2 Service manual

Bpt PHONIC GROUP AZ/98 installation instructions

Bpt

Bpt PHONIC GROUP AZ/98 installation instructions

Korg mr-2 owner's manual

Korg

Korg mr-2 owner's manual

Tascam CD-RW750 owner's manual

Tascam

Tascam CD-RW750 owner's manual

Arturia VOCODER V user manual

Arturia

Arturia VOCODER V user manual

Comm-Tec DAN-B202 user manual

Comm-Tec

Comm-Tec DAN-B202 user manual

Xaoc Devices Tirana Operator's manual

Xaoc Devices

Xaoc Devices Tirana Operator's manual

ARP 1601 owner's manual

ARP

ARP 1601 owner's manual

V.I.O POV.HD user manual

V.I.O

V.I.O POV.HD user manual

25-Seven PDM Operator's manual

25-Seven

25-Seven PDM Operator's manual

Lennox 10T50 Installation and setup guide

Lennox

Lennox 10T50 Installation and setup guide

Logitek Artisan Reference manual

Logitek

Logitek Artisan Reference manual

Sony SRP-L210 operating instructions

Sony

Sony SRP-L210 operating instructions

Olympia MEMO88 operating instructions

Olympia

Olympia MEMO88 operating instructions

Zaxcom RX-4 user manual

Zaxcom

Zaxcom RX-4 user manual

JL Audio MediaMaster MMA-1-HTML owner's manual

JL Audio

JL Audio MediaMaster MMA-1-HTML owner's manual

M-Audio Groove Lab quick start guide

M-Audio

M-Audio Groove Lab quick start guide

MOTU 1248 user guide

MOTU

MOTU 1248 user guide

manuals.online logo
manuals.online logoBrands
  • About & Mission
  • Contact us
  • Privacy Policy
  • Terms and Conditions

Copyright 2025 Manuals.Online. All Rights Reserved.