Pivothead Telepresence Glasses User manual

1
Pivothead Telepresence Glasses User
Quick Start Guide
Safety Eyewear
with Live Mod Pro
Live Mod Pro
Call Button
Power Button
Power Bank & Safety Eyewear
Micro USB Cable Camera

2
Get Started
Configure Your Glasses for
Telepresence
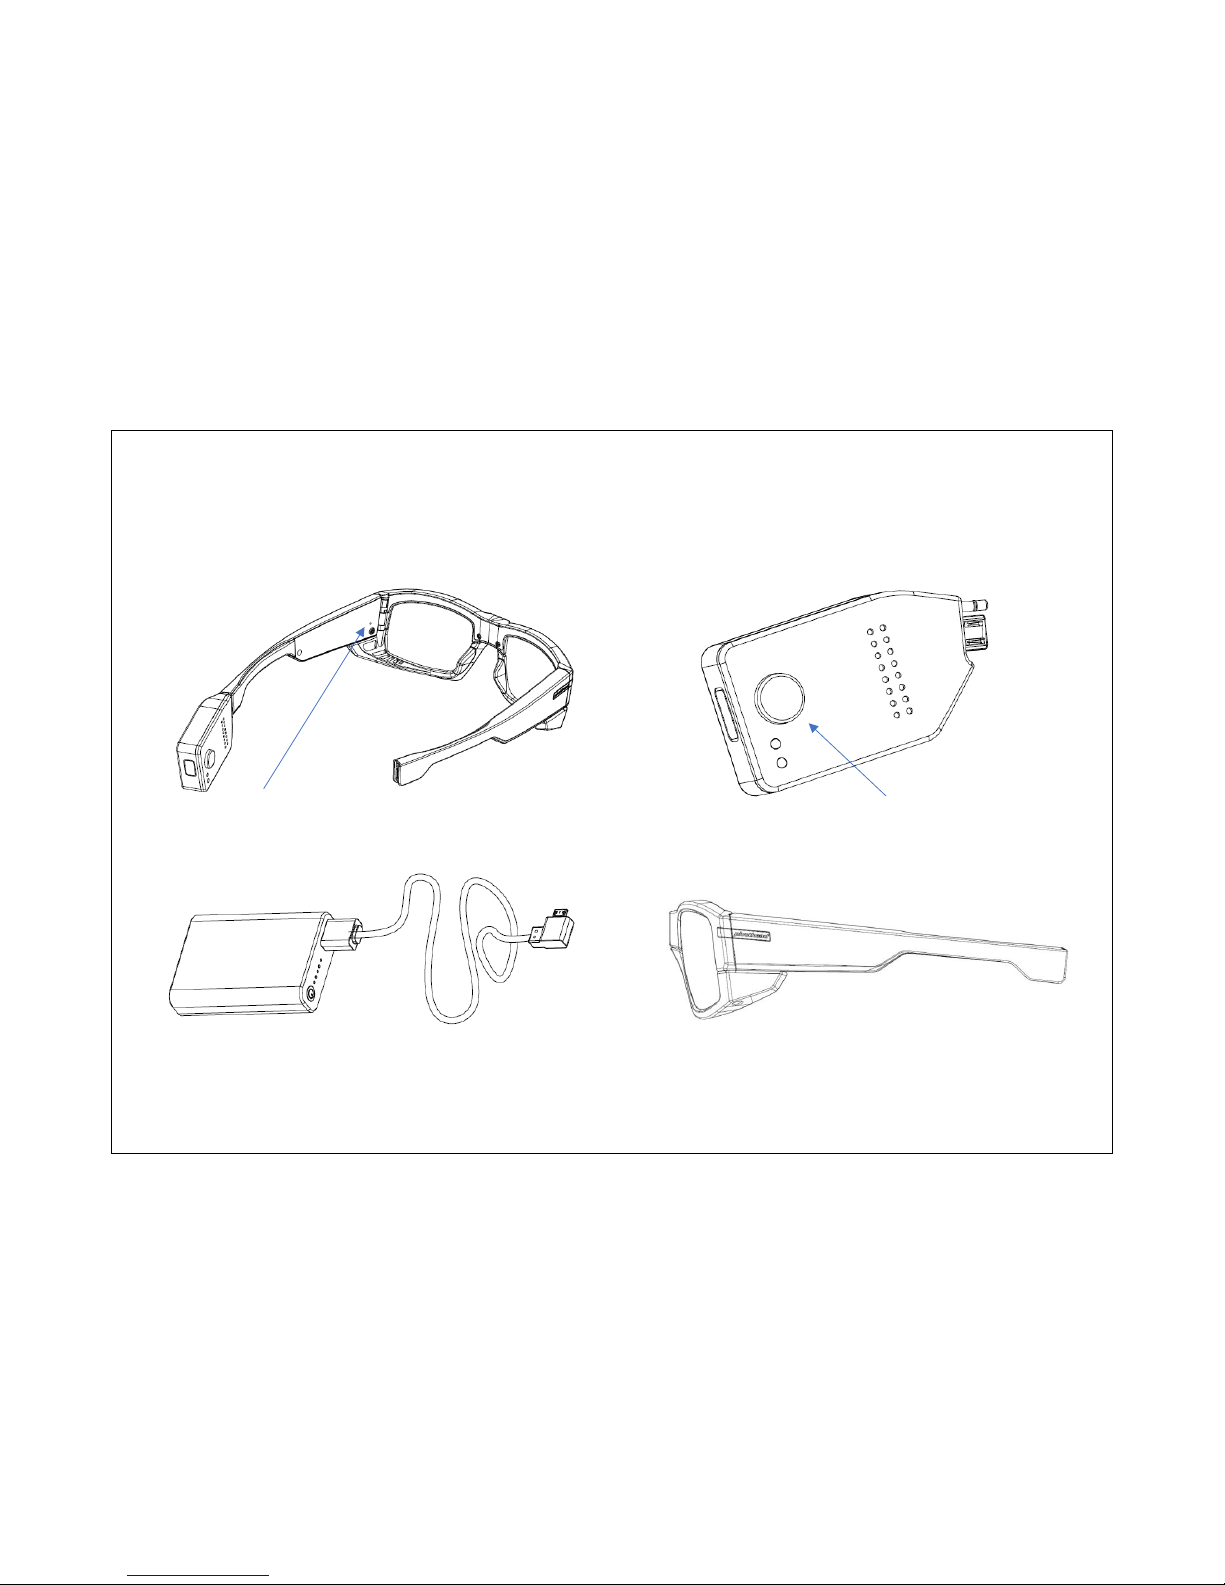
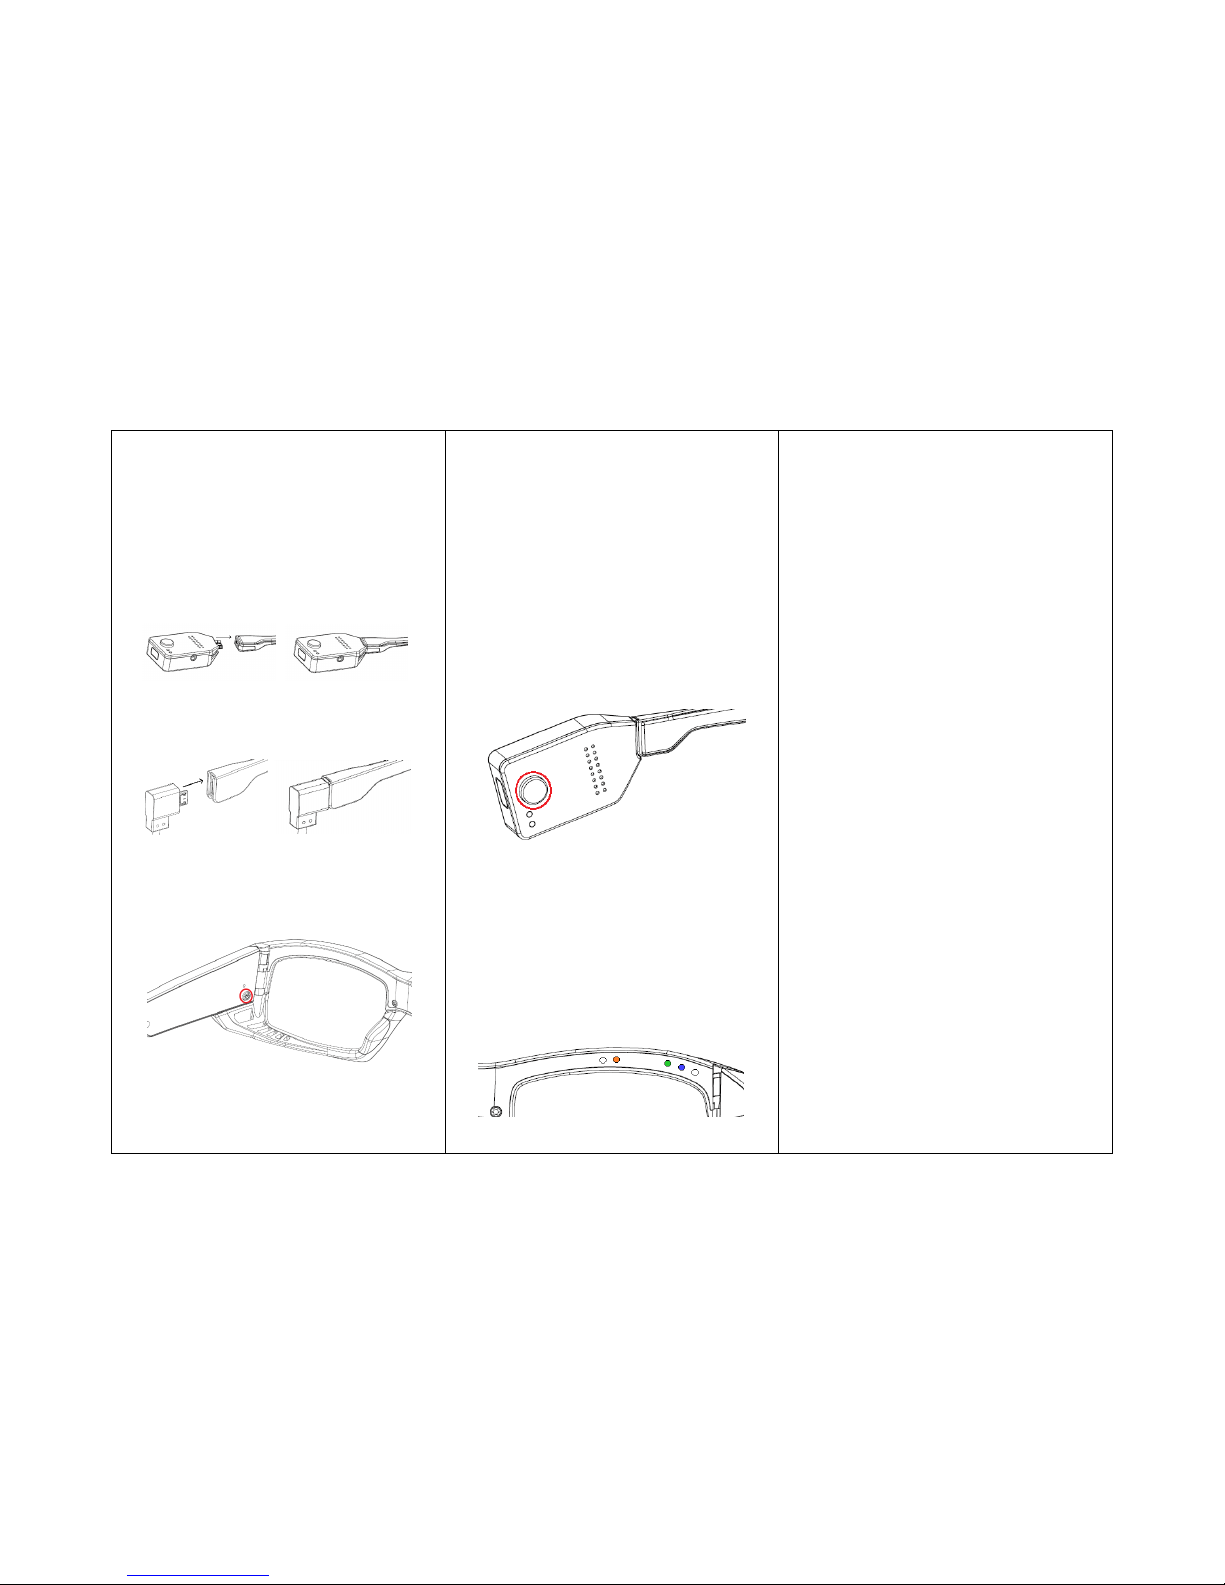
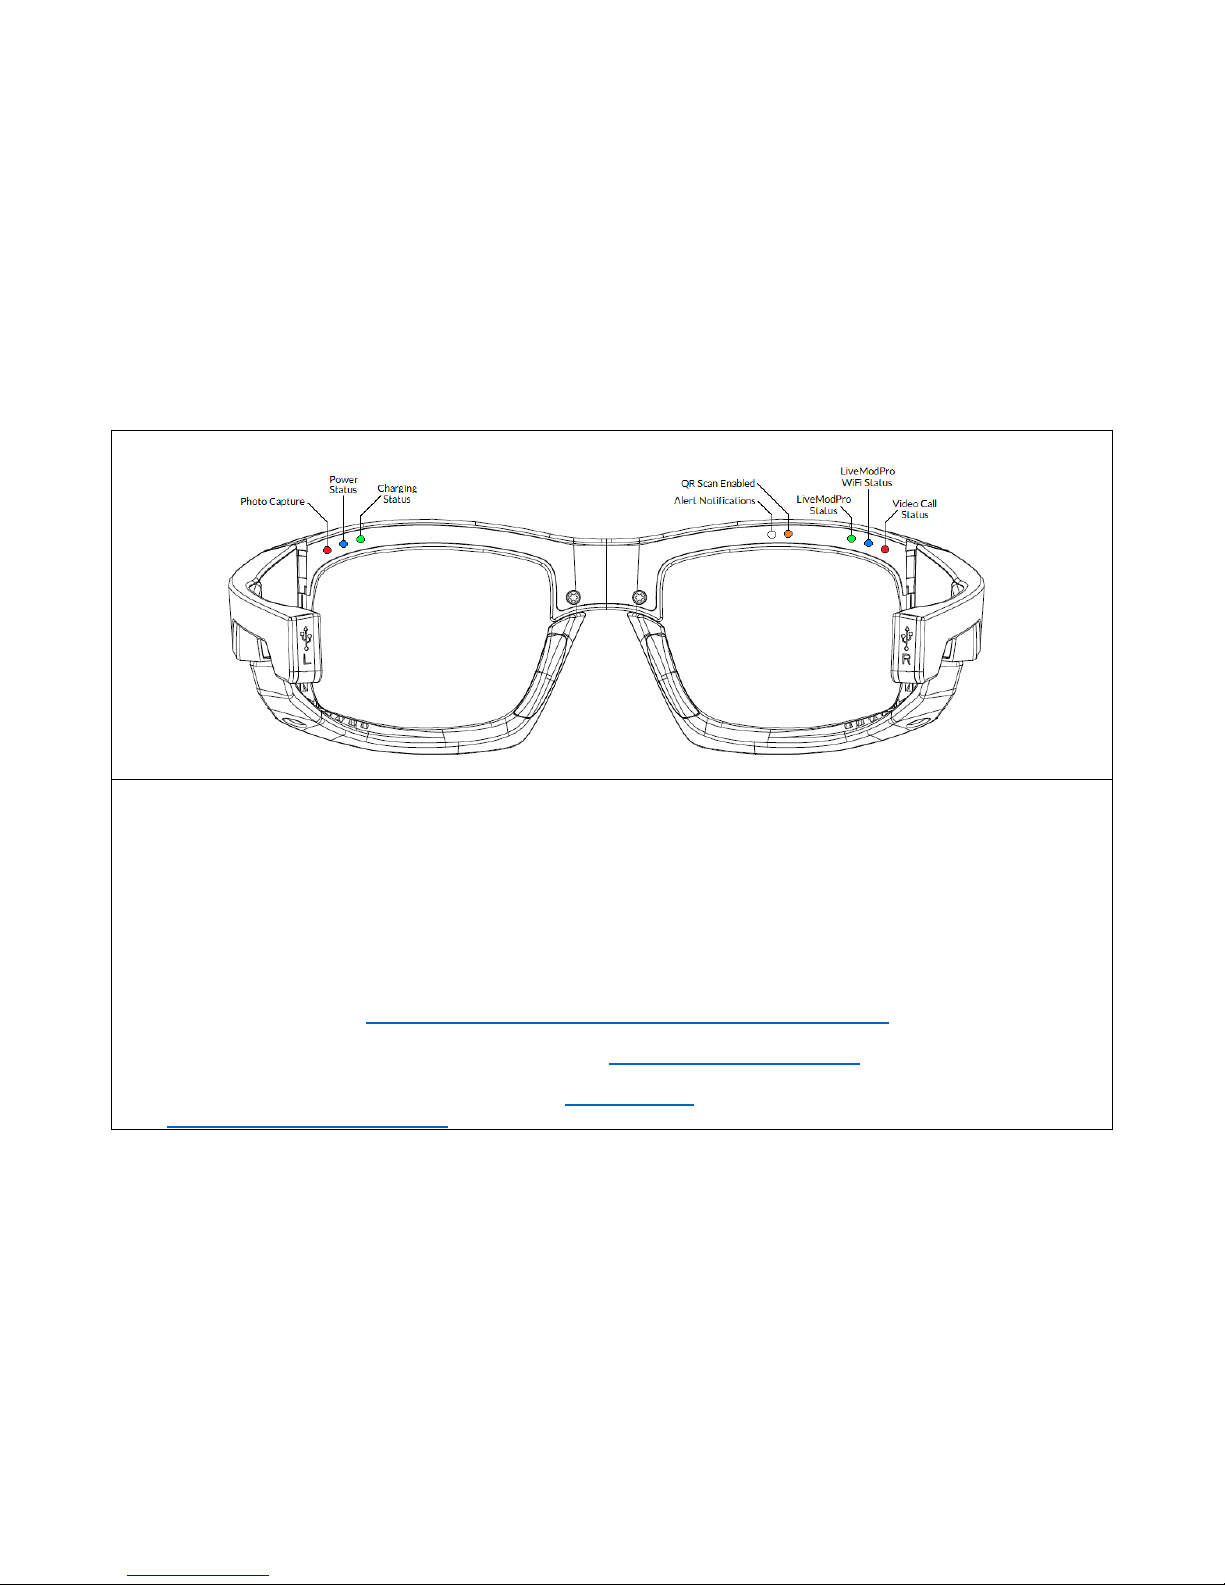
1. Insert Live Mod Pro into the glasses
left
temple frame.
2. Connect glasses
right
temple to
power source.
3. Power on glasses here.
4. Wait for glasses boot up. You will
hear the voice assistant say
“Pivothead Ready to Go”.
5. If your glasses are not
preconfigured, the voice assistant
will say “Check Credentials, No
Connectivity”.
6. Now let’s put your Glasses into
Scan Mode. Press the Live Mod
Pro Call Button for 8 seconds,
or until the voice assistant says,
“Scan Mode”, then immediately
release. Upon hearing, “Scan Mode
Success”, you will see many LED
lights on the glasses, if you see the
orange QR Scan Enabled light
above the right eye of the frame,
you are in Scan mode.
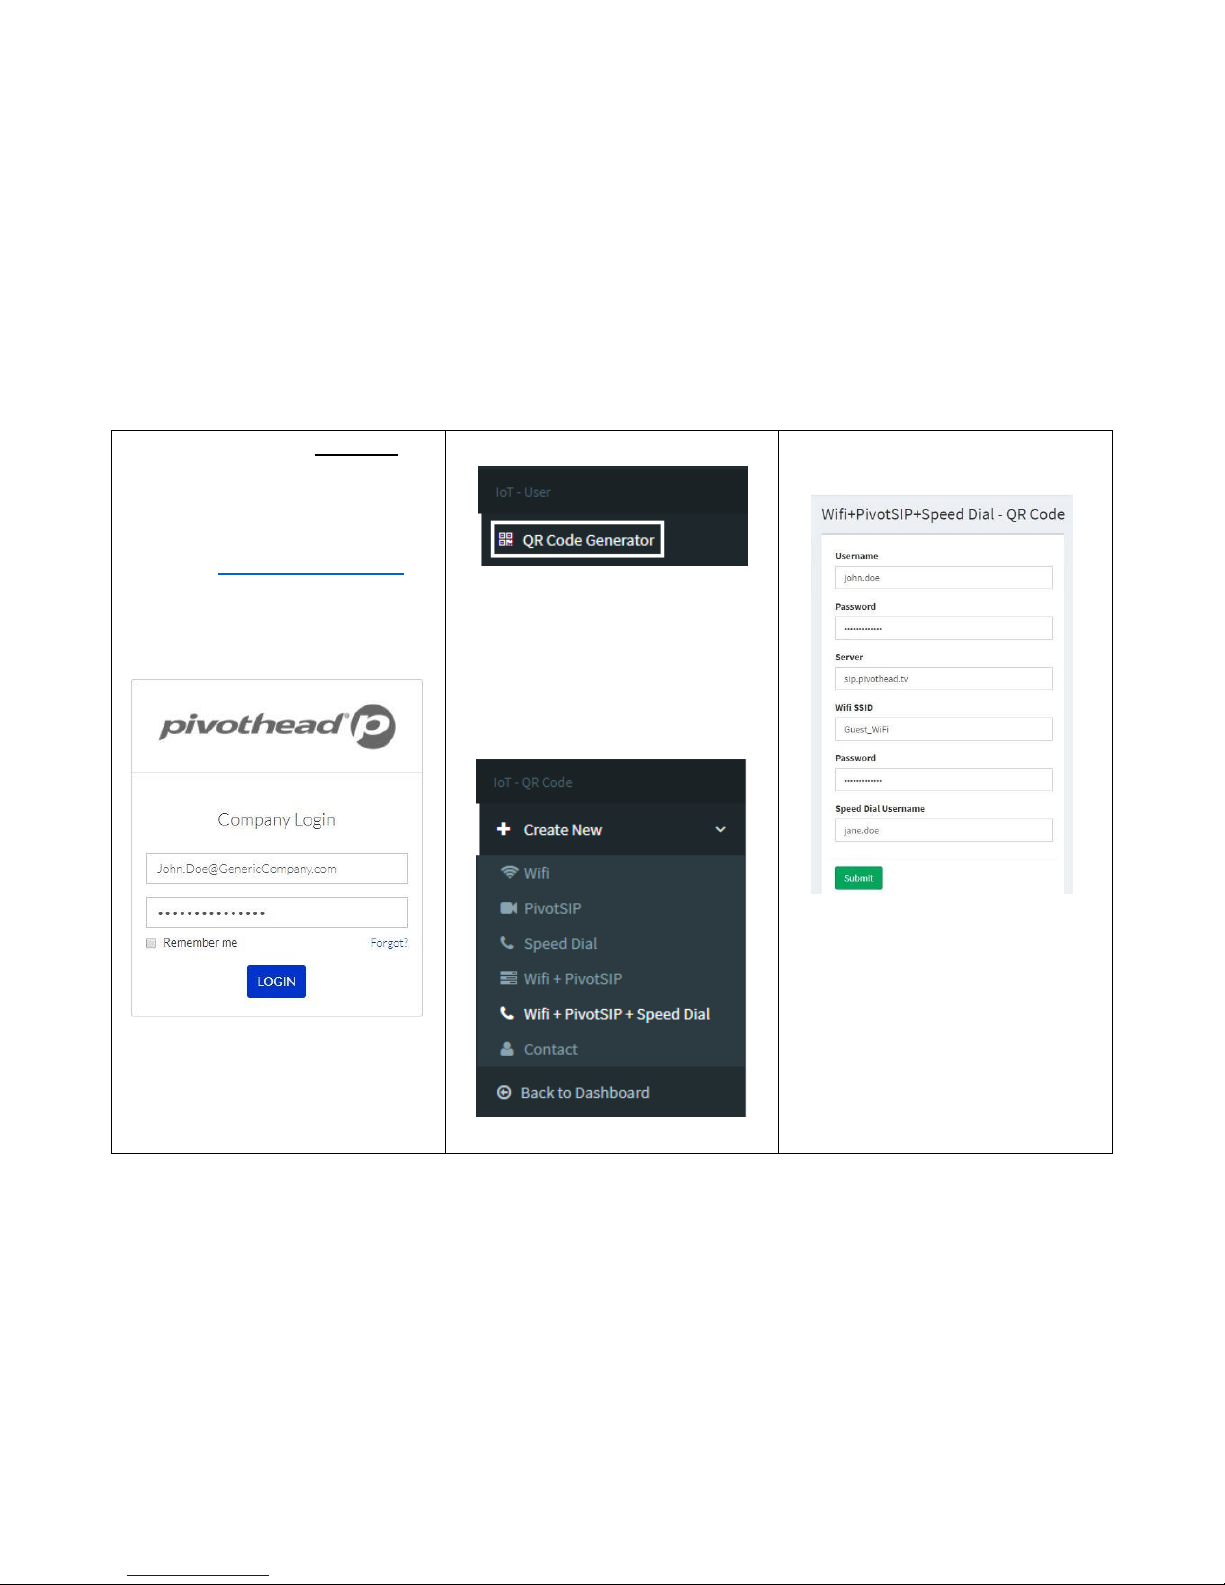
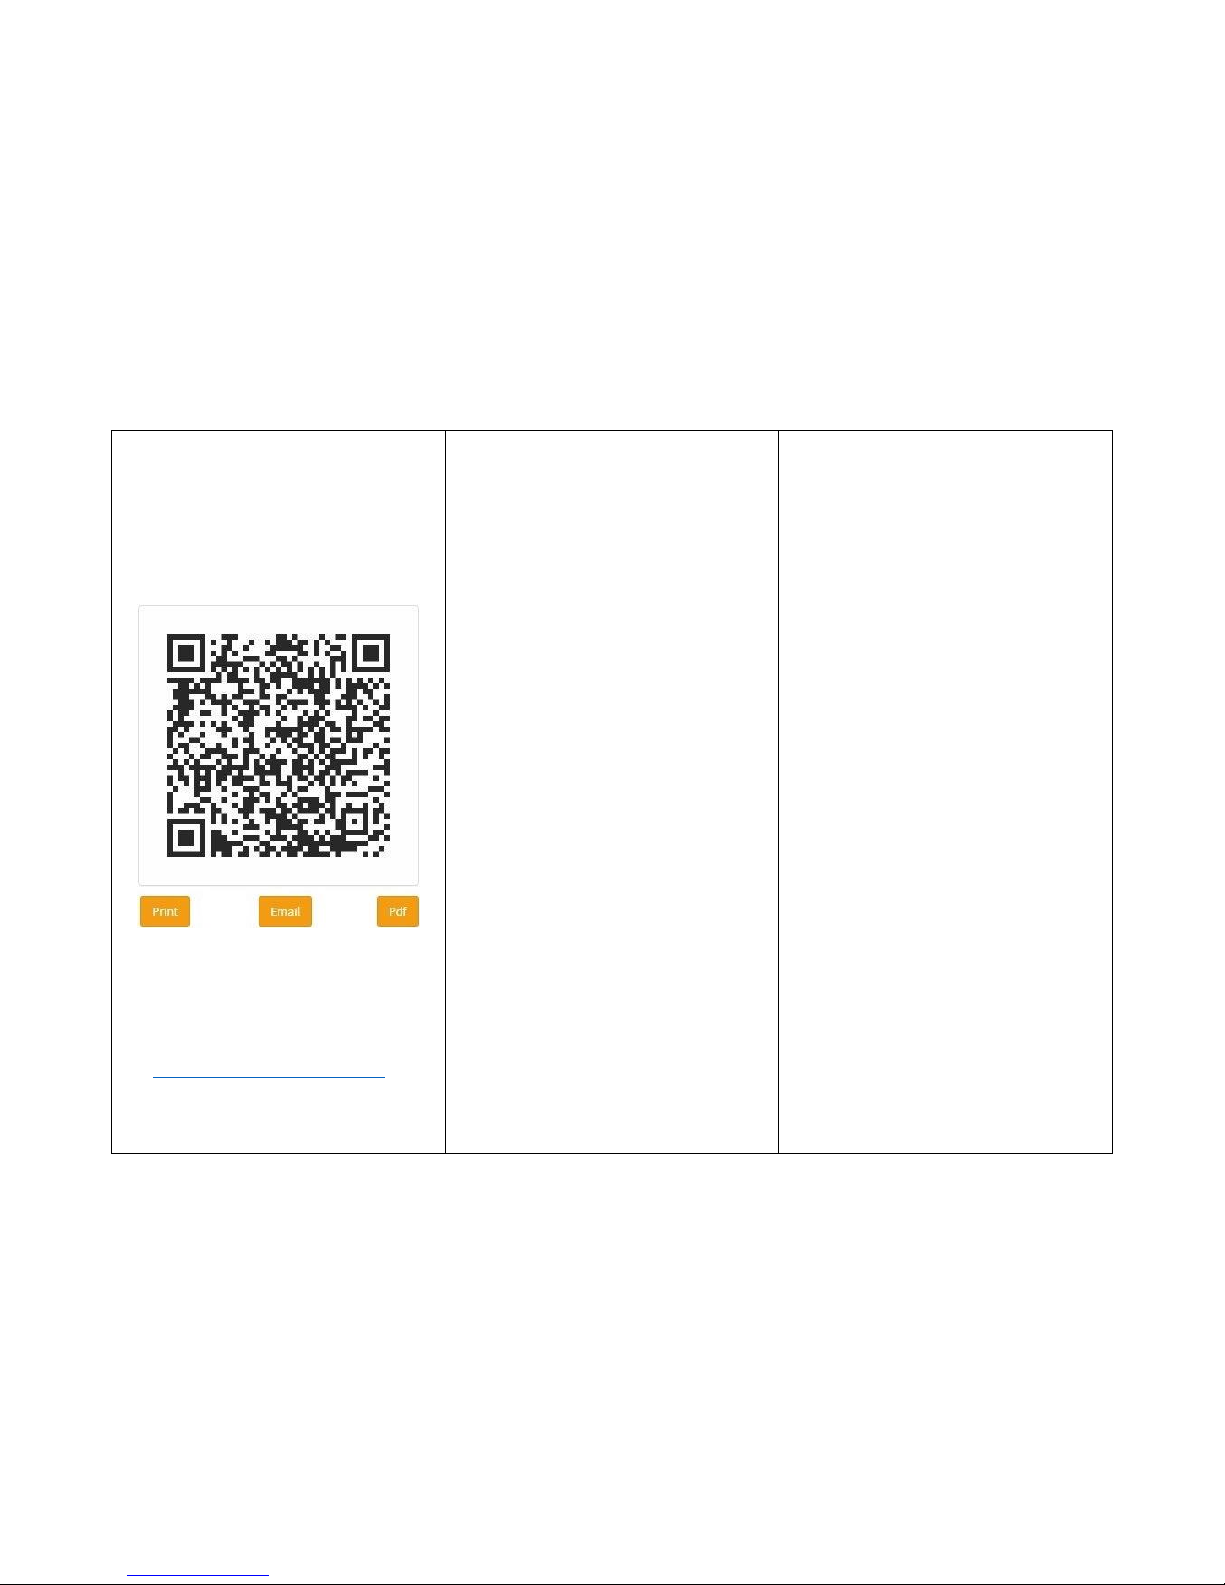
7. Retrieve the QR code provided to
you from your admin. Simply hold
the glasses approximately 6-12
inches away from the code until
you see a white LED light flash and
the voice assistant says, “Scan
Success”. If your QR code contains
a PivotSIP Account and WIFI
Connection credentials, the glasses
will automatically connect to the
internet and the video telepresence
service. You are ready for calls.
Next Page.

3
If you do not have a QR code
with the required information,
you can generate them on your
own from the IOT Portal.
1. Login to https://iot.pivothead.tv
with the email address and
password for your
Pivot
SIP™
account. Then, enter the User
Portal.
1. Go to
QR Code Generator.
3. Choose QR Code Type
To receive calls, the glasses
need a
Pivot
SIP™ account and a
WiFi connection. To make calls,
the device also needs a Speed
Dial contact.
4. Enter fields for desired QR Code
and Submit.
Next Page.

4
QR Code continued…
4. Code can now be scanned from the
screen, or sent directly to a glasses
user. Once code is scanned, glasses
will automatically connect to the
internet and be ready for call.
If you want to access the
settings directly and manually
input them to the device, please
see the section titled:
Connect to
Interface
at
http://www.pivotvision.com.
Ready for Video Calls
Receive a Call with your Glasses
1. Ensure your glasses are successfully
connected. The indicators for this
are the voice assistant will have told
you “Service Connected”.
2. When your glasses ring, press the
Live Mod Pro call button and
release quickly.
3. Either party can hang up the call.
If you hang up, press the call button
for 3 seconds.
Make A Video Call with your
Glasses
1. Make sure you have your speed dial
configured to who you want to call.
2. Press the call button and quickly
release. You will hear a call tone
while you wait for the other party
to answer.
3. Either party can hang up the call. If
you hang up, press the call button
for 3 seconds.
Next Page.

5
SMART LED Notifications
Basics
Charging
1. To charge your eyewear connect the right-temple Micro-USB port to a power source. It is suggest to always provide
external power source to the glasses during usage.
Updates
1. For instructions on managing local media, using the glasses as camera, touch panel operations, Firmware updates for
the glasses and more, visit: http://support.pivothead.com/customer/portal/articles/1254086
2. For video instructions to update your Live Mod Pro, visit: https://youtu.be/KgRz_1SS_pA.
For complete setup information and resources visit Pivotvision.com. Contact the Pivothead Enterprise Support team
Table of contents