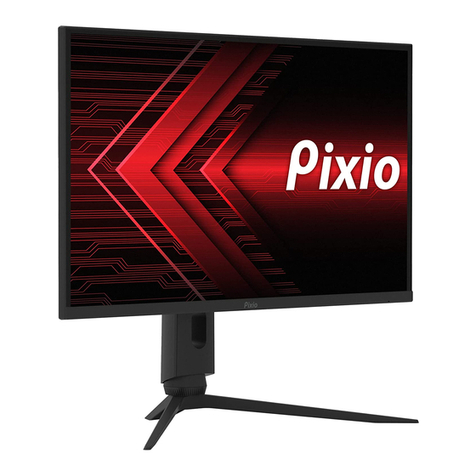
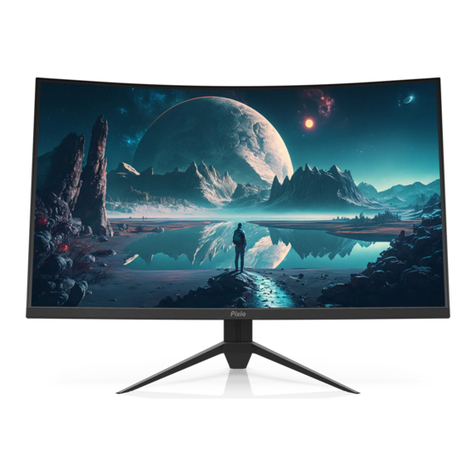
Pixio PX325c User manual


2
Table of Contents
Safety Warning --------------------------------------------------------- 3
Notice --------------------------------------------------------- 4
Important Information --------------------------------------------------------- 5
Front and Back View --------------------------------------------------------- 7
Connections --------------------------------------------------------- 8
OSD --------------------------------------------------------- 9
Color --------------------------------------------------------- 10
OSD Setting --------------------------------------------------------- 11
Setup --------------------------------------------------------- 12
Others --------------------------------------------------------- 13
Gaming Features --------------------------------------------------------- 14

3
Safety warning
Please refer to the following safety precautions prior to operating the device for best
usage practices and maintenance.
Please take note of the warnings and illustrated guides.
Do not remove the rear cover and try to repair the device as it may void the
warranty.
Contact the retailer to process a warranty service for any issues regarding the
product.
Try and maintain the original packaging in the event of a return or repair of the
product.
Please do not put large amounts of pressure on the monitor while it is placed flat
or stick any foreign objects into the orifices or signal ports.
Make sure the integrity of the power cord is maintained for safe usage.
Do not place the product in a flammable environment, in case of electrical
inflammation.
Immediately disconnect the power cable in the event of smoke or strong odors
emitting from the monitor. Contact the retailer to have the monitor serviced.
Be careful of exposing the product to moisture or liquid chemicals. If exposure
were to occur, make sure the product is thoroughly dry before activating.
Make sure the product is turned off and unplugged before any cleaning.
Ensure that the monitor stand is fast secured before placing on a flat surface.
Please do not try to expose or replace the internal components personally.
Components may get damaged and will likely induce a shock, even after
disconnecting the power.

4
NOTICE
When determining placement for the monitor, make sure to find a cool, dry area
that avoids direct sunlight, high temperatures, dust, and gases.
Do not place the product near heat sources like a radiator or stove.
If considering wall mounting, make sure the wall and/or mount is capable of
maintaining the monitor’s weight as it can injure if dropped on an individual.
Major temperature fluctuations may cause image distortion or decay of color.
Give the monitor some time, while plugged in, for the distortion to disappear.
Please make sure the ventilation openings are not covered to ensure proper
cooling and maintenance of the product.
When plugging the power cord and signal inputs, make sure to maintain a firm
grasp of the base of the plugs to prevent damage to the product and cables.
Please make sure all the cables being used are not damaged in any way.
Exposed cables run the risk of electrical shock or fires.
Look out for potential cable pinching when moving relevant furniture.
Please be careful when determining a location to place the monitor,
as the monitor will get damaged if tipped over and may injure an individual.
Always make sure the signal inputs and power cord are disconnected prior to
moving the product around.
It is best to unplug the product if one is not planning on using it for an extended
period.
Make sure to prevent any hard collisions to the product as it is easily susceptible
to cracks and scratches.
Make sure to only use the proper signal input cables and power cord to prevent
technical issues.

5
Important Information
Always maintain the mindset that the product is connected to a source of electricity
and may run the risk of injury or property damage. This product has been
engineered and manufactured with the highest priority on safety. However, improper
handling of the product may still result in electric shock and/or fire.
In order to prevent potential dangers, please observe the following instructions
when installing, operating, and cleaning the product.
To ensure your safety and the service life of the product, please read the following
precautions before using the product.
Read the instructions.
Keep the instructions.
Heed all the warnings.
Follow all the instructions.
Do not use the product near water sources.
Clean only with a dry cloth and appropriate cleaning solutions.
Do not block any ventilation openings.
Install in accordance with the manufacturer’s instructions.
Do not install near any major heat source.
Do not defeat the safety purpose of the polarized or grounding-type plug.
A polarized plug has two blades with one wider than the other.
A grounding type plug has two blades and a third grounding prong.
The wide blade and the third prong are provided for your safety.
If the provided plug does not fit into your outlet, consult an electrician for
replacement of the obsolete outlet.
1.
2.
3.
4.
5.
6.
7.
8.
9.

Protect the power cord from any exposure or damage as a result of improper
disconnection, significant pinching, and exposing lacerations.
Only use the recommended peripherals and accessories specified by the
manufacturer.
When using the provided stand, make sure to handle with care as the product is
subject to tipping over unless firmly planted on a flat surface.
Make sure the product is not plugged into an outlet during a thunderstorm or
when used for long periods of time.
Contact the retailer for any warranty services. Servicing may be required in case
of damage due to: damaged power cord, liquid spills, heavy impacts, ambient
moisture exposure, improper functionality, or drops.
Package Contents
Input Voltage
Monitor Display x 1
Monitor Base x 1
User Manual x 1
Power Cord x 1
DVI Cable x 1
DP cable x 1
Audio cable x 1
AC 110-240V 50/60Hz
6
10.
11.
12.
13.
14.

7
Front and Back View
OSD Control Buttons
1. The MENU button activates the On Screen Display (OSD) menu. While the OSD menu is open, this
button will act as the select button to open up options for adjustment.
2. The UP button navigates up in the OSD menu. This button will increase the value of the selected
option. When outside of the OSD menu, the UP button will toggle through the ECO pre-sets: Standard,
Movie, Photo, Game, FPS, RTS, and User.
3. The DOWN button navigates down in the OSD menu. This button will decrease the value of the
selected option. When outside of the OSD menu, the DOWN button will activate the Game Menu, in
which you can access the Game Cursor and Game Time features.
4. The EXIT button will act as the back button in the OSD menu. The button will move back one option
menu and with an additional press, will exit the OSD menu. If pressed for 3 seconds, the EXIT button
will cycle through the different signal inputs connected to the monitor.
5. The power button turns the display on or off.

8
Connections
1. HDMI –High Definition Multimedia Interface Version 1.4
2. DP – DisplayPort Version 1.2
3. DVI – Digital Video Interface Dual Link
4. Audio In – 3.5 mm Mini-jack
5. Power Cable

9
On Screen Display (OSD)
PICTURE
Press the MENU button and the OSD screen will appear. Browse through the different
functions with the UP and DOWN buttons and select the highlighted item with the MENU
button. Adjust the value of the selected item with the UP or DOWN button. When you want to
go back to the main OSD menu, press EXIT. Press EXIT once more to close the OSD menu.
This function lets you adjust the brightness, contrast, toggle through the ECO presets, and
Main SR strength.
1. To access this menu, press MENU and highlight “Picture” using the UP and DOWN buttons
if necessary.
2. Once highlighted, press MENU to access the sub-menu.
3. Use the UP and DOWN buttons to toggle through the options and press MENU to select the
option.
4. Use the UP and DOWN buttons to adjust the values of the selected option.
a. Brightness – This option adjusts the intensity of the backlight. If the value is adjusted
too high, the picture will look washed out. If too low, the picture will be very dark.
b. Contrast – This option adjusts the white levels in a picture. If the value is adjusted too
high, the picture will be much too bright. If adjusted too low, the picture will be too dark.
c. ECO – This option allows you to select the desired pre-set modes: Standard, Movie,
Photo, Game, FPS, RTS, and User.
d. Main SR – This option adjusts display quality ranging from: Off, Weak, Median,
Strong, Strongest.

10
COLOR
This function adjusts the color temperature.
1. To access this menu, press MENU and highlight “Color” using the UP and DOWN buttons.
2. Once highlighted, press MENU to access the sub-menu.
3. Use the UP and DOWN buttons to toggle through the options and press MENU to select
the option.
4. Use the UP and DOWN buttons to adjust the values of the selected option.
a. Color Temp – This options adjusts color temperature to: 6500k (Warm), 9300k
(Cool), and User for manual adjustments.
b. Red – Adjusts the red levels while on User mode.
c. Green – Adjusts the green levels while on User mode.
d. Blue – Adjusts the blue levels while on User mode.

11
OSD Setting
This function adjusts OSD options.
1. To access this menu, press MENU and highlight “OSD Setting” using the UP and DOWN
buttons.
2. Once highlighted, press MENU to access the sub-menu.
3. Use the UP and DOWN buttons to toggle through the options and press MENU to select
the option.
4. Use the UP and DOWN buttons to adjust the values of the selected option.
a. Language – Change the OSD menu language. Select from: English, Spanish,
French, German, Italian, Portuguese, and Korean.
b. Horizontal – Adjust the horizontal position of the OSD menu screen.
c. Vertical – Adjust the vertical position of the OSD menu screen.
d. Transparency – Adjust how transparent the OSD menu screen looks.
e. OSD Time Out – Change how long it takes for the OSD menu to automatically close.

12
SETUP
This function allows you to change the signal source, volume, and reset the monitor settings.
1. To access this menu, press MENU and highlight “Setup” using the UP and DOWN buttons.
2. Once highlighted, press MENU to access the sub-menu.
3. Use the UP and DOWN buttons to toggle through the options and press MENU to select the
option.
4. Use the UP and DOWN buttons to adjust the values of the selected option.
a. Input – Change between input signals: DVI, HDMI, and DP.
b. Mute – Turn the mute function on or off.
c. Volume – Adjust the monitor speaker volume.
d. Reset – Factory reset the monitor settings.

13
OTHERS
This function includes additional features.
1. To access this menu, press MENU and highlight “Others” using the UP and DOWN
buttons.
2. Once highlighted, press MENU to access the sub-menu.
3. Use the UP and DOWN buttons to toggle through the options and press MENU to select
the option.
4. Use the UP and DOWN buttons to adjust the values of the selected option.
a. Display Size – Toggle between aspect ratios: Full Screen, AUTO, and 4:3.
b. Low Blue – Adjust the strength of blue light: Off, Weak, Median, Strong, Strongest
c. Over Driver – This feature shortens the panel response time.
d. FreeSync – This feature provides a dynamic refresh rate to reduce screen tearing.

GAMING FEATURES
Press the DOWN button and the GAME MENU will appear.
1. Use the UP and DOWN keys to toggle between the “GAME CURSOR” feature (left) and the
“GAME TIME” feature (right).
2. Press MENU to select the option.
3. Game Cursor – Select a crosshair out of four choices using the UP and DOWN buttons to
choose and the MENU button to select the desired choice. Use the UP and DOWN buttons to
cycle through the crosshairs while it is active, and press MENU or EXIT to turn the crosshair off.
4. Game Time – Select an OSD stop watch using the UP and DOWN buttons to choose and the
MENU button to select the desired choice. Choose between 10-90 minute timers and three
different screen positions. Once displayed, toggle through the different timers using the UP and
DOWN buttons, and MENU or EXIT to turn the timer off.
14

144hz refresh rate only works with
DP (Display Port) cable or DVI-D(Dual Link) Cable.
Table of contents
Other Pixio Monitor manuals

Pixio
Pixio PX245c User manual

Pixio
Pixio PX248 Prime Advanced V2 User manual

Pixio
Pixio PXC327 V2.0 User manual

Pixio
Pixio PXC348C User manual

Pixio
Pixio PX329 User manual

Pixio
Pixio PX274 Prime User manual

Pixio
Pixio PX279 Prime User manual

Pixio
Pixio PXC277 User manual

Pixio
Pixio PX222 User manual

Pixio
Pixio PX5 HAYABUSA Series User manual

Pixio
Pixio PX7 PRIME User manual

Pixio
Pixio PXC243S User manual

Pixio
Pixio PX259 Prime S User manual

Pixio
Pixio PX247 User manual

Pixio
Pixio PXC243 User manual

Pixio
Pixio PXC325 User manual

Pixio
Pixio PX278 User manual

Pixio
Pixio PXC273 User manual

Pixio
Pixio PX277 Prime User manual

Pixio
Pixio PX275h User manual