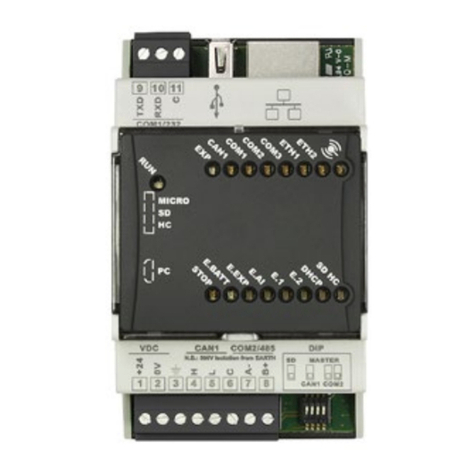
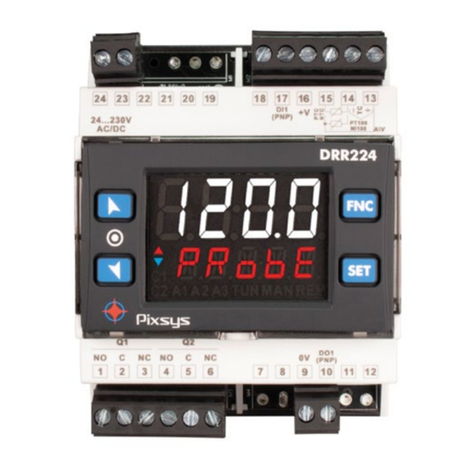
Pixsys DRR460 Series User manual

DRR460 CAN
Controller / Regolatore
User manual - Manuale uso


Table of contents
1 Safety guidelines.......................................................................................................................................................... 8
1.1 Organization of safety notices....................................................................................................................... 8
1.2 Safety Precautions............................................................................................................................................. 8
1.3 Precautions for safe use ................................................................................................................................... 9
1.4 Environmental policy / WEEE.......................................................................................................................... 9
2 Model identification.................................................................................................................................................. 10
3 Technical data............................................................................................................................................................. 10
3.1 Main features.................................................................................................................................................... 10
3.2 Hardware Features.......................................................................................................................................... 10
3.3 Software features ............................................................................................................................................ 10
4 Dimensions and Installation................................................................................................................................... 11
5 Electrical wirings ........................................................................................................................................................ 11
5.1 Wiring diagram................................................................................................................................................ 11
5.1.a Power Supply........................................................................................................................................ 11
5.1.b Analogue Input .................................................................................................................................... 12
5.1.c Examples of connection for Volt and mA inputs ......................................................................... 12
5.1.d Serial input ............................................................................................................................................ 13
5.1.e CT input.................................................................................................................................................. 13
5.1.f Digital outputs ..................................................................................................................................... 13
5.1.g Analogue output ................................................................................................................................. 13
6 Leds and key function............................................................................................................................................... 13
6.1 Meaning of status lights (LED)...................................................................................................................... 13
6.2 Key ....................................................................................................................................................................... 13
6.3 Dip switch.......................................................................................................................................................... 14
7 Controller functions .................................................................................................................................................. 14
7.1 Loading default values................................................................................................................................... 14
7.2 Automatic tuning ............................................................................................................................................ 14
7.3 Manual tuning ................................................................................................................................................. 14
7.4 AutoTuning Launch “Once”........................................................................................................................... 14
7.5 Synchronized tuning....................................................................................................................................... 15
7.6 Automatic/Manual regulation for % output control.............................................................................. 15
7.7 Heater Break Alarm on CT (Current Transformer) ................................................................................... 15
7.8 Dual Action Heating-Cooling....................................................................................................................... 16
7.9 Soft-Start function........................................................................................................................................... 17
7.10 Retransmission function on analogue output......................................................................................... 17
7.11 LATCH ON Function......................................................................................................................................... 17
7.12 Regulation control .......................................................................................................................................... 18
7.12.a 0 Time control....................................................................................................................................... 18
7.12.b 1 and 3 Burst fire control.................................................................................................................... 18
7.12.c 2 and 4 Advanced Burst fire control................................................................................................ 18
7.13 Expansion function......................................................................................................................................... 19
8 Serial communication .............................................................................................................................................. 19
9 Alarm Intervention Modes....................................................................................................................................... 19
9.a Absolute Alarm or Threshold Alarm active over (Index 0x3000 Sub-Index 56 = 1).............................. 19
9.b Absolute alarm or threshold alarm referred to command setpoint active over (Index 0x3000 Sub-In-
dex 56 = 6).............................................................................................................................................................. 19
9.c Band alarm (Index 0x3000 Sub-Index 56 = 3)............................................................................................... 19
9.d Upper deviation alarm (Index 0x3000 Sub-Index 56 = 4)..........................................................................20
9.e Lower deviation alarm (Index 0x3000 Sub-Index 56 = 5) ..........................................................................20
10 CANopen ...................................................................................................................................................................... 21
10.1 SET-UP as CANopen slave mode.................................................................................................................. 21
10.2 Operation as CANopen slave node............................................................................................................. 21
10.3 EDS Files............................................................................................................................................................. 21
11 CANopen in details....................................................................................................................................................22
11.1 Object Dictionary............................................................................................................................................22

11.1.1 CANopen communication model ...................................................................................................23
11.1.2 CANopen Pre-defined Connection Set ........................................................................................... 24
11.1.3 CANopen identifier distribution.......................................................................................................25
11.1.4 CANopen boot-up process ................................................................................................................25
11.1.5 Communication profile: start ...........................................................................................................26
11.2 Communication Profile Area ........................................................................................................................27
11.2.1 Device Type ...........................................................................................................................................27
11.2.2 Error Register.........................................................................................................................................28
11.2.3 Pre-defined Error Field........................................................................................................................28
11.2.4 COB-ID SYNC message .......................................................................................................................28
11.2.5 Communication Cycle Period ...........................................................................................................28
11.2.6 Manufacturer Device Name..............................................................................................................29
11.2.7 Manufacturer Hardware Version.....................................................................................................29
11.2.8 Manufacturer Software Version.......................................................................................................29
11.2.9 Node ID ..................................................................................................................................................29
11.2.10 Guard Time............................................................................................................................................29
11.2.11 Life Time Factor.................................................................................................................................... 29
11.2.12 Store Parameters .................................................................................................................................29
11.2.13 Restore Default Parameters ..............................................................................................................29
11.2.14 COB-ID Emergency Object ................................................................................................................30
11.2.15 Inhibit Time Emergency Object........................................................................................................30
11.2.16 Producer Heartbeat Time ..................................................................................................................30
11.2.17 Identity Object......................................................................................................................................30
11.2.18 Error Behaviour ....................................................................................................................................30
11.2.19 Receive PDO Communication Parameter...................................................................................... 31
11.2.20 Receive PDO Mapping Parameter................................................................................................... 32
11.2.21 Transmit PDO Communication Parameter ...................................................................................32
11.2.22 Transmit PDO Mapping ..................................................................................................................... 33
11.3 Manufacturer Specific Parameter Area......................................................................................................34
11.3.1 Device specification ............................................................................................................................34
11.3.3 Command setpoint.............................................................................................................................46
11.3.4 Alarm 1 setpoint...................................................................................................................................46
11.3.5 Alarm 2 setpoint...................................................................................................................................46
11.3.6 Start / Stop Command........................................................................................................................46
11.3.7 Heating output percentage ..............................................................................................................46
11.3.8 Cold output percentage.....................................................................................................................46
11.3.9 Cold junction temperature................................................................................................................46
11.3.10 Error Flags..............................................................................................................................................46
11.3.11 Real command setpoint..................................................................................................................... 47
11.3.12 Digital outputs status......................................................................................................................... 47
11.3.13 Command output reset...................................................................................................................... 47
11.3.14 Alarms reset .......................................................................................................................................... 47
11.3.15 Remote Alarm 1 ................................................................................................................................... 47
11.3.16 Remote Alarm 2 ................................................................................................................................... 47
11.3.17 Autotuning status................................................................................................................................ 47
11.3.18 Automatic/Manual command.........................................................................................................48
11.4 Standard Device Profile Area ........................................................................................................................48
11.4.1 Digital Output ......................................................................................................................................48
11.4.2 Error Mode Output 8bit......................................................................................................................48
11.4.3 Error Value Output 8bit ......................................................................................................................49
11.4.4 Analogue Input 16bit..........................................................................................................................49
11.4.5 Analogue Output 16bit ......................................................................................................................49
11.4.6 Analogue Input Interrupt Trigger Selection ..................................................................................49
11.4.7 Analogue Input Global Interrupt Enable .......................................................................................50
11.4.8 Analogue Input Interrupt Upper Limit Integer .............................................................................50
11.4.9 Analogue Input Interrupt Lower Limit Integer .............................................................................50
11.4.10 Analogue Input Interrupt Delta Unsigned.....................................................................................50

11.4.11 Analogue Input Interrupt Negative Delta Unsigned................................................................... 51
11.4.12 Analogue Input Interrupt Positive Delta Unsigned ..................................................................... 51
11.4.13 Analogue Output Error Mode........................................................................................................... 51
11.4.14 Analogue Output Error Value Integer............................................................................................. 51
11.4.15 Error Behaviour .................................................................................................................................... 51
11.5 PDO Transmission............................................................................................................................................52
11.5.1 PDO Mapping....................................................................................................................................... 52
11.6 SYNC Monitoring .............................................................................................................................................52
11.7 Node Guarding.................................................................................................................................................52
11.8 Heartbeat Monitoring....................................................................................................................................53
11.9 Emergency.........................................................................................................................................................53
Indice degli argomenti
1 Norme di sicurezza ....................................................................................................................................................58
1.1 Organizzazione delle note di sicurezza .....................................................................................................58
1.2 Note di sicurezza..............................................................................................................................................58
1.3 Precauzioni per l’uso sicuro...........................................................................................................................59
1.4 Tutela ambientale e smaltimento dei rifiuti / Direttiva WEEE............................................................... 59
2 Identificazione del modello.....................................................................................................................................60
3 Dati tecnici...................................................................................................................................................................60
3.1 Caratteristiche generali..................................................................................................................................60
3.2 Caratteristiche hardware...............................................................................................................................60
3.3 Caratteristiche software ................................................................................................................................60
4 Dimensioni ed installazione.................................................................................................................................... 61
5 Collegamenti elettrici................................................................................................................................................ 61
5.1 Schema di collegamento............................................................................................................................... 61
5.1.a Alimentazione...................................................................................................................................... 61
5.1.b Ingresso analogico..............................................................................................................................62
5.1.c Esempi di collegamento per ingressi Volt e mA............................................................................62
5.1.d Ingresso seriale.....................................................................................................................................63
5.1.e Ingresso per trasformatore amperometrico .................................................................................63
5.1.f Uscite digitali ........................................................................................................................................63
5.1.g Uscita analogica ..................................................................................................................................63
6 Funzione dei led e del tasto .....................................................................................................................................63
6.1 Significato delle spie di stato (led) ...............................................................................................................63
6.2 Tasto....................................................................................................................................................................64
6.3 Dip switch..........................................................................................................................................................64
7 Funzioni del regolatore.............................................................................................................................................64
7.1 Caricamento valori di default.......................................................................................................................64
7.2 Tuning “Automatico” ......................................................................................................................................64
7.3 Lancio dell’AutoTuning “Manuale” .............................................................................................................65
7.4 Lancio dell’AutoTuning “Once” ....................................................................................................................65
7.5 Tuning “sincronizzato”................................................................................................................................... 65
7.6 Reg. automatico / manuale per controllo % uscita ................................................................................65
7.7 Heater Break Alarm su CT (Trasformatore Amperometrico).................................................................66
7.8 Funzionamento in doppia azione (caldo-freddo)...................................................................................66
7.9 Funzione Soft-Start ......................................................................................................................................... 67
7.10 Funzione ritrasmissione su uscita analogica............................................................................................68
7.11 Funzione LATCH ON........................................................................................................................................68
7.12 Controllo di regolazione ................................................................................................................................69
7.12.a 0 Controllo a tempo ............................................................................................................................69
7.12.b 1 e 3 Burst fire control ......................................................................................................................... 69
7.12.c 2 e 4 Advanced Burst fire control......................................................................................................69
7.13 Funzione espansione......................................................................................................................................69
8 Comunicazione Seriale.............................................................................................................................................70
9 Modi d’intervento allarme.......................................................................................................................................70

9.a Allarme assoluto o allarme di soglia attivo sopra (Index 0x3000 Sub-Index 56 = 1) ..........................70
9.b Allarme assoluto o allarme di soglia riferito al setpoint di comando attivo sopra (Index 0x3000
Sub-Index 56 = 6)................................................................................................................................................. 70
9.c Allarme di Banda (Index 0x3000 Sub-Index 56 = 3) ....................................................................................70
9.d Allarme di deviazione superiore (Index 0x3000 Sub-Index 56 = 4) .........................................................71
9.e Allarme di deviazione inferiore (Index 0x3000 Sub-Index 56 = 5) ........................................................... 71
10 CANopen ...................................................................................................................................................................... 71
10.1 SET-UP nodo CANopen slave........................................................................................................................72
10.2 Funzionamento nodo CANopen slave .......................................................................................................72
10.3 EDS Files.............................................................................................................................................................72
11 CANopen nel dettaglio.............................................................................................................................................72
11.1 Object Dictionary............................................................................................................................................73
11.1.1 CANopen communication model ................................................................................................... 74
11.1.2 CANopen Pre-defined Connection Set ........................................................................................... 75
11.1.3 CANopen identifier distribution....................................................................................................... 76
11.1.4 Procedura di boot-up CANopen ...................................................................................................... 76
11.1.5 Communication profile: inizializzazione.......................................................................................77
11.2 Communication Profile Area ........................................................................................................................78
11.2.1 Device Type ...........................................................................................................................................78
11.2.2 Error Register.........................................................................................................................................79
11.2.3 Pre-defined Error Field........................................................................................................................79
11.2.4 COB-ID SYNC message .......................................................................................................................79
11.2.5 Communication Cycle Period ...........................................................................................................79
11.2.6 Manufacturer Device Name..............................................................................................................79
11.2.7 Manufacturer Hardware Version.....................................................................................................80
11.2.8 Manufacturer Software Version.......................................................................................................80
11.2.9 Node ID ..................................................................................................................................................80
11.2.10 Guard Time............................................................................................................................................80
11.2.11 Life Time Factor....................................................................................................................................80
11.2.12 Store Parameters .................................................................................................................................80
11.2.13 Restore Default Parameters ..............................................................................................................80
11.2.14 COB-ID Emergency Object ................................................................................................................ 81
11.2.15 Inhibit Time Emergency Object........................................................................................................ 81
11.2.16 Producer Heartbeat Time .................................................................................................................. 81
11.2.17 Identity Object...................................................................................................................................... 81
11.2.18 Error Behaviour .................................................................................................................................... 81
11.2.19 Receive PDO Communication Parameter......................................................................................82
11.2.20 Receive PDO Mapping Parameter...................................................................................................83
11.2.21 Transmit PDO Communication Parameter ...................................................................................83
11.2.22 Transmit PDO Mapping .....................................................................................................................85
11.3 Manufacturer Specific Parameter Area......................................................................................................85
11.3.1 Device specification ............................................................................................................................86
11.3.3 Setpoint di comando ..........................................................................................................................98
11.3.4 Setpoint allarme 1...............................................................................................................................98
11.3.5 Setpoint allarme 2...............................................................................................................................98
11.3.6 Comando Start / Stop.........................................................................................................................98
11.3.7 Percentuale uscita caldo....................................................................................................................98
11.3.8 Percentuale uscita freddo..................................................................................................................98
11.3.9 Temperatura giunto freddo ..............................................................................................................98
11.3.10 Flags errori.............................................................................................................................................98
11.3.11 Setpoint di comando reale................................................................................................................99
11.3.12 Stato uscite digitali..............................................................................................................................99
11.3.13 Riarmo uscita di comando ................................................................................................................99
11.3.14 Riarmo allarmi .....................................................................................................................................99
11.3.15 Allarme 1 remoto.................................................................................................................................99
11.3.16 Allarme 2 remoto.................................................................................................................................99
11.3.17 Stato autotuning ...............................................................................................................................100
11.3.18 Comando automatico / manuale .................................................................................................100
11.4 Standard Device Profile Area ......................................................................................................................100
11.4.1 Digital Output .................................................................................................................................... 101
11.4.2 Error Mode Output 8bit.................................................................................................................... 101
11.4.3 Error Value Output 8bit ....................................................................................................................101
11.4.4 Analogue Input 16bit........................................................................................................................101
11.4.5 Analogue Output 16bit ....................................................................................................................102
11.4.6 Analogue Input Interrupt Trigger Selection ................................................................................102
11.4.7 Analogue Input Global Interrupt Enable .....................................................................................102
11.4.8 Analogue Input Interrupt Upper Limit Integer ...........................................................................103
11.4.9 Analogue Input Interrupt Lower Limit Integer ...........................................................................103
11.4.10 Analogue Input Interrupt Delta Unsigned...................................................................................103
11.4.11 Analogue Input Interrupt Negative Delta Unsigned.................................................................103
11.4.12 Analogue Input Interrupt Positive Delta Unsigned ...................................................................104
11.4.13 Analogue Output Error Mode.........................................................................................................104
11.4.14 Analogue Output Error Value Integer...........................................................................................104
11.4.15 Error Behaviour ..................................................................................................................................104
11.5 Trasmissione PDO..........................................................................................................................................104
11.5.1 PDO Mapping.....................................................................................................................................105
11.6 Monitoraggio tramite SYNC .......................................................................................................................105
11.7 Node Guarding...............................................................................................................................................105
11.8 Monitoraggio tramite Heartbeat ..............................................................................................................105
11.9 Emergency.......................................................................................................................................................106

8 - DRR460 CAN - User manual
Introduction
Thanks for choosing a Pixsys controller.
The DRR460 series integrates in a single device the main elements of the control loop: reading of
temperature sensor, control output by SSR module, reading and control of the current on the load by
means of integrated current CT. Serial communication RS485 and ModbusRTU or CA№pen protocol
allow the connection to PC/HMI Panels for supervisory functions/remote control.
This device is provided with alarms functions, management of double action installation and possibility
to be used as expansion controlled by PLC.
1 Safety guidelines
Read carefully the safety guidelines and programming instructions contained in this manual before
connecting/using the device.
Disconnect power supply before proceeding to hardware settings or electrical wirings to avoid risk of
electric shock, fire, malfunction.
Do not install/operate the device in environments with flammable/explosive gases.
This device has been designed and conceived for industrial environments and applications that rely
on proper safety conditions in accordance with national and international regulations on labour
and personal safety. Any application that might lead to serious physical dama ge/ life risk or involve
medical life support devices should be avoided.
Device is not conceived for applications related to nuclear power plants, weapon systems, flight
control, mass transportation systems.
Only qualified personnel should be allowed to use device and/or service it and only in accordance to
technical data listed in this manual.
Do not dismantle/modify/repair any internal component.
Device must be installed and can operate only within the allowed environmental conditions.
Overheating may lead to risk of fire and can shorten the lifecycle of electronic components.
1.1 Organization of safety notices
Safety notices in this manual are organized as follows:
Safety notice Description
Danger! Disregarding these safety guidelines and notices can be life-threatening.
Warning! Disregarding these safety guidelines and notices can result in severe injury or
substantial damage to property.
Information! This information is important for preventing errors.
1.2 Safety Precautions
Danger!
CAUTION - Risk of Fire and Electric Shock
This product is UL listed as Open Type Process Control Equipment. It must be
mounted in an enclosure that does not allow fire to escape externally.
Danger!
If the output relays are used past their life expectancy, contact fusing or burning may
occasionally occur.
Always consider the application conditions and use the output relays within their
rated load and electrical life expectancy. The life expectancy of output relays varies
considerably with the output load and switching conditions.
Warning!
Devices shall be supplied with limited energy according to UL 61010-1 3rd Ed, section
9.4 or LPS in conformance with UL 60950-1 or SELV in conformance with UL 60950-1
or Class 2 in compliance with UL 1310 or UL 1585.
Warning! Loose screws may occasionally result in fire.
For screw terminals, tighten screws to tightening torque of 0.5 Nm
Table of contents

User manual - DRR460 CAN - 9
Warning!
A malfunction in the Digital Controller may occasionally make control operations
impossible or prevent alarm outputs, resulting in property damage. To maintain
safety in the event of malfunction of the Digital Controller, take appropriate safety
measures, such as installing a monitoring device on a separate line.
1.3 Precautions for safe use
Be sure to observe the following precautions to prevent operation failure, malfunction, or adverse
affects on the performance and functions of the product. №t doing so may occasionally result in
unexpected events. Do not handle the Digital Controller in ways that exceed the ratings.
• The product is designed for indoor use only. Do not use or store the product outdoors or in any of
the following places.
- Places directly subject to heat radiated from heating equipment.
- Places subject to splashing liquid or oil atmosphere.
- Places subject to direct sunlight.
- Places subject to dust or corrosive gas (in particular, sulfide gas and ammonia gas).
- Places subject to intense temperature change.
- Places subject to icing and condensation.
- Places subject to vibration and large shocks.
• Installing two or more controllers in close proximity might lead to increased internal temperature
and this might shorten the life cycle of electronic components. It is strongly recommended to
install cooling fans or other air-conditioning devices inside the control cabinet.
• Always check the terminal names and polarity and be sure to wire properly. Do not wire the
terminals that are not used.
• To avoid inductive noise, keep the controller wiring away from power cables that carry high voltages
or large currents. Also, do not wire power lines together with or parallel to Digital Controller
wiring. Using shielded cables and using separate conduits or ducts is recommended. Attach a
surge suppressor or noise filter to peripheral devices that generate noise (in particular motors,
transformers, solenoids, magnetic coils or other equipment that have an inductance component).
When a noise filter is used at the power supply, first check the voltage or current, and attach the
noise filter as close as possible to the Digital Controller. Allow as much space as possible between
the Digital Controller and devices that generate powerful high frequencies (high-frequency
welders, high-frequency sewing machines, etc.) or surge.
• A switch or circuit breaker must be provided close to device. The switch or circuit breaker must be
within easy reach of the operator, and must be marked as a disconnecting means for the controller.
• The device must be protected by a fuse 1 A (cl. 9.6.2).
• Wipe off any dirt from the Digital Controller with a soft dry cloth. Never use thinners, benzine,
alcohol, or any cleaners that contain these or other organic solvents. Deformation or discoloration
may occur.
• The number of non-volatile memory write operations is limited. Therefore, use EEprom write mode
when frequently overwriting data, e.g.: through communications.
1.4 Environmental policy / WEEE
Do not dispose electric tools together with household waste material.
According to European Directive 2012/19/EU on waste electrical and electronic equipment and its
implementation in accordance with national law, electric tools that have reached the end of their life
must be collected separately and returned to an environmentally compatible recycling facility.

10 - DRR460 CAN - User manual
2 Model identification
DRR460-12A-T128 Power supply 24Vdc ±15% + 1 analogue input + 2 logic output 24Vdc/50mA
+ 1 output 0/4...20mA + RS485 +C.T.
DRR460-12A-CAN Power supply 24Vdc ±15% + 1 analogue input + 2 logic output 24Vdc/50mA
+ 1 output 0/4...20mA + CA№pen +C.T.
3 Technical data
3.1 Main features
Operating
temperature 0-45°C, humidity 35..95uR%
Contenitore DIN43880, 18 x 90 x 64 mm
Material Box: PC UL94V0 self-extinguishing; front panel: PC UL94V0 self-extinguishing
Protezione IP20 (box and terminal blocks)
Peso Approx. 30 g
3.2 Hardware Features
Power supply 24 VDC ±15% Consumption: 3 VA
Analogue input
1: AN1 Configurable via software.
Input: Thermocouple type K, S, R, J,
T, E, N, B. Automatic compensation of
cold junction from 0..50°C.
Thermoresistance: PT100, PT500,
PT1000, Ni100, PTC1K, NTC10K (β
3435K).
Input V/I: 0-10 V, 0-20 or 4-20 mA, 0-60
mV.
Pot. input: Configurable 1..150kΩ,
1: C.T.: 50 mAAC 50/60 Hz
Tolerance (25 °C)
+/-0.3% ±1 digit (su F.s.) for
thermocouple, thermoresistance and
V / mA.
Cold junction accuracy 0.1 °C/°C
Impedence:
0-10 V: Ri>110 kΩ
0-20 mA: Ri<50 Ω
4-20 mA: Ri<50 Ω
0-60 mV: Ri>500 kΩ
Logic output
2SSR.
Configurable as command or alarm
output
+24VDC ±15%/ 50mA
Analogue output
10/4..20 mA.
Configurable as command output,
alarm output or retransmission
0..20 mA:
42500 points, ±0.3% on F.S.
4..20 mA
34000 points, ±0.3% on F.S.
3.3 Software features
Regulation
algorithms
ON-OFF with hysteresis.
P, PI, PID, PD proportional time.
Proportional band 0..999°C or °F
Integral time 0,0..999,9 s (0 excludes integral function)
Derivative time 0,0..999,9 s (0 excludes derivative function)
Controller functions Manual or automatic tuning, configurable alarm, Start/Stop.

User manual - DRR460 CAN - 11
4 Dimensions and Installation
RUN
OUT1
OUT2
1 2 3 4
5 6 7 8
9 10 11 12
13 14 15 16
RUN
OUT1
OUT2
1 2 3 4
5 6 7 8
9 10 11 12
13 14 15 16
ON ON
8
7
6
5
4
3
2
1
4
3
2
1
ON ON
8
7
6
5
4
3
2
1
4
3
2
1
64 mm
Attacco a guida DIN EN50022
Din rail mounting guide EN50022
18 mm
90 mm
64 mm
Attacco a guida DIN EN50022
Din rail mounting guide EN50022
18 mm
90 mm
DRR460-12A-T128 DRR460-12A-CAN
5 Electrical wirings
This controller has been designed and manufactured in conformity to Low Voltage Directive 2014/35/
EU (LVD) and EMC Directive 2014/30/EU (EMC). For installation in industrial environments please
observe following safety guidelines:
• Separate control line from power wires.
• Avoid proximity of remote control switches, electromagnetic contactors, powerful engines and use
specific filters.
• Avoid proximity of power groups, especially those with phase control.
• It is strongly recommended to install adequate mains filter on power supply of the machine where
the controller is installed, particularly if supplied 230Vac. The controller is designed and conceived
to be incorporated into other machines, therefore CE marking on the controller does not exempt
the manufacturer of machines from safety and conformity requirements applying to the machine
itself.
• Wiring of pins use crimped tube terminals or flexible/rigid copper wire with diameter 0.25 to 1.5
mm2 (min. AWG28, max. AWG16, operating temperature: min. 70°C). Cable stripping lenght 7 to 8
mm.
5.1 Wiring diagram
DRR460-12A-CAN
5.1.a Power Supply
1
+
–
24 VDC
2
Power supply 24 VDC ±15%

12 - DRR460 CAN - User manual
5.1.b Analogue Input
+
–
AI TC
Shield / Schermo
13
14
For thermocouples K, S, R, J, T, E, N, B.
• Comply with polarity
• For possible extensions, use compensated cable and terminals suitable for
the thermocouples used(compensated)
• When shielded cable is used, it should be grounded at one side only
AI
Rosso
Red
Bianco
White
Rosso
Red
Shield / Schermo
PT/NI100
13
14
15
For thermoresistances PT100, Ni100.
• For the three-wire connection use wires with the same section
• For the two-wire connection short-circuit terminals 13 and 15
• When shielded cable is used, it should be grounded at one side only
RED
ROSSO
RED
ROSSO
WHITE
BIANCO 14
13
15
AI
Shield / Schermo
PTC/NTC
14
15
For thermoresistances NTC, PTC, PT500, PT1000 and linear potentiometers
When shielded cable is used, it should be grounded at one side only to avoid
ground loop currents
+
–
AI V
mA
Shield / Schermo
13
14
For linear signals in Volt and mA
Comply with polarity
When shielded cable is used, it should be grounded at one side only to avoid
ground loop currents
5.1.c Examples of connection for Volt and mA inputs
PRESSURE TRANSMITTER /
SENSORE DI PRESSIONE
B
C
A
4...20mA
2
14
13
1
P :0...100mbar
Pmax :3bar
T :0..70°C
OUT : 4...20mA
IN :9...33V DC
For linear signals 0/4..20 mA with three-wires sensors.
Comply with polarity:
A= Sensor output
B= Sensor ground
C= Sensor supply (24VDC)
Short circuit pins 2 and 14.
External supply /
Alimentazione esterna
P :0...100mbar
Pmax :3bar
T :0..70°C
OUT : 4...20mA
IN :9...33V DC
PRESSURE TRANSMITTER /
SENSORE DI PRESSIONE
A
B
4...20mA
13
14
For linear signals 0/4..20 mA with external power
supply for sensor.
Comply with polarity:
A= Sensor output
B= Sensor ground
P :0...100mbar
Pmax :3bar
T :0..70°C
OUT : 4...20mA
IN :9...33V DC
A
C
PRESSURE TRANSMITTER /
SENSORE DI PRESSIONE
4...20mA
2
14
13
1
For linear signals 0/4..20 mA with two-wires sensors.
Comply with polarity:
A= Sensor output
C= Sensor supply (24VDC)
Short circuit pins 2 and 14.

User manual - DRR460 CAN - 13
5.1.d Serial input
CANL
TERM
120Ω
CANH
CAN
Shield / Schermo
10
9
11
Communication CA№pen Slave galvanically insulated from the sensor. When
shielded cable is used, it should be grounded at the Master side only.
Short circuit pins 9 and 10 to enter on the bus a 120Ω termination resistance.
5.1.e CT input
12
CT
16
Input for CT 50mA.
Sampling time 100 µs.
Current measure true RMS for Heater Break Alarm and overcurrent alarm
functions.
5.1.f Digital outputs
5
+
–
Q1
24VDC / 50mA
6
7
+
–
Q2
24VDC / 50mA
8
Digital output 24VDC ±15%/ 50mA max.
5.1.g Analogue output
3
+
–
AO1
0/4..20mA
4
Linear output in mA (galvanically insulated from the sensor) configurable as
command (Index 0x3000 Sub-Index 16) or retransmission of process-setpoint
(Index 0x3000 Sub-Index 100)
6 Leds and key function
6.1 Meaning of status lights (LED)
RUN • See paragraph no. 10
OUT1
• №rmally it indicates the status of output OUT1.
• During test (pressing key), if the command output is OUT1, blinks with
frequency 50ms.
• At the end of current acquisition by the CT, blinks with frequency 0.5s if
the operation has been done successfully,
• In case of error, it blinks in alternation with the led OUT 2 (ex. broken
sensor).
OUT2
• №rmally indicates the status of output OUT2.
• During test (pressing key), if the command output is OUT2, blinks with
frequency 50ms.
• At the end of current acquisition by the CT, blinks with frequency 0.5s if
the operation has been done successfully
• In case of error, it blinks in alternation with the led OUT 1 (ex. broken
sensor).
6.2 Key
• If pressed it enables the command output: press for more than 3 seconds
to manage the threshold current reading for the Heater Break Alarm
control.
• If pressed during the modbus address assignment function, it stores the
value assigned by the master (only if the dip1 is all in OFF).

14 - DRR460 CAN - User manual
6.3 Dip switch
1
ON
2
3
4
5
6
7
8
DIP 1 – Slave address:
• If contacts 1..8 are in OFF position, the slave address for the CA№pen
device is selected on Index 0x3000 Sub-Index 111.
• Determines the CA№pen slave address in binary code, as shown in the
following example:
0000001=1; 0000010=2; 0000011=3; 0000100=4; 0000101=5; 0000110=6;
00 0 0111=7; 1111010=122; 1111011=123; 111110 0 =124; 1111101=125;
1111110 =12 6; 1111111=127.
The leftmost digit of the binary code corresponds to the DIP contact 7, while
the rightmost digit corresponds to the DIP contact 1. N.B.: DIP CONTACT 8
MUST BE KEPT OFF
1
ON
2
3
4
DIP 2 - Baud rate and loading of factory values
• If contacts 1..3 are in OFF position, the baud rate for the CA№pen device is
selected on Index 0x3000 Sub-Index 112.
• If contact 4 is in ON position, the parameters and all eeprom data are
loaded with default values.
• Determines the CA№pen baud rate, using the following values:
001=50kBit/s; 010=62.5kBit/s; 011=100kBit/s; 100=125kBit/s; 101=250kBit/s;
110 = 50 0 kB it /s ; 111=1MB it /s .
The leftmost digit corresponds to the DIP contact 3, while de rightmost
digit corresponds to the DIP contact 1.
7 Controller functions
7.1 Loading default values
This procedure allows to restore default settings as pre-selected at the factory.
There are two reset modes:
• Close contact 4 of the dip switch 2 and reopen it at restart (fast blink of all leds).
• Write “load“ on Index 0x1011 Sub-Index 1.
After the restore, device restarts.
7.2 Automatic tuning
Select 1 on Index 0x3000 Sub-Index 31. Automatic tuning is always active and analyses constantly
the difference setpoint-process. If this difference is greater than the value selected on Index 0x3000
Sub-Index 47 (Max Gap Tune), the DRR460 decides autonomously when to modify PID parameters.
7.3 Manual tuning
Select 2 on Index 0x3000 Sub-Index 31. The manual procedure allows the user a greater flexibility on
deciding when to update PID algorithm parameters.
This procedure is activated writing 1 on Index 0x400E. The reference threshold to calculate the new
PID parameters is given by the result of the following operation:
Tune threshold = Setpoint (Index 0x4000) – Par. 32 s.d.tu. (Index 0x3000 Sub-Index 32)
Ex.: if setpoint is 100.0°C and Par. 32 s.d.tu. is 20.0°C, the threshold to calculate PID parameters is
(100.0–20.0) = 80.0°C.
N.B.: for greater accuracy in the calculation of PID parameters it is recommended to launch the manual
tuning when the process is far from setpoint (at least 30%).
7.4 AutoTuning Launch “Once”
Set 3 on Index 0x3000, Sub-Index 31. Autotuning procedure is executed only once at next DRR460
restart. If the procedure doesn’t work, will be executed at next restart.

User manual - DRR460 CAN - 15
7.5 Synchronized tuning
Select 4 on Index 0x3000, Sub-Index 31. This procedure has been conceived to calculate correct PID
values on multi-zone systems, where each temperature is influenced by the adjacent zones.
Writing on Index 0x400E, the device works as follows:
Value Index 0x400E Action
0Tune off.
1 Command output OFF
2 Command output ON
3Tune active
4Tune completed: command output OFF (read only)
5Tune not available: softstart function enabled (only reading)
The operation of this Tuning mode is the following: the master switches-off or turns-on all zones (value
1 or 2 on Index 0x400E) for a time long enough to create inertia on the system.
At this point the autotuning is launched (value 3 on Index 0x400E). The controller calculates the new
PID values. When the procedure ends, it switches-off the control output and sets the value 4 on Index
0x400E. The master, which should always read the Index 0x400E, checks the various zones and when
all of them have reached the value 4 it will bring to 0 the value of Index 0x400E.
The various devices will regulate the temperature basing on the new values.
N.B. The master must read the Index 0x400E at least every 10 seconds or the controller will automatically
exit the autotuning procedure.
7.6 Automatic/Manual regulation for % output control
This function allows to select automatic functioning or manual command of the output percentage.
With parameter 25 (au.ma. Index 0x3000 Sub-Index 25), you can select two methods.
1. The first selection (value 1 on Index 0x3000 Sub-Index 25) allows to modify, through the Index
0x400F, the functioning mode: after writing 1 it is possible to change the output percentage on
Index 0x4004 (range 0-10000).
To return to automatic mode, write 0 on Index 0x400F.
2. The second selection (value 2 on Index 0x3000 Sub-Index 25) enables the same functioning, but
with two important variants:
• If there is a temporary lack of voltage or after switch-off, the manual functioning will be
maintained as well as the previously set output percentage value.
• If the sensor breaks during automatic functioning, the controller moves to manual mode
while maintaining the output percentage command unchanged as generated by the P.I.D.
immediately before breakage.
7.7 Heater Break Alarm on CT (Current Transformer)
This function allows to measure load current to manage an alarm during a malfunctioning with power
in short circuit, always open or partial break of the charge.
To enable this function set 1 (50 Hz) or 2 (60 Hz) on paramater 90 c. t. (Index 0x3000 Sub-Index 90). Set
the value of the connected transfomer on parameter 91 c. t. v . (Index 0x3000 Sub-Index 91).
• Select on H,b.a.t. (Index 0x3000 Sub-Index 92) the Heater Break Alarm intervention threshold in
Ampere. Otherwise it is possible to select this value in automatic mode pressing for more than 3
seconds.
• Select on H,b.a.d.(Index 0x3000 Sub-Index 94) the delay time in seconds for the Heater Break Alarm
intervention.
• It is possible to associate the alarm to the output OUT2, selecting 10 on par. a L. 1. or par. aL. 2. (Index
0x3000 Sub-Index 56 or sub-Index 68).
It is possible also to enable an overcurrent control, setting on parameter ocu .t. (Index 0x3000 Sub-Index
93) the intervention threshold in Ampere.

16 - DRR460 CAN - User manual
7.8 Dual Action Heating-Cooling
DRR460 is suitable also for systems requiring a combined heating-cooling action.The command
output has to be configured as PID for Heating (par. p. b. - Index 0x3000 Sub-Index 33 -greater than 0),
while the alarm 1 and 2 has to be configured as Cooling (value 9 on par. AL. 1 - Index 0x3000 Sub-Index
56 o par. a L. 2 - Index 0x3000 Sub-Index 68). The command output must be connected to the actuator
responsible for heating, while the alarm will control cooling action.
Parameters to be configured for the heating PID are:
p. b . (Index 0x3000 Sub-Index 33): Heating proportional band
t.i . (Index 0x3000 Sub-Index 34): Integral time of heating and cooling
t.d . (Index 0x3000 Sub-Index 35): Derivative time of heating and cooling
t. c. (Index 0x3000 Sub-Index 40): Heating time cycle
Parameters to be configured for the cooling PID are:
AL. 1 (Index 0x3000 Sub-Index 56) or AL. 2 (Index 0x3000 Sub-Index 68) = co oL (value 9) Alarm selection
(Cooling)
p. b .M. (Index 0x3000 Sub-Index 42): Proportional band multiplier
ou.d.b. (Index 0x3000 Sub-Index 43): Overlapping / Dead band
co.c.t. (Index 0x3000 Sub-Index 44): Cooling time cycle
Par. p. b .M. (that ranges from 1.00 to 5.00) determines the proportional band of cooling action basing
on the formula:
Proportional band for cooling action = p. b . * p. b .M.
This gives a proportional band for cooling which will be the same as heating band if p. b .M. = 1.00, or 5
times greater if p. b .M. = 5.00.
Integral and derivative time are the same for both actions.
The par. ou.d.b.determines the percentage overlapping between the two actions. For systems in which
the heating output and cooling output must never be simultaneously active a dead band (ou.d.b. ≤ 0)
must be configured, vice versa you can configure an overlapping (ou.d.b. > 0).
The following figure shows an example of dual action P.I.D. (heating-cooling) with t.i . = 0 and t. d. = 0.
ACTIVE
ACTIVE
SPV
PV
x = COOL
x = COOL
x = COOL
< 0
= 0
> 0
(HEAT)
(HEAT)
(HEAT)
COMMAND OUTPUT (HEAT)
ALARM OUTPUT (COOL)
COMMAND OUTPUT (HEAT)
ALARM OUTPUT (COOL)
COMMAND OUTPUT (HEAT)
ALARM OUTPUT (COOL)
SPV
PV
ACTIVE
ACTIVE
SPV
PV
ACTIVE
ACTIVE
ACTIVE
ACTIVE
SPV
PV
x = COOL
x = COOL
x = COOL
< 0
= 0
> 0
(HEAT)
(HEAT)
(HEAT)
COMMAND OUTPUT (HEAT)
ALARM OUTPUT (COOL)
COMMAND OUTPUT (HEAT)
ALARM OUTPUT (COOL)
COMMAND OUTPUT (HEAT)
ALARM OUTPUT (COOL)
SPV
PV
ACTIVE
ACTIVE
SPV
PV
ACTIVE
ACTIVE
ACTIVE
ACTIVE
SPV
PV
x = COOL
x = COOL
x = COOL
< 0
= 0
> 0
(HEAT)
(HEAT)
(HEAT)
COMMAND OUTPUT (HEAT)
ALARM OUTPUT (COOL)
COMMAND OUTPUT (HEAT)
ALARM OUTPUT (COOL)
COMMAND OUTPUT (HEAT)
ALARM OUTPUT (COOL)
SPV
PV
ACTIVE
ACTIVE
SPV
PV
ACTIVE
ACTIVE
The par. co.c.t. has the same meaning as the heating time cycle t. c.
Par. c o o . F. (Cooling Fluid – Index 0x3000 Sub-Index 41) pre-selects the proportional band multiplier
p.b.m. and the cooling PID cycle time co.c.t. basing on the type of cooling fluid:

User manual - DRR460 CAN - 17
co o . f.
Cooling fluid type
p.b.m. co.c.t.
Ai r Air 1.00 10
oi L Oil 1.25 4
H2o Water 2.50 2
Once selected the parameter co o . f., parameters p.b.m., ou.d.b and co.c.t. can however be modified.
7.9 Soft-Start function
DRR460 is provided with two types of softstart selectables on parameter 80 SS. tY.(
“Softstart Type”
Index
0x3000 Sub-Index 80).
1 First selection (value 1 of Index 0x3000 Sub-Index 80) enables gradient softstart. At starting the
controller reaches setpoint basing on the rising gradient set on parameter SS.G r. (
“Softstart Gradient”
on Index 0x3000 Sub-Index 81) in Unit/hour (ex. °C/h). If parameter S S . ti . (
“Softstart Time”
on Index
0x3000 Sub-Index 84) is different to 0, at starting when the time selected on parameter 84 is
elapsed, the controller stops to follow the gradient and reaches setpoint with the maximum power.
2 Second selection (value 2 of Index 0x3000 Sub-Index 80) enables output percentual softstart. On
par. SS. tH. (
“Softstart Threshold”
on Index 0x3000 Sub-Index 83) it is possible to set the threshold
under which starts the softstart. On par. SS.PE. (
“Softstart Percentage”
on Index 0x3000 Sub-Index 82)
an output percentage is selectable (0 to 100), which controller keeps until the process exceeds the
threshold set on parameter SS. tH. or until the time in minutes set on parameter S S . ti . (
“Softstart Time”
of Index 0x3000 Sub-Index 84) expires.
7.10 Retransmission function on analogue output
If not used as command, the anaolgue output can be used to retransmit process/ setpoint/ current
read by the C.T. input/ output percentage.
Select on parameter rEt r. (
“Retransmission”
on Index 0x3000 Sub-Index 100) the value to be
retransmitted. Select on parameter rE. tY. (
“Retransmission Type”
on Index 0x3000 Sub-Index 101) the
type of output. It is possible also to select on Index 0x3000 Sub-Index 102 and 103 the input value
rescale limites.
7.11 LATCH ON Function
For use with input p o t .1 (potentiometer 6 KΩ) and po t.2 (potentiometer 150 KΩ) and with linear input
(0..10 V, 0..60 mV, 0/4..20 mA), it is possible to associate start value of the scale (par. Lo.L.i. “Lower Linear
Input“ Index 0x3000 Sub-Index 3) to the minimum position of the sensor and value of the scale end
(par. u P. L.i . “Upper Linear Input“ Index 0x3000 Sub-Index 4) to the maximum position of the sensor
(select 1 on parameter Lt c h ”Latch On” Index 0x3000 Sub-Index 9).
It is also possible to fix the point in which the controller will display 0 (however keeping the scale range
between Lo.L.i. e u P. L.i .) using the
“virtual zero”
option by setting 2 or 3 in par. Lt c h .
Setting 2 virtual zero can be modified in each moment while setting 1, Latch-On function ends after
120 seconds.
Then refer to the following table for the calibration procedure:
Index Sub Index Display Do
0x4011 1Write 1 to enable Latch on. Write 0
to end procedure
Place the sensor on minimum operating
value (corresponding to Lo .L.i)
0x4011 2 Write 1 to fix value on minimum Place sensor on maximum operating
value (corresponding to u P. L.i .)
0x4011 3 Write 1 to fix value on maximum
To exit standard procedure write 0 on
Index 0x4011 Sub-Index 1 or wait 120
seconds. With
“virtual zero”
put the sensor
on zero point.
0x4011 4Write 1 to fix zero virtual value.Write
2 to reset zero virtual value.
To exit procedure write 0 on Index 0x4011
Sub-Index 1

18 - DRR460 CAN - User manual
7.12 Regulation control
DRR460 integrates different types of control for the regulation of the command output, selecting
parameter 52 o.cL.t. (
“Output Control Type”
index 0x3000, sub-index 52) as follows:
7.12 .a 0 Time control
For this type of control it is necessary to use a “zero-crossing” SSR.
Activation and deactivation of the output is related to the time selected on parameter 40 c. t. (
“Cycle
Time”
index 0x3000, sub-index 40). Ex. selecting a time of 10 s and supposing a 30% percentage, the
output will remain active for 3 s and inactive for 7 s.
7.12 .b 1 and 3 Burst fire control
For this type of control it is necessary to use a “zero-crossing” SSR.
The “Burst-fire” control (1 cycle) is a duty cycle mode which consists of supplying a series of complete
mains voltage cycles to the load.
t
Load voltage
TF
0
TM
TNF
t
TF
0
TM
TNF
t
TF
0
TM
TNF
50% power TF= TNF
25% power TNF = 3 TF
0
75% power TF= 3 TNF
At 50% power, the modulation time is 40ms:
• 1 firing cycle (20ms at 50Hz)
For a setpoint less than 50%:
• The firing time remains constant (1 cycle)
• The non-firing and modulation time increases
For a setpoint greater than 50%:
•
The non-firing time remains constant (1 cycle)
• The firing and modulation time increases.
7.12 .c 2 and 4 Advanced Burst fire control
For this type of control it is necessary to use a “zero-crossing” SSR.
In order to minimise power fluctuation during the modulation period, the
“advanced Burst fire”
SSR
output firing mode uses:
· A complete number of cycles for firing
· A complete number of half-cycles for non-firing
Load
voltage
t
TF
TM
TNF
t
TF
0
T
M
TNF
0
Standard Single-Cycle (1 cycle Burst-firing)
Advanced Single-cycle
Load
voltage
For a percentage less than 66%, SSR output firing takes place as in
the
“Burst fire”
mode. (parag. 7.12.b)
For a setpoint greater than 66% in
“Advanced Burst fire”
mode:
· The non-firing time is constant at one half-cycle
· Firing takes place over whole cycles.
In a ‘short-wave infrared’ application, ‘advanced Burst fire’ firing
mode reduces the brightness of the infrared elements and thus
minimises annoying visual flickering.
In a short-wave infrared application,
“advanced Burst fire”
firing mode reduces the brightness of the
infrared elements and thus minimises annoying visual flickering.

User manual - DRR460 CAN - 19
7.13 Expansion function
Selecting 1 on par. E.M o d . (
“Expansion Module”
Index 0x3000 Sub-Index 121) DRR460 works as a
expansion module. Controller functions (temperature control, alarms, softstart etc..) are disabled and
outputs management must be done by an external master (Es. PLC, HMI panel...).
It is possible to configure output status at starting and in case of error, programming parameters Index
0x3000 Sub-Index 122 - 131 (see par. 9).
8 Serial communication
DRR460-12A-CAN is equipped with an USB micro connector which, connected to the PC, allows the
communication with the Pixsys configuration program LabSoftView (available on the reserved area of
www.pixsys.net).
9 Alarm Intervention Modes
9.a Absolute Alarm or Threshold Alarm active over (Index 0x3000 Sub-Index 56 = 1)
Alarm Spv
Pv
O
On On
O
Hysteresis
parameter
> 0
Time
Alarm
output
Absolute alarm. Hysteresis value greater than “0” (Par. a .1 . H Y Index
0x3000 Sub-Index 58 > 0).
Alarm Spv
O
On On
O
Hysteresis
parameter
< 0
Time
Alarm
output
Absolute alarm. Hysteresis value less than “0” (Par. a .1 . H Y Index 0x3000
Sub-Index 58 < 0).
9.b Absolute alarm or threshold alarm referred to command setpoint active over (Index
0x3000 Sub-Index 56 = 6)
O
On
O
Time
Alarm Spv
Hysteresis
parameter
> 0
Alarm
output
Comand Spv
Absolute alarm referred to command setpoint. Hysteresis value
greater than “0” (Par. a .1 . H Y Index 0x3000 Sub-Index 58 > 0).
Command setpoint can be modified by CA№pen (Index 0x4000).
9.c Band alarm (Index 0x3000 Sub-Index 56 = 3)
Alarm Spv
O O
On On On
Hysteresis
parameter
> 0
Time
Alarm
output
Alarm Spv
Band alarm hysteresis value greater than “0” (Par. a .1 . H Y Index 0x3000
Sub-Index 58 > 0).

20 - DRR460 CAN - User manual
Pv
Alarm Spv
O O O
Hysteresis
parameter
< 0
Hysteresis
parameter
< 0
Time
Alarm
output
Alarm Spv
Comand Spv Band alarm hysteresis value less than “0” (Par. a .1 . H Y Index 0x3000
Sub-Index 58 < 0).
9.d Upper deviation alarm (Index 0x3000 Sub-Index 56 = 4)
Pv
Comand Spv
Alarm Spv
O O
On On
Hysteresis
parameter
> 0
Time
Alarm
output
Alarm Spv
Comand Spv
Upper deviation alarm value of alarm
setpoint greater than “0” and hysteresis
value greater than “0” (Par. a .1 . H Y Index 0x3000 Sub-Index 58 > 0).
With hysteresis value less than “0” (A .1 . H Y . < 0) the dotted line moves
under the alarm setpoint.
Comand Spv
Alarm Spv
O O
On On
Hysteresis
parameter
> 0
Time
Alarm
output
Comand Spv
Alarm Spv
Alarm Spv
Alarm Spv
Upper deviation alarm value of alarm
setpoint less than “0” and hysteresis
value greater than “0” (Par. a .1 . H Y Index 0x3000 Sub-Index 58 > 0).
With hysteresis value less than “0” (A .1 . H Y . < 0) the dotted line moves
under the alarm setpoint.
9.e Lower deviation alarm (Index 0x3000 Sub-Index 56 = 5)
Pv
Comand Spv
Alarm Spv
O O
On On
Hysteresis
parameter
> 0
Time
Alarm
output
Alarm Spv
Lower deviation alarm value of alarm
setpoint greater than “0” and hysteresis
value greater than “0” (Par. a .1 . H Y Index 0x3000 Sub-Index 58 > 0).
With hysteresis value less than “0” (A .1 . H Y . < 0) the dotted line moves
under the alarm setpoint.
Pv
Comand Spv
Alarm Spv
O O
On On
Hysteresis
parameter
> 0
Time
Alarm
output
Comand Spv
Comand Spv
Comand Spv
Comand Spv
Alarm Spv
Alarm Spv
Lower deviation alarm value of alarm
setpoint less than “0” and hysteresis
value greater than “0” (Par. a .1 . H Y Index 0x3000 Sub-Index 58 > 0).
With hysteresis value less than “0” (A .1 . H Y . < 0) the dotted line moves
under the alarm setpoint.
Other manuals for DRR460 Series
1
Table of contents
Languages:
Other Pixsys Controllers manuals

Pixsys
Pixsys ATR 243 User manual

Pixsys
Pixsys ATR 121 User manual

Pixsys
Pixsys ATR 121 User manual

Pixsys
Pixsys ATR 171 User manual

Pixsys
Pixsys ATR226 User manual

Pixsys
Pixsys DRR227 User manual

Pixsys
Pixsys DRR245-21-ABC-T User manual

Pixsys
Pixsys ATR 621 series User manual

Pixsys
Pixsys ATR 243 User manual

Pixsys
Pixsys DRR450 User manual

Pixsys
Pixsys ATR142-ABC User manual

Pixsys
Pixsys ATR 902 User manual

Pixsys
Pixsys DRR 245 Guide

Pixsys
Pixsys PL260 User manual

Pixsys
Pixsys ATR 121 User manual

Pixsys
Pixsys ATR 142 User manual

Pixsys
Pixsys ATR 902 User manual

Pixsys
Pixsys ATR227 Series User manual

Pixsys
Pixsys DRR 245 User manual

Pixsys
Pixsys ATR444 User manual