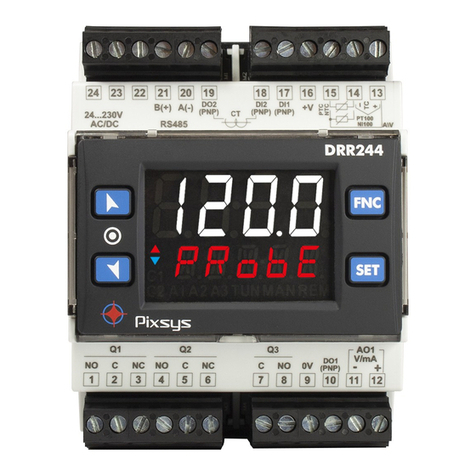
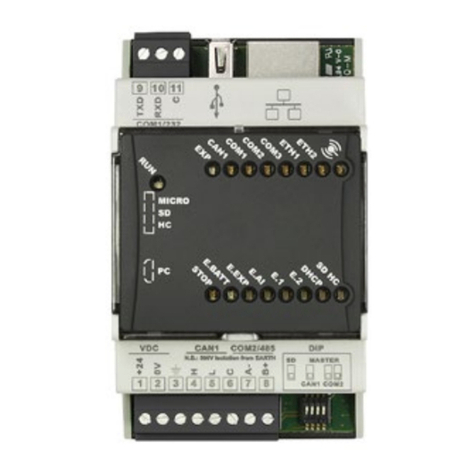
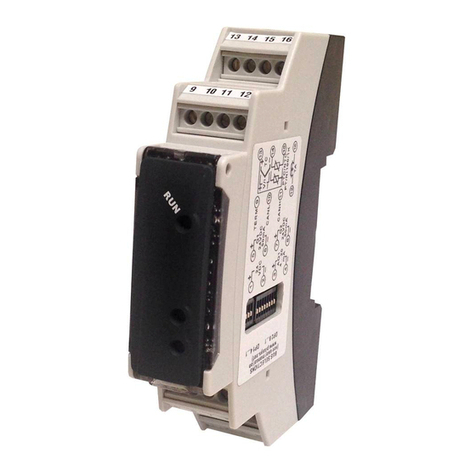
Pixsys DRR450 User manual

DRR450
Controller - Regolatore
User manual - Manuale installatore


Summary
1 Safety guide lines ................................................................................4
2 Model identication...........................................................................4
3 Technical data......................................................................................5
3.1 Main features..............................................................................5
3.2 Hardware features.....................................................................5
3.3 Software features ......................................................................5
4 Size, installation and wiring diagram ...........................................6
4.1 Electrical wirings .......................................................................7
5 Leds and key function ........................................................................8
5.1 Meaning of status lights (LED) ...............................................8
5.2 Key .................................................................................................9
5.3 Dip switch ....................................................................................9
6 Controller functions............................................................................9
6.1 Automatic tuning ......................................................................9
6.2 Manual tuning .........................................................................10
6.3 Synchronized tuning...............................................................10
6.4 Automatic/manual regulation for % output control..... 11
6.5 Loading default values ..........................................................12
6.6 Heater Break Alarm on TA (Current Transformer)...........12
6.7 Dual Action Heating-Cooling ..............................................12
7 Serial communication .....................................................................15
8 Table of conguration parameters ..............................................19
9 Alarm intervention modes..............................................................26
10 Table of Anomaly Signals................................................................29
11 Summary of conguration parameters......................................30

Sommario
1 Norme di sicurezza ...........................................................................32
2 Identicazione del modello............................................................32
3 Dati tecnici ..........................................................................................33
3.1 Caratteristiche generali .........................................................33
3.2 Caratteristiche hardware ......................................................33
3.3 Caratteristiche software........................................................33
4 Dimensioni, installazione e schema di collegamento ............34
4.1 Collegamenti elettrici............................................................35
5 Funzione dei led e del tasto ............................................................36
5.1 Signicato delle spie di stato (led).......................................36
5.2 Tasto ............................................................................................37
5.3 Dip switch ..................................................................................37
6 Funzioni del regolatore ...................................................................37
6.1 Tuning “Automatico”..............................................................37
6.2 Lancio dell’AutoTuning “Manuale”.....................................38
6.3 Tuning “sincronizzato”...........................................................38
6.4 Regolazione automatico / manuale
per controllo % uscita.............................................................39
6.5 Caricamento valori di default ..............................................40
6.6 Heater Break Alarm su TA
(Trasformatore Amperometrico).........................................40
6.7 Funzionamento in doppia azione (caldo-freddo)..........41
7 Comunicazione Seriale....................................................................43
8 Tabella parametri di congurazione...........................................47
9 Modi d’intervento allarme..............................................................55
10 Tabella segnalazioni anomalie.....................................................58
11 Summary of conguration parameters......................................59
User manual - DRR450 5
Introduction
Thanks for choosing a Pixsys controller.
The DRR450 series integrates in a single device the main
elements of the control loop: reading of temperature
sensor, control output by SSR module, reading and control
of the current on the load by means of integrated current
transformer. Serial communication RS485 and ModbusRTU
protocol allow the connection to PC/HMI Panels for
supervisory functions/remote control.
A second output is available for alarm or management of
cooling systems for double PID action.
Safety guide lines
Read carefully the safety guidelines and programming
instructions contained in this manual before using/
connecting the device.
Disconnect power supply before proceeding to hardware
settings or electrical wirings.
Only qualied personnel should be allowed to use the device
and/or service it and in accordance to technical data and
environmental conditions listed in this manual.
Do not dispose electric tools together with household waste
material. In observance European Directive 2002/96/EC on
waste electrical and electronic equipment and its implemen-
tation in accordance with national law, electric tools that have
reached the end of their life must be collected separately and
returned to an environmentally compatible recycling facility.
Model identication
DRR-A-T
Power supply Vdc ±% + logic output
Vdc/ma + logic output Vdc/ma
+ RS +current transformer

6 DRR450 - User manual
Technical data
. Main features
Operating
temperature -°C, humidity ..uR%
Sealing IP
Material PA ULV self-exstinguishing
Weight g
. Hardware features
Analogue
input
AN
Congurable via software
Input
Thermocouple type
K, J, T, E. Automatic
compensation of cold
junction from °C to
°C.
Tolerance (°C)
±. % Full scale
± tenth of degree.
Cold junction accuracy
.°C/°C
Command
output
logic output.
For connection to SSR
Celduc SU/SUL series.
Vdc mA
Auxiliary
output
logic output.
Congurable as alarm or
cooling control output
in double loop mode.
Vdc mA
. Software features
Regulation
algorithms
ON-OFF with hysteresis.
P, PI, PID, PD proportional time.
Proportional band ...°C or °F
Integral time ,..., sec ( excludes integral
function)

User manual - DRR450 7
Derivative time ,..., sec ( excludes derivative
function)
Controller
functions
Manual or automatic tuning, congurable
alarm, Start/Stop.
Size, installation and wiring diagram

8 DRR450 - User manual
. Electrical wirings
Although this controller has been designed to
resist noises in industrial environment, please
notice following safety guidelines:
· Separate control lines from the power wires
· Avoid the proximity of remote control switches, electro-
magnetic meters, powerful engines.
· Avoid the proximity of power groups, especially those with
phase control.
Power Supply
Vdc ±% – VA
Analogue input AN
For thermocouples K, J, T, E.
compensated cable and terminals
suitable for the thermocouples used
(compensated)
grounded at one side only.
Serial input
Communication RS485 Modbus RTU/Slave

User manual - DRR450 9
Logic output OUT1
Celduc SU/SUL series.
Logic output OUT
Leds and key function
. Meaning of status lights (LED)
OUT 1
frequency.
at 0.5s frequency if the operation has been done
led if the operation was not succesfull.
AL
AL. 1
AL. 1
is disabled or selected
Heater Break Alarm:
a. ON xed: SSR in short circuit.
b. Flashing 50ms: open charge.
c. Flashing 0.5s: partial lack of the charge.
COM

DRR450 - User manual
. Key
Teach
more than 3 seconds to manage the threshold
current reading for the Heater Break Alarm
control.
assignment function, it stores the value assigned
by the master (only if the dips are all in OFF).
. Dip switch
1
ON
2
3
4
5
6
7
8
for the modbus is selected on parameter 29
sL. a d .
eeprom data are loaded with default values
(DEFAULT setting)
Modbus in binary code (contact 8 excluded).
Controller functions
. Automatic tuning
Tu n e
word 2005).
Automatic tuning is always active and analyses constantly the
dierence setpoint-process. If this dierence is greater than
the value selected on parameter 7
m.G.tu.
(Max Gap Tune),
the DRR450 decides autonomously when to modify PID
parameters.

User manual - DRR450
. Manual tuning
Select 2 on parameter 5 (
Tu n e
word 2005).
deciding when to update PID algorithm parameters.
The reference threshold to calculate the new PID parameters
is given by the result of the following operation:
Tune thresholdSetpointPar.
s.d.tu.
(word
2006)
s.d.tu.
is 20.0°C, the
N.B.: for greater accuracy in the calculation of PID parameters
it is recommended to launch the manual tuning when the
process is far from setpoint.
. Synchronized tuning
Select 3 on parameter 5 (
Tu n e
word 2005).
This procedure has been conceived to calculate correct PID
values on multi-zone systems, where each temperature is
device works as follows:
Word value Action
Tune o.
Command output OFF
Command output ON
Tune active
Tune completed: command output OFF
The operation of this Tuning mode is the following: the master
for a time long enough to create inertia on the system. At this

DRR450 - User manual
controller calculates the new PID values. When the procedure
ends, it switches-o the control output and sets the value 4
The various devices will regulate the temperature basing on
the new values.
autotuning procedure.
. Automatic/manual regulation for %
output control
This function allows to select automatic functioning or
manual command of the output percentage. With parameter
28 (
au.ma.
word 2028), you can select two methods.
2. The second selection (value 2 of word 2028) enables the
same functioning, but with two important variants:
the manual functioning will be maintained as well as the
previously set output percentage value.
controller moves to manual mode while maintaining the
output percentage command unchanged as generated by
the P.I.D. immediately before breakage.

User manual - DRR450
. Loading default values
This procedure allows to restore default settings as
pre-selected at the factory.
There are two reset modes:
After the restore, device restarts.
. Heater Break Alarm on TA (Current
Transformer)
This function allows to measure load current to manage an
alarm during a malfunctioning with power in short circuit,
always open or partial break of the charge.
must be 50mA (sampling time 80 ms).
H,b.a.t.
the Heater Break Alarm
intervention threshold in Ampere. Otherwise it is possible
to select this value in automatic mode pressing for more
than 3 seconds.
H,b.a.d.
the delay time in seconds for the
Heater Break Alarm intervention.
aL. 1.
The Solid State Relay malfunctions are reported as follows:
AL ON.
AL
AL
. Dual Action Heating-Cooling
DRR450 is suitable also for systems requiring a combined
heating-cooling action.

DRR450 - User manual
The command output has to be congured as PID for
p. b.
AL. 1
).
The command output must be connected to the actuator
responsible for heating, while the alarm will control cooling
action.
Parameters to be congured for the heating PID are:
p. b.
t.i .
t.d.
t. c.
Parameters to be congured for the cooling PID are:
AL. 1
p. b .M.
(word 25): Proportional band multiplier
ou.d.b.
(word 26): Overlapping / Dead band
co.c.t.
(word 27): Cooling time cycle
Par.
p. b .M.
proportional band of cooling action basing on the formula:
Proportional band for cooling action
p. b.
*
p. b .M.
This gives a proportional band for cooling which will be the
same as heating band if
p. b .M.
p. b .M.
Integral and derivative time are the same for both actions.
The par.
ou.d.b.
determines the percentage overlapping
between the two actions. For systems in which the heating
output and cooling output must never be simultaneously
active a dead band (
ou.d.b.
≤ 0) must be congured, vice
versa you can congure an overlapping (
ou.d.b.
> 0).
The following gure shows an example of dual action P.I.D.
(heating-cooling) with
t.i .
t.d.

User manual - DRR450
SPV
PV
ATTIVO
ACTIVE
ATTIVO
ACTIVE
P. b .
x
P.b.m.
(COOL)
ou.d.b
< 0
P. b .
(HEAT)
COMMAND OUTPUT (HEAT)
ALARM OUTPUT (COOL)
SPV
PV
ATTIVO
ACTIVE
ATTIVO
ACTIVE
P. b .
x
P.b.m.
(COOL)
ou.d.b
P. b .
(HEAT)
COMMAND OUTPUT (HEAT)
ALARM OUTPUT (COOL)
SPV
PV
ATTIVO
ACTIVE
ATTIVO
ACTIVE
P. b .
x
P.b.m.
(COOL)
ou.d.b
> 0
P. b .
(HEAT)
COMMAND OUTPUT (HEAT)
ALARM OUTPUT (COOL)
The parameter
co.c.t.
has the same meaning as the heating
time cycle
t. c.
Par. 24
co.c.t.
(Cooling Fluid – word 2024) pre-selects the
proportional band multiplier
p.b.m.
and the cooling PID cycle
time
co.c.t.

DRR450 - User manual
co o . f.
Cooling uid
type
p.b.m. co.c.t.
Ai r
Air
oi L
Oil 4
H2o
Water 2.50 2
Once selected the parameter
co o . f.
, parameters
p.b.m.
,
ou.d.b
and
co.c.t.
can however be modied.
Serial communication
broadcast data via serial communication using MODBUS RTU
protocol.
The device can only be congured as a Slave.
This function enables the control of multiple controllers
connected to a supervisory system/SCADA.
If contacts of dip-switch are all open each controller responds
to a Master query only if the query contains the same address
as parameter 29
SL.a.d.
not be controllers with the same address on the same line.
Address 255 can be used by the Master to communicate with
all the connected equipment (broadcast mode), while with
0 all the devices receive the command, but no response is
expected.
DRR450 can introduce a delay (in milliseconds) of the
response to the master request. This delay must be set on
parameter 32
Se. d e.
Each parameter modication is saved by the controller in
modication.
NB: Changes made to words that are dierent from those

User manual - DRR450
reported in the following table can lead to malfunction.
Modbus RTU protocol features
Baud-rate
Selectable on par.
bd. rt.
Value : bit/sec Value : bit/sec
Value : bit/sec
Format
Selectable on par.
s. p. p.
Value : N Value : N
Value : E Value : E
Value : O Value : O
Supported
functions
WORD READING (max word) (x, x)
SINGLE WORD WRITING (x)
MULTIPLE WORDS WRITING (max word) (x)
Modbus
address Description Read
Write
Reset
value
Type of device RO EEPROM
Software version RO EEPROM
Slave address R/W EEPROM
Automatic addressing WO -
System code comparison WO -
Loading default values (write ) RW
Process (tenth of degree) RO ?
Command setpoint (tenth of degree) R/W EEPROM
Alarm setpoint (tenth of degree) R/W EEPROM

DRR450 - User manual
Modbus
address Description Read
Write
Reset
value
Start/Stop
R/W
RO
R/W
With synchronized tuning (word
cooling)
heating)
R/W
Automatic/manual selection
R/W
OUT
OUT
RO
RO
RO

User manual - DRR450
Modbus
address Description Read
Write
Reset
value
charge)
RO
Cold junction temperature (degree
with tenth) RO ?
Hot output percentage (-) R/W
Cold output percentage (-) R/W
Current TA (ampere with tenth) RO ?
Current TA ON (ampere with tenth) RO ?
Current TA OFF (ampere with tenth) RO ?
Key status RO
Dip value RO
Parameter R/W EEPROM
Parameter * R/W EEPROM
Parameter R/W EEPROM

20 DRR450 - User manual
Table of conguration parameters
1
s e n .1
Sensor 1
Word modbus 2001
Default
2 Tc-T 0…400°C
3 Tc-E 0…540°C
2
o.ca.1
Oset Calibration AI1
Value added/subtracted to visualized process value (nor-
mally used to correct ambient temperature value)
Word modbus 2002
-…+ tenths of degree. >Default: 0.
3
G . c a .1
Gain Calibration AI1
% value multiplied with displayed number to calibrate
process value.
Word modbus 2003
-%…+ % in tenths. >Default: 0.
4
c. Hy.
Command Hysteresis
Hysteresis in ON/OFF or dead band in P.I.D.
Word modbus 2004
-…+ tenths of degree. >Default: 0.
Table of contents
Languages:
Other Pixsys Controllers manuals

Pixsys
Pixsys DRR245-21-ABC-T User manual

Pixsys
Pixsys ATR227 Series User manual

Pixsys
Pixsys DRR460 Series User manual

Pixsys
Pixsys PL500 User manual

Pixsys
Pixsys ATR 121 User manual

Pixsys
Pixsys ATR 121 User manual

Pixsys
Pixsys DRR227 User manual

Pixsys
Pixsys ATR 243 User manual

Pixsys
Pixsys ATR 121 User manual

Pixsys
Pixsys DRR244 User manual

Pixsys
Pixsys ATR 902 User manual

Pixsys
Pixsys DRR227 User manual

Pixsys
Pixsys ATR 243 User manual

Pixsys
Pixsys ATR 421 User manual

Pixsys
Pixsys ATR111-AD User manual

Pixsys
Pixsys DRR 245 User manual

Pixsys
Pixsys DRR 245 User manual

Pixsys
Pixsys ATR 401 User manual

Pixsys
Pixsys ATR226 User manual

Pixsys
Pixsys DRR 245 Guide