Planet UMG-1000 User manual

Unified Office Gateway
UMG-1000
UMG-1000W
User's Manual
Version 1.0.0

2
Copyright
Copyright (C) 2011 PLANET Technology Corp. All rights reserved.
The products and programs described in this User’s Manual are licensed products of PLANET
Technology, This User’s Manual contains proprietary information protected by copyright, and this
User’s Manual and all accompanying hardware, software, and documentation are copyrighted.
No part of this User’s Manual may be copied, photocopied, reproduced, translated, or reduced to
any electronic medium or machine-readable form by any means by electronic or mechanical.
Including photocopying, recording, or information storage and retrieval systems, for any purpose
other than the purchaser's personal use, and without the prior express written permission of
PLANET Technology.
Disclaimer
PLANET Technology does not warrant that the hardware will work properly in all environments and
applications, and makes no warranty and representation, either implied or expressed, with respect
to the quality, performance, merchantability, or fitness for a particular purpose.
PLANET has made every effort to ensure that this User’s Manual is accurate; PLANET disclaims
liability for any inaccuracies or omissions that may have occurred.
Information in this User’s Manual is subject to change without notice and does not represent a
commitment on the part of PLANET. PLANET assumes no responsibility for any inaccuracies that
may be contained in this User’s Manual. PLANET makes no commitment to update or keep current
the information in this User’s Manual, and reserves the right to make improvements to this User’s
Manual and/or to the products described in this User’s Manual, at any time without notice.
If you find information in this manual that is incorrect, misleading, or incomplete, we would
appreciate your comments and suggestions.
FCC Warning
This equipment has been tested and found to comply with the limits for a Class A digital device,
pursuant to Part 15 of the FCC Rules. These limits are designed to provide reasonable protection
against harmful interference when the equipment is operated in a commercial environment. This
equipment generates, uses, and can radiate radio frequency energy and, if not installed and used in
accordance with the Instruction manual, may cause harmful interference to radio communications.
Operation of this equipment in a residential area is likely to cause harmful interference in which
case the user will be required to correct the interference at his own expense.
FCC Caution
To assure continued compliance (example-use only shielded interface cables when connecting to
computer or peripheral devices). Any changes or modifications not expressly approved by the party
responsible for compliance could void the user’s authority to operate the equipment.
This device complies with Part 15 of the FCC Rules. Operation is subject to the Following two
conditions: (1) This device may not cause harmful interference, and (2) this Device must accept any
interference received, including interference that may cause undesired operation.
CE mark Warning
The is a class A device, In a domestic environment, this product may cause radio interference, in
which case the user may be required to take adequate measures.
Energy Saving Note of the Device
This power required device does not support Stand by mode operation.
For energy saving, please remove the DC-plug or push the hardware Power Switch to OFF position
to disconnect the device from the power circuit.
Without remove the DC-plug or switch off the device, the device will still consuming power from the
power circuit. In the view of Saving the Energy and reduce the unnecessary power consuming, it is
strongly suggested to switch off or remove the DC-plug for the device if this device is not intended to
be active.

3
Trademarks
The PLANET logo is a trademark of PLANET Technology. This documentation may refer to
numerous hardware and software products by their trade names. In most, if not all cases, these
designations are claimed as trademarks or registered trademarks by their respective companies.
WEEE WarningTo avoid the potential effects on the environment and human health as a result of
the presence of hazardous substances in electrical and electronic equipment, end
users of electrical and electronic equipment should understand the meaning of the
crossed-out wheeled bin symbol. Do not dispose of WEEE as unsorted municipal
waste and have to collect such WEEE separately.
Safety
This equipment is designed with the utmost care for the safety of those who install and use it.
However, special attention must be paid to the dangers of electric shock and static electricity when
working with electrical equipment. All guidelines of this and of the computer manufacture must
therefore be allowed at all times to ensure the safe use of the equipment.
Revision
User’s Manual for PLANET Unified Office Gateway
Model: UMG-1000 / UMG-1000W
Rev: 1.0 (Feburary. 2011)
Part No.: EM-UMG1000 Series_v1.0

4
Table of Contents
1. Introduction................................................................................................................7
1.1 Product Features.................................................................................................8
1.2 Package Contents...............................................................................................9
1.3 Outlook ..............................................................................................................10
1.3.1 Front Panel ...............................................................................................10
1.3.2 Rear Panel................................................................................................10
2.1 Hardware Installation........................................................................................11
2.1.1 Removing the Chassis Cover.................................................................... 11
2.1.2 The Hard Disk Installation ......................................................................... 11
2.2 Physical Connection.........................................................................................15
2.2.1 WAN Connection.......................................................................................15
2.2.2 LAN Port Connection ................................................................................15
2.2.3 PSTN FXO Port Connection .....................................................................16
2.3 Quick Setup Wizard ..........................................................................................17
2.3.1 First Time Login ........................................................................................17
2.3.2 Welcom to Quick Start...............................................................................18
3. Web Management - Home .......................................................................................25
3.1 Overview............................................................................................................25
3.2 Alert Log ............................................................................................................26
4. Web Management - User .........................................................................................27
4.1 User Overview...................................................................................................27
4.2 Deleting a User Account...................................................................................28
4.3 Updating the User Setting................................................................................28
4.4 Creating a User Account ..................................................................................29
4.5 Departments and Groups .................................................................................30
4.6 Deleting a Group...............................................................................................30
5. Web Management - Network...................................................................................31
5.1 Overview............................................................................................................31
5.2 Internet...............................................................................................................33
5.3 Local Network....................................................................................................33
5.4 Service...............................................................................................................34
5.5 The VPN Log......................................................................................................34
6. Web Management - Wireless...................................................................................35
6.1 Overview............................................................................................................35
6.2 Wireless Setting................................................................................................36
6.3 Wireless Clients ................................................................................................37
6.4 Blocking the Connected Wireless Client ........................................................37
6.5 Wireless MAC Block List..................................................................................38
7. Web Management - Storage....................................................................................39
7.1 Storage Overview..............................................................................................39
7.2 View a Volume by SMB.....................................................................................41
7.3 Updating a Volume............................................................................................41
7.4 Deleting a Volume .............................................................................................41
7.5 Creating a Storage Volume...............................................................................42
7.6 Storage Setting..................................................................................................43
7.7 Storage Bakcup and Restore...........................................................................44
7.8 The Storage Log................................................................................................45
8. Web Management - PBX..........................................................................................46
8.1 IP PBX Overview ...............................................................................................46
8.2 IP PBX Call Setting............................................................................................48
8.3 Voice...................................................................................................................50
2. Hardware Installation ...............................................................................................11
5
8.4 IP PBX Call Rules..............................................................................................51
8.5 IP PBX Channel Setting....................................................................................52
8.6 SIP Trunk Setting ..............................................................................................52
8.7 IP PBX Call Reference ......................................................................................53
8.8 IP PBX Call Log.................................................................................................54
9. Web Management - Email........................................................................................55
9.1 Email Overview..................................................................................................56
9.2 Email Basic Setting...........................................................................................57
9.3 Email Blacklist...................................................................................................58
9.4 Email Alias.........................................................................................................59
9.5 Email Forward ...................................................................................................60
9.6 Email Log...........................................................................................................61
10. Web Management - FTP ........................................................................................62
10.1 FTP Overview ..................................................................................................62
10.2 FTP Setting......................................................................................................62
10.3 FTP Account....................................................................................................62
10.4 FTP Log............................................................................................................63
11. Web Server .............................................................................................................64
11.1 Web Server Overview......................................................................................64
11.2 Web Server Settings .......................................................................................64
12. Web Management - Security.................................................................................65
12.1 Security Overview...........................................................................................65
12.2 Security Setting...............................................................................................66
12.3 Content Filter...................................................................................................68
12.4 Access Control................................................................................................69
12.5 Port Forwarding ..............................................................................................70
12.6 Security Log ....................................................................................................71
13. Web Management - System...................................................................................72
13.1 System Overview ............................................................................................72
13.2System Setting................................................................................................73
13.3 System Event Log...........................................................................................73
14. Web Management - Branch-to-Branch.................................................................75
14.1 Branch-to-Branch Setup.................................................................................75
14.2 Secruity Channel.............................................................................................75
14.3 Remote Calls ...................................................................................................75
14.4 Remote Data Synchronization .......................................................................76
14.5 Shared Services..............................................................................................76
14.6 Global user Profile..........................................................................................77
14.7 Centralized Configuration management .......................................................77
14.8 Branch-to-Branch Overview...........................................................................77
14.9 Delete a Branch...............................................................................................79
14.10 Branch-to-Branch Setting ............................................................................80
14.11 Branch Users.................................................................................................81
14.12 Branch-to-Branch Log..................................................................................81
15. Web Management - Maintenance..........................................................................82
15.1 System .............................................................................................................82
15.2 Software Update..............................................................................................83
15.3Remote Service...............................................................................................83
16. Personal Account Web Administration................................................................84
16.1 User Login .......................................................................................................84
16.2 User Home Page..............................................................................................85
16.3 Access to Administrator.................................................................................86

6
16.4 Personal Setting..............................................................................................86
16.5 Contract List....................................................................................................87
16.6 Personal Call Records....................................................................................87
16.7 Call Reference.................................................................................................88
16.8 Logout..............................................................................................................88
Appendix A – Console Maintenance Mothod ............................................................89
Appendix B – Remote Access ....................................................................................90
Appendix C – Scenario Example................................................................................91
Case 1_X-Lite how to register on the UMG-1000 Series......................................91
Case 2_ VIP-880 VoIP Gateway how to register on the UMG-1000 Series..........97
Case 3_ VIP-281GS GSM Gateway how to register on the UMG-1000..............102
Case 4_ VIP-254 and VIP-360PT how to register on the UMG-1000..................111
Case 5_ How do you setup a VPN with UMG-1000 Series.................................118
Case 6_ How to use LCR function on UMG-1000 Series ...................................127

8
1.1 Product Features
IP PBX / VoIP Service
¾SIP 2.0 (RFC3261)
¾PSTN Support
¾Call-Parking, Echo Cancellation
¾FXO Disconnection Tone Detection
¾QoS Support
¾Music on Hold
¾Telephone Conference, 3-Way Calling
¾Voicemail to E-mail
¾Forwards to Voicemail on No-Answer
¾Supports Call Hold, Call Waiting
¾Blacklist of Number Patterns
¾Call Privilege Control, Call Log
¾450 Minutes Recording Time
¾Unconditional, Unavailable, Busy Call Forward
¾Fax Server Support
¾Multiple SIP Trunk Support
¾Upload Sound Files for IVR
¾Least Cost Routing (LCR)
¾Busy Lamp Field (BLF)
¾Bridged Line Appearance (BLA)
E-mail Service
¾Supports POP3, SMTP, IMAP
¾Secured Socket Layer (SSL)
¾Junk Mail Filtering
¾E-mail Storage Quota
¾E-mail Alias Group Assignment
¾Mail Attachment Size Restriction
¾User E-mail Storage Quota
¾E-mail Log Record Management
¾Anti-Virus and Anti-Spam
¾Auto Backup, Auto Reply
¾E-mail White and Black list Based on Domain
¾Name, User Name, and E-mail Address
¾Supports Web Mail
¾Supports Mail Service via DDNS
Internet Security Service
¾Static IP, PPPoE, DHCP, PPTP, L2TP
¾Web Content Filter by Domain and Keyword
¾Access Control List (ACL)
¾URL / IM / P2P Blocking
¾Firewall / NAT
¾IPSec / PPTP / L2TP Pass-through
¾DoS Attack Protection (TCP SYN Flood, UDP Flood, ICMP Flood, Ping of Death)
¾UPnP and DMZ
¾Site-to-Site SSL VPN
¾PPTP VPN Remote Access
¾RIP / Static Route
1. Introduction

9
¾IP-MAC Binding
Network Storage Service
¾Up to 1.5TB Hard Disk
¾Supports User Network Storage Quota
¾Compatible Windows 2000 / XP / Vista, Mac, Linux
¾Scheduled Auto Backup, Auto Snapshot
¾Supports User / Group Privilege ACL
System Management
¾Single Point of Management
¾System Logging with E-mail Alert
¾Fast Recovery with Remote Service
¾Environment Monitoring
¾Dynamic Domain Name Services (DDNS)
¾Multiple Domain Name Support
¾Multiple Hostname Support
WiFi Service (UMG-1000W only)
¾1 x 802.11b/g/n Wireless Access Point
¾2 x RP-SMA Detachable Antenna
¾Security: WEP / WPA / WPA2
¾SSID
¾Wireless 802.1x Authentication
1.2 Package Contents
UMG-1000 / UMG-1000W Unit x 1
AC Power Cord x 1
CD x 1
Quick Installation Guide x 1
HDD accessories package x 1
RJ-45 to RS-232 Console cable x 1
Antenna x2 (UMG-1000W)
If any of above items are damaged or missing, please contact your dealer immediately.

10
1.3 Outlook
1.3.1 Front Panel
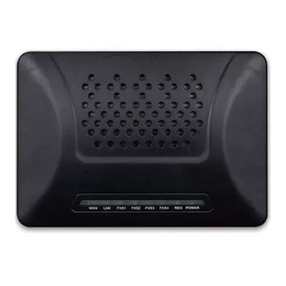
LED ON/OFF Description
On Power On
Power Off Power Off
Status Flash System operating
On Connect to WAN port
WAN Off Disconnect to WAN port
On Connect to 1~3 LAN ports
LAN Off Disconnect to 1~3 LAN ports
1.3.2 Rear Panel
Port Description
DC 12V DC 12V, 3.75A
Power Power ON/OFF button
Console Use RJ-45 to RS-232 console cable for engineer maintenance
(future feature)
USB 2 x USB2.0 (future feature)
LAN 3 x RJ-45 10/100/1000Base-T, Auto-Negotiation, Auto MDI/MDI-X
WAN 1 x RJ-45 10/100/1000Base-T, Auto-Negotiation, Auto MDI/MDI-X
Voice 4 x RJ-11 (4 x FXO)
Antenna
(For UMG-1000W)
Used to connect the external antenna for 802.11b/g/n wireless
network


11
2.1 Hardware Installation
2.1.1 Removing the Chassis Cover
The screws around the cover are used to secure the cover to the chassis. Remove
these screws and put them in a safe place for later use.
Slide the cover backward then remove it from the chassis.
2.1.2 The Hard Disk Installation
The 2.5” SATA HDD is necessary for system operating. Please install at least 80G HDD
before system configurations.
Remove the drive bay from the chassis.
Insert the provided dampers on the sides of the drive bay.
L
Caution
Prior to removing the chassis cover, make sure the unit’s
power is off and disconnected from the power sources to
prevent electric shock or system damage.
2. Hardware Installation

12
Place the SATA drive on the drive bay.
Turn to the other side of the bay then use the provided mounting screws to secure
the SATA drive to the drive bay.
The photo below shows the screws mounted in place.
Locate for the SATA data connector and the SATA power connector on the
motherboard.

13
Connect the provided SATA data cable and SATA power cable to the connectors on
the motherboard.
Locate for the mounting studs on the board.

14
Align the mounting holes of the drive bay with the mounting studs on the board then
use the provided mounting screws to secure the drive bay in place.
Connect the SATA data cable and SATA power cable to the SATA drive.
Putting the cover back to the chassis and lock the screws.

15
2.2 Physical Connection
2.2.1 WAN Connection
Locate the WAN port on the rear panel.
Connect the WAN port with the Ethernet cable.
2.2.2 LAN Port Connection
There are 3 Ethernet ports on the rear panel. It is recommended to connect the third
party switches to the LAN port to expand the LAN ports.

16
2.2.3 PSTN FXO Port Connection
Locate the voice port of the PSTN adapter on the rear panel.
The Analog PSTN port may vary from 4 FXO ports.
Connect one or more telephone cables to one of the selected FXO port.

17
2.3 Quick Setup Wizard
2.3.1 First Time Login
Now that the network connection between your PC and UMG-1000 Series has been
established, you must login in order to access PLANET View.
Launch a web browser (for example: IE, Firefox etc.) and type the UMG-1000 Series IP
address in the address bar. The default address is “http://192.168.1.1”.
If you can not see the following login page, recheck your physical LAN connection and
repeat Section 4.2 LAN Connection. To avoid web-based management abused by
unauthorized users, the login sessions will logout automatically if the session is inactive for
more than 5 minutes. Type in an authorized username and password and then click the
button ”Apply”. The default username is “admin”, and its password is “admin”all in lower
case.

18
2.3.2 Welcom to Quick Start
After the first login, an easy and short quick start up should be completed to make the
UMG-1000 Series service normally. There is an alternative selection in the page “Welcome”.
One selection is for “Quick Start” and the other is for “Faster Recovery UMG to UMG” which
will be explained in the user’s manual. The quick start includes five steps which will lead
administrator to setup the UMG-1000 Series. Check the first radio box and then click the
button “Start” to continue.
Step 1: Create the Company Profile
This page allows an administrator to build a company profile. Specify the profile and then
click the button “Next” to go to step 2.

19
Item Description
Company Specify your company name.
Location Specify your city name.
Country Specify your country name.
Time Zone Specify the time zone.
PBX Extension Specify the prefix of the extensions. All PBX extensions will be
prefixed with this number. (X=0~9).
Step 2: Activating UMG-1000 Series services
The UMG-1000 Series allows the administrator to activate the service on demand. By
default, all services are inactive. The administrator can activate the service in this page by
checking the radio box of the corresponding service. The activated services will start up by
using the default configuration after the quick start. Click the button “Next” to go to step 3.
Item Description
PBX Enable or disable the IP PBX service.
PPTP VPN Enable or disable the PPTP VPN service.
Email Enable or disable the Email service.
Network Storage Enable or disable the network storage service.
Internet Domain Name Specify a valid Internet domain for the email server if
the email service is enabled.

20
Step 3: Setting up the Internet Connection
This page allows the administrator to quickly setup the WAN connection. To setup the
Internet connection, you should be awarded of what method you are using to connect to the
Internet. All technical information should be provided by your Internet Service Provider
(ISP). The ISP type should be one of the followings: static, DHCP, PPPoE or PPTP. Select
your ISP type in the drop down menu. Specify the Internet connection configuration and
then click the button “Next” to go to step 4 or click the button “Skip” to skip this step.
AUTO DETECT ISP TYPE
By clicking the button “Detect”, you can make the UMG-1000 Series to recognize the ISP
type automatically.
It may take a while to detect your ISP type. Please wait.
This manual suits for next models
1
Table of contents
Other Planet Gateway manuals

Planet
Planet IG-100 User manual

Planet
Planet WPG-120 User manual

Planet
Planet UMG-2000 User manual

Planet
Planet WIPG-300H User manual

Planet
Planet Network Device MAP-2105 User manual

Planet
Planet MH-5000 User manual

Planet
Planet WPG-130N User manual

Planet
Planet CS-2000 User manual

Planet
Planet WPG-100 User manual

Planet
Planet UMG-2000 User manual

Planet
Planet BM-525 User manual

Planet
Planet UMG-2000 User manual

Planet
Planet VIP-000 User manual

Planet
Planet ICG-2515 Series User manual

Planet
Planet WPG-100 User manual

Planet
Planet MH-4000 User manual

Planet
Planet VIP-160 User manual

Planet
Planet WPG-210N User manual

Planet
Planet MH-5000 User manual

Planet
Planet WSG-401 User manual