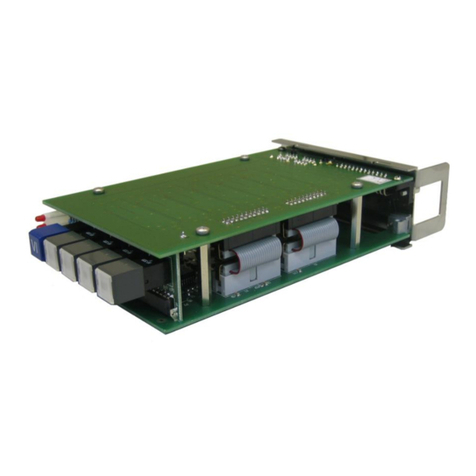
Plura TCU User manual

Operating Manual
Version: 4.6
April 7, 2017
Timer Control Unit
TCU
Operational Units for PLURA’s MTD and MTDoE Systems


Operating Manual TCU
Page 3
CONTENTS
A1 REVISION HISTORY
A2 COPYRIGHT
A3 WARRANTY
A4 UNPACKING/SHIPPING/REPACKAGING INFORMATION
A5 SAFETY INSTRUCTIONS
A6 CERTIFICATIONS & COMPLIANCES
SHORT DESCRIPTION: THE FIRST STEPS 11
Preparation 11
Installation and Set-Up 11
Basic Functions of TCU within an MTDoE System 14
FUNCTIONAL DESCRIPTION 15
INTRODUCTION 15
POWER SUPPLY 16
START-UP SEQUENCE 17
OPERATING MODES 18
Overview 18
The Keyboard 18
The Displays 19
The Access Rights 19
The Display Modes 20
Overview 20
Local Stop Timer 21
TC: Time Code 21
NTP: Real-Time and Date – Local Time Zone or Reference Time 22
LTC: Real-Time, Date and User – Local Time Zone or Reference Time 23
MTD: Real-Time and Date 24
MTD: Timer A - F 25
“Main Timer” Functionality 26
“Serial: MTD Master”: Local Stop Timer and External Displays 27
CONFIGURATION 28
The Configuration Program 28
“Profile“ Tab: Store and Load a Complete Set-Up 29
“System“ Tab: View and Change System Parameters 30
“Source“ Tab: Select the Signal Source 31
“Real-Time“ Tab: Set-Up of the Real-Time Parameters 32
“Ethernet“ Tab: IP Addresses ... 33
“Keyboard“ Tab: Function Keys, Access Rights, Beeper 35
“Shifted Keys“ Tab: Programming Alternate Functions 37
“Timer Names“ Tab: Customize the Text Display 38
“Display“ Tab: Display Mode, Brightness, ... 39
“GPI“ Tab: Programming GPI Inputs and Outputs 41
PROGRAMMING FUNCTION KEYS AND GPI INPUTS 43
FIRMWARE UPDATE 47

Operating Manual TCU
Page 4
TECHNICAL DATA 48
CONNECTIONS AT THE REAR 48
SPECIFICATIONS 50
MECHANICAL 51
Desktop Housing 51
Module in a 19“ 3 RU Housing 51
Special Tabletop Mounting 51
19“ 1 RU Version: TCU H1 52
EPSD AND EPSW: POWER ADAPTERS 53
Description and Technical Data 53
Safety Precautions 54

Operating Manual TCU
Page 5
A1 Revision History
No. Date Subject
0.x
Preliminary documents, changes without notice.
4.3
February 10, 2017
First released document, based on TCUE manual version 4.2.
4.4
February 13, 2017
Corrected power supply ordering codes EPSD and EPSW; minor changes.
4.5
February 28, 2017
Added TCUH1 rear connectors.
4.6
April 4, 2017
Added source “Serial: MTD Master”.
The latest document describes the functions of the latest product’s software. You can download the
latest software version from:
http://www.plurabroadcast.com/downloads
A2 Copyright
Copyright © PLURA Europe GmbH 2017. All rights reserved. No part of this publication may be
reproduced, translated into another language, stored in a retrieval system, or transmitted, in any
form or by any means, electronic, mechanical, photocopying, recording, or otherwise without the
prior written consent of PLURA Europe GmbH.
Printed in Germany.
Technical changes are reserved.
All brand and product names mentioned herein are used for identification purposes only, and are
trademarks or registered trademarks of their respective holders.
Information in this publication replaces all previously published information. PLURA Europe GmbH
assumes no responsibility for errors or omissions. Neither is any liability assumed for damages
resulting from the use of the information contained herein.
For further information please contact your local dealer or:
PLURA Europe GmbH
Muehlweg 11
73433 Aalen, Germany
Phone: +49 7361– 589460
Fax: +49 7361– 5894655
E-Mail: mailto:info@plurabroadcast.com
Internet: http://www.plurabroadcast.com/

Operating Manual TCU
Page 6
A3 Warranty
PLURA warrants that their products will be free from defects in materials and workmanship for a
period of two years from the date of shipment. If this product proves defective during the warranty
period, PLURA, at its option, will repair or replace the defective product without charge, provided
this product is returned to PLURA freight prepaid.
In order to obtain service under this warranty, Customer must notify PLURA of the defect before
expiration of the warranty period and make suitable arrangements for the performance of service.
Customer shall be responsible for packaging and shipping the defective product to PLURA, please
notice the Shipping Information given below.
This warranty shall not apply to any defect, failure or damage caused by abuse, misuse, improper
use, negligence, accident, modification, alteration, or improper or inadequate maintenance and
care.
This warranty is given by PLURA with respect to this product in lieu of any other warranties, express
or implied. PLURA and its vendors disclaim any implied warranties of merchantability or fitness for
a particular purpose. PLURA’s responsibility to repair or replace defective products is the sole and
exclusive remedy provided to the customer for breach of this warranty. PLURA and its vendors will
not be liable for any indirect, special, incidental, or consequential damages irrespective of whether
PLURA or the vendor has advance notice of the possibility of such damages.

Operating Manual TCU
Page 7
A4 Unpacking/Shipping/Repackaging Information
This product has been carefully inspected, tested and calibrated before shipment to ensure years of
stable and trouble-free service.
The shipping carton and pads provide protection for the product during transit. Retain the shipping
cartons in case subsequent shipment becomes necessary.
Carefully unpack the product from its transit material and carefully check the product for signs of
damage. In the event that the product has been damaged during transit, contact the carrier and
your PLURA dealer.
Please confirm that all items listed on the packing list have been received. Check the items against
your original order to ensure that you have received the correct parts. If any item is missing, please
contact your PLURA dealer.
Ensure that all packaging material is removed from the product and its associated components
before installing the unit.
Products returned to PLURA for servicing or repair should have a tag attached showing:
•Name and complete address of the owner and the name of the person that can be contacted.
•Unit’s serial number and a description of the service required or failure detected.
Products returned should be shipped prepaid in the original packaging material if possible. If the
original packaging is not available or is unfit for use, supply an adequate packaging which should
meet the following criteria:
•Packaging must be able to withstand the product weight.
•Product must be held rigid within the packaging.
•Allow at least two inches of space between the product and the container.
•The corners of the product must be protected.
•Seal the carton with shipping tape or an industrial stapler.
If the product is still within the warranty period, the product will be returned by prepaid shipment
after servicing.

Operating Manual TCU
Page 8
A5 Safety Instructions
The general safety information in this part is for both operating and service personnel. PLURA
products are only to be used as directed. Specific warnings and cautions will be found throughout
the manual where they apply.
Review the following safety instructions to avoid injury and prevent damage to this product or any
products connected to it.
•Read these instructions.
•Keep these instructions.
•Heed all warnings.
•Follow all instructions.
Safety Terms and Symbols
Terms and Symbols in this manual:
CAUTION: Caution statem
ents identify conditions or practices that could result in
damage to this product or other property.
Terms and Symbols which may be found on the product:
ATTENTION: Refer to the manual.
Observe precautions for handling electrostatic-sensitive devices.
Signal Ground.
Product Damage Precautions
PREVENT OVERHEATING
To prevent product overheating, position the unit only where sufficient air
circulation can be maintained. Good air circulation is essential to prevent internal
heat build-up, do not b
lock any ventilation openings. Do not expose the unit to
direct sun light or any other strong lights. Keep the unit away from heat sources.
PROVIDE PROPER ENVIRONMENT
Dust, humidity, shocks and strong electro
magnetic fields must be avoided. Do not
expos
e this apparatus to dripping or splashing water. Ensure that no objects filled
with liquid are placed on the apparatus.

Operating Manual TCU
Page 9
OBSERVE EMC REGULATIONS
The EMC regulations are observed only under the following condition:
Use high quality shielded cables at data inputs and outputs.
SUSPECTED FAILURES
Whenever it is likely that safe operation is impaired, the apparatus must be made
inoperative and secured against unintended operation. The appropriate service
authority must then be informed. Do not operate with
suspected failures. Servicing
is required when the apparatus has been damaged in any way, such as power-
supply is damaged, liquid has been spilled or objects have fallen into the
apparatus, the apparatus has been exposed to rain or moisture, does not operate
normally, or has been dropped.
PREVENTIVE MAINTENANCE: CLEANING
Qualified Service Personnel Only: The apparatus should be cleaned often enough
to prevent dust or dirt from accumulating. Dust accumulating in the apparatus acts
as an insulating blanke
t, preventing proper cooling, and possibly causing
overheating and component breakdown. Under high humidity conditions,
accumulated dust can also provide an electrical conduction path. Remove
accumulated dust with a soft cloth or small paint brush. Remove hardened dirt with
a soft cloth, dampened in a mild detergent and water solution. Do not use polish
or abrasive cleaners or any other chemical cleaning agents.
PREVENTIVE MAINTENANCE: VISUAL INSPECTION
Qualified Service Personnel Only: Visually inspect
the apparatus for signs of
damage, scorched components, and loose or disconnected pin connectors. If you
discover heat damaged parts, try to determine the cause of the overheating before
replacing the damaged parts; otherwise, the damage may repeat.
ATTENTION:
Observe precautions for handling electrostatic-
sensitive devices. See “Electro Static
Discharge (ESD) Precautions” below for details.

Operating Manual TCU
Page 10
Electro Static Discharge (ESD) Precautions
All semiconductor devices are sensitive to ESD. To prevent any dama
ge or
degradation on components of the product caused by ESD, observe these
precautions when directed to do so (installing, removing sensitive components):
1. Use a Ground Strap. Wear a grounded anti-static wrist or heel strap to discharge the static
voltage from your body.
2. Use a Safe Work Area. Avoid handling components in areas that have a floor or work surface
covering capable of generating a static charge. Also nothing capable of generating or holding
a static charge should be allowed in the work area.
3. Handle ESD sensitive components carefully. Do not slide components over any surface. Do
not touch exposed connector pins. Pick-up components by the body, never by the leads.
4. Transport and store sensitive components or assemblies in a static-protected bag or container.
A6 Certifications & Compliances
CE-Declaration:
We,
PLURA Europe GmbH
Muehlweg 11
73433 Aalen, Germany
herewith declare under our sole responsibility that the
TCU / TCU H1
meets the intent of the following directives, standards and specifications:
89/336/EEC Electromagnetic Compatibility
EN 50081-1 Emissions
•EN 55022
•EN 55103-1
EN 50082-1 Immunity
•EN 55024
•EN 55103-2

Operating Manual TCU
Page 11
Short Description: The First Steps
Preparation
The following description refers to installation (= integration into an MTDoE system) and set-up of
a TCU device.
Application: Display and control of Timer A (= DOWN) + Timer B (= remaining time).
Display of local real-time.
Apart from TCU you need the following accessories:
•MTDoE central unit (RUB GT or GL + RUB IE with option M), UD displays.
•Ethernet switch + RJ45 Ethernet patch cable.
•Computer with USB and Ethernet interfaces.
•Product CD, included.
•Maybe a standard USB cable: A – B type.
The computer should have been connected to your local network. Connect TCU via RJ45 patch
cable to an Ethernet switch. Switch on all units.
Installation and Set-Up
S1 Start UD SC Config.exe program from CD. At “Filter”, “Group = <all>” should have
been selected. TCU should appear on the list:
If TCU does not appear on the list, proceed as follows:
S1a Connect TCU via USB to the computer. Maybe a driver has to be installed. This driver
is part of Windows, it can be found automatically.
S1b Execute UD SC Config.exe anew.
S1c Start the set-up with double-clicking on TCU.
S1d At Ethernet tab:
Click on button Change ..., then a new window appears, there click on Use DHCP.
Make a restart of TCU and start again at S1.

Operating Manual TCU
Page 12
S2 If there are any other devices on this list, please take notice of the number shown after the
name at the “Mode” column (= group number).
S3 Start the set-up with double-clicking on TCU.
S4 At System tab: Give TCU a significant name.
S5 At Source tab: Click on “Ethernet MTD“.
S6 At Ethernet tab:
•Automatic MTD Master IP Address: Verify, that this checkbox is checked, and that
“MTD Master IP Address” shows any IP address which is valid for your network.
•Group: Choose a group number identical to the number shown for other devices – as
explained at item S2. If there are no other devices, choose “1”.

Operating Manual TCU
Page 13
S7 At Display tab: Select “Mode = Real-Time“.
This selection determines the display mode after switching on TCU, in this case the local
real-time will be displayed.
S9 At Keyboard tab:
•At Buttons: Programming function keys. In order to control stop timers, assign “Down”
to the first and “Diff Time” to the second function key, for example (see next chapter).
Assign “No Operation“ to keys which are not used.
•At Access Rights: This set-up enables you to reduce the functionality of the unit, so that
you just work with the functions which are really required for your application. If you just
want to control Timer A and Timer B, and display local real-time, click “On“ at Timer A
and Timer B, click “Display” at Time, and “Off“ everywhere else.
S10 Installation and basic set-up of TCU is now completed. Click button Disconnect.
The text display at TCU now shows:
TIME .
DOWN TIME
DIFF

Operating Manual TCU
Page 14
Basic Functions of TCU within an MTDoE System
Switch TCU off and on again. After an initialization process, TCU displays the local real-time.
Press key “+” or “–“ to switch between those operating modes which are enabled at the “Access
Rights” set-up:
TIME = display of local real-time, no operating;
TIMER A = stop timer A, e.g. a down-counting timer (DOWN);
TIMER B = stop timer B, e.g. showing a remaining time.
The following keys at TCU are provided to control the stop timer:
Press key “+” to switch to TIMER A.
0 – 9 Enter a preset value.
Function key DOWN Accept preset value and set stop timer to mode DOWN.
Now, the preset value is indicated at all UD displays which show
Timer A.
START/STOP/RESET Timer starts, timer stops, or timer resets to zero.
•Counter automatically counts upwards if START is pressed at preset = 0.
•Counter automatically counts downwards if START is pressed at preset > 0.
Press key “+” to switch to TIMER B.
0 – 9 Enter an event time, e.g. the end of a TV program.
Function key DIFF TIME Accept event value and set stop timer to mode DIFF TIME. Now,
the time difference of event time against local real-time will be
calculated; this results in a down-counting time (remaining time).
This time difference is shown at all UD displays which have display
mode set to Timer B.

Operating Manual TCU
Page 15
Functional Description
Introduction
PLURA has developed a system called the Multiple Time Display (MTD) system. A MTD system
consists of a central generator unit, control units, digital displays and/or studio clocks. The central
MTD generator (RUB GT or RUB GL module) is the time & date reference and manages stop
timers.
A MTDoE system utilizes the Ethernet to transport the MTD data as well as to communicate
between control units and central generator. The central generator transmits the MTD data to the
RUB IE (with option M) Ethernet module via the internal TC_link interface of the RUBIDIUM
system, the RUB IE module then opens the gates to the local Ethernet.
The MTD data of the central generator include six independent programmable timers (stop timers,
time zones), real-time, date and status data.
Displays, studio clocks and control units read these data and communicate via Ethernet. Current
PLURA devices or older ones of type “E” will work within the MTDoE system.
PLURA’s MTDoE devices have the property to perform an auto-installation within an Ethernet
network, i.e. the units find them selves, assign them selves to a group and can be listed, named
and configured centrally.
Please refer to “The MTD System – Installation and Operation Manual” to read about
installation and basic set-up of a TCU in a MTD or MTDoE system.
TCU can be used in both MTD or MTDoE timer systems. It is a control unit with a numerical LED
display, a text information display and a backlit keypad:
•The LED display has 15mm digit height 7-segmented LEDs in a red colour. It simply displays a
time in a HH:MM:SS format.
•TCU H1 can have a second 7-segmented LED display installed. It can be used to display
another time, e.g. the first display shows a timer and the second display the local time. Please
order TCU DR for a second red display, TCU DG for a green one and TCU DY for a yellow
one.
•The colour of the text display is white. It displays the status information.
•The keypad has 18 illuminated keys, 15 keys have an inscription. All keys except the numeric
keys 0 – 9 can receive a programmable function. The three keys without inscription are the
special function keys, where the current selected function is indicated directly above on the text
display.

Operating Manual TCU
Page 16
Power Supply
TCU receives power either via an external DC power supply or via “Power over Ethernet“ (PoE).
EPSD: External Power Supply for TCU EPSW: External Power Supply for TCU H1
EPSD (order number 11011010) and EPSW (order number 14085100) are 24
VDC/20
W
external AC/DC adapters. They are not part of the delivery.
EPSD has a (115
cm
/
45.3
in) DC output cable with a DSUB9 female connector suitable to
connect to the DC connector at TCU.
EPSW has a (115
cm
/
45.3
in) DC output cable with a 2-pole jack suitable to connect to the
DC terminal connector at TCU H1.
Refer to chapter “EPSD and EPSW: Power Adapters” for detailed technical data.
USB
1
DATA
DC
ETHERNET
GPI
1
DSUB9F:
6/7: V-
8/9: V+
External Power Supply:
Option TCU-EP
1: V-
2: V+
External Power Supply:
Option UD-EP
DC
1 2
USB
ETHERNET
1. . . . . 8
GPI
1
1 2
PoE: “Power over Ethernet“
Power over Ethernet or PoE technology describes a system to pass electrical power, along
with data, on Ethernet cabling.
USB
1
DATA
DC
ETHERNET
GPI
POE
PoE Switch
Pi: “Power Injector“
Pi (order number 14085015) is an external AC/DC adapter. It is not part of the delivery.
In the case your network devices cannot supply PoE, using this PoE injector keeps the
advantage to have only one cable connected to your TCU or TCU H1.
USB
1
DATA
DC
ETHERNET
GPI
Non-PoE Switch
External Power Supply:
Option PI
Power-over-Ethernet Injector
~
AC Power
Power Supply:
EPSD
Power Supply:
EPSW

Operating Manual TCU
Page 17
Start-Up Sequence
The text display indicates step by step:
•the firmware revision number,
TCUE
2.4
•and then installed options – if any Option,
•and then the selected source,
MTD CLIEN
SRC: MTD NTP CLIEN
SRC: NTP
•and then it switches to normal operating mode.
In the beginning, all of the LEDs and lamps will light up shortly.
The red LED display indicates status information step by step:
Current display mode at the last two digits of the LED display:
Digits Mode Source
∏L Local MTD
г Г Real-Time MTD
г d Date MTD
ГA Timer A MTD
ГB Timer B MTD
ГC Timer C MTD
Гd Timer D MTD
ГE Timer E MTD
ГF Timer F MTD
∏1 Main 1 MTD
∏2 Main 2 MTD
∏3 Main 3 MTD
Г LTime Code MTD
n ГNTP Time NTP
n d NTP Date NTP
L ГLTC Time LTC
L d LTC Date LTC
L U LTC Date LTC
∏∏MTD Master Serial
In case “source = MTD or NTP”:
“Init” indicates that the Ethernet initialization is still in progress.
After success “Init o” shortly will be displayed, then or after one
minute at the latest the device switches to normal operating mode.
In case “source = MTD”:
The device tries to find the RUB IE module responsible for the
indicated MTD group number.
In case “source = MTD”:
The MTDoE Master has been found, now the device synchronizes
its internal clock with NTP commands.

Operating Manual TCU
Page 18
Operating Modes
Overview
TCU is a timer display and control unit. A timer can be a local real-time or date, a stop timer, or a
remaining time, or more.
TCU receives data via Ethernet or LTC. There are five different methods corresponding to five
different sources TCU can use to decode and display data. Selection of this source will be done by
configuration of the unit (chapter “Source” Tab: Select the Signal Source).
•Source = Ethernet: TD: TCU is able to decode and display all the timers of the MTD data
over Ethernet.
•Source = Ethernet: NTP (for service purposes only): TCU receives and displays time or date.
The received reference time can get a programmable offset. It is possible to enable a Daylight
Saving Time handling. This programming is done by configuration of the unit.
•Source = LTC: MTD: TCU is able to decode and display all the timers of the MTD data over
LTC.
•Source = LTC (for service purposes only): TCU reads LTC and displays time, user or date. The
received reference time can get a programmable offset. It is possible to enable a Daylight
Saving Time handling. This programming is done by configuration of the unit.
•TCU can be set to a local timer mode, thus being independent from any external interface.
TCU can control this timer by start/stop/reset commands, by setting a start value, etc.
•Source = Serial: MTD Master: TCU operates as a local timer and sends its timer values to
a “slave” UD display that is connected to the RS485 interface.
TCU offers a numerical keypad, programmable function keys, and two displays.
The Keyboard
789
654
123
0
F1 F2 F3
START
RESET
STOP
+_
TCUE
1 2 3 4 5
67890
START STOP
RESET
+
_
TCUE
H1
F3
F2
F1
•0 – 9 keys to enter numerical values; these keys are not programmable.
•The +and –keys are preferably used to switch to the next display mode, but they could
also receive a user defined function.
•The START/STOP/RESET keys are preferably used for a stop timer operation, but they could
also receive a user defined function.
•The F1–F3 keys receive a user defined function, e.g. UP or DOWN to select a stop timer
mode, or A, B, to switch to a specific display mode. The backlit lamp in the key will light up
if the programmed function is currently activated. A text on the text display just near the key
describes the programmed function.
•Programming of the keys is done by configuration of the unit and will be stored at a
non-volatile memory of the TCU (chapter “Keyboard” Tab: Function Keys, Access Rights,
Beeper).

Operating Manual TCU
Page 19
The Displays
During normal operating mode the red LED display (at TCU H1 the LED display to the right (= 1st
display) shows the time of the selected timer or, if any date mode has been selected, a date.
During an input with the numerical keypad the display switches to show the entries.
The optional available 2nd display of the TCU H1 shows no entries, it shows the time of the selected
timer or, if any date mode has been selected, a date.
The text display shows the following information:
TCU
OFFSET
TIME
DOWN DIFF
TIME
OFFSET TC
TIMER A
F1 F2 F3
Display mode (please notice *1 below)
Mode of the selected timer
Function of the programmable keys
TCU H1
OFFSET
TIME
DOWN DIFF
TIME
OFFSET TC
TIMER
Mode of the
selected timer
Function of the programmable keys
F1 F3
F2
A
Display mode (please notice *1 below)
*1 Special cases: A leading “*“ indicates that this timer can be remote controlled by an
automation system. Example: “*A“.
A leading “.“ indicates that operation on this timer has been disabled
(access rights has been set to “display only”). Example: “.A“.
The Access Rights
According to application it is recommended not to enable the control to every display mode. For
example it is possible to disable the control of selected stop timers or to refuse setting the real time.
Even displaying the time of specific timers can be disabled, thus limiting TCU’s functionality to
those timers actually used in a given application. This keeps the operation on the timer system
easy.
This installation is done by the Access Rights feature. A display mode can be switched to:
On = displaying and operating possible;
Display = displaying possible but no operating;
Off = neither displaying nor operating possible.
Programming the Access Rights is done by configuration and will be stored at a non-volatile
memory of TCU (chapter ““Keyboard” Tab: Function Keys, Access Rights, Beeper).

Operating Manual TCU
Page 20
The Display Modes
Overview
The +and –keys are preferably used to switch to the next display mode. The Access Rights feature
offers to completely disable a display mode, this mode will then be skipped in case of switching
from one mode to the other.
The following display modes are available:
Mode Text
Display
Sourc
e
Description
Local stop timer LOCAL No Ethernet connection required
MTD Master LOCAL Serial No Ethernet connection required
Real-time TIME NTP NTP Real-time received from an NTP Server, ± Offset
Date DATE NTP NTP Date, received from an NTP Server, ± Offset
Real-time TIME LTC LTC Real-time received from LTC, ± Offset
Date DATE LTC LTC Date, received from LTC, ± Offset
User USER LTC LTC User, received from LTC
Real-time TIME MTD Display and control of MTD real-time
Date DATE MTD Display and control of MTD date
Timer A TIMER A MTD Display and control of timer A (e.g. stop timer A)
Timer B TIMER B MTD Display and control of timer B (e.g. stop timer B)
Timer C TIMER C MTD Display and control of timer C (e.g. stop timer C)
Timer D TIMER D MTD Display and control of timer D (e.g. stop timer D)
Timer E TIMER E MTD Display and control of timer E (e.g. stop timer E)
Timer F TIMER F MTD Display and control of timer F (e.g. stop timer F)
1st main timer MAIN-1 MTD Display and control of 1st “main timer”
2nd main timer MAIN-2 MTD Display and control of 2nd “main timer”
3rd main timer MAIN-3 MTD Display and control of 3rd “main timer”
Time code TC MTD Displaying the time of the MTDoE reference
By configuration of the unit it is possible to determine the display mode which TCU selects after
power-on: Chapter “Display” Tab: Display Mode, Brightness, ....
This manual suits for next models
1
Table of contents
Other Plura Control Unit manuals