PMG Ultraguard Antifouling UG Series User manual

UG SERIES COMMERCIAL ULTRASONIC ANTIFOULING SYSTEM
OPERATORS MANUAL

How Does Ultraguard Work
The microbiome and larvae that are the early stages of marine growth require a number of
environmental criteria to be in an optimum state to allow them to begin the colonisation
process. These criteria include water temperature, salinity, light levels, time of year,
concentration of larvae and seed in the water and many other criteria can affect colonisation
depending on the species and type of growth. A suitable substrate to attach to is also
essential.
Our goal is to use ultrasonic sound waves to create a resonance in the substrate which causes
a vibration in the surface of the substrate. This, in turn, becomes a sub-optimal location for
the colonisation process to begin. This vibration can only prevent the colonisation at the larval
stage. Mature growth creates bonds that are too strong to be affected by the vibrations. To
this end, ultrasonic antifouling systems can only keep a clean substrate clean, they can not
clean a heavily fouled surface.
It sounds like a simple process but acoustically there are many challenges to overcome,
especially on acoustically complex structures such as coolers. It is the research and
development that MGPS and our partners have undertaken that sets Ultraguard apart from
the competition.
Each transducer acts like an audio speaker. In the control panel, each transducer has its own
control board and power supply. These generate ultrasonic acoustic signals which are then
boosted via an amplifier and sent down the cable to the transducer. The transducer is
attached to the structure being protected by an adhesive bond. It is essential that there is
always full surface to surface contact between the transducer head and the protected
structure. This is why we choose the bonding method over methods such as a screw in ring
welded or attached to the surface. In that method the ultrasonic waves can loosen the
transducer in the mounting ring.
By causing each transducer to resonate at the correct frequency we induce the required
vibrations which prevent the larvae from attaching themselves to the surface being
protected.
Ultraguard’s design means that if a transducer cable, power supply or control PCB is damaged
or fails it can be swapped out by ship’s staff in a matter of minutes. The rest of the system
can operate as normal until the replacement takes place so there is minimum downtime and
minimum loss of antifouling effect.

Installation Instructions
Transducer Location
Locate where your installation plan recommends fitting the
transducers. For box coolers these should be on the top of the water
manifold of the cooler taking care to avoid the flow directing baffles
inside the manifold lid. On pipes the transducers should be attached
with the use of a pipe adapter which Ultraguard can supply. On hulls
you should locate the transducers as equidistant from hull frames as
you can to allow the maximum resonance response.
Remove the paint and any coatings right back to the bare
substrate.
Ensure the surface is smooth and free of gouges or
dimples that could cause an air gap between the
transducer and the surface.
Clean the surface and the head of the transducer with
acetone until both surfaces are, ‘Surgically,” Clean.
Once the surfaces are clean DO NOT TOUCH them again
with fingers or skin as the oils in your skin affect the
bond. If you do, re-clean thoroughly.
Ensure you are happy with the location and practice dry
fitting the transducer.
Once you are happy with location, get into position to
apply the transducer. The adhesive will cure in seconds
and you have to place the transducer onto the surface
IMMEDIATELY
once the adhesive is applied. (You will not
have time to move from a work bench or other location
before the adhesive cures!)
Fit the supplied nozzle to the adhesive syringe
Have a spatula or similar implement ready to spread and
smooth adhesive.
Apply a serpentine bead across the face of the
transducer and immediately smooth it across the
transducer face with the spatula. The aim is to have an
even coverage of 2mm-3mm thick with no bare spots
which could form air gaps.
IMMEDIATELY place the transducer into location and
hold in place for 30 seconds.
Leave the transducer to fully cure for 24 hours before
connecting its cable to the control unit.
Whilst waiting you can run the main section of
transducer cable back to the control unit. Ultraguard
recommends using suitable cable trays and conduits to
achieve this.
Control Unit Installation
Find a suitable location for the control unit within 40m of
cable run from the transducers. The control units should
be located in a dry position off the deck that allows easy
access.
Using the dimensional diagram on the following sheet,
set out the mounting points required on your vessel. You
may need to manufacture a suitable bracket to mount
the control unit on.
Mount the control unit onto the vessel using the supplied
mounting brackets.
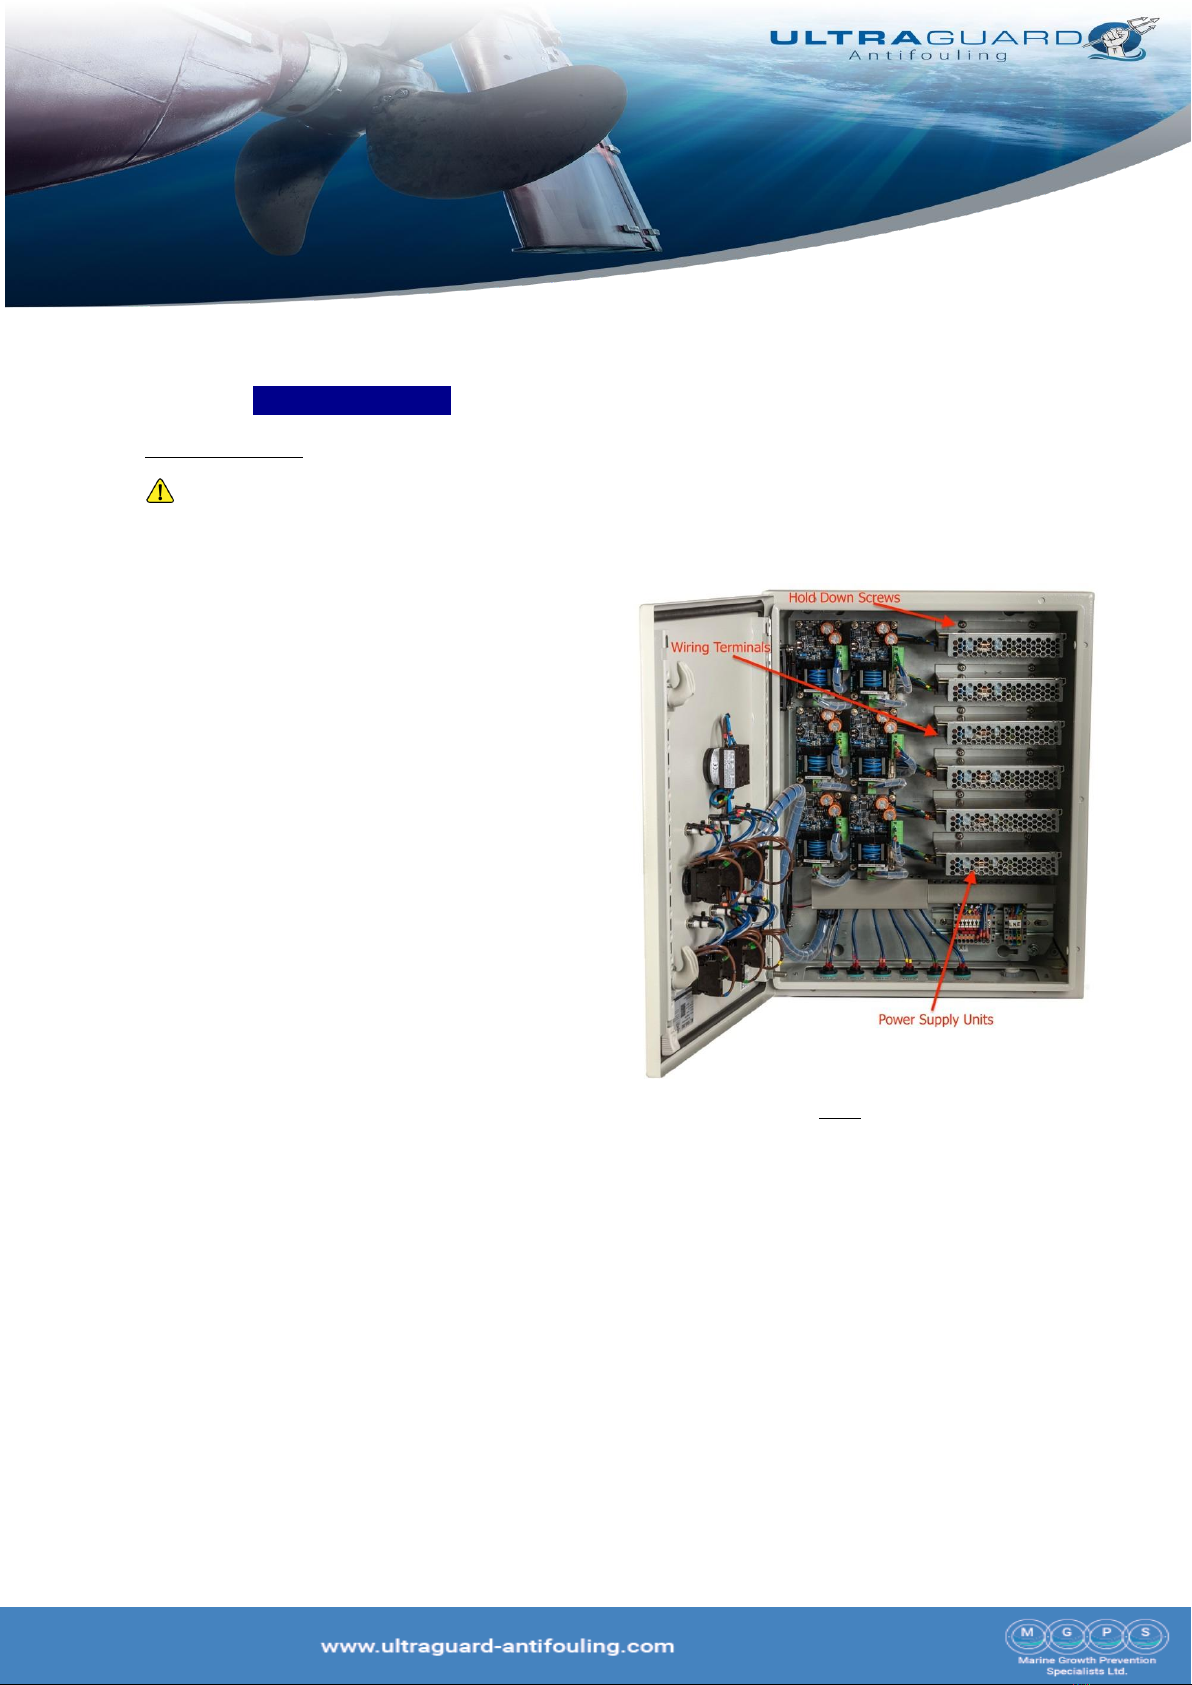
Run a fuse protected 240v AC 1 Phase power supply from
the vessel’s power distribution system into the control
panel via the cable gland and connect it to the power
terminals.
Connect the transducer main cables in order to the
transducer outlet connectors on the bottom of the
panel.
Once the transducers have had 24 hours to bond to the
protected surface, Connect the transducer tail cable to
the control panel via the main cables.
Turn on the main RED isolation switch on the front of the
control unit.
Switch the transducer operating switches to ON one at a
time. Wait until each LED turns green before switching
on the next switch.
Once every transducer is switched ON and the LEDs are
GREEN go to each transducer and ensure that you can
hear it operating. If they are located in a noisy
environment put your ear to the back of the transducer.
You should hear a high pitched tone as the transducer re-
starts each frequency sweep. You may also hear a
scratchy clicking sound as the transducer operates.
If there is a problem or not all of the LEDs are GREEN,
please refer to the Operators Manual supplied with your
Ultraguard system.

Basic System Fault Finding
When switching on each transducer circuit switch (Fig 1), it is normal
for the LED on the panel front (Fig 1) to remain blank for a few
seconds whilst the control circuit initializes and pulse width
modulation (PWM) begins. The LED should then turn GREEN and
remain so throughout operation.
Amber LED at Switch On
If the LED turns AMBER, check that the transducer cable is properly
connected to the panel and that there is no damage to the cable.
Blank LED at Switch On
If the LED does not illuminate and remains blank, check that power
is properly applied to the panel. If it is, isolate power from the panel
and open the panel to locate the affected PCB. Check the fuse on the
PCB has continuity across it. If it doesn’t, change the fuse.
Red LED at Switch On
There is a major PCB Fault. Contact Ultraguard technical support.
Green LED During Operation
System is operating normally
Amber LED during Operation
There is a minor fault on the system. Switch off circuit. Check
transducer cable is properly connected and that the cable is not
damaged or broken along its length.
Switch circuit back on, fault should have cleared. If fault reappears
contact Ultraguard technical support. If you have the Ultraguard TCB
APP you can follow the directions in the next section to pinpoint the
fault.
Red LED During Operation
System has a major fault. Switch off circuit, wait 30 seconds and
switch the circuit back on. Fault should clear. If fault reappears
please contact Ultraguard technical support. If you have the
Ultraguard TCB APP you can follow the next section to pinpoint fault.
System Fault Finding With TCB App
Connecting to the PCB
To connect your Ultraguard system to the app, you need to use the
supplied Ultraguard UG-TCB Serial Cable.
This has a USB at one end and a three pin micro connector at the
other end. There is a programmed chip in the USB end so please do
not use a non Ultraguard supplied cable.
First, switch off each transducer circuit, wait for the
circuit LEDs to extinguish and isolate the power from the
panel via the red isolator switch on the panel front.
Open the panel with the supplied panel key and locate
the PCB you want to connect to.
Locate the 3-pin serial connector on the PCB and connect
the serial cable to it with the orange wire towards the
adjacent hold down screw and the black wire towards
the adjacent battery holder.
Plug the USB end into your computing device.
From outside the panel, switch the power back on to the
panel, then switch on the relevant transducer circuit (Do
not put your hands into the panel whilst power is live!)
Follow the procedures in the TCB user guide.
Once you have completed using the app, switch off the
transducer circuit and isolate power from the panel
before removing the serial cable.
Close the panel, switch the power back onto the panel,
then switch each transducer circuit back on one at a
time. Wait until each circuit LED turns green before
switching on the next.
Fig 1
Please Refer to the Ultraguard TCB APP User Guide Before
Connecting APP Device.

System Fault Repair
REPLACING A PCB
THIS PROCEDURE SHOULD ONLY BE ATTEMPTED BY
PERSONNEL WHO ARE COMPETENT AND EXPERIENCED WITH
ELECTRONIC COMPONENTS.
Before starting the PCB replacement procedure, switch off every
transducer on the control panel (Fig 2) one at a time then switch off
the main RED isolator switch (fig 2) on the front of the control panel
and lock the isolator switch off with a suitable padlock. Now switch
off and lock out the system power supply breaker at the vessel’s
power distribution panel.
Open the control unit panel door and locate the faulty
PCB
Unplug the green two pin transducer plug. This is located
on the PCB in line with the transformer core (Fig 3).
Unplug the green six pin power plug. This is located on
the edge of the PCB next to the fuse housing (Fig 3).
Unscrew the four Pozidrive hold down screws. These are
located one at each corner of the PCB.
Lift out the old PCB.
Make sure any static charge you may have built up is
minimised by touching the earth connection on the
control unit door.
Remove the new PCB from its anti-static packaging.
Place the PCB into position and loosely re-fit the four
Pozidrive hold down screws.
Once you are happy with the final position of the PCB,
tighten the four Pozidrive hold down screws to a firm
hand tightness. DO NOT OVERTIGHTEN!
Re-connect the green six pin power plug.
Re-connect the green two pin transducer plug.
Re-check everything is secure, remove all tools from the
control unit and close and secure the control unit door.
Unlock the power supply and the red isolator switch and
re-admit power to the control unit.
Switch on ONLY the new PCB circuit and watch the LED
turn GREEN (Fig 2) after the PCB goes through its
automatic initialisation process.
Turn on the other transducer circuits one at a time
allowing each one to turn
GREEN
before switching on the
next circuit.
Fig 2
Fig 3
Table of contents
Other PMG Marine Equipment manuals