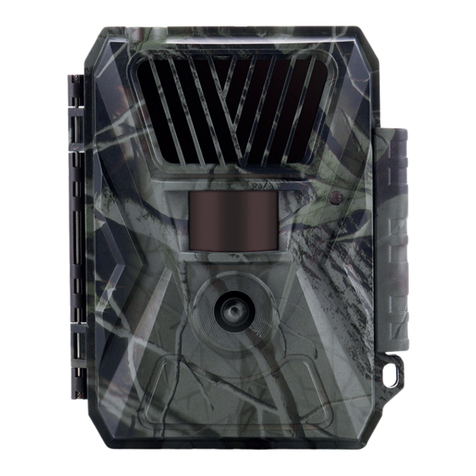
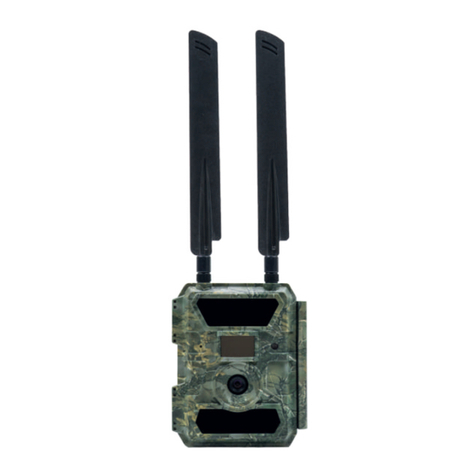
PNI HUNTING 280C User manual

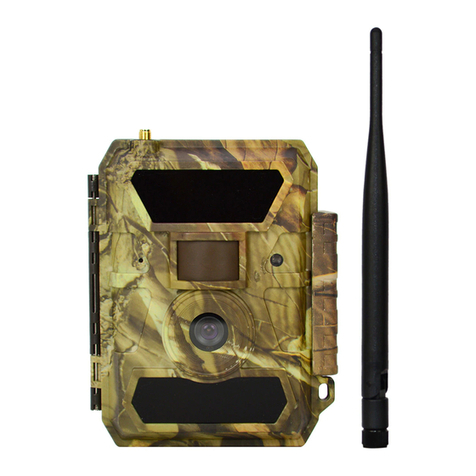
PNI HUNTING 280C
Trail camera/Camera de vanatoare
EN User manual ............................................. 3
DE Benutzerhandbuch .................................. 18
RO Manual de utilizare ................................... 33


3User manual
English
Main functions
• Shutter speed 0.8-1.0 sec.
• FOV 52°/PIR angle 60°
• Resolutions 24MP/1080P@15FPS
• Programmable photo size 12/16/24MP
• 40 invisible IR LEDs that oer night visibility up to 20 meters
• Excellent quality of images and videos, both during the day and at night
• Continuous shooting, one photo/second, maximum 7 photos, to capture
the complete movement of the subject
• Adjustable PIR sensitivity
• Programmable delay between shots
• Printed on image: camera ID, date/time, temperature, moon fase
• TFT screen 2.0 inch
Camera description
Front view
Bottom view
Inside view
1
3
4
2
5
7
6
8
9
11
10
13
14
12

User manual 4
English
Front view
Bottom view
Inside view
1
3
4
2
5
7
6
8
9
11
10
13
14
12
1. IR LEDs
2. LED indicator
3. PIR sensor
4. Lens
5. DC-in power supply (12V/1-2A)
6. Mini USB port
7. SD card slot (supports up to 32GB)
8. 2.0 inch color LCD screen
9. Menu key
10. Navigation keys
11. Camera mode/power switch
12. Battery compartment A (for 6 AA batteries)
13. Battery compartment B (for 6 AA batteries)
14. OK key (Set/Save)

5User manual
English
Keys and functions
1. Menu key
When the camera is in settings mode, the LCD screen lights up. Press the
MENU key to access the camera settings menu. When in the menu, press
the MENU key to return to the previous interface or to exit the menu.
2. Camera mode/power switch
a. Switch to OFF position - the room is turned o
b. Switch to SETUP position - when the camera is in the settings mode, the
LCD screen lights up. Press the MENU key to access the camera settings
menu or playback of recordings.
Note: The settings made will be saved only after you press the MENU key to exit
the menu.
c. Switch to ON position- the camera is on. When the camera is in the ON

User manual 6
English
mode, the LCD screen remains o and the camera operates according to the
settings.
3. OK (Set/Save)
4. UP. When the camera is in SETUP mode, press the UP key to enter the
playback mode.
5. LEFT
6. DOWN
7. RIGHT. When the camera is in SETUP mode, press the right key to
display the time on the screen.
• Move the switch to the ON position. The LED indicator will flash 5 times,
then the camera will enter PIR Auto Mode.
• Move the switch to the SETUP position. The LCD screen will light up.
The camera will enter Test mode.
• Move the switch to the OFF position. The camera will turn o.
Basic instructions
Battery supply
PNI Hunting 280C hunting camera works with 6 or 12 AA alkaline or
Ni-MH batteries. We recommend that you do not use Lithium batteries.
Insert the 6 or 12 batteries in the dedicated slot in accordance with the
polarity indicated on the housing.
We recommend that you replace the batteries when the icon indicating the
low battery appears on the camera screen.
Do not use dierent types or brands of batteries or batteries with a dierent
charge level at the same time.
The table below provides some approximate information on the number of
photos or videos that can be taken with 12 alkaline batteries.
Testing conditions: Closed LCD screen, Mode: Power on, automatic PIR.

7User manual
English
12 AA alkaline batteries
Photo per day Time Video per day Time
IR lights on IR lights on
12MP 100 pict. 64 days VGA 10 sec. 10 video 59 days
16MP 100 pict. 61 days HD 10 sec. 10 video 57 days
24MP 100 pict. 57 days FHD 10 sec. 10 video 54 days
IR lights o IR lights o
12MP 100 pict. 72 days VGA 10 sec. 20 video 163 zike
16MP 100 pict. 67 days HD 10 sec. 20 video 151 days
24MP 100 pict. 61 days FHD 10 sec. 20 video 140 days
Solar panel power supply
PNI Hunting 280C hunting camera works with standard 12V/1-2A Lithium
batteries with solar panel.
Power supply via power adapter
You can also power the camera with an external 12V/1-2A DC
power adapter. When using external power, we recommend that you
remove the batteries from the camera to avoid overcharging them.
Adapter power is only recommended when using the PNI Hunting 280C
security video surveillance camera.
SD card selection
In order to use the camera, an SD card must be inserted. When the camera
is turned on but no card is inserted, the warning appears on the screen Please
insert memory card.
PNI Hunting 280C supports cards with a maximum capacity of 32GB.
To avoid losing files saved on the card, when you insert or remove the card,
turn o the camera first.

User manual 8
English
When the card is full, the text appears on the screen Memory full.
The table below shows the approximate number of photos and video files that
can be saved to a card depending on its capacity.
SD card 1GB 2GB 4GB 8GB 16GB 32GB
Pictures
12MP 391 733 1613 3371 6887 13919
16MP 299 560 1232 2575 5260 10630
24MP 201 376 827 1728 3530 7134
Video (hours)
VGA 00:05:27 00:10:13 00:22:28 00:46:57 01:35:56 03:13:52
HD 00:03:59 00:07:23 00:16:13 00:33:53 01:09:14 02:19:56
FHD 00:02:04 00:03:53 00:08:31 00:17:48 00:36:20 01:13:21
USB connection
When the camera is connected via a USB cable, MSDC appears on the
screen. Press the MENU key once, MSDC changes to PC Cam; you can
now use the camera as a webcam. Press the MENU key again, the camera
exits the PC camera mode.
Warnings
• Insert and remove the memory card only when the camera is turned o.
• We recommend that you use good quality AA batteries to prevent
corrosion and acid leakage inside the chamber.
• Use only a 12V/1-2A power supply to power the camera, and do not
reverse the polarity when inserting batteries or accumulators.
• In test mode, the camera will turn o automatically in 5
minutes if no button is pressed. If you want to enter PIR
Auto Mode again, move the main button to the ON position.
When the screen is lit, whether in the main interface or in the menu, if no
key is pressed for 5 minutes, the camera will turn o automatically.
• Do not interrupt the power supply to the device during the software
update and return the device to the seller if the update procedure fails.
Our recommendation is to send the product to the seller for the soft
9User manual
English
update procedure, in order to eliminate the risk of irreparably damaging
the product.
• Remove branches or moving objects from the monitored area that may
cause false photos to be taken.
• Do not place the camera near heat-emitting equipment,
ventilation equipment, light sources, to avoid taking fake photos.
The camera has 40 IR LEDs and a 52° FOV lens. Use only high-quality
batteries capable of providing enough power to illuminate consistently in
dark environments.
Turning the camera on
Move the switch to the ON position.
The camera will start with the factory settings. So, for testing, the user only
needs to insert an SD card and batteries in the camera
Functions setting
1. Move the switch to the SETUP position. The camera screen will light up.
The camera will enter Test mode.
2. Press ◄, ►, ▲ and ▼ to navigate through settings.
3. Press the OK key to confirm.
4. Press the MENU key to exit the settings interface.
Note: In order for some settings (such as Cam ID, Delay, Time Lapse, Password)
to be saved and take eect, the user must press the MENU key after pressing the
OK key..

User manual 10
English
Menu
Note: The default settings are marked in red
Auto Modes
Hunting
ON/OFF
Security
ON/OFF
Setup
Language
English…
Camera ID
Date/Time
YYYY/MM/DD
HH:MM
Cam Name
OFF/ON
Password
OFF/ON
Image Setup
Camera Mode
Picture/Video/PIC+Video
1P-7P
Multi-Shot
Image Size
12MP/16MP/24MP
Video Size
FHD/HD/VGAVideo Setup Video Frame
30FPS/15FPS
Video Length
/SS 05-60s
Timer
OFF/ON
PIR Sensitivity
High/Middle/Low
Time Lapse
OFF/ON
Delay
OFF/ON
Other
Battery Type
Alkaline/NI-MH
SD Cycle
OFF/ON
Frequency
50Hz/60Hz
Reset
No/Yes
About
Version:

11 User manual
English
Operations
Photo/video playback
1. Move the switch to the SETUP position. The camera screen will light up.
The camera will enter Test mode.
2. Press ▲to access the playback interface
3. Press ◄/►to select and the OK key to play the selected photo or video
file.
4. Press ▲to get out.
5. When in Playback mode, press the MENU key to delete a file or format
the SD card.
6. Press the MENU key again to exit.
Delete files
1. Delete one (delete one file): delete the selected photo or video file. Press
OK to choose the option Delete one, then ◄/►to select the file and Yes
to delete or No to return to the main interface.
2. Delete all (delete all files)
SD card formatting
In Test mode, the camera will enter PIR Auto Mode if no key has been pressed
for 5 minutes.
Note: the camera remains in Test mode if it is in the configuration interface (in
the menu).
Operations menu
In Test mode, press the MENU key to access the menu.
Press ◄, ►, ▲and ▼to navigate through settings.
Press the OK key to confirm.
Press the MENU key to switch between letters, numbers and symbols.
Press the MENU key to exit the settings interface.

User manual 12
English
Note: In order for some settings (such as Cam ID, Delay, Time Lapse, Password)
to be saved and take eect, the user must press the MENU key after pressing the
OK key..
Auto Modes/Setup
Auto Modes
Setting Options
Hunting The default camera settings are: multi-shot 3P
(continuous shooting 3 photos), photo size 12M,
Delay (delay) 5 seconds
Security The default camera settings are: photo + video,
12M photo size, 1080P video resolution, 10 sec
video duration.

13 User manual
English
Setup
Setting Option
Language English ...
Time/Date
Month: Day: Year, Hour: Minutes: Seconds
Note: We recommend that you set the correct date
and time to ensure that some functions work properly.
Camera ID
Cam Name - select ON, press OK and enter the
4-digit/letter camera name. This feature helps you
identify from which camera you are receiving a
particular photo.
Password - select ON, press OK to activate the
password protection of the camera. The password
must contain a maximum of 6 digits/letters.
Camera Mode Select the operating mode of the camera: Picture,
Video, Pic+Video
Image setup
Image size:
12MP (4000*3000), 16MP (4608*3456),
24MP (5632*4224)
Multi-shot: 1 - 7 pictures
Video setup
Video size:
FHD (1920*1080), HD (1280*720), VGA
(640*480)
Video Frame: 30FPS,15FPS
Video length Options: 5 - 60 sec.

User manual 14
English
PIR Sensitivity
High, Middle, Low
Higher sensitivity means:
- the camera is more sensitive to the movement of
small objects
- the detection distance is longer
- the sensor more easily detects the dierence
between body heat and air temperature
- The camera triggers recording more easily.
In high temperature environments, it is more
dicult for the camera to tell the dierence
between the subject’s body heat and the heat of
the air. Therefore, we recommend setting the PIR
sensitivity to High.
Timer
Select ON and press OK to set the camera start
time and stop time (hour/minute). The camera will
operate only during the set time interval.
Time Lapse
Select ON and press OK to set the interval at
which the camera will take photos and recordings.
The camera’s PIR sensor will be disabled.
Configurable interval: between 5 seconds and 24
hours.
Note: Do not activate the Time Lapse and Delay
functions simultaneously.
Delay
Select ON and press OK to set the time after
which the camera will fire (photo or video) when
motion is detected. By activating this option, the
camera will not take too many photos and videos.
Example: The camera will wait 1 minute between
triggers when it detects motion, if the set interval
is 00:01:00
Configurable options: between 0 seconds and 24
hours
Note: Do not activate the Time Lapse and Delay
functions simultaneously.
Battery Type
Alkaline/Ni-MH
Choose the correct type of batteries inserted in
the camera to ensure proper operation.

15 User manual
English
Other
SD-Cycle
Select ON and press OK to activate the cyclic
recording. The camera will delete older files when
the memory is full.
Frequency
50Hz/60Hz
Incorrect frequency setting may cause the screen
to flicker.
Reset Select Yes to return the camera to the factory
settings
About The camera firmware version is displayed
Technical specifications
Real pixels 2560 x 1920px
Day/night mode Yes
Distant IR up to 20m
IR settings All: 40 LEDs/Partial: 20 LEDs
Memory SD card slot (maximum 32GB)
Lens F=3.0, FOV 52°
Auto IR-Cut-Remove (at night)
LCD screen TFT RGB 2.0 inch, 262k
Distant PIR 15m
PIR angle 60°
Image size 12MP/16MP/24MP =
4000x3000/4608x3456/5632x4224
Image format JPEG
Video resolution FHD (1920x1080): 15FPS, HD (1280x720),
VGA(640x480)
Video format AVI
Video duration Programmable, between 5 - 60 seconds
Multi-shot Yes, maximum 7 photos/shot

User manual 16
English
Trigger speed 0.8 - 1 sec.
Trigger interval 5 - 7 sec.
Microphone Yes
POwer supply Battery 9V/DC 12V
Battery 12 x AA
External power
supply DC 12V
Standby
consumption 0.15mA
Standby battery life 5 - 8 months (with 6 AA batteries or 12 AA
batteries)
Power o voltage Alkaline batteries: 6.3V
NI-MH battery: 6.0V
DC power supply: 6.5V
Ports Micro USB, SD card slot, DC port
Temperature -26°C ~ +60°C
Water resistance
class IP66
Dimensions 118 x 78 x 144 mm
Weight 350 g (without batteries)
Troubleshooting
Photos do not capture the subject
1. Check the PIR sensitivity parameter. For high temperature environment
conditions, set the sensitivity level to High and for use in low temperature
conditions, set the sensitivity level to Low.
2. Try to install the camera in an area where there are no heat sources in the
field of view of the room.
3. In some cases, positioning the camera near water will cause the camera to
take images without a subject in it. Try to point the camera at the ground.
4. Try to place the camera on stable and immovable objects, ie: large trees,
thick poles, etc. Avoid mounting on thin trees or branches that can be moved

17 User manual
English
by the wind. Break the branches in the field of view of the camera, because
they can be moved by the wind and can trigger photos.
5. At night, the motion detector can detect beyond the IR illumination range.
Reduce the distance by adjusting the sensitivity of the sensor.
6. Sunrise or sunset may trigger the sensor. The camera must be reoriented.
7. Iftheperson/animalmovesquickly, it canpassthefield of view of the camera
before being photographed. Mount the camera further back or reorient the
camera.
The camera no longer takes photos or videos
1. Check the SD card memory. If the memory is full, the camera will stop
taking pictures. Empty the card or activate the cyclic recording mode to
avoid such a problem.
2. Check that the alkaline or NiMH AA batteries are suciently charged.
3. Check that the camera’s power switch is in the “ON” position.
4. Format the SD card in the camera before using it or when the camera
stops taking pictures.
The IR illumination distance does not meet expectations
1. Check that the batteries are fully charged or charged enough for proper
operation
2. High quality 1.5V NiMH AA batteries can provide much better IR lighting.
Alkaline batteries may not provide enough amperage to illuminate suciently
at night;
3. To ensure the accuracy and quality of the night image, please mount the
camera in a dark environment, without strong light sources.
4. Certain surroundings (such as trees, walls, ground, etc.) within the range of
the LEDs can give you better images at night. Please do not point the camera
to open field because if there is nothing in the range of the IR LEDs, the light
will not reflect back; it’s like pointing a flashlight at the sky at night without
seeing anything.

Benutzerhandbuch
Deutsche
18
Hauptfunktionen
• Geschwindigkeit Auslöser 0.8-1.0 Sek.
• FOV 52°/Winkel PIR 60°
• Auflösungen 24MP/1080P@15FPS
• Auflösung Foto programmierbar 12/16/24MP
• 40 LEDs IR unsichtbar mit Nachtsicht bis zu 20 m
• Hohe Bild- und Videoqualität, tags und nachts
• kontinuierliches Fotografieren, ein Foto/Sekunde, höchstens 7 Fotos um
die komplette Bewegung des Subjekts zu verfolgen
• Sensibilität PIR anpassbar
• Programmierbare Verzögerung zwischen den Bewegungen
• Ausdruck auf Foto: ID Kamera, Datum/Uhr, Temperatur, Mondphase
• Bildschirm TFT 2.0 inch
Kamera Beschreibung
Vedere frontala
Vedere de jos
Vedere din interior
1
3
4
2
5
7
6
8
9
11
10
13
14
12

Benutzerhandbuch
Deutsche
19
Vedere frontala
Vedere de jos
Vedere din interior
1
3
4
2
5
7
6
8
9
11
10
13
14
12
1. LEDs IR
2. LED Anzeige
3. Sensor PIR
4. Objektiv
5. Versorgung DC-in (12V/1-2A)
6. Port Mini USB
7. Slot Karte SD (es unterstützt höchstens 32GB)
8. Bildschirm LCD 2.0 inch
9. Taste Menü
10. Tasten
11. Schalter Modus Betrieb/Kamera einschalten
12. Abteilung Batterien A (für 6 Batterien AA)
13. Abteilung Batterien B (für 6 Batterien AA)
14. Taste OK (Einstellung/Speichern)

Benutzerhandbuch
Deutsche
20
Tasten und Funktionen
15. Taste Menü
Wenn die Kamera in Einstellung-Modus ist, schaltet der LCD Bildschirm ein.
Drücken Sie die Taste MENÜ, um die Einstellungen der Kamera abzurufen.
Wenn Sie im Menü sind, drücken Sie die Taste MENÜ, um zum vorherigen
Interface zurückzukehren oder um das Menü zu verlassen.
16. Schalter Modus Betrieb/ Kamera einschalten
a. Schalter auf OFF - die Kamera ist ausgeschaltet
b. Schalter auf SETUP - wenn die Kamera in Einstellung-Modus ist, schaltet
der LCD Bildschirm ein. Drücken Sie die Taste MENÜ, um die Einstellungen
abzurufen oder um die Aufnahmen wiederzugeben.
Hinweis: die durchgeführten Einstellungen werden gespeichert nur nachdem Sie
die Taste MENÜ gedrückt haben, um das Menü zu verlassen.
c. Schalter auf ON - die Kamera ist eingeschaltet. Wenn die Kamera auf ON
ist, bleibt der LCD Bildschirm ausgeschaltet, die Kamera funktioniert laut
Other manuals for HUNTING 280C
1
Table of contents
Languages:
Other PNI Scouting Camera manuals

PNI
PNI HUNTING 480C User manual

PNI
PNI Hunting 550C User manual

PNI
PNI Hunting 400C User manual

PNI
PNI HUNTING 280C User manual

PNI
PNI Hunting 2C 8MP User manual

PNI
PNI Hunting 550C User manual

PNI
PNI Hunting 350C User manual

PNI
PNI Hunting 3C / 300C User manual

PNI
PNI Hunting 400C User manual

PNI
PNI Hunting 250C User manual