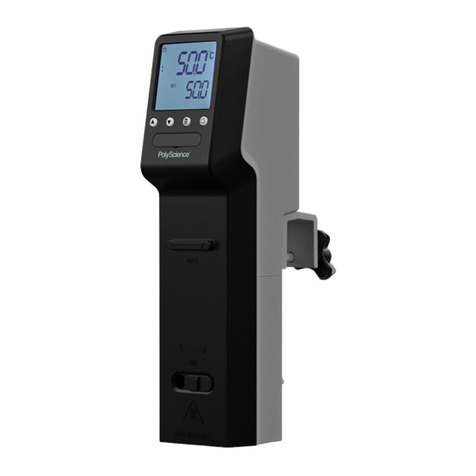
PolyScience LX Immersion Circulator User manual

110-874 PSC/EN 25 February 2014
LX Immersion Circulator
Operator’s Manual


110-874 1
Table of Contents
Introduction ........................................................................ 2
General Information............................................................ 3
General Safety Information................................................ 3
Safety Recommendations.................................................. 4
Regulatory Compliance and Testing .................................. 5
Unpacking Your Immersion Circulator................................ 6
Package Contents ............................................................. 6
Controls and Components ................................................. 7
Installation and Startup...................................................... 9
Normal Operation ............................................................. 10
Buttons and Controls....................................................... 10
Turning Your Circulator ON.............................................. 10
Main Operational Displays................................................11
Set-Up Sub-Menus.......................................................... 12
Adjusting the Temperature Set Point................................ 13
Selecting the Temperature Unit ....................................... 13
Setting and Using the Timer ............................................ 14
Loss of Power Restart ..................................................... 14
Alarm Messages ............................................................. 15
Routine Maintenance and Troubleshooting..................... 15
Maintaining Clear Bath Water.......................................... 15
Cleaning Your Immersion Circulator ................................ 16
Resetting the Over-Temperature Safety........................... 17
Troubleshooting Chart ..................................................... 17
Technical Information....................................................... 19
Performance Specifications............................................. 19
Reservoir Fluids .............................................................. 19
Equipment Disposal (WEEE Directive) ............................ 20
Service and Technical Support ........................................ 21
Warranty............................................................................ 21

2110-874
WARNING: Circulating Baths are not intended
for directly controlling the temperature of foods,
pharmaceuticals, medicines or other objects which
may be ingested by or injected in humans or animals.
Any such objects must be isolated from contact with
the bath fluids and bath surfaces.
!
Introduction
Thank you for choosing the LX Immersion Circulator. It is
intended for the precise temperature control of suitable liquids in
a reservoir.
Here are some of the features of the LX Immersion Circulator:
• Simple, intuitive operation
• Displays actual and set point temperature simultaneously
• Powerful pump
• Attaches securely to both flat and rounded tank walls
• Converts any tank or vessel up to 20 liters into a reliable
circulating bath
• Fully enclosed housing prevents direct contact with pump and
heater
• Suitable for use with Class I non-flammable fluids per DIN
12876-1
We recommend that you read the Operator’s Manual thoroughly
before you begin.

110-874 3
This symbol alerts you to a wide range of potential
dangers.
!
General Information
When installed, operated and maintained according to the
directions in this manual and common safety procedures,
your LX Immersion Circulator should provide safe and reliable
liquid heating. Please ensure that all individuals involved in
the installation, operation or maintenance of this unit read this
manual thoroughly prior to working with the unit.
General Safety Information
Read all instructions pertaining to safety, set-up and
operation. Proper operation and maintenance is the
user’s responsibility.
This symbol advises of danger from electricity or
electric shock.
This symbol indicates a protective conductor
terminal.
This symbol marks information that is particularly
important.
!
This symbol indicates that a hot surface may be
present.
This symbol indicates alternating current.
These symbols on the Power Switch indicate that
they place the main power supply ON/OFF.

4110-874
Safety Recommendations
To prevent injury to personnel and/or damage to property,
follow your workplace’s safety procedures when operating
this equipment. You should comply with the following safety
recommendations:
WARNING:
• This Immersion Circulator is suitable only for use
with Class I non-flammable fluids
(per DIN 12876-1).
• Be aware of the chemical hazards that may be
associated with the bath fluid used. Observe all
safety warnings for the fluids used as well as those
contained in the material safety data sheet.
• Use only recommended bath fluids.
• Use only non-acid bath fluids.
• Use fluids that satisfy safety, health and equipment
compatibility requirements.
!
WARNING:
• Connect the power cord on this unit to a properly
grounded power outlet. Make certain that the outlet
is the same voltage and frequency as your unit.
• Never operate the unit with a damaged power cord.
• The use of an extension cord is not recommended.
• Turn the unit OFF and disconnect mains power
before performing any maintenance or service.
WARNING:
• Never operate the Circulator without bath fluid in
the reservoir. Periodically check the reservoir to
ensure that the liquid depth is within acceptable
levels. Refill the reservoir using the same bath
fluid that is already in the reservoir. Bath oil must
not contain any water contaminants and should be
preheated to the actual bath temperature before
adding as there is an explosion hazard at high
temperatures.
• Drain all fluid from the reservoir before moving
or lifting. Be sure to follow your organization’s
procedures and practices regarding the safe lifting
and relocation of heavy objects.
• Turn electrical power to the unit OFF and remove
the Immersion Circulator from reservoir before
draining.
!

110-874 5
WARNING: It is the user’s responsibility to properly
decontaminate the unit in the event hazardous
materials are spilled on exterior or interior surfaces.
Consult manufacturer if there is any doubt regarding
the compatibility of decontamination or cleaning
agents.
!
WARNING:
• Allow the bath fluid to return to ambient
temperature before draining.
• Keep within the 85°C maximum operating
temperature limit if using a polycarbonate bath.
Regulatory Compliance and Testing
The following are the compliance certifications for the equipment.
120V Units - ETL Certification
UL 61010-1 / CSA C22.2 No. 61010-1, 2nd Edition
07/12/04 (R 10/28/2008)
IEC 61010-2-010: 2003, CSA C22.2 No. 61010-2-
010:2004/07/01 Ed:2 (R2009)
IEC 61010-2-051: 2003, CSA C22.2 No. 61010-2-051:04
Ed:2 (R2009)
240V Units - CE Compliance
Low Voltage Directive 2006/95/EC
EN 61010-1, 2nd Edition Issued March, 2001
EN 61010-2-010 2nd Edition Issued October, 2003
EN 61010-2-051 2nd Edition Issued October, 2003
EMC Directive 2004/108/EC
EN 61326-1: 2006
Machinery Directive 2006/42/EC Annex I
All Units - RoHS2 2011/65/EU

6110-874
Unpacking Your Immersion Circulator
Your Immersion Circulator is packed in a special carton. You
should keep this carton, along with all packing materials, until the
unit has been installed and you are certain it is working properly.
CAUTION: Remove any loose packing material that
may have fallen into the heater/pump housing during
shipping. Before powering up, check that nothing
remains around the heater or circulator pump.
!
We recommend that you begin using your Immersion Circulator
immediately to confirm proper operation.
In the unlikely event that the unit was damaged or does not
operate properly, immediately contact the company where your
Immersion Circulator was purchased.
• LX Immersion Circulator
• Quick-Start Guide
• Operator’s Manual
• Selection Guide
Package Contents
This product has been tested to the requirements of CAN/
CSA-C22.2 No. 61010-1, second edition, including Amendment
1, or a later version of the same standard incorporating the same
level of testing requirements.
The user shall be made aware that the protection provided by
the equipment may be impaired if the equipment is used with
accessories not provided or recommended by the manufacturer,
or used in a manner not specified by the manufacturer.

110-874 7
Controls and Components
Backlit Display
Run Button
Stop Button
Increase Value Button
Decrease Value Button
Menu Button
Cover Plate for
Over-
Temperature
Protection Reset
Button
Minimum Liquid
Level Line
Front Flow
Port
Maximum Liquid
Level Line

8110-874
Mounting Clamp
Rear Flow Port
Power Switch
Electrical Power
Cord
Removable
Heater/Pump
Access Cover
Circulating
Heating
Actual Fluid
Temperature
Set Point
Temperature
Countdown
Timer

110-874 9
Installation and Startup
1. Attach the Immersion
Circulator to the reservoir
(user-supplied). The mounting
clamp mounts securely to both
flat and rounded tank walls.
Allow a minimum of 1.3 cm /
0.5 inch clearance between
the bottom of the Circulator’s
housing and the bottom of the
reservoir.
2. Add liquid to the reservoir.
The liquid in the reservoir
should be maintained
somewhere between the
“Maximum” and “Minimum”
liquid level lines embossed on
the housing.
WARNING: See Reservoir Fluids (page 19).
WARNING: Read the safety data sheet for the bath
fluid being used carefully before filling reservoir.
WARNING: If the proper fluid level is not maintained,
the heater coil may become exposed and possibly
damaged (fluid level too low) or the bath may
overflow (fluid level too high).
!
3. Plug the power cord into a properly grounded electrical
outlet. The LCD will light and the actual and set point
temperatures will appear on the display.
WARNING: Make certain that the electrical outlet is
the same voltage and frequency as your Circulator;
the correct voltage and frequency are indicated on
the identification label on the back of the unit.
The use of an extension cord is not recommended. If
one is necessary, it must be properly grounded and
capable of handling the total wattage of the unit. The
extension cord must not cause more than a 10% drop
in voltage to the unit.
Minimum
Liquid Level
Line
Maximum
Liquid Level
Line

10 110-874
Normal Operation
Buttons and Controls
Power Turns the Circulator On, placing it in
Standby mode.
Run Starts operation.
Stop
Places Circulator in Standby mode.
Display is lit, but neither the pump
nor heater is operating.
Menu
Accesses the Temperature
Controller’s set-up sub-menus. The
items in these sub-menus are used
to select the temperature unit, adjust
the set point and set the timer.
Increase Value Increase the temperature set point
or timer setting.
Decrease Value Decrease temperature set point or
timer setting.
Turning Your Circulator ON
Press the button on the rear of the unit.
All characters/symbols on the LCD will momentarily light,
after which the actual and set point temperature (in °C) will be
displayed. The Circulator is now in the Standby mode.

110-874 11
Main Operational Displays
Circulating
Heating*
Actual Bath
Temperature
Set Point
Temperature
Set Point
Temperature/
Countdown Timer
(alternating
display)
Standby Mode
Run Mode
Actual Bath
Temperature
*May be shown if
set temperature is
greater than actual
temperature.

12 110-874
Set-Up Sub-Menus
IMPORTANT: The Circulator’s set-up sub-menus
cannot be set/changed while the Circulator is heating
or circulating the bath liquid. You must first place the
unit in Standby by pressing .
!
Press the Menu button to access the Temperature Controller’s
set-up sub-menus.
To accept a value in a sub-menu, press the button.
Sub-Menu Selection /
Range To Change Current Value
Temperature Set
Point
5° to 98°C
41° to 208 °F
Press or until the desired
temperature value is displayed.
Temperature Unit
°C
°F
Press once for °C.
Press three times for °F.
Timer 00:05 to 99:00
Press twice and then enter
the desired time period using
and buttons.

110-874 13
Adjusting the Temperature Set Point
This is the temperature at which the fluid in your circulating bath
will be maintained. It may be set to one-tenth of a degree over a
range of 5° to +98°C / 41° to +208°F. The factory default is
20°C / 68°F.
1. Press once
for °C or three
times for °F. 2. Press and/
or until the
desired set point
temperature is
displayed.
3. Press .
The temperature units sub-menu allows you to select the
temperature unit in which the actual bath temperature and set
point temperature are displayed. The factory default is °C.
2. Press .
1. Press once
for °C or three
times for °F.
Current
Temperature
Unit
Selecting the Temperature Unit

14 110-874
Setting and Using the Timer
Your LX Immersion Circulator has a timer that can be set for time
periods from 5 minutes to 99 hours. The factory default is 24:00
hours.
2. Press and/
or until the
desired time period
is displayed.
When the timer is running, the remaining time and the set point
temperature appear alternately on the display. When the time
period set has elapsed, the Circulator will beep three times, go
silent for 15-20 seconds and then repeat. The Circulator will
continue circulating the bath fluid and maintaining it at the set
point temperature until the Stop button is pressed; this also
resets the timer.
3. Press .
1. Press
twice.
Loss of Power Restart
If electrical power lost while your Circulator is in use, it will
begin operating automatically once power is restored, with the
temperature displayed in °C and the timer set for 24:00 hours.
WARNING: The unit will start automatically after a
disruption in electrical power.
!

110-874 15
Alarm Messages
E01 appears on the display - Indicates that the fluid level in the
bath reservoir is too low. To clear, fill reservoir until the fluid level
is above the MIN liquid level mark on the Circulator’s housing
and then turn power to the unit Off and back On.
Routine Maintenance and Troubleshooting
WARNING: Turn electrical power to the unit OFF and
remove Immersion Circulator from reservoir before
draining.
Always drain all fluid from the reservoir before
moving or lifting. Be sure to follow your organization’s
procedures and practices regarding the safe lifting
and relocation of heavy objects.
!
WARNING: To avoid the potential for burns, allow the
unit to return to ambient temperature before cleaning
or performing any maintenance.
WARNING: Always turn your Circulator OFF and
disconnect it from the electrical power outlet before
performing any maintenance or service.
!
CAUTION: Always clean and dry your LX Immersion
Circulator thoroughly before storing.
!
Maintaining Clear Bath Water
Optimum temperature and moisture conditions for algae
growth exist when using water as a bath fluid. To prevent algae
contamination and minimize the frequency of draining the
reservoir, an algaecide should be used.
WARNING: Do not use chlorine bleach.
!

16 110-874
Cleaning Your Immersion Circulator
Temperature Controller
Place the unit in Standby by pressing , press on the rear
of the unit to turn the unit OFF and unplug power cord from
electrical outlet.
Remove Temperature Controller from bath reservoir and, keeping
it upright, wipe the housing with a clean cloth dampened with a
mild detergent and water or mild all-purpose cleaner.
WARNING: It is the user’s responsibility to properly
decontaminate the unit in the event hazardous
materials are spilled on exterior or interior surfaces.
Consult the manufacturer if there is any doubt
regarding the compatibility of decontamination or
cleaning agents.
!
CAUTION: Do not spray cleaning liquids directly onto
the Temperature Controller or allow them to enter
the Controller’s vents. Do not use abrasives as these
could scratch the housing or the digital display.
!
CAUTION: Never immerse the Circulator’s controls
or display in water or other liquids or place under
running water. Do not clean the unit in a glassware
washer.
!
Bath Reservoir and Wetted Components
A vinegar solution or calcium/lime/rust remover can be used
to remove mineral deposits from the Temperature Controller’s
wetted parts. The cleaner should be added to the bath reservoir
at the prescribed dosage and circulated at 60°C / 140°F until the
scale is removed.
Pump Impeller
In the unlikely event that debris becomes lodged in the pump
impeller, a soft brush can be used to remove any lodged
particles. If necessary, soak in a solution of distilled water and
vinegar to soften before brushing.
CAUTION: Do not use hard utensils or abrasive pads
to remove trapped debris.
!

110-874 17
Resetting the Over-Temperature Safety
Troubleshooting Chart
Problem Possible Causes Corrective Action
Unit does not run
(Digital Display is
blank)
No power to unit
Over-temperature
safety has tripped
due to high liquid
temperature
Check that the electrical cord
is secure and connected to an
operating electrical outlet.
Allow fluid in the reservoir to cool
and reset over-temperature safety
(see above).
Unit does not
run (Neither the
Circulating nor
Heating icon is
lit)
Unit in Standby
mode
Press Run button.
No fluid
circulation
Unit in Standby
mode
Insufficient fluid in
reservoir
Pump impeller
jammed
Press Run button.
Add fluid to reservoir.
Inspect pump and remove debris
as required.
*Over-
Temperature
Safety Reset
Button
The Circulator’s automatic over-temperature safety* removes
power from the unit whenever the fluid temperature exceeds a
factory-set temperature. This safety is reset as follows:
1. Place the power switch on the rear of the unit in the Off
position.
2. Disconnect the electrical power cord from the electrical outlet.
3. Allow the fluid in the reservoir to cool.
4. Remove the plate covering the red reset button.
5. Press the red reset button.
6. Replace the cover plate.
7. Restore power to the unit.
8. Press the Run button.
If the problem persists, contact your supplier.

18 110-874
Problem Possible Causes Corrective Action
Insufficient
circulation
Fluid viscosity too
high
Low line voltage
Replace with lower viscosity bath
fluid.
Check and correct as required.
Fluid circulating
but circulating
icon not lit
Momentary
electronics
problem
Turn power to the unit Off, back
On and then press the Run
button.
Unit does not
heat
Unit in Standby
mode
Insufficient fluid in
reservoir
Temperature set
point too low
Press Run button.
Add fluid to reservoir.
Increase temperature set point.
Insufficient
Heating
Insufficient
circulation
Low line voltage
Ambient
temperature too
cool
Excessive heat
loss
See Insufficient circulation,
above.
Check and correct as required.
Increase ambient temperature or
relocate unit.
Check for vapor/heat loss from
internal reservoir.
Temperature
unstable
Insufficient
circulation
Debris or mineral
build-up on
pump, heater
or temperature
sensor.
Check pump flow and operation.
Clean as required.
E01 appears on
the display
Water level in the
reservoir is too
low
Add fluid to the reservoir and
then turn power to the unit Off
and then back On.
This manual suits for next models
1
Table of contents
Other PolyScience Laboratory Equipment manuals

PolyScience
PolyScience Histology Bath User manual

PolyScience
PolyScience MX-CA12E User manual

PolyScience
PolyScience WB05A11B User manual

PolyScience
PolyScience WBE20A11B User manual

PolyScience
PolyScience MX-CA11B User manual

PolyScience
PolyScience DuraChill 58 Series User manual

PolyScience
PolyScience 4100 Series User manual

PolyScience
PolyScience IP-80 User manual
PolyScience
PolyScience WBE10A11B User manual
PolyScience
PolyScience MX07R-20 User manual