TEST
BEFORE
USING
(continued)
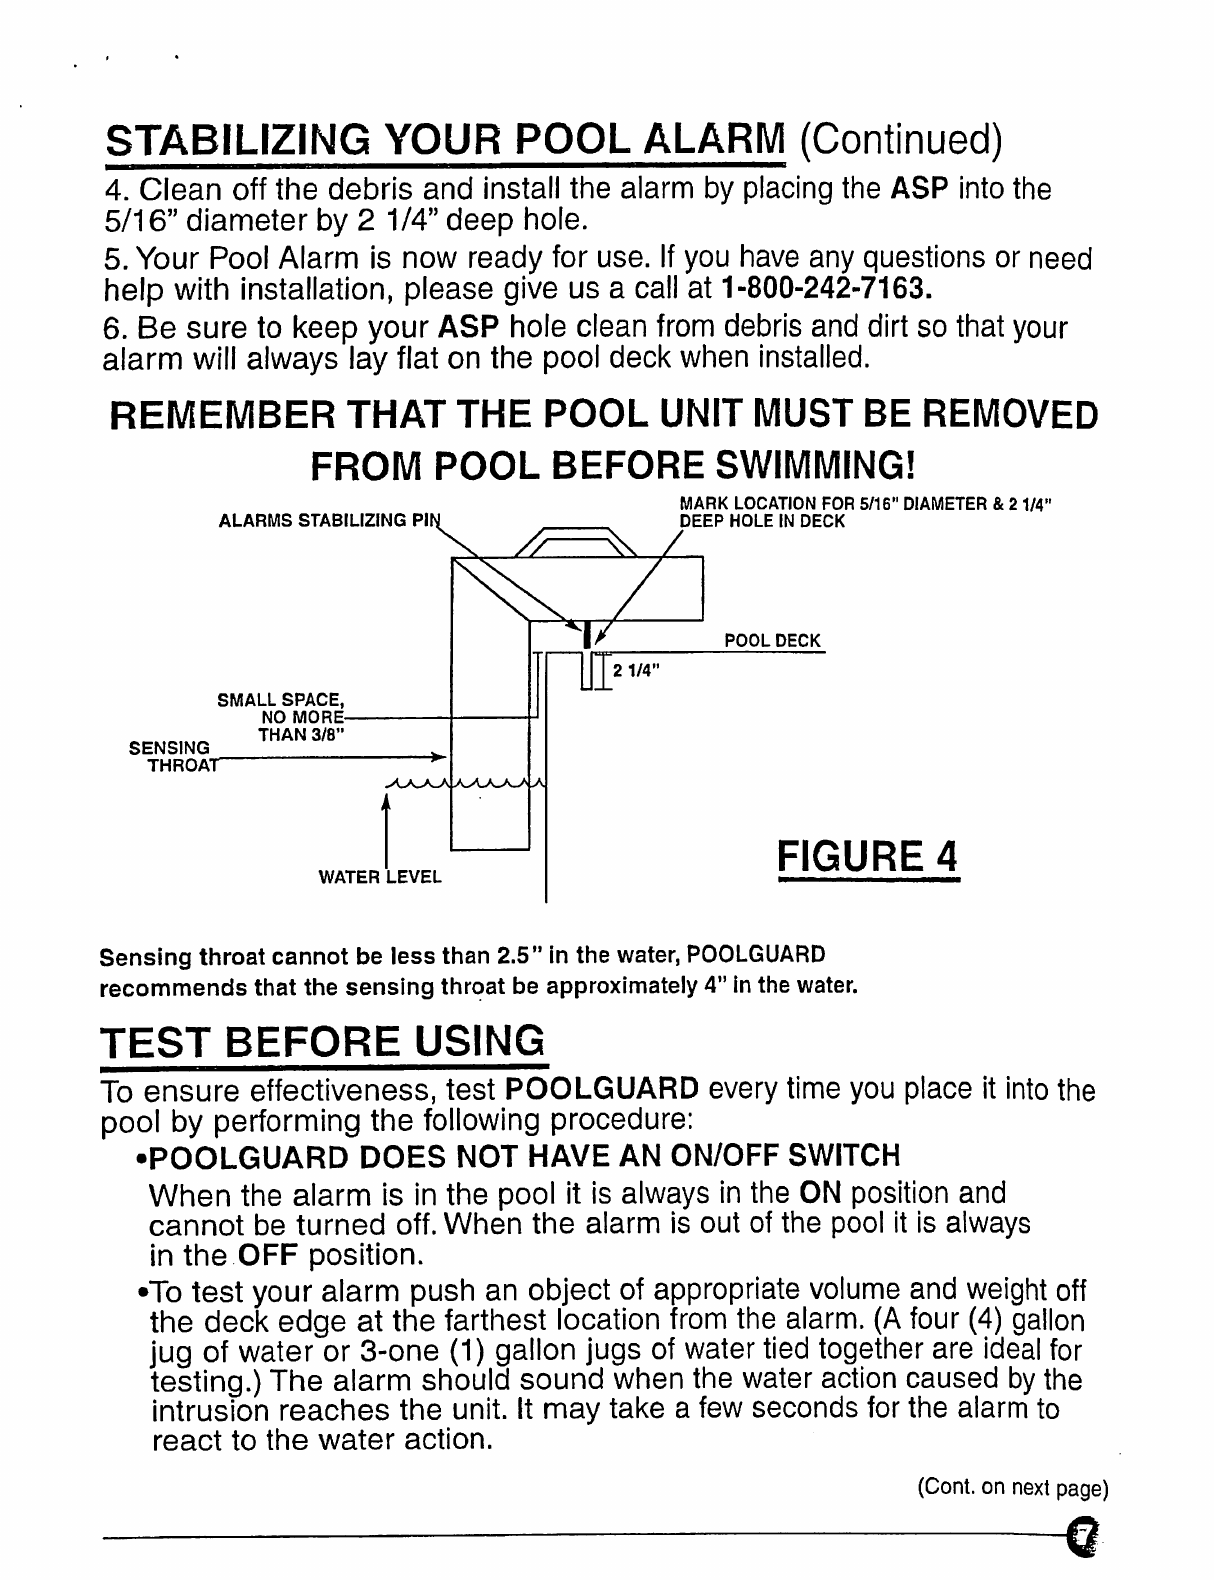
•After resetting the alarm and
allowing
time
for
the water
action
to settle,
repeat the procedure
from
another
point
in
the
pool
until
you
are
confident
of
detection
performance.
•POOLGUARD
includes
atimer function which automatically
resets
the
unit
after
the
alarm
has
sounded
for approximately 5minutes.
ADJUSTING
YOUR
RETURN
LINE
FITTINGS
The
POOLGUARD alarm
should
not
be
placed too close to a return line,
also do not place POOLGUARD
in
alocation
in
the
pool
where a
return
line is pointing in the alarms direction. Waterturbulence
may
be too
strong,
falsely setting the alarm
off
or the waterturbulence
may
interfere
with
the
alarms ability to detect an intrusion.
If
you have
more
than 2
return
lines
please
call
customer service at
1-800-242-7163.
It
is
very
important
in
pools
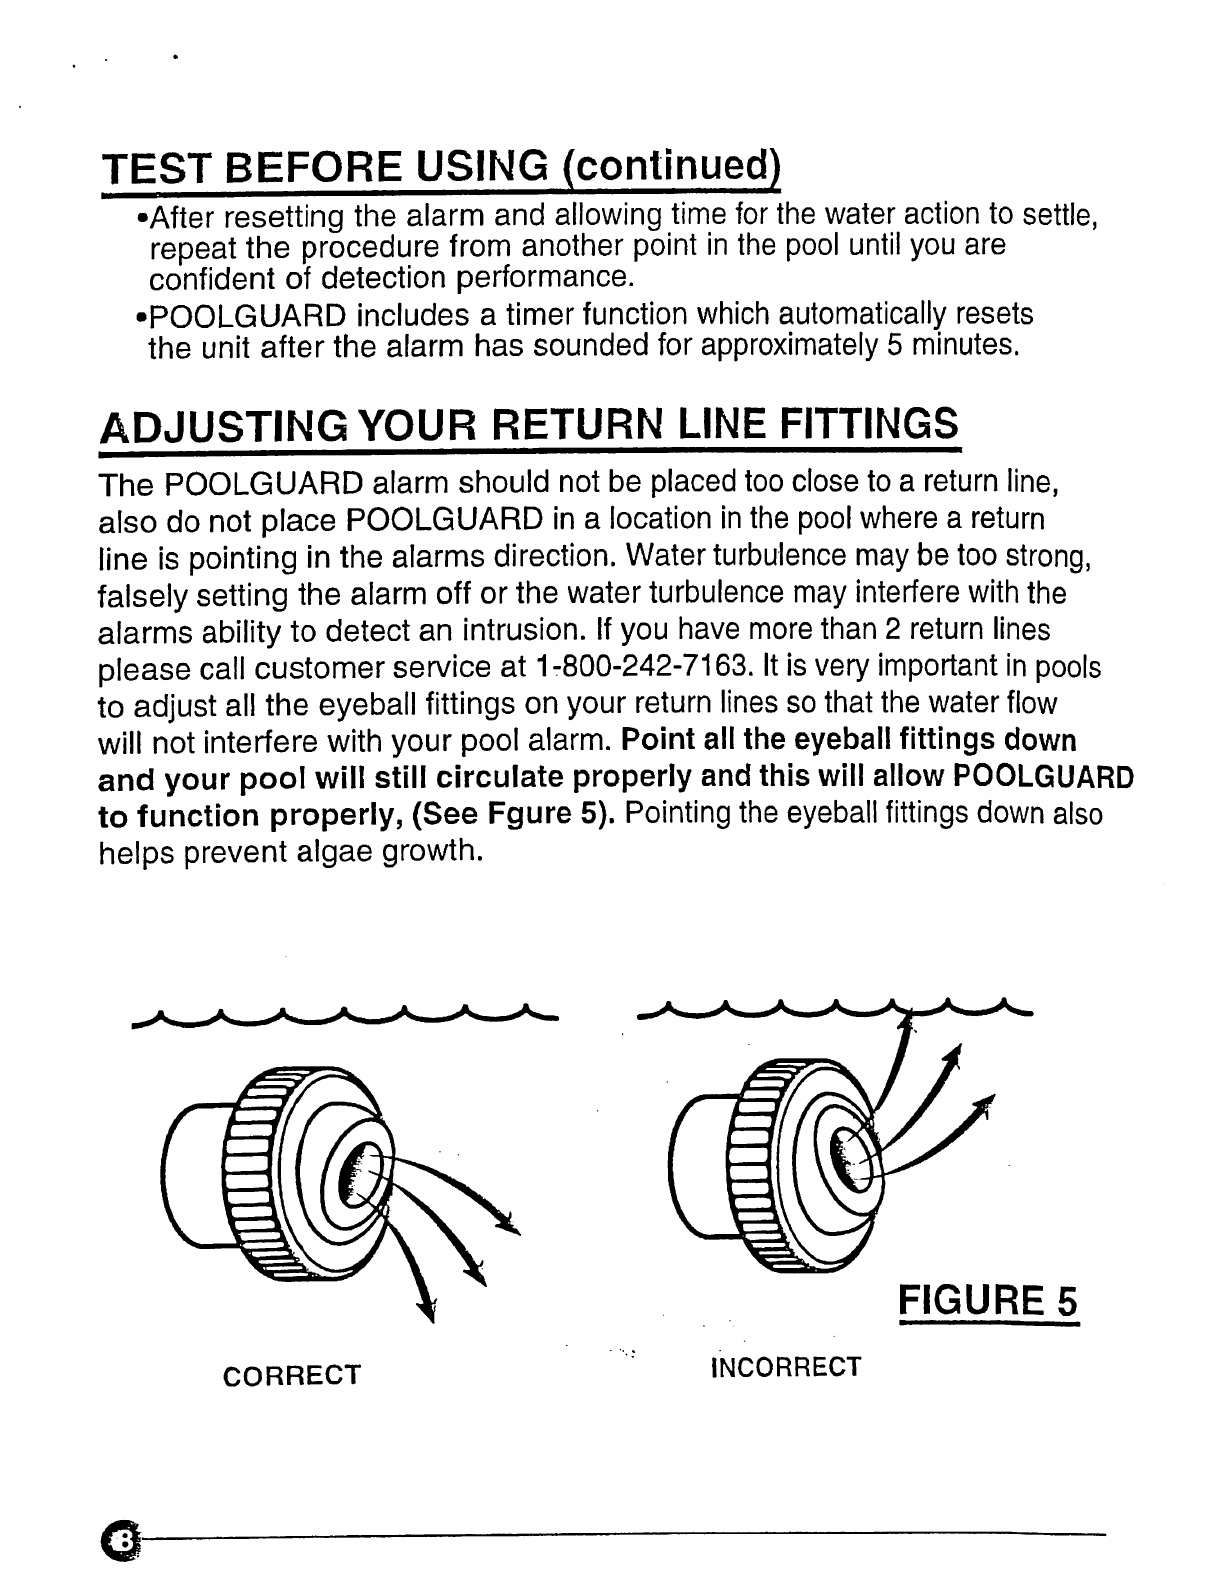
to adjust
all
the eyeball fittings on your
return
lines
so that the water
flow
will
not interfere with your pool alarm. Point allthe eyeball fittings down
and
your pool will still circulate properly and this
will
allow
POOLGUARD
to
function properly,
(See
Fgure 5). Pointing the eyeball
fittings
down
also
helps prevent algae growth.
FIGURE
5
CORRECT
INCORRECT