manuals.online logo
Brands
  1. Home
  2. •
  3. Brands
  4. •
  5. Portfolio
  6. •
  7. Outdoor Light
  8. •
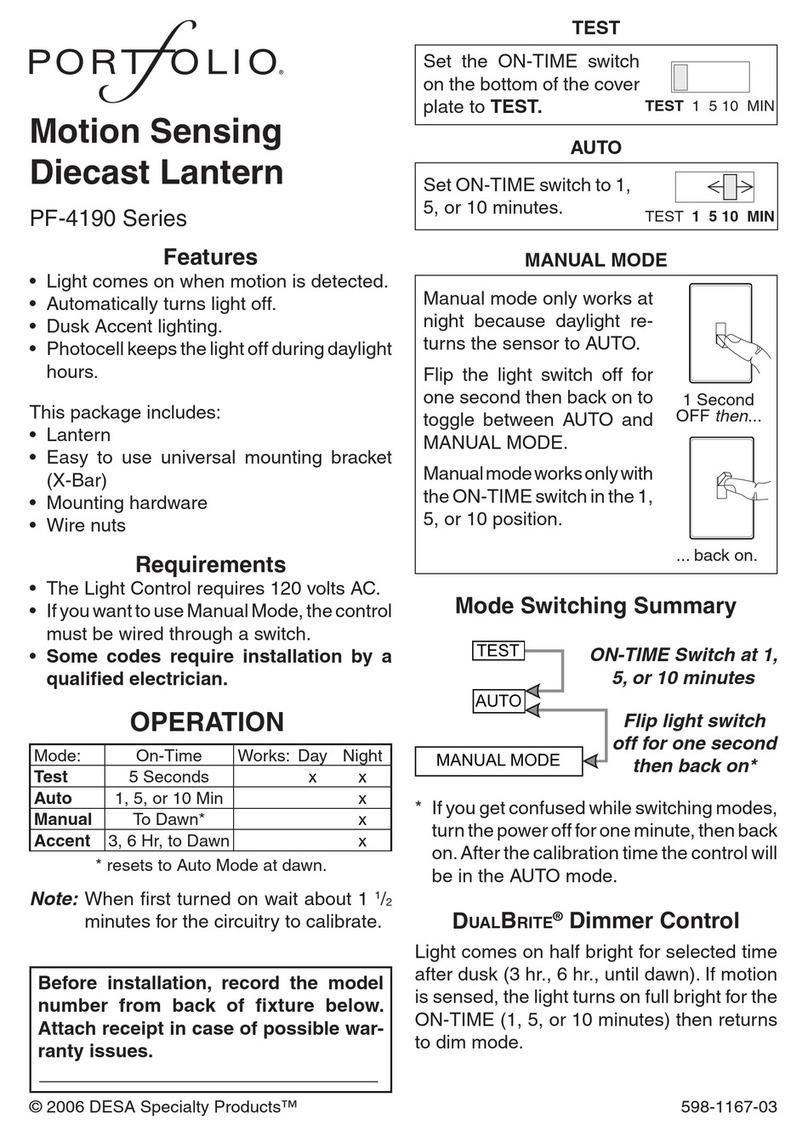
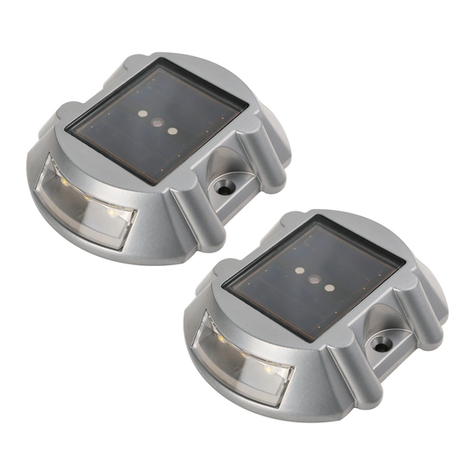
  9. Portfolio 00976 User manual

Portfolio 00976 User manual

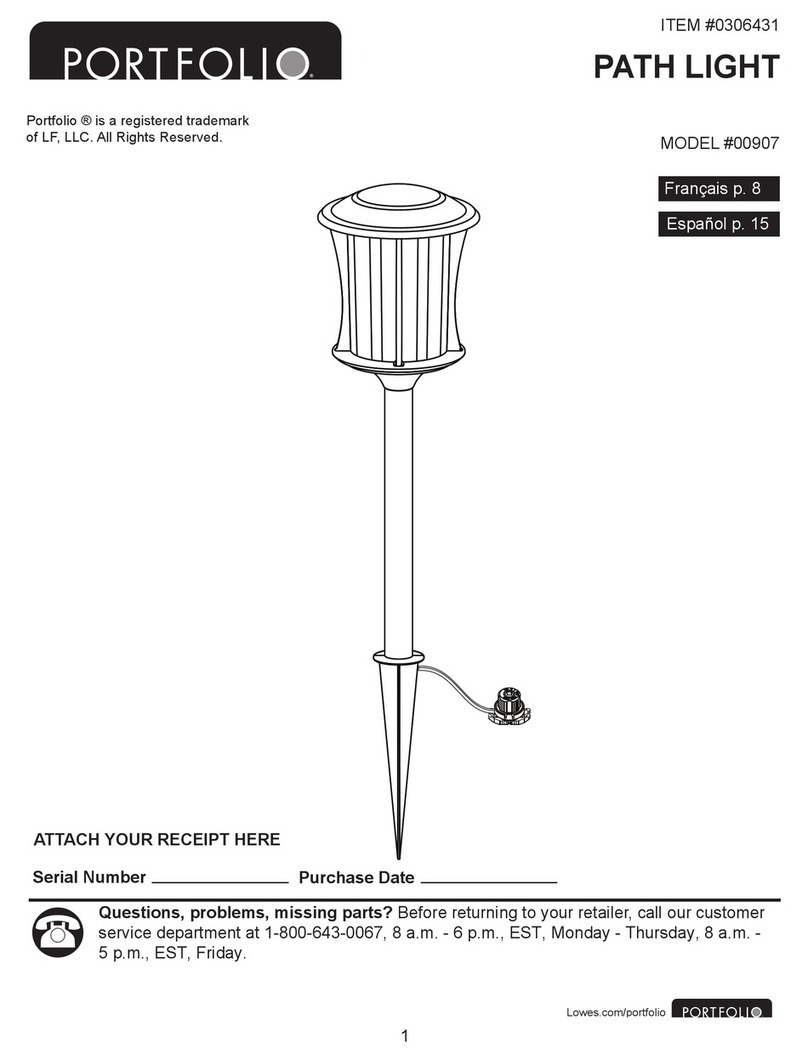
ITEM/ARTICLE/ART[CULO #0329363
Porfolio®
is
a registered trademark
of
LF,
LLC. All Rights Reserved.
2 CT
PATH
LIGHT
FEUX
PATH
2 CT
2 LUCES PARA SENDERO
Portfolio® est une marque de
commerce deposee de
LF,
LLC. Tous
Portfolio® es una marca registrada
de
LF,
LLC. Todos los derechos
reservados.
eQuestions?/Des
questions?/i.Preguntas?
Call customer service at 1-800-643-0067,
8 a.m. - 6 p.m.,
EST,
Monday-
Thursday,
8 a.m. -5 p.m.,
EST,
Friday.
Communiquez avec notre service a
Ia
clientele
au
1 800 643-0067, entre 8 h et 18 h (HNE)
du lundi
au
jeudi, ou entre 8 h et 17 h (HNE)
le
vendredi.
MODELIMODELE/MODELO #00976
ATTACH YOUR RECEIPT HERE
JOIGNEZ VOTRE RECU ICI
ADJUNTE
SU
RECIBO AQUi
Llame a Servicio
al
Cliente
al
1-800-643-0067,
de lunes a jueves de 8 a.m. a 6 p.m., y los
viernes de 8 a.m. a 5 p.m., hora estandar del
Este. Serial Number/Numero de serie/Numero de serie
____
_
Purchase Date/Date d'achaUFecha de compra
____
_
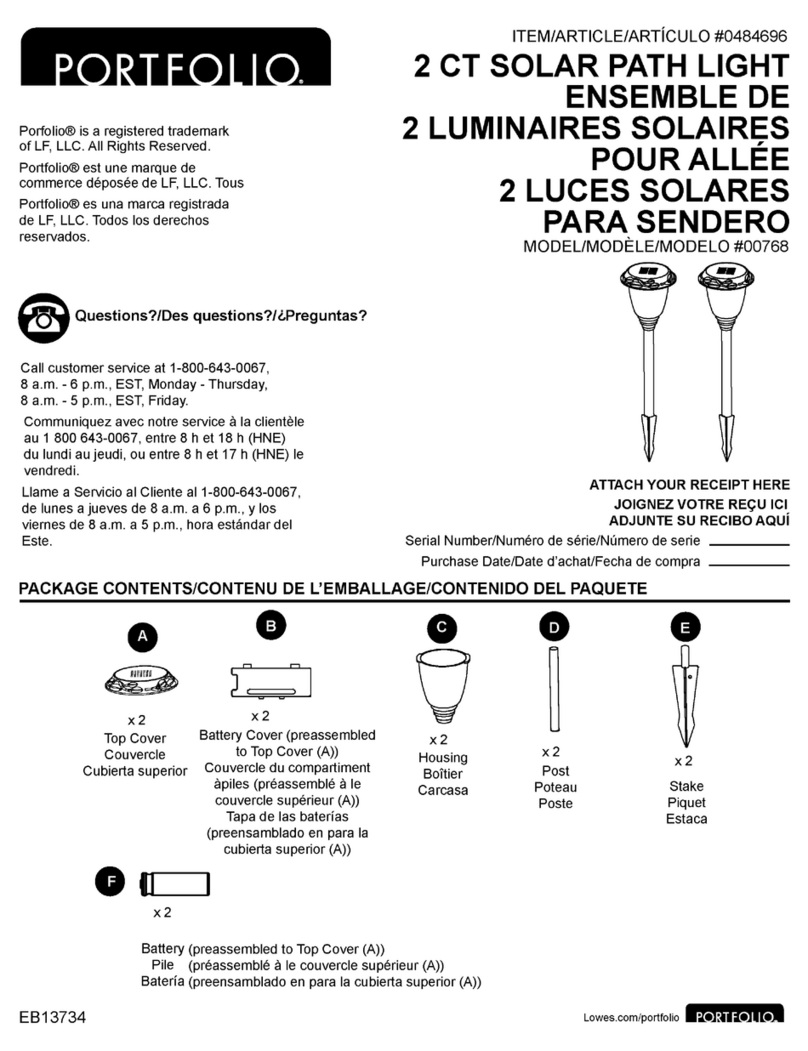
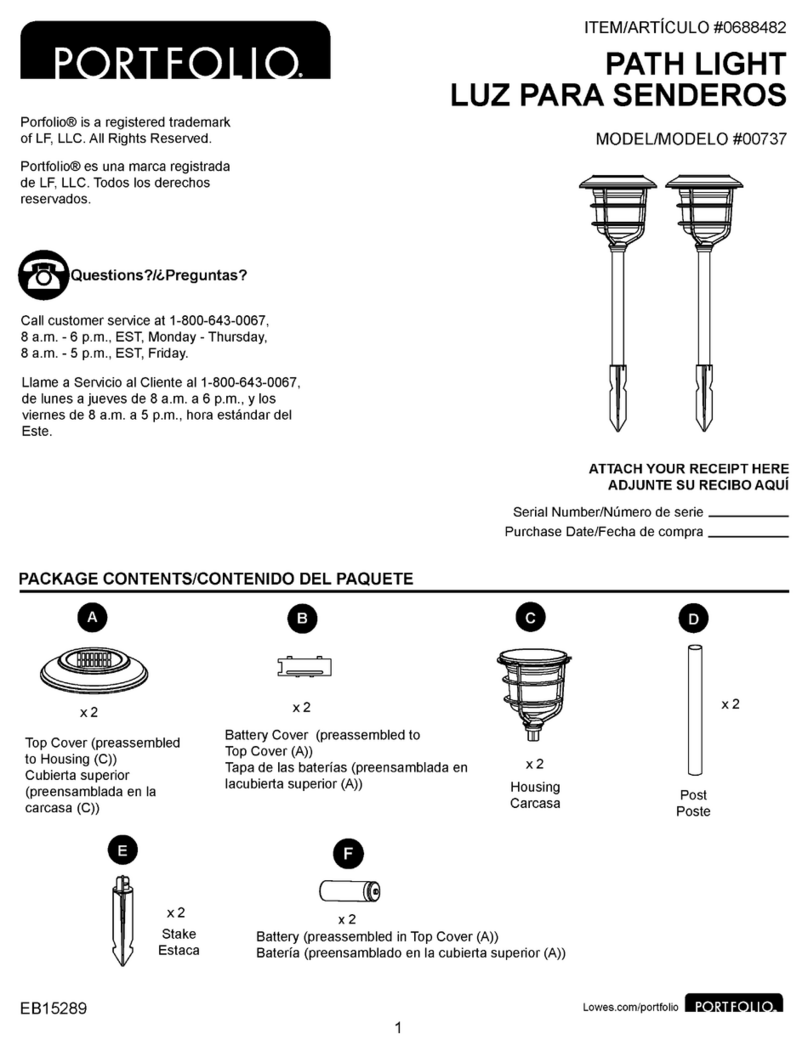
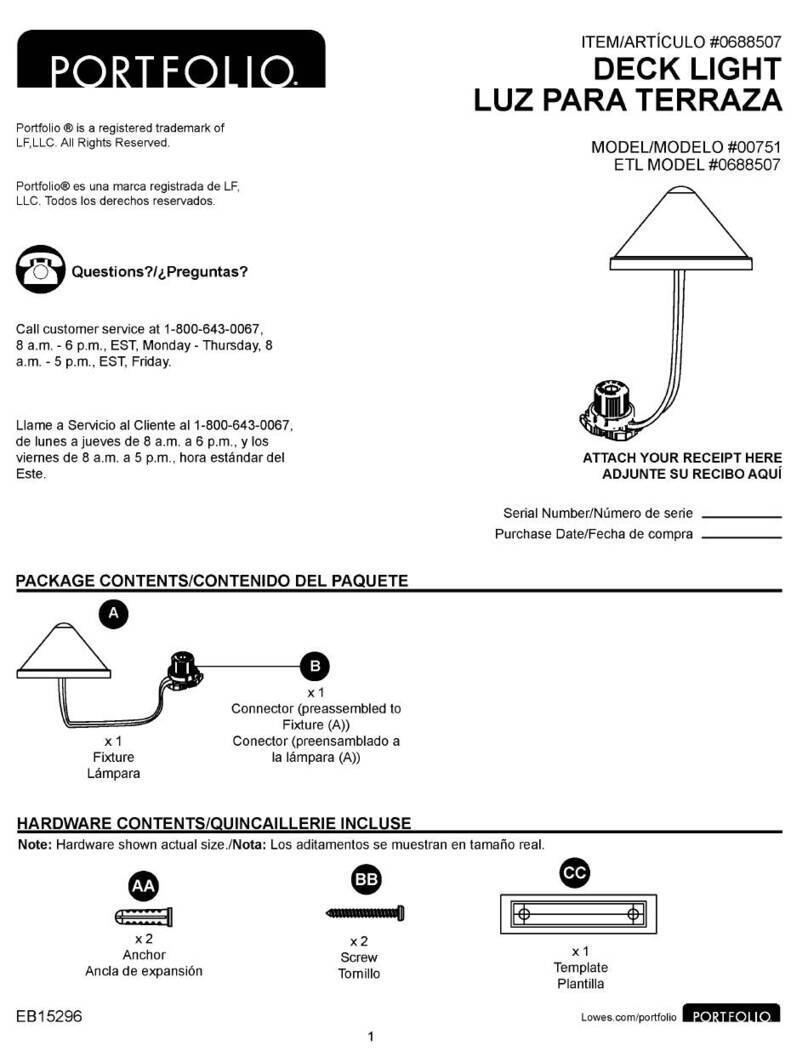
PACKAGE CONTENTS/CONTENU
DE
L'EMBALLAGE/CONTENIDO DEL PAQUETE
0
x2
Top Cover (preassembled
to Housing (C))
Couvercle (preassemble
vers
le
boltier (C))
Cubierta superior
(preensamblada en
Ia
carcasa (C))
EB13686
x2
Stake
Piquet
Estaca
x2
Battery Cover (preassembled to
Top Cover (A))
Couvercle du compartiment apiles
(preassemble a l'interieur vers
le
couvercle superieur (A) )
Tapa de las baterfas (preensamblada en
lacubierta superior (A) )
x2
Battery (preassembled to Top Cover (A))
•
x2
Housing
Boltier
Carcasa
Pile (preassemble a l'interieur vers
le
couvercle superieur (A) )
Baterfa (preensamblada en lacubierta superior (A) )
Post
Tige
Poste
Lowes.com/portfolio
x2
A SAFETY INFORMATION/CONSIGNES
DE
SECURITE/INFORMACION DE SEGURIDAD
Please read and understand this entire manual before attemting to assemble, operate or install the product.
Assurez-vous
de
lire et
de
comprendre l'integralite
de
ce
manuel avant de tenter d'assembler, d'utiliser.
Lea y comprenda completamente este manual antes
de
intentar ensamblar, usar o instalar
el
producto.
AWARNING/AVERTISSEMENT/ADVERTENCIA
• Use rechargeable battery only./N'utilisez que des piles rechargeables./ Use
s61o
baterfas recargables.
• Do not open, short circuit, or damage batteries
as
injury may occur./Evitez d'ouvrir, de court-circuiter
ou
d'endommager
les piles; vous risqueriez
de
vous blesser./No abra las baterfas, no las exponga a cortocircuitos
ni
las corte, ya que
podrfa ocasionar lesiones.
CAUTION/MISE
EN
GARDE/PRECAUCION
• Do not dispose
of
batteries
in
the regular trash, municipal waste stream or by fire
as
batteries may leak or explode./
Ne jetez pas les piles avec les dechets courants
ou
les ordures menageres et
ne
les jetez pas
au
feu; elles pourraient
couler
ou
exploser./No deseche las baterfas
en
los basureros comunes,
en
los basureros municipales,
en
corrientes
de
agua
ni
incinerandolas,
ya
que podrfan explotar o filtrarse.
• Preserve our environment by recycling batteries or disposing
of
them
in
accordance with local, state, and federal
regulations./Recyclez les piles
ou
jetez-les conformement aux reglements locaux, provinciaux ou federaux afin de
preserver l'environnement./Cuide
el
medio ambiente y recicle las baterfas o desechelas
de
acuerdo con los reglamentos
locales, estatales o federales.
• Do not mix old and new batteries./Ne combinez pas des piles usagees avec des piles neuves./No mezcle baterfas antiguas
con nuevas.
• Do not mix alkaline or standard (carbon-zinc) batteries./Ne combinez pas des piles alcalines avec des piles ordinaires
(carbone-zinc)./No mezcle baterfas estandar o alcalinas (carbona-cine).
PREPARATION/PREPARATION/PREPARACION
Before beginning installation
of
product, make sure
all
parts are present. Compare parts with package contents list. If
any part
is
missing or damaged, do not attempt to assemble, install or operate the product.
Estimated Assembly Time: 5-10 minutes
Helpful Tools (not included): Trowel
Avant de commencer !'assemblage
du
produit, assurez-vous d'avoir toutes les pieces. Comparez les pieces avec
Ia
liste.S'il y a des pieces manquantes
ou
endommagees, ne tentez pas d'assembler
le
produit.
Temps d'assemblage approximatif : 5-10 minute
Outils utiles (non inclus): Truelle
Antes
de
comenzar a ensamblar
el
producto, asegurese de tener todas las piezas. Compare las piezas con
Ia
lista. No
intente ensamblar, instalar o usar
el
producto
si
falta alguna pieza o
si
las piezas estan dariadas.
Tiempo estimado de ensamblaje: 5-10 minutos
Herramientas utiles
(nose
incluyen): Llana
Lowes.com/portfolio
ASSEMBLY INSTRUCTIONS/CONSIGNES
DE
SECURITE/INSTRUCCIONES DE ENSAMBLAJE
1.
Remove pull tab from the
bottom
of
top cover (A).
Use the switch to choose
the preferred working mode
of
the fixture.
Note:
6H
provides
30
lumens
light output while 1
OH
provide
24 lumens light output.
II
Retirez
Ia
languette situee sous
le
couvercle (A). Reglez
l'interrupteur
du
luminaire
au
mode d'eclairage souhaite.
Remarque :
Le
mode
6H
offre
un
flux lumineux
de
30
lumens pendant et
le
mode 1
OH
offre
un
flux lumineux
de
24 lumens pendant.
Retire
Ia
lengueta de
Ia
parte inferior
de
Ia
cubierta
superior (A). Utilice
el
interrupter para seleccionar
el
modo
de funcionamiento que prefiera para
Ia
lampara.
Nota:
6H
brinda
30
lumenes
de
salida de luz por y 10H
brinda 24 lumenes
de
salida de luz por .
2.
Slide and secure post (D)
to the housing (C). Attach
the post (D) to stake (E).
Push the assembly firmly into
the ground.
CAUTION: DO NOT use a
hammer. For ground with
hard soil, use a trowel
(not included) to loosen soil to
prevent breaking the stake (E).
Glissez
le
poteau (D)
au
boitier (C). Fixez
le
poteau (D)
au
piquet (E).Enfoncez
fermement !'ensemble
dans
Ia
terre.
MISE
EN
GARDE : N'utilisez
PAS
de marteau.
Si
le
sol est
II
dur,
utilisez une truelle (non incluse)pour
le
ramollir afin d'eviter de briser
le
piquet (E).
Deslice y asegure
el
poste (D)
en
Ia
carcasa
(C). Fije
el
poste (D)
en
Ia
estaca (E). Empuje
el
conjunto con firmeza para enterrarlo.
PRECAUCION: NO use
un
martillo. Para
suelos con tierra dura, use una IIana
(nose
incluye) para aflojar
Ia
tierra y evitar romper
Ia
estaca (E).
REPLACING BATTERY/REMPLACEMENT DES PILES/REEMPLAZO
DE
LAS BATERiAS
1.
Twist and remove the
top cover (A) from
housing (C)
Devissez et retirez
le
couvercle (A)
du
boitier (C).
Gire y retire
Ia
cubierta
superior (A) de
Ia
carcasa (C).
•
<
W--e
2.
Remove the battery cover (B). Replace the battery (F) with
a new rechargeable 3.2-volt Lithium (LiFeP04) battery.
Replace the battery cover (B).
FOR FIRST TIME USE: Allow the light to run 8-12 charging
and discharging cycles to reach battery's maximum capacity.
Retirez
le
couvercle des
compartiments apiles (B).
Remplacez les piles (F) par
des piles rechargeables
au
I
ithium (LiFeP04)
de
3,2-volts
chaque annee. Replacez
le
couvercle
du
compartiment a
piles (B).
PREMIERE UTILISATION:
Laissez
le
luminaire effectuer
8 a
12
cycles
de
charge et
de decharge pour atteindre
Ia
capacite maximale
de
Ia
pile.
Retire
Ia
tapa de las baterfas (B).
0
--Q
0 -
{}
Reemplace las baterfas (F) por baterfas recargables
lithium (LiFeP04) de 3,2-voltios. Coloque
de
nuevo
Ia
tapa
de
las baterfas (B).
EN
EL PRIMER USO: Deje que
Ia
luz complete
al
menos 8
a
12
ciclos
de
carga y descarga completas para que
se
alcance
Ia
capacidad maxima de las baterfas.
Lowes.com/portfolio
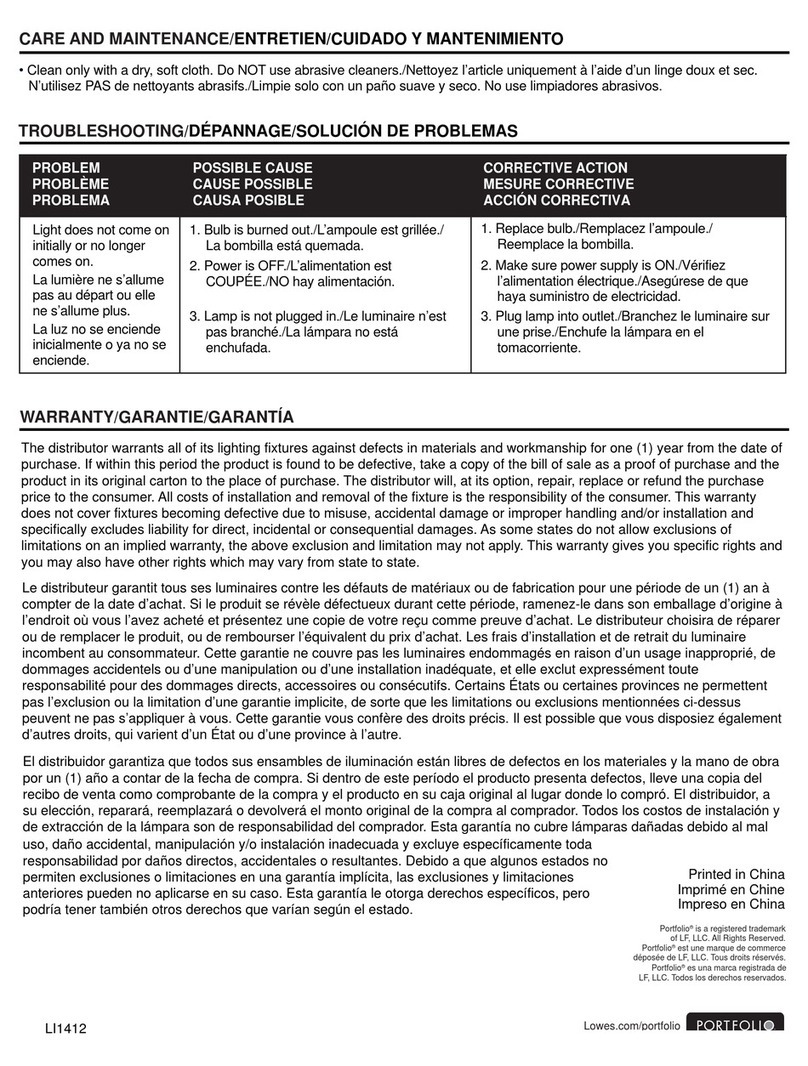
CARE AND MAINTENANCE/ENTRETIEN/CUIDADO Y MANTENIMIENTO
•
For
optimum
performance,
it
is
best
to
install
the
solar lights
in
full
sunlight
and
charge
for 1
0-12
hours
.
Allow
the
light
to
run
at
least
8-12
entire
charging
and
discharging
cycles
to
reach
battery's
maximum
capacity./Pour
un
rendement
optimal,
veuillez installer
les
lanternes
sola
ires
en
pie
in
solei
I
et
les
laisser
se
charger
pendant
10
a
12
heures.
Laissez
les
lanternes
effectuer 8a
12
cycles
de
charge
et
de
decharge
complets
pour atteindre
Ia
capacite
maximale
de
Ia
pile./Para
un
6ptimo
rendimiento,
instale
las
luces
solares
a
pleno
sol
y
carguelas
durante
10a
12
horas.
Deje
que
Ia
luz
complete
al
me
nos
8 a
12
ciclos
de
carga
y
descarga
completas
para
que
se
alcance
Ia
capacidad
maxima
de
las
baterfas
.
•
Keep
debris
and
snow
off
the
solar
panel
to
allow
the
battery
to
recharge./Assurez-vous
que
le
panneau
solaire
est
libre
de
tout
debris
et
de
toute
neige
pour
que
Ia
pile
puisse
se
recharger./Mantenga
el
panel
solar
libre
de
desechos
y
nieve
para
permitir
que
las
baterfas
se
recarguen
.
•
If
lights
have
been
covered
by
snow
for a
long
time,
allow
batteries
to
recharge
in
full,
direct sunlight for
at
least 1
0-12
hours
so
they
can
maintain
maximum
capacity./Si
les
lanternes
ont
ete
recouvertes
de
neige
pendant
longtemps,
laissez
Ia
pile
se
recharger completement
en
plein
soleil
pendant
10
a
12
heures
pour qu'elle
puisse
conserver
sa
charge
maximale./Si
Ia
nieve
ha
cubierto
las
luces
durante
un
tiempo
prolongado,
deje
que
las
baterfas
se
recarguen
a
plena
luz
solar
directa
de
10
a
12
horas
como
mfnimo
de
modo
que
mantengan
su
maxima
capacidad.
•
If
lights
will
not
be
in
use
for
an
extended
period
of
time
or
you
do
not
wish
for
the
lights
to
be
on,
remove
the
battery./Si
vous
ne
prevoyez
pas
utiliser
les
luminaires
pour
escalier
pendant
une
periode
prolongee
ou
si
vous
ne
souhaitez
pas
qu'ils s'allument,
retirez
leur pile./Si
no
va
a usar
las
luces
para
escalon
durante
un
periodo
prolongado
o
si
no
desea
que
las
luces
esten
encendidas,
retire
Ia
baterfa
.
TROUBLESHOOTING/DEPANNAGE/SOLUCION
DE
PROBLEMAS
PROBLEM POSSIBLE CAUSE CORRECTIVE ACTION
PROBLEME CAUSE POSSIBLE MESURE CORRECTIVE
PROBLEMA CAUSA POSIBLE ACCION CORRECTIVA
Solar light does not turn
1.
Solar light
is
installed close to other
1.
Relocate the solar light
or
eliminate other
on at night./L'eclairage
ne
light sources./Les lanternes solaires light sources./ Deplacez les lanternes solaires
s'allume pas une fois
Ia
nuit sont situees aproximite d'autres ou retirez les autres sources de lumiere./Cambie
tombee./La luz solar no se sources de lumiere./La luz solar esta
Ia
ubicacion de
Ia
luz solar o elimine las otras
enciende
al
instalad cerca de otras fuentes de luz. fuentes de luz.
anochecer.
2.
The switch
is
in
the OFF position./
2.
Push the switch to the
ON
position../Mettez
L'interrupteur est en position d'arret./EI l'interrupteur en position de marche./Coloque
el
interrupter esta en
Ia
posicion "OFF". interrupter en
Ia
posicion "ON".
The nightly run time
is
1.
Battery
is
not fully charged./La
1.
Place the solar light
in
an area where it can
shorter./L'eclairage dure pile n'est pas entierement chargee./ receive the maximum amount
of
full, direct
moins longtemps que prevu
La
baterfa no esta completamente sunlight every day./Piacez les lanternes solaires
une fois I a nuit tombee./ cargada. dans
un
endroit ou elles peuvent recevoir
El
tiempo de operacion
2.
Battery
is
reaching the end
of
its life./ directement le maximum
de
lumiere solaire
nocturno es menor.
La
pile a atteint
Ia
fin de sa duree de vie chaque jour./Coloque
Ia
luz solar en
un
area
utile./La baterfa esta llegando
al
final de donde pueda recibir a diario
Ia
cantidad maxima
su
vida util. de plena luz solar directa.
2.
Replace the old battery with a new one./
Remplacez
Ia
pile par une pile neuve./Reemplace
Ia
baterfa antigua con una nueva.
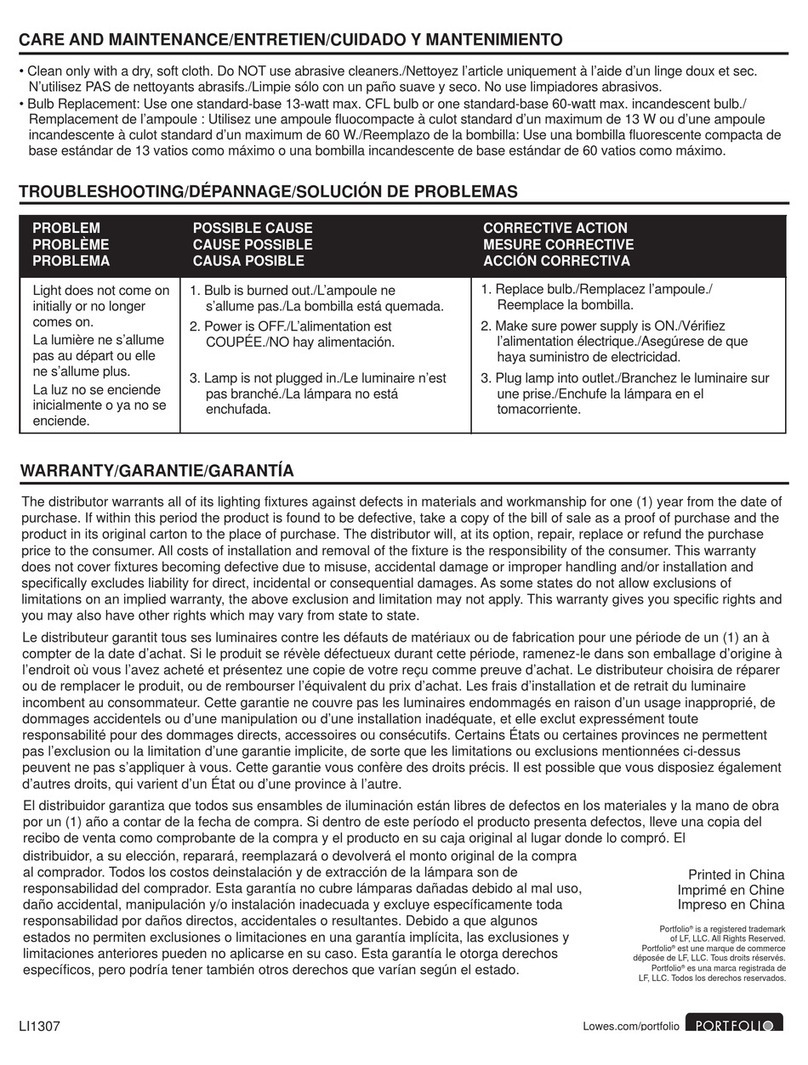
WARRANTY/GARANTIE/GARANTiA
The
manufacturer warrants
this
product against defects
in
material
or
workshop
for a
period
of (
1)
year
from
the
original
purchase.
The
manufacturer
agrees
to
either repair
the
product
or
replace
it.
Only
the
original
purchase
of
this
product
is
extended
this
warranty.
No
warranty
work
will
be
provided
under
this
warranty without purchaser's receipt or other proof
of
the
date
of
original
purchase
aceptable
to
us
.
Purchasing
this
product
from
a
third
party
vendor
negates
all
warranties
(expressed
or
implied)
in
this
warranty.
Le
fabricant garantit
cet
article
contre
les
defauts
de
materiaux
ou
de
fabrication
pour
une
periode
de
un
(1)
an
a
compter
de
Ia
date
d'achat.
Le
fabricant s'engage a reparer
ou
a remplacer
le
produit.
La
presente
garantie n'estoferte
qu'a
l'acheteur initial
du
produit.
Cette
garantie
ne
sera
pas
appliquee
en
!'absence
du
re9u
ou
d'une
autre
preuve
de
Ia
date
d'achat originale
que
nous
jugeons acceptable.
Lachat
de
ce
produit
au
pres
d'un
fournisseur
tiers
entraine l'annulation
de
toute
garantie
(explicite
ou
implicite).
El
fabricante garantiza
este
producto
contra
defectos
en
los
materiales yen
Ia
mano
de
obra
por
un
perfodo
de
(1
ano)
a partir
de
Ia
fecha
de
compra
original.
El
fabricante
acepta
reparar o reemplazar
el
producto.
Esta
garantfa
se
extiende
s61o
para
el
comprador
original
del
producto
.
No
se
llevara
a
cabo
ningun
tipo
de
trabajo
en
virtud
de
esta
garantfa
sin
el
recibo
del
comprador u
otra
prueba
de
Ia
fecha
de
compra
original y
que
sea
aceptable
para
nosotros.
Comprar
este
Printed
in
China
lmprime
en
Chine
lmpreso
en
China
Portfolio®is a registered
trademark
of
LF, LLC. All
rights reserved.
Portfolio®
est
une marque de
commerce d€posee de LF,
LLC. Tous droits reserves.
Portfolio® es una marca
registrada de LF, LLC. Todos
los derechos reservados.
producto
a
un
proveedor
externo
anula
todas
las
garantfas
(expresas
o implfcitas)
de
Ia
presente
. Lowes.com/portfolio

This manual suits for next models

1

Other Portfolio Outdoor Light manuals

Portfolio 00737 Instruction sheet

Portfolio

Portfolio 00737 Instruction sheet

Portfolio 0688491 User manual

Portfolio

Portfolio 0688491 User manual

Portfolio DL6904RBS User manual

Portfolio

Portfolio DL6904RBS User manual

Portfolio LWS0038D User manual

Portfolio

Portfolio LWS0038D User manual

Portfolio 4193 User manual

Portfolio

Portfolio 4193 User manual

Portfolio LW688488 User manual

Portfolio

Portfolio LW688488 User manual

Portfolio 16073 User manual

Portfolio

Portfolio 16073 User manual

Portfolio PL1585 User manual

Portfolio

Portfolio PL1585 User manual

Portfolio E3A User manual

Portfolio

Portfolio E3A User manual

Portfolio LWS1204E User manual

Portfolio

Portfolio LWS1204E User manual

Portfolio 18224 User manual

Portfolio

Portfolio 18224 User manual

Portfolio WL132MBK User manual

Portfolio

Portfolio WL132MBK User manual

Portfolio FY09-002 User manual

Portfolio

Portfolio FY09-002 User manual
Portfolio RS40Pb-R8-RS-C4 User manual

Portfolio

Portfolio RS40Pb-R8-RS-C4 User manual

Portfolio LWS1204B3 User manual

Portfolio

Portfolio LWS1204B3 User manual

Portfolio 00686 User manual

Portfolio

Portfolio 00686 User manual

Portfolio DL6905RBS User manual

Portfolio

Portfolio DL6905RBS User manual

Portfolio 16025 User manual

Portfolio

Portfolio 16025 User manual

Portfolio 00756 User manual

Portfolio

Portfolio 00756 User manual

Portfolio DL6906RBS Installation instructions

Portfolio

Portfolio DL6906RBS Installation instructions

Portfolio LBSH01MTN User manual

Portfolio

Portfolio LBSH01MTN User manual

Portfolio SLS1AL User manual

Portfolio

Portfolio SLS1AL User manual

Portfolio RS14Pa-N2-MB-W8 User manual

Portfolio

Portfolio RS14Pa-N2-MB-W8 User manual
Portfolio MS16Mh-R5-CB-C8 User manual

Portfolio

Portfolio MS16Mh-R5-CB-C8 User manual

Popular Outdoor Light manuals by other brands

Visual Comfort Fresno XL 3/4 Assembly instructions

Visual Comfort

Visual Comfort Fresno XL 3/4 Assembly instructions

LIGMAN JET 57 installation manual

LIGMAN

LIGMAN JET 57 installation manual

atmosphera 135313 installation instructions

atmosphera

atmosphera 135313 installation instructions

SUN AMEX BORNEO 30 RGB Instructions for use

SUN AMEX

SUN AMEX BORNEO 30 RGB Instructions for use

LIGMAN VANCOUVER 43 installation manual

LIGMAN

LIGMAN VANCOUVER 43 installation manual

LIGMAN POWERVISION 4 installation manual

LIGMAN

LIGMAN POWERVISION 4 installation manual

Henn&Hart FL0022 instructions

Henn&Hart

Henn&Hart FL0022 instructions

Meyer Fluxa C 8 277 1.8 Mounting instructions

Meyer

Meyer Fluxa C 8 277 1.8 Mounting instructions

Quoizel Tiffany TF6152MBK installation guide

Quoizel

Quoizel Tiffany TF6152MBK installation guide

MAXSA 43319 Assembly and Instruction Guide

MAXSA

MAXSA 43319 Assembly and Instruction Guide

MAUL MAULavior manual

MAUL

MAUL MAULavior manual

urban ambiance UQL1147 installation instructions

urban ambiance

urban ambiance UQL1147 installation instructions

Maxim 40420WGOB manual

Maxim

Maxim 40420WGOB manual

Performance In Lighting Steel Square 20 manual

Performance In Lighting

Performance In Lighting Steel Square 20 manual

LEHNER 5789503 Using instruction

LEHNER

LEHNER 5789503 Using instruction

LUMIEN N4B2 instruction manual

LUMIEN

LUMIEN N4B2 instruction manual

SensLights SLDY008D instruction manual

SensLights

SensLights SLDY008D instruction manual

esotec 102104 Using instructions

esotec

esotec 102104 Using instructions

manuals.online logo
manuals.online logoBrands
  • About & Mission
  • Contact us
  • Privacy Policy
  • Terms and Conditions

Copyright 2025 Manuals.Online. All Rights Reserved.