und Altakkumulatoren, die nicht vom Altgerät um-schlossen sind, sowie Lampen, die
zerstörungs¬frei aus dem Altgerät entnommen werden können, vor der Abgabe an einer
Erfassungsstelle von diesem zu trennen.
Letzteres gilt nicht, soweit die Altgeräte nach §
14 Absatz 4 Satz 4 oder Absatz 5 Satz 2 und 3 ElektroG im Rahmen der Optierung durch
die öffent-lich-rechtlichen Entsorgungsträger zum Zwecke der Vorbereitung zur
Wiederverwendung von anderen Altgeräten separiert werden, um diese für die Wie-
derverwendung vorzubereiten.
Anhand des Symbols nach Anlage 3 zum ElektroG können Besitzer Altgeräte erkennen, die
am Ende ihrer Lebensdauer getrennt vom unsortierten Sied-lungsabfall zu erfassen sind.
Das Symbol für die ge-trennte Erfassung von Elektro- und Elektronikgeräten stellt eine
durchgestrichene Abfalltonne auf Rädern dar und ist wie folgt ausgestaltet:
2. Unentgeltliche Rücknahmevon Altgeräten durch Vertreiber: Vertreiber (jede natürliche
oder juristische Person oder Personengesellschaft, die Elektro- oder Elektro-nikgeräte
anbietet oder auf dem Markt bereitstellt) mit einer Verkaufsfläche für Elektro- und
Elektronikgeräte von mindestens 400 Quadratmetern (bei Vertrieb unter Verwendung von
Fernkommunikationsmittels stattdessen mit Lager- und Versandflächen für Elektro- und
Elektronikgeräte von mindestens 400 Quadratmetern) sowie Vertreiber von Lebensmitteln mit
einer Gesamtverkaufsfläche von mindestens 800 Quadratmetern , die mehrmals im Kalenderjahr
oder dauerhaft Elektro- und Elektronikgeräte anbieten und auf dem Markt bereitstellen (bei
Vertrieb unter Verwendung von Fernkommunikationsmitteln statt-dessen mit Gesamt-Lager-
und -Versandflächen von mindestens 800 Quadratmetern), sind gegenüber Endnutzern zur
unentgeltlichen Rücknahme von Elektro-Altgeräten wie folgt verpflichtet:
a) Rückgabe/Abholung bei Kauf eines Neuge-räts und Auslieferung an privaten Haushalt:
Bei Abschluss eines Kaufvertrages über ein neues Elektro- oder Elektronikgerät ist der
Vertreiber ver-pflichtet, ein Altgerät der gleichen Geräteart, das im Wesentlichen dieselben
Funktionen wie das Neu-gerät erfüllt, unentgeltlich zurückzunehmen.
Ist Ort der ein privater Haushalt, erfolgt die Rück-nahme durch eine kostenlose Abholung.
Hierfür kann bei der Auslieferung des Neugeräts ein Altgerät der gleichen Geräteart mit im
Wesentlichen gleichen Funktionen dem ausliefernden Transportunternehmen übergeben
werden.
Erfolgt der Vertrieb des Neugeräts ausschließlich unter Verwendung von
Fernkommunikationsmitteln (§ 312c Abs. 2 BGB) , gilt einschränkend:
• Die kostenlose Abholung eines geräteart- und funktionsgleichen Altgeräts erfolgt nur, wenn
es sich dabei um ein Gerät der Kategorie 1 (Wär-meübertrager), 2 (Bildschirme, Monitore,
Geräte mit Bildschirmen mit einer Oberfläche von mehr als 100 Quadratzentimetern) und/
oder 4 (Groß-geräte, bei denen mindestens eine der äußeren Abmessungen mehr als 50
Zentimeter beträgt) handelt.
• Handelt es sich stattdessen um ein Altgerät der Kategorie 3, 5 und/oder 6, erfolgt
eine kostenlose Abholung nicht und gilt stattdessen für die kos-tenlose Rückgabe der
nachfolgende Buchstabe b).
Eine Übersicht über die Gerätekategorien und die jeweils erfassten Geräte findet sich hier:
https://www. gesetze-im-internet.de/elektrog_2015/anlage_1.html
b) Rückgabe bei Kauf eines Neugerätes und Ab-gabe anderenorts/Rückgabe von
Kleingeräten: Bei Abschluss eines Kaufvertrages über ein neues Elektrogerät, das nicht an
den privaten Haushalt ausgeliefert wird, und bei Vertrieb eines Neugeräts der Kategorien
3, 5 und/oder 6 ausschließlich unter Verwendung von Fernkommunikationsmitteln (§ 312c
Abs. 2 BGB) mit Auslieferung an den privaten Haushalt besteht die Möglichkeit, ein Altgerät
der gleichen Geräteart, das im Wesentlichen dieselben Funktionen wie das Neugerät erfüllt,
unentgeltlich an den Vertreiber zurückzugeben.
Dieselbe Möglichkeit besteht unabhängig vom Kauf eines neuen Elektro- oder
Elektronikgerätes auch für Altgeräte, die in keiner äußeren Abmessung größer als 25
Zentimeter sind. Die Rückgabemöglichkeit durch den Endnutzer beim Vertreiber ist in diesem
Fall auf 3 Altgeräte pro Geräteart beschränkt.
Beim Vertrieb ausschließlich unter Verwendung von Fernkommunikationsmitteln (§ 312c Abs.
2 BGB) erfolgt unter den oben genannten Voraussetzungen die Rückgabe
• von Altgeräten der Kategorien 3, 5 und/oder 6
• von Altgeräten, die in keiner äußeren Abmessung größer als 25 Zentimeter sind, durch
geeignete Rückgabe¬möglichkeiten in zumut-barer Entfernung zum jeweiligen Endnutzer.
Anderenfalls erfolgt die Rückgabe am Ort der Ab-gabe oder in unmittelbarer Nähe hierzu.
Die Vertreiber müssen hierzu geeignete Rückgabe-möglichkeiten eingerichtet haben.
3. Hinweise zu den Möglichkeiten der Rückgabe von Altgeräten: Besitzer von Altgeräten
können diese im Rahmen der durch öffentlich-rechtlichen Entsorgungsträger einge-
richteten und zur Verfügung stehenden Möglichkeiten der Rückgabe oder Sammlung von
Altgeräten ab-geben, damit eine ordnungsgemäße Entsorgung der Altgeräte sichergestellt
ist. Gegebenenfalls ist dort auch eine Abgabe von Elektro- und Elektronikgeräten zum
Zwecke der Wiederverwendung der Geräte möglich. Nähere Informationen hierzu erhalten Sie
von der jeweiligen Sammel- bzw. Rücknahmestelle.
4. Hinweis zum Datenschutz: Auf zu entsorgenden Altgeräten befinden sich teil-weise
sensible personenbezogene Daten (etwa auf einem PC oder einem Smartphone), die nicht
in die Hände Dritter gelangen dürfen. Wir weisen ausdrücklich darauf hin, dass Endnutzer
von Altgeräten eigenverantwortlich für die Löschung personenbezogener Daten auf den zu
entsorgenden Altgeräten sorgen müssen.
5. Hinweis zu unserer WEEE-Registrierungs-nummer: Wir sind bei der Stiftung Elektro-
Altgeräte Register, Nordostpark 72 in 90411 Nürnberg, als Hersteller von Elektro- und/
oder Elektronikgeräten unter der folgenden Registrierungsnummer (WEEE-Reg.-Nr. DE)
registriert: 43139807
Das CE-Zeichnung ist eine Erklärung des Herstellers, dass das Produkt den
geltenden europäischen Richtlinien und Vorschriften für Gesundheit, Sicherheit und
Umweltschutz entspricht.
IMPOSTAZIONI (ITALIANO)
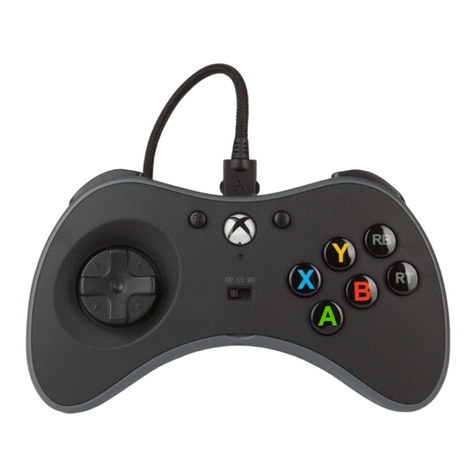
1. Collegare il cavo USB alla porta disponibile sulla Xbox e alla porta USB-C del
controller. Se la Xbox è SPENTA, premere il Pulsante Xbox per accenderla. La spia
luminosa a LED del controller si illuminerà.
2. Per l’assegnazione di giocatori e controller, consultare il manuale utente Xbox.
