PowerTech ZM9178 User manual

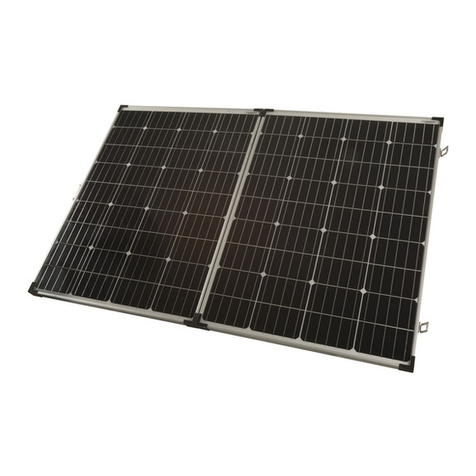
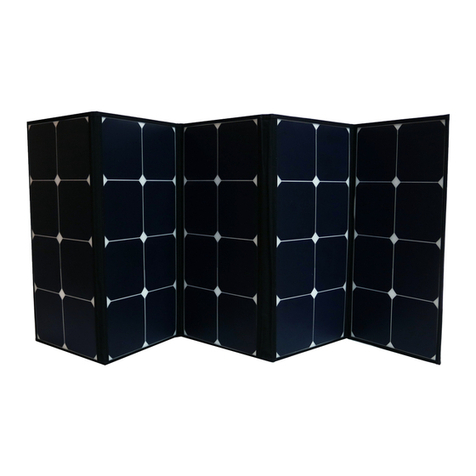
160W Folding Solar Panel
ZM9178

1
USER MANUAL
Please ensure that you have read the product manual and instructions in full
prior to use. Failure to do so may result in incorrect operation and therefore
impact on the products performance.
PART LIST
1 x 12V 160W Folding Solar Panel
1 x 10A PWM Solar Charge Controller
1 x 5m Extension Lead with Anderson Connectors
1 x Anderson to Alligator Clips Lead
1 x Heavy Duty Storage Bag
SAFETY PRECAUTIONS
1. This product is designed for portable short-term use, It is NOT suitable for long
term permanent installation
2. Solar panel will start producing electricity as soon as they are exposed to the
sun. Care must be taken when connecting the DC clamps to the battery and
joining cable. To reduce the risk of an electric shock or short circuit, it is
recommended to place a blanket or tarp over the panels or block out any
sunlight temporarily while all connections are made
3. Care must be taken when handing this product and while in use
4. Keep away from any flammable substances.
5. Make sure to connect with correct polarity
6. Battery must be removed from the confines of a vehicle when connected to the
solar controller.
7. Always adhere to battery manufacturer’s recommendations when charging
batteries.
8. Always avoid charging old, damaged or overly discharged or defective batteries.
9. Keep the surface of the solar panels clean from dust by wiping with a soft cloth.
Do not walk on the solar panel.
10. To reduce the risk of injury, charge only 12V lead-acid batteries, AGM and gel
batteries. Other types of batteries may be subject to bursting which can lead to
personal injury and property damage.
11. This system is not intended for use by young children.

2
INSTALLATION GUIDE
Step 1:
Locate a clear sunlit area free from overhanging branches or heavy shade.
Step 2:
Unfold the solar panels, adjust the two supports to the suitable angle.
Step 3:
Always face the front side of solar panels toward the sun.
Wipe down the panels with a microfiber cloth to remove any dust or debris.
Note:
To ensure maximum possible output we recommend that the solar
panels are regularly re-aligned to follow the sun’s movement.
Wipe the solar panel with microfiber cloth for maximum efficiency.

3
ABOUT THE REGULATOR
1.
Safety Information
•
Read all of the instructions in the manual before installation.
•
DO NOT disassemble or attempt to repair the regulator.
•
Disconnect the solar panel before installing or moving the regulator.
•
Power connections must remain tight to avoid excessive heating from a loose
connection.
•
Only charge 12V batteries that comply with the parameters of regulator.
•
Battery connection may be wired to one battery or a battery bank.
2. Overview
The 12V/10A regulator is a PWM charge regulator with USB output that uses the
most advanced digital technique. Regulator features as follows:
•
Support 3 charging options: AGM, Gel &FIooded lead acid battery
•
Battery status LED indicator indicates battery situation
•
The USB will provide power supply that can charge electronic equipment
•
Battery type and load output can be set via button
•
Extensive Electronic protection
3. Regulator unit
1. MENU KEY 2. PAGE UP 3. PAGE DOWN/OPERATION
4. LCD DISPLAY 5. USB CONNECTIONS

4. LCD DISPLAY
6. Sun icon: Solar panel is charging
Moon icon: Solar panel is not charging
Solar panel icon: Solar panel is connected to battery
7. Input-Connected battery is being charged
8. Battery is connected to solar panel
9. Output-Device is connected via USB
10. Connected battery in use to charge USB connected device
11. Voltage, battery type connected or charge hours
12. Voltage
4

5. Regulator functions
一
,
-v v
嘈I嘈售呻9 响 ,兰1
BROWSING INTERFACE
Press MENU to cycle these
interfaces.
0
个
。
记5v
心}
个
c' H尸
SET PARAMETERS
In 1nte
「
face 2 to 5, long p
「
ess
MENU to ente
「
settings. Use
[UP] [DOWN] to set the
pa
「
amete
「,
long p
「
ess MENU
again to ex
五)
牖9
0
Charging will stop if the
battery falls below the
selected'Discharge Stop'
voltage. Default is 10.7V.
The
r
egulato
r
is only
suitable for lead acid
OPEN, AGM and GEL
batteries. It is not suited for
nickel metal hydride,
lithium ion o
r
other
batteries.
1.
Batte
r
y to Cont
r
oller
2.
Panel to Controller
3.
Appliance (o
r
USB) to
Cont
r
olle
r
5

6. Settings Description
1.MAIN
This will display only when a battery is connected. It shows the current output
voltage to the battery.
2.FLOATING VOLTAGE
Pre-set at 13.8V. This is the maximum Voltage the battery will be charged to.
3.DISCHARGE RECONNECT
Pre-set at 12.6V. This is the Voltage that the
regulator will recommence output to the "output terminals" and the USB, in
situations where the "Discharge Stop" Voltage (pre-set at 10. 7v) has been
reached. This gives the battery some juice before power output
recommences.
4.DISCHARGE STOP
Pre-set at 10. 7V. This is the lowest Voltage the regulator will allow the battery
to reach, before disconnecting the output to the "output terminals" and the
USB. This protects the battery from over-discharging. Power will recommence
once the battery voltage reaches the "Discharge Reconnect" voltage (Pre-set
at 12.6v)
5.WORK MODE
Pre-set at 24H. This means the output to the "output terminal" and USB will
always be active (as long as there is sufficient power in the battery). Other
hour settings mean that the output to the "output terminals" and the USB will
continue for the set period of time after the last detection of light. For e.g. if
set at 1H, the regulator will continue output for an hour after the last detection
of light.
6.BATTERY TYPE
Set the type of battery you have. B01 is for sealed batteries. B02 is for colloid
batteries. B03 is for open batteries.
7.NOTICE
THE REGULATOR IS ONLY SUITABLE FOR LEAD ACID OPEN, AGM AND
GEL BATTERIES. IT IS NOT SUITABLE FOR NICKEL METAL HYDRIDE,
LITHIUM ION OR OTHER BATTERIES.
CHARGING WILL STOP IF THE BATTERY FALLS BELOW THE SELECTED
" DISCHARGE STOP" VOLTAGE. DEFAULT IS 10.7V.
6

Type
Mono Crystalline Solar Cells
Peak Power
160W
Rated Voltage
12V
Voltage @ Peak Power
18.0V
Current @ Peak Power
8.88A
Open Circuit Voltage
22.30V
Short Circuit Current
9.19A
Maximum system Voltage
1000V DC
Gross Weight
15 kg
Panel Dimensions
1355(W) x 780(H) x 35(D)mm (open)
675(W) x 780(H) x 75(D)mm (closed)
7
PROBLEM POSSIBLE CAUSE POSSIBLE SOLUTION
Solar panel is exposed to
sunlight but the charging
indicator on the regulator is
not lit.
Battery is not properly
connected to the regulator
or the regulator is not
properly connection to the
panel, or the sunlight is too
weak.
1. Check all connections to make
sure the regulator is properly
connected to both the battery and the
panel.
2. Wait until the sun shines more
brightly or the weather condition
improves.
Without load, battery
indicators stay at the same
level even after charging
for a long period of time.
The battery is damaged or
has died and no longer
holds an adequate charge.
Replace the battery.
Battery indicator on
regulator flashes no output.
The battery is over-
discharged.
Disconnect the load from the battery
and charge the battery for a longer
period of time.
There is no voltage output
reading from the panel.
The output cables may not
be connected correctly.
Verify that the output cables are
connected to the battery correctly.
The charge indicator on the
regulator doesn’t come on.
Battery voltage is too low.
Battery fuse is blown (if
applicable).
Check the battery voltage. If the
battery voltage is too low (often less
than 8V), the controller will not work.
Check the fuse. The fuse will
typically be blown for the following
reasons:
1. Battery poles +/- are reversed or a
short circuit occurred.
2. Solar controller output current
over the level specified for that
controller.

11.Disclaimer
This warranty does not apply under the following conditions:
•
Damage from improper use or use in an unsuitable environment.
•
User disassembly or attempted repair the regulator without permission.
Distributed by:
Electus Distribution Pty. Ltd.
320 Victoria Rd, Rydalmere
NSW 2116 Australia
Ph: 1300 738 555
Int'l: +61 2 8832 3200
Fax: 1300 738 500
www.electusdistribution.com.au
Made in China
8
10. Regular Maintenance
To maintain the long-term and trouble-free performance of your solar panel
system, it is recommended that you follow these guidelines prior to each
operation:
•Always check to ensure that the product is clean and in good working
condition with no visible defects or damage.
•Ensure that the environment where the solar panel system is going to be
placed has adequate ventilation.
•Make sure that all connection cables and extension cables are
undamaged and in good working order.
•Make sure all connectors are clean and free of dust, debris and/or rust.
•Keep the surface of the solar panels clean from dust by wiping with a soft
cloth.
Table of contents
Other PowerTech Solar Panel manuals
