manuals.online logo
Brands
  1. Home
  2. •
  3. Brands
  4. •
  5. POWERTEX
  6. •
  7. Lifting System
  8. •
  9. POWERTEX PAPH-S1 Series User manual

POWERTEX PAPH-S1 Series User manual

User Manual
UMPAPHS120200329NL
POWERTEX
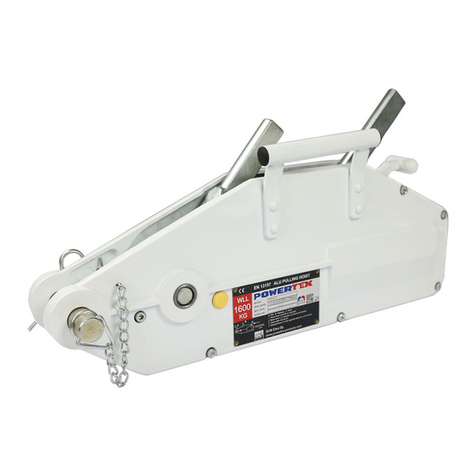
Aluminum Pulling Hoist PAPH-S1
!
GB Instruconforuse
NL Gebruikersinstruces
2
Read through these user instructions before using the wire rope hoist. Improper operation may lead to hazardous situations.
General safety provisions
• Only to be used by trained operator.
• Do not use in explosive or corrosive environment.
• Temperature range: -10°C up to +50°C. Using the wire rope hoist in icy conditions, make sure that neither the wire rope or machinery is frozen.
• Check the function of the wire rope hoist before use.
• Do not exceed the maximum load.
• Handle the wire rope hoist with care. Do not throw the hoist about or let it fall to the ground.
• Do not use the wire rope hoist for welding work where it is exposed to welding spatter or current.
• Don’t use with food, cosmetics or pharmaceutical products, and must not be subjected to severe corrosive inuences (e.g. acids).
• Don’t use any surface nishing that could have an impact on the material. Don’t expose the hoist to heat, welding or drilling.
Keep the wire hoist clean, dry and protected from corrosion.
• The wire rope hoist must not be used for lifting persons.
POWERTEX Aluminum Wire Rope Pulling Hoist PAPH-S1 0,8 - 5,4 ton
Instruction for use (GB) (Original instructions)
Data
Dimensions
Art No Model WLL Hand force max. Movement* Wire rope dia. Lever length Weight
(ton) (N) (mm) (mm) (mm) (kg)
16.25PAPHS10080 PAPH-S1/800 0,8 341 >52 8,3 800 6,4
16.25PAPHS10160 PAPH-S1/1600 1,6 400 >55 11,0 1200 12
16.25PAPHS10320 PAPH-S1/3200 3,2 438 >28 16,0 1200 23
16.25PAPHS10540 PAPH-S1/5400 5,4 850 >22 20,0 1120 58
*Wire rope movement with one back and forth movement
WLL ton A B C D E L1 L2
(mm) (mm) (mm) (mm) (mm) (mm) (mm)
0,8 426 235 168 60 64 - 800
1,6 545 284 190 72 97 692 1200
3,2 660 325 230 91 116 692 1200
5,4 930 390 300 110 150 692 1200
0,8 t 1,6/3,2/5,4 t
2 3
Function
Operating principle
The wire rope hoist works by pulling the lever back and forth when the wire rope runs through the hoist. The wire rope hoist can be used for lifting,
pulling and tightening.
The wire rope hoist has two jaws that open in turns so that the wire will always stay tight and will not be able to loosen.
The safety shear pin on the wire rope hoist’s lifting lever breaks at just above WLL to prevent overloading. 5 pcs of spare shear pins included in the
handle.
Procedure before use
Wire rope hoists inspection before use
A competent person should check the wire rope hoist visually and its workability before rst use. By testing the wire rope hoist you make sure the
wire rope hoist hasn’t been damaged or broken during its transportation.
Inspection before lift/pull
Before every use the hoist, wire rope, anchor sling and other lifting tools conditions have to be checked in case of any kind of damage. Also check
that the hoist’s name plate is legiable.Any equipment or parts with defects must be taken out of service until it has been repaired or replaced. In ad-
dition, the jaw clamps function ability as well as the anchors durability is to be tested by lifting/pulling the load a short distance and then lowering it.
Wire rope inspection
Check the wire rope for deformation, bending, twisting, cutting of lines, corrosion, overheating etc. before use.
Eye sling hook inspection
Check the hook for deformation, notches, wear and corrosion or in case of any damage.
Wire rope specication
It is allowed to use only this type of wire rope:
∙Steel core
∙Grade 1770 N/mm2
∙Construction 6x19-IWRC
∙Dry
Use
Open the wire rope jaw clamps so that the wire rope won’t bend or twist.
Push the release handle on top of the wire rope hoist in a forward position until you hear the jaws open.
Push the wire rope through the wire rope hoist so you can see it from the other side. Pull as much rope as you need and then lock the wire rope by
pushing the release handle to a backwards position.
Place the lever handle extension either in the front or back peg depending if you want to lift or lower the load. Now the wire rope hoist is ready for
use.
Take the anchor pin out and attach hook, shackle, sling or some other tool needed to connect the hoist to the anchor point.
Attention! Check the strength of the attachment point before starting to lift or pull.
Operating the lifting lever back and forth will make the wire move through the wire rope hoist and tighten. Moving one of the levers you can make
the wire rope move in or out.
When nishing the use of the wire rope hoist pull the wire out by pushing the release lever on top of the wire rope hoist into a frontward position so
that the wire rope get released. Clean the wire rope before releasing it through the wire rope hoist so that no dirt will get into the wire rope hoist.
After removal of the wire rope push the release handle back to the backwards position so that the spring relaxes.
Wire rope hoist anchoring
When attaching the wire rope hoist make sure that the person who is using the wire rope hoist won’t be put into dangerous situations from the load
or attaching the wire rope hoist.
Mount the wire rope hoist in between the anchoring point and the load so that the wire rope hoist is set in the same direction as the wire rope and
so the wire rope moves straight through the direction of the pulling direction.
In an indirect pull use only strong enough wire rope blocks.
Using lifting slings or lifting tools, make sure that they have at least the same loading capacity as the wire rope hoist that is being used.
Make sure that the anchor pin is fully locked in place with a spring pin.
Warnings
Before use make sure all the wire rope hoist’s screws are tightened. Also check the product’s common condition and that the handles move freely.
Check that the wire rope is clean. If the wire rope is damaged, the wire rope hoist won’t work properly and must be replaced immediately.
Only use one lever at the same time. Never touch the release handle when the wire rope hoist is loaded.
Don’t pull on the lifting lever too hard, since the overload safety pin will break. Don’t use homemade overloading safety pins on the wire rope hoist!
Lifting lever Lowering lever
Release handle
Wire insert direction
Anchor pin
4
Don’t extend the lever length. Abort the lifting process straight away if the load needs more power for lifting or lowering it.
Never be on top of the load and make sure no one is working close or under the load that is being lifted.
Don’t let the load spin during the lift. Avoid to impact, shock or swinging the load.
Only direct loading. The wire rope hoist must not be exposed to a bending load, were the wire is loaded in an improper way. Use the wire rope hoist
by keeping the wire rope hoist hook and anchor peg in line with each other. Don’t load on the tip of the hook. Loading with the hook is only allowed
in the longitudinal direction and the load has to be directed to the middle of the hook’s radius.
The working load limit which is marked on the product must not be exceeded.
Don’t use other wire ropes that aren’t from the distributer and accepted by the manufacturer. When the diameter of the wire has reduced more than
10% in dimension it has to be changed immediately. Don’t insert the wire rope from the front of the wire rope hoist, since the hook will be on the
wrong side.
Keep the wire rope hoist clean, don’t let any dirt into it, mud or any other harmful substance that could break or wear down the wire rope hoist.
Lubricate the wire rope hoist frequently.
Never lift or pull people with the wire rope hoist.
Never leave the load without supervision.
Don’t ever use a hammer etc. for releasing the release lever.
Maintenance, inspections and repairs
Maintenance: The wire rope hoist and wire must be washed, dried after use in wet conditions and protected from corrosion
Inspections: The product must be clean when checked. The product must be checked before every use in case of visible damage. Once a year a
competent person must check the product thouroughly. This time period must be shortened if the working conditions require it. When checking the
product it has to be checked visually and also tested. Parts and components should be checked for damage, wear, corrosion etc. and also analyze
the wire rope hoists workability as a safe lifting tool. The wire rope hoists clamps should be checked by testing them with the nominal load capacity.
If you notice any deviation on the wire rope hoist it should be disassembled and inspected thoroughly by a competent person.
Repairs: All possible repairs concerning the wire rope hoist and wire rope are to be made by the seller’s authorized technicians.
4 5
Lees deze handleiding voor het in gebruik nemen van de staalkabeltakel. Verkeerd gebruik kan tot gevaarlijke situaties leiden.
Algemene veiligheidsvoorschriften
• Alleen te gebruiken door bevoegde personen.
• Niet gebruiken in explosieve of bijtende omgevingen.
• Temperatuur bereik: -10°C tot aan +50°C. Zorg bij gebruik in koude condities dat zowel de staalkabel als het apparaat niet bevroren zijn.
• Controleer de functionaliteit van de staalkabeltakel voor gebruik.
• Overschrijd de maximale werklast niet.
• Behandel de staalkabeltakel met zorg. Gooi er niet mee en laat het niet op de grond vallen.
• Gebruik de staalkabeltakel niet voor laswerk waar het blootstaat aan lasspetters en stroom.
• Stel het takel niet bloot aan voedsel, cosmetische en farmaceutische producten bij gebruik en vermijd zware corrosieve en/of bijtende inv-
loeden (bv zuren).
• Gebruik geen oppervlaktebehandeling die het materiaal aan kan tasten. Stel het takel niet bloot aan warmte, laswerk of boren. Houd het takel
schoon, droog en bescherm het tegen roestvorming.
• De staalkabeltakel mag beslist niet worden gebruikt om personen te hijsen.
POWERTEX Aluminium Staalkabeltakel PAPH-S1 0,8 - 5,4 ton
Gebruikersinstructies (NL)
Data
Afmetingen
Art Nr. Model WLL Handkracht max.Verplaatsingen* Staalkabel dia. Lengte hendel Gewicht
(ton) (N) (mm) (mm) (mm) (kg)
16.25PAPHS10080 PAPH-S1/800 0,8 341 >52 8,3 800 6,4
16.25PAPHS10160 PAPH-S1/1600 1,6 400 >55 11,0 1200 12
16.25PAPHS10320 PAPH-S1/3200 3,2 438 >28 16,0 1200 23
16.25PAPHS10540 PAPH-S1/5400 5,4 850 >22 20,0 1120 58
*Staalkabel verplaatsing met één verplaatsing heen en één terug.
WLL ton A B C D E L1 L2
(mm) (mm) (mm) (mm) (mm) (mm) (mm)
0,8 426 235 168 60 64 - 800
1,6 545 284 190 72 97 692 1200
3,2 660 325 230 91 116 692 1200
5,4 930 390 300 110 150 692 1200
0,8 t 1,6/3,2/5,4 t
6
Functie
Bedieningsprincipe
De staalkabeltakel werkt door de hendel heen en weer te trekken waardoor de staalkabel door het takel wordt getrokken. De staalkabeltakel kan
gebruikt worden voor hijsen, trekken en aansjorren.
De staalkabeltakel heeft twee bekopeningen die om en om openen zodat de kabel steeds strak in het takel blijft en niet los komt te zitten.
Om overbelasting te voorkomen breekt de veiligheidspin in de hendel van het takel wanneer de maximum werklast wordt overschreden. Er worden
vijf reserve veiligheidspinnen met het takel meegeleverd.
Procedure voor gebruik
Inspectie van de staalkabeltakel voor gebruik
Een competent persoon moet voor gebruik de staalkabeltakel visueel controleren op juiste werking en beschadigingen / vervorming. Door de staal-
kabeltakel te testen weet je zeker dat de staalkabel niet beschadigd of gebroken is tijdens transport.
Inspectie voor hijsen/trekken
Voor elk gebruik moeten het takel, de staalkabel, de ankerlijn en andere hijsmaterialen gecheckt worden op beschadigingen. Contoleer ook of de
naamplaat van het takel leesbaar is. Alle materialen of onderdelen met gebreken moeten buiten dienst worden gesteld tot het is gerepareerd of ver-
vangen. Daarnaast moet de functie van de klembekken alsmede de levensduur van de ankers getest worden door de lading over een korte hoogte
te hijsen/trekken en dan weer te laten zakken.
Staalkabelinspectie
Controleer de staalkabel op vervorming, verbuiging, verdraaiing, breuken, roestvorming, oververhitting etc. voor gebruik.
Inspectie ooghaak
Controleer de haak op vervorming, inkepingen, slijtage, roestvorming of beschadigingen.
Staalkabel specicaties
Alleen dit type staalkabel mag worden gebruikt:
∙Stalen kern
∙Treksterkte 1770 N/mm2
∙Constructie 6x19-stk
∙Droog
Gebruik
Open de klembekken zodat de staalkabel niet kan buigen of draaien.
Duw de ontkoppelingshendel bovenop het takel naar voren tot je de bekken open hoort gaan.
Duw de staalkabel door de staalkabeltakel zodat je deze aan de andere kant kunt zien. Trek zoveel kabel aan als je nodig hebt en zet de staalkabel
vast door de ontkoppelingshendel naar achteren te duwen.
Plaats de uitschuifbare hendel op de vooruitloophandel of de terugloophandel afhankelijk of je de lading wilt hijsen of laten zakken. Nu is de staal-
kabeltakel klaar voor gebruik.
Verwijder de verankeringspin en bevestig de haak, sluiting, lijn of ander benodigd gereedschap om het takel met het ankerpunt te verbinden.
Attentie! Controleer de sterkte van het bevestigingspunt voor je begint met hijsen of trekken.
Door de hendel t.b.v. het hijsen heen en weer te bewegen zal de staalkabel door het takel gevoerd worden en vast komen te zitten. Door één van
de hendels te bewegen kun je de kabel naar binnen of naar buiten verplaatsen.
Na gebruik van het takel trek je de kabel eruit door de ontkoppelingshendel bovenop het takel vooruit te duwen zodat de kabel loskomt. Maak de
kabel schoon voordat deze door de staalkabeltakel wordt getrokken zodat er geen vuil in het takel komt.
Nadat de kabel is verwijderd duw je de bedieningshendel terug zodat de veer ontspant.
Staalkabeltakel verankering
Let bij het verankeren van de staalkabeltakel erop dat de gebruiker niet door de last of door de manier van verankeren in gevaarlijke situaties
beland.
Monteer de staalkabeltakel tussen het ankerpunt en de last zodat de staalkabeltakel in dezelfde richting staat als de trekrichting van de staalkabel.
Gebruik alleen sterke staalkabelblokken in het geval van indirect trekken.
Zorg ervoor dat bij het gebruik van hijsbanden of hijsmiddelen de werklast in ieder geval even groot is als die van de staalkabeltakel. Let erop dat
de verankeringspin vergrendeld is d.m.v. een veerbelaste pin.
Waarschuwingen
Let erop, voor gebruik, dat de schroeven van de staalkabeltakel vast zitten. Check ook de algehele staat van het product en controleer of de hen-
dels soepel kunnen bewegen. Check of de staalkabeltakel schoon is. Als de staalkabel beschadigd is zal de staalkabeltakel niet goed werken en zal
meteen vervangen moeten worden.
Gebruik de hendels niet tegelijkertijd. Raak de ontkoppelingshendel niet aan als de staalkabeltakel last vasthoudt.
Hendel omhoog Hendel omlaag
Vrijloop hendel
Staalkabelinvoer richting
Anker-pen
6 7
Trek niet te hard aan de hijshendel omdat de veiligheidspin t.b.v. overbelasting zal breken. Gebruik geen zelfgemaakte veiligheidspinnen in de
staalkabeltakel!
Verleng de hendels niet. Staak het hijsproces meteen als er meer kracht nodig is om de lading te hijsen of om deze te laten zakken. Bevind je nooit
boven de last en zorg ervoor dat niemand in de buurt van of onder de last aan het werk is als deze wordt gehesen.
Laat de lading tijdens het hijsen niet draaien. Voorkom dat de lading ergens tegenaan stoot of schokt.
Alleen directe lading. De staalkabeltakel mag niet worden blootgesteld aan buigbelasting, waarbij de kabel onjuist wordt belast. Houd bij gebruik
van de staalkabeltakel de haak en de verankeringspin op één lijn. Plaats de last niet op het puntje van de haak. Met de haak belasten mag alleen in
de lengterichting en de last moet gericht zijn naar het midden van de radius van de haak.
De veilige werklast, aangegeven op het product, mag niet worden overschreden.
Gebruik geen staalkabels die niet van de distributeur afkomstig zijn en die niet door de fabrikant worden geaccepteerd. Vervang de staalkabel
onmiddellijk als de straal met meer dan 10% in afmeting is afgenomen. Voer de kabel niet aan de voorkant van het takel in, omdat de haak dan aan
de verkeerde kant zit.
Houd de staalkabeltakel schoon, zorg dat er geen vuil, modder of andere schadelijke viezigheid inkomt waardoor de staalkabeltakel slijt of kapot-
gaat. Smeer de kabel regelmatig.
Hijs of trek nooit personen met de staalkabeltakel. Houd altijd zicht op de last.
Gebruik nooit een hamer o.i.d. om de ontkoppelingshendel te ontkoppelen.
Onderhoud, inspecties en reparaties
Onderhoud: De staalkabeltakel moet na gebruik worden schoongemaakt, gedroogd als deze nat is geworden en beschermd tegen roestvorming.
Inspecties: Tijdens de inspectie moet het product schoon zijn. Voor elk gebruik moet het product worden gecontroleerd op zichtbare beschadigin-
gen. Elk jaar moet een competent person het takel uitvoerig testen. Er moet eerder worden getest als de werkomstandigheden daarom vragen.
Testen gebeurt d.m.v. een visuele inspectie en een beproeving. Onderdelen moeten worden gecheckt op beschadigingen, slijtage, roest etc. en
de staalkabel moet voldoen aan de eisen om veilig te kunnen hijsen. De staalkabeltakel klemmen moeten worden gecontroleerd door deze met
de nominale werklast te testen. Bij de geringste afwijking moet de staalkabeltakel uit elkaar worden gehaald en grondig geïnspecteerd door een
competent persoon.
Reparaties: Alle mogelijke reparaties aan de staalkabeltakel of de staalkabel mogen alleen worden uitgevoerd door bevoegde monteurs.
8
HX-800
Parts Name
1-3.Case right,assy.
2.Cylindric-head tapping screw
3.Washer
4.Case left,assy.
5.Name plate
6.Rivet
7.Fastening bolt,assy.
8.Shearing bolt
9.Action lever,assy.
10.Retaining ring
11.Cylindric-head screw
12.Nut with square
13.Spring cotter,assy.
14.Guide sleeve of cable
15.Opening lever for clamps,assy.
16.Push lever left
17.Push lever right
18.Action lever backwards
19.Bolt
20.Lock washer
21.Bolt
22.Bolt
23.Thrust bolt
24.Action lever forward,assy.
25.Shearing bolt
26.Axle
27.Front slide,assy.
28.Spring guide
29.Spring
30.Clamp under
31.Clamp upper
32.Back slide,assy.
33.SWIVEL HOOK
33
POWERTEX Aluminium Pulling Hoist PAPH-S1 – Spare parts 0,8 t
When ordering spare parts, specify model, WLL, part number and the quantity needed.
8 9
Pos Description Qty.
1-3 Case right, assy.
2 Cylindric-head tapping screw
3 Washer
4 Case left, assy
5 Name plate
6 Rivet
7 Fastening bolt, assy.
8 Shearing bolt
9 Action lever, assy.
10 Retaining ring
11 Cylindric-head screw
12 Nut with square
13 Spring cutter, assy.
14 Guide sleeve of wire rope
15 Release handle for jaw clamps, assy.
16 Push lever left
17 Push lever right
18 Lowering lever backwards
19 Bolt
20 Lock washer
21 Bolt
22 Bolt
23 Thrust bolt
24 Lifting lever forward, assy.
25 Shearing bolt
26 Axle
27 Front slide, assy.
28 Spring giude
29 Spring
30 Jaw clamp under
31 Clamp upper
32 Back slide, assy.
Spare parts list 0,8 t
10
HX-1600
Parts Name
1-3.Case right,assy.
2.Cylindric-head tapping screw
3.Washer
4.Case left,assy.
5.Name plate
6.Rivet
7.Fastening bolt,assy.
8.Shearing bolt
9.Telescopic action lever,assy.
10.Retaining ring
11.Cylindric-head screw
12.Nut with square
13.Spring cotter,assy.
14.Guide sleeve of cable
15.Opening lever for clamps,assy.
16.Push lever left
17.Push lever right
18.Action lever backwards
19.Bolt
20.Lock washer
21.Bolt
22.Spring bolt
23.Thrust bolt
24.Action lever forward,assy.
25.Shearing bolt
26.Axle
27.Front slide
28.Spring
29.Clamp under
30.Clamp upper
31.Back slide,assy.
32.Handgrip,assy.
33.Rubber hand grip
34.Cap
35.Lever for clamp,short
36.Lever for clamp,long
37.Lock washer
38.Bearing bolt
39.SWIVEL HOOK
39
POWERTEX Aluminium Pulling Hoist PAPH-S1 – Spare parts 1,6 t
When ordering spare parts, specify model, WLL, part number and the quantity needed.
10 11
Pos Description Qty.
1-3 Case right, assy.
2 Cylindric-head tapping screw
3 Washer
4 Case left, assy
5 Name plate
6 Rivet
7 Fastening bolt, assy.
8 Shearing bolt
9 Telescopic action lever, assy.
10 Retaining ring
11 Cylindric-head screw
12 Nut with square
13 Spring cutter, assy.
14 Guide sleeve of wire rope
15 Release handle for jaw clamps, assy.
16 Push lever left
17 Push lever right
18 Lowering lever backwards
19 Bolt
20 Lock washer
21 Bolt
22 Spring bolt
23 Thrust bolt
24 Lifting lever forward, assy.
25 Shearing bolt
26 Axle
27 Front slide
28 Spring
29 Jaw clamp under
30 Jaw clamp upper
31 Back slide, assy.
32 Handgrip, assy
33 Rubber handgrip
34 Cap
35 Lever for clamp, short
36 Lever for clamp, long
37 Lock washer
Spare parts list 1,6 t
12
HX-3200
Parts Name
1-3.Case right,assy.
2.Cylindric-head tapping
screw
3.Washer
4.Case left,assy.
5.Name plate
6.Rivet
7.Fastening bolt,assy.
8.Shearing bolt
9.Telescopic action lever,
assy.
10.Retaing ring
11.Cylindric-head screw
12.Nut with square
13.Spring cotter,assy.
14.Guide sleeve of cable
15.Opening lever for
clamps,assy.
16.Push lever left
17.Push lever right
18.Action lever backwards
19.Bolt
20.Lock washer
21.Bolt
22.Spring bolt
23.Thrust bolt
24.Action lever forward,
assy.
25.Shearing bolt
26.Axle
27.Front slide
28.Spring
29.Clamp under
30.Clamp upper
31.Back slide,assy.
32.Handgrip,assy.
33.Rubber hand grip
34.Cap
35.Lever for clamp,short
36.Lever for clamp,long
37.Lock washer
38.Bearing bolt
39.Bolt
40.Roll
41.Bolt
42.Centering shaft
43.Intermediate actuating
lever
44.Cylindric-head screw
45.Lock washer
46.SWIVEL HOOK
46
POWERTEX Aluminium Pulling Hoist PAPH-S1 – Spare parts 3,2 t
When ordering spare parts, specify model, WLL, part number and the quantity needed.
12 13
Pos Description Qty.
1-3 Case right, assy.
2 Cylindric-head tapping screw
3 Washer
4 Case left, assy
5 Name plate
6 Rivet
7 Fastening bolt, assy.
8 Shearing bolt
9 Telescopic action lever, assy.
10 Retaining ring
11 Cylindric-head screw
12 Nut with square
13 Spring cutter, assy.
14 Guide sleeve of wire rope
15 Release handle for jaw clamps, assy.
16 Push lever left
17 Push lever right
18 Lowering lever backwards
19 Bolt
20 Lock washer
21 Bolt
22 Spring bolt
23 Thrust bolt
24 Lifting lever forward, assy.
25 Shearing bolt
26 Axle
27 Front slide
28 Spring
29 Jaw clamp under
30 Jaw clamp upper
31 Back slide, assy.
32 Handgrip, assy
33 Rubber handgrip
34 Cap
35 Lever for clamp, short
36 Lever for clamp, long
37 Lock washer
38 Bearing bolt
39 Bolt
40 Roll
41 Bolt
42 Centering shaft
43 Intermediate actuating lever
44 Cylindric-head screw
45 Lock washer
Spare parts list 3,2 t
14
POWERTEX Aluminium Pulling Hoist PAPH-S1 – Spare parts 5,4 t
When ordering spare parts, specify model, WLL, part number and the quantity needed.
14 15
Pos Description Qty.
1 Square nut M10 7
2 Name plate 2
3 Case left 1
4 Axle 2
5 Sleeve 2
6 Shaft 1
7 Fastening bolt assembly 1
8 Action lever forwardassy 1 1
9 Action lever forwardassy 2 1
10 Shearing bolt 5
11 Intermediate actuating lever 2
12 Centering shaft 1
13 Rocker shaft 2
14 Front slide 2
15 Bearing NU2307 2
16 Roller 1
17 Lever for clamp short 4
18 Lever for clamp long 4
19 Thrust bolt 8
20 Bolt 2
21 Action lever backwards 1
22 Case right 1
23 Washer 1
24 Flat head screw M8 1
25 Cap 4
26 Cylindrec-head screw M10 7
27 Handgrip assy 2
28 Retaining ring M10 7
29 Shaft 1
30 Wire rope guide sleeve 1
31 Release handle for clamps assy 1
32 Lock washer Ø8 2
33 Push lever 2
34 Lock washer Ø12 2
35 Bolt 1
36 Bottom clamp 2
37 Top clamp 2
38 Spring bolt 2
39 Telescopic action lever assy 1
40 Spring 2
41 Bearing bolt 4
42 Lock washer Ø19 4
43 Back slide 2
44 Side assy. 2
Spare parts list 5,4 t
16
16 17
CertMax+
The CertMax+ system is a unique leading edge certication management
system which is ideal for managing a single asset or large equipment port-
folio across multiple sites. Designed by the Lifting Solutions Group, to deliver
optimum asset integrity, quality assurance and traceability, the system also
improves safety and risk management levels.
Marking
The POWERTEXAluminium Wire Rope Hoist is equipped with a RFID
(Radio-Frequency IDentication) tag, which is a small electronic device, that
consist of a small chip and an antenna. It provides a unique identier for the
block.
The POWERTEXAluminium Wire Rope Hoist is CE marked
Standard: EN 13157
User Manuals
You can always nd the valid and updated User Manuals on the web.
The manual is updated continuously and valid only in the latest version.
NB! The English version is the Original instruction.
The manual is available as a download under the following link:
www.powertex-products.com/manuals
!
Product compliance and conformity
SCM Citra OY
Juvan Teollisuuskatui 25 C
02920 Espoo
Finland
www.powertex-products.com
Canary Islands

Other manuals for PAPH-S1 Series

2

This manual suits for next models

8

Other POWERTEX Lifting System manuals

POWERTEX PLH-S1 User manual

POWERTEX

POWERTEX PLH-S1 User manual

POWERTEX PCB-S1 User manual

POWERTEX

POWERTEX PCB-S1 User manual

POWERTEX PCB-S1 User manual

POWERTEX

POWERTEX PCB-S1 User manual

POWERTEX PAPH-S1 Series User manual

POWERTEX

POWERTEX PAPH-S1 Series User manual

POWERTEX PLM User manual

POWERTEX

POWERTEX PLM User manual

POWERTEX PLM User manual

POWERTEX

POWERTEX PLM User manual

POWERTEX PGT-S2 User manual

POWERTEX

POWERTEX PGT-S2 User manual

POWERTEX PCB-S2 User manual

POWERTEX

POWERTEX PCB-S2 User manual

POWERTEX PGT-S2 User manual

POWERTEX

POWERTEX PGT-S2 User manual

POWERTEX PGT-S2 User manual

POWERTEX

POWERTEX PGT-S2 User manual

POWERTEX PBSB User manual

POWERTEX

POWERTEX PBSB User manual

POWERTEX PAPH-S1 Series User manual

POWERTEX

POWERTEX PAPH-S1 Series User manual

Popular Lifting System manuals by other brands

AMGO BP-9 Installation and service manual

AMGO

AMGO BP-9 Installation and service manual

Bravi Platforms SPRINT LUI MINI T.L. Use and safety

Bravi Platforms

Bravi Platforms SPRINT LUI MINI T.L. Use and safety

WITTUR WSG-W8 Series operating instructions

WITTUR

WITTUR WSG-W8 Series operating instructions

SGK AL-12 instruction manual

SGK

SGK AL-12 instruction manual

Prism Medical UK C1000 owner's manual

Prism Medical UK

Prism Medical UK C1000 owner's manual

Reechcraft PowerLift M20C Operators safety manual

Reechcraft

Reechcraft PowerLift M20C Operators safety manual

Harmar Mobility AL100-DE owner's manual

Harmar Mobility

Harmar Mobility AL100-DE owner's manual

Oshkosh Corporation JLG 3394RT Service maintenance manual

Oshkosh Corporation

Oshkosh Corporation JLG 3394RT Service maintenance manual

Haulotte Group HA120PX Maintenance book

Haulotte Group

Haulotte Group HA120PX Maintenance book

R. Beck Maschinenbau HS 1000 operating manual

R. Beck Maschinenbau

R. Beck Maschinenbau HS 1000 operating manual

Space SDE2250LIKA Translation of the original instructions

Space

Space SDE2250LIKA Translation of the original instructions

Scheppach TBL400 Translation of original instruction manual

Scheppach

Scheppach TBL400 Translation of original instruction manual

Anchor APEX 80 Use and maintenance

Anchor

Anchor APEX 80 Use and maintenance

aidapt VA147F Fitting and Maintenance Instructions

aidapt

aidapt VA147F Fitting and Maintenance Instructions

Affordable Wheelchair Lifts KCSPM3648 owner's manual

Affordable Wheelchair Lifts

Affordable Wheelchair Lifts KCSPM3648 owner's manual

EAE EE-6445P Installation, operation, and parts manual

EAE

EAE EE-6445P Installation, operation, and parts manual

Haulotte OPTIMUM 8 Operator's manual

Haulotte

Haulotte OPTIMUM 8 Operator's manual

Quadra Bigfoot user manual

Quadra

Quadra Bigfoot user manual

manuals.online logo
manuals.online logoBrands
  • About & Mission
  • Contact us
  • Privacy Policy
  • Terms and Conditions

Copyright 2025 Manuals.Online. All Rights Reserved.