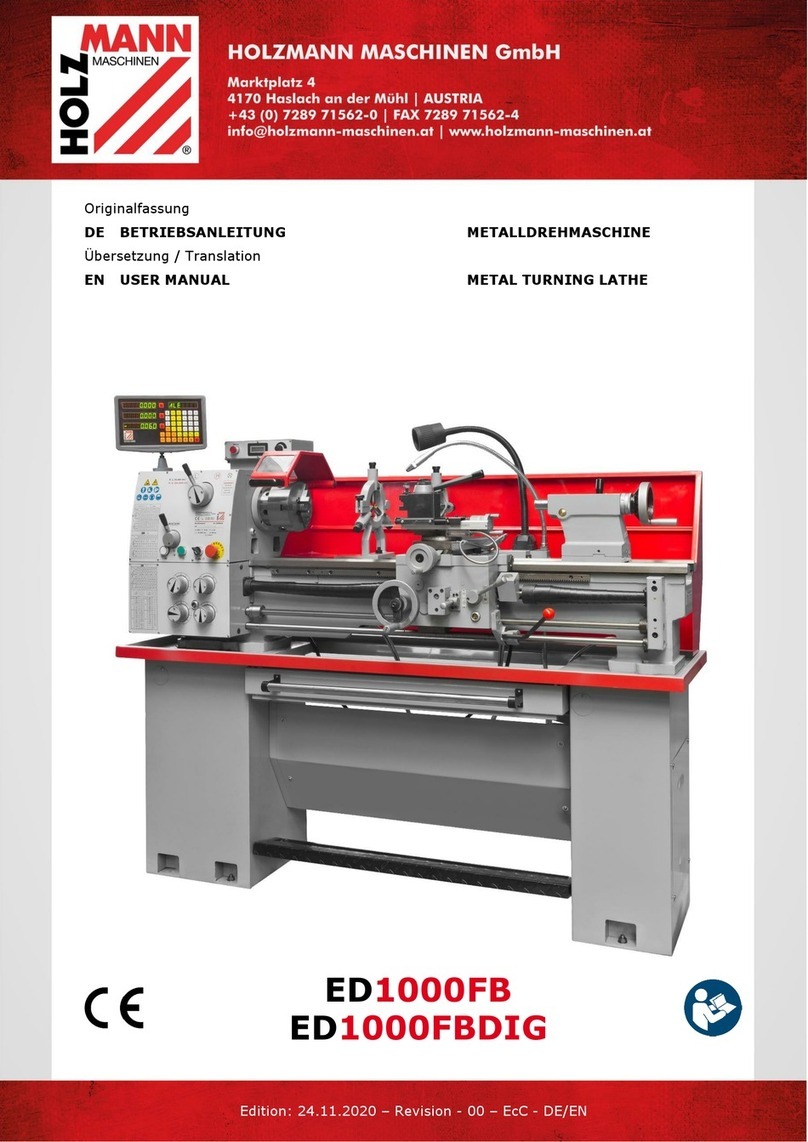
Precision matthews PM-1440E-LB Installation guide

1PM-1440E-LB 11-13-17 V1 Copyright © October 2017 Quality Machine Tools, LLC
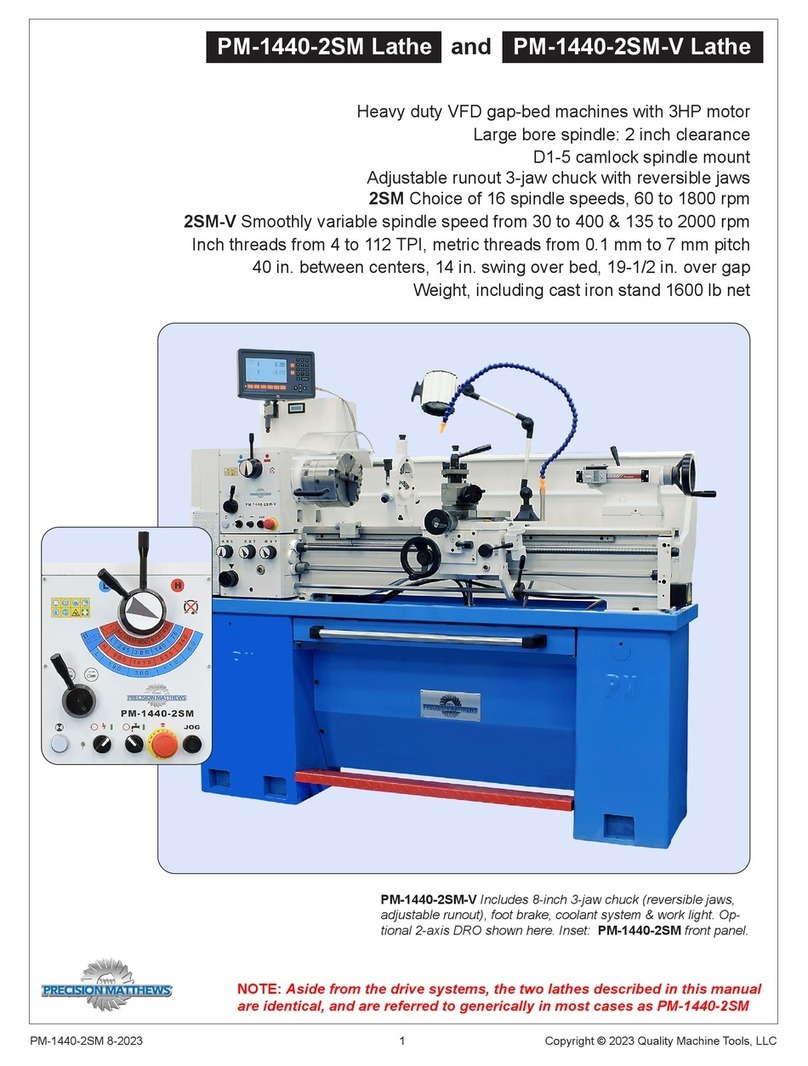
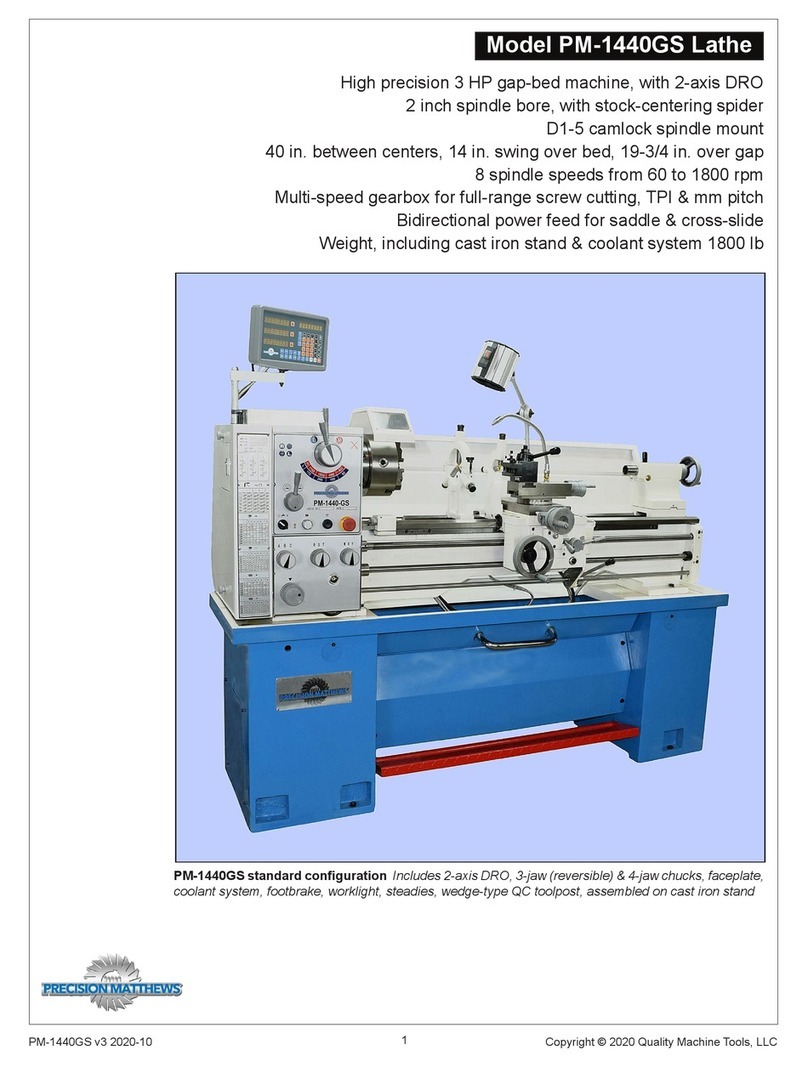
Model PM-1440E-LB Lathe
High precision 3 HP gap-bed machine
2 inch spindle bore
D1-5 camlock spindle mount
40 in. between centers, 14 in. swing over bed, 19-3/4 in. over gap
8 spindle speeds from 70 to 2000 rpm
Full range of Inch and Metric thread cutting
Bidirectional power feed for saddle & cross-slide
Weight, including cast iron stand & coolant system 1800 lb
PM-1440E-LB Shown here with 2-axis DRO (option), 3-jaw chuck, coolant sys-
tem, footbrake, worklight, steadies, wedge-type QC toolpost, cast iron stand

2PM-1440E-LB 11-13-17 V1 Copyright © October 2017 Quality Machine Tools, LLC
PM-1440E-LB
FAQ
Check main power switch ON
Check circuit breaker QF1
AC power connected, but
motor doesn’t run (1)
This manual contains essential safety advice on the proper setup, operation, maintenance, and service
of the PM-1440E-LB lathe. Failure to read, understand and follow the manual may result in property
damage or serious personal injury.
There are many alternative ways to install and use a lathe. As the owner of the lathe you are solely
responsible for its proper installation and safe use. Consider the material contained in this manual to
be advisory only. Quality Machine Tools, LLC cannot be held liable for injury or property damage during
installation or use, or from negligence, improper training, machine modications or misuse.
This manual describes PM-1440E-LB machines as shipped from late 2017. There may be detail dierences
between your specic machine and the information given here (with little or no impact on functionality). If you
have questions about any aspect of the manual or your machine, please email us at service@precisionmat-
thews.com. Your feedback is welcomed!
(4)
Main power
switch ON (back
of machine)?
Master switch
(24Vac control
circuit) must also
be ON
(2)
GREEN light OFF?
By design the motor should NOT run
if the Motor Control lever is UP or
DOWN when power is connected.
Electrical schematic, Section 5: Move
the Motor Control switch to neutral
= OFF (mid travel), to energize the
gate relay KA0, thus restoring normal
conditions.
This material was originated by Precision Matthews. No portion
of the manual may be reproduced or distributed in any form
without the written approval of Quality Machine Tools, LLC.
The 3 gearboxes in this machine
(Headstock, Saddle Feed and
Apron) may have been shipped
empty. They must be lled be-
fore use, see Section 4.
(3)
Footbrake moves freely?
Treadle should be fully UP.
Belt cover installed?
Chuck cover down?
Each of the above has a
microswitch that must be
closed for power to be
connected to the motor
E-Stop button in? Twist
it, should pop out.
Cover
microswitch

3Copyright © October 2017 Quality Machine Tools, LLCPM-1440E-LB 11-13-17 V1
Section 1 INSTALLATION
THESE ARE THE MAIN POINTS TO WATCH OUT FOR!
But read the following pages for more information
• Handling the lathe is at least a two-man job.
• Lifting gear – sling, hoist or forklift – must be rated for at least 1-1/2 tons.
• Working location of the mill must allow space for removal of the belt cover at left; also, ac-
cess to the coolant system (back of right hand cabinet) and the electrical box at the back
of the headstock.
• Power requirement is 220V, 60Hz, 1φ, 20A circuit protection (spindle motor 12A full load).
• Extension cord not recommended; if no alternative, use 12 AWG not longer than 20 ft.
• Before connecting power be sure that:
1. The machine is on a rm footing.
2. Chuck camlocks tight, no wrench left in chuck.
3. Saddle and cross-slide approx. mid-travel, power feed disengaged (Figure 1-9).
4. The headstock gear selectors are set for the lowest spindle speed.
SETTING UP THE LATHE
The PM-1440E-LB is shipped fully assembled in a single
packing case. The machine can be lifted in one piece by an
overhead hoist or forklift with slings and/or chains, all items
rated for a total weight of at least 1-1/2 tons. If using slings, as
Figure 1-1, use spreaders to keep them clear of the leadscrew,
etc. Move the saddle and tailstock for best balance. To fork-lift
the machine clear of the pallet use 1 inch diameter steel bars
through the holes in LH and RH stand cabinets, Figure 1-2.
Inspect the coolant tank and pump assembly in the RH cabi-
net, Figure 1-3. The tank may have become dislodged in ship-
ment. Level it if necessary.
Install six 500 lb-rated leveling mounts in the mounting holes
of the two stand cabinets, 4 for the left hand cabinet, 2 for
the right. Alternatively, level the lathe using metal shims under
the cabinets. The mounts shown in Figure 1-4, available from
Precision Matthews, allow leveling adjustment from above.
To install this type of mount, remove the threaded stem from
the inverted cup stamping (yellow), then place the cup under
the stand with holes aligned — no washer between stand and
mount. If there is insucient headroom in the stand, short-
en the threaded stem; re-install it, with washer and locknut,
through the hole in the stand. Once the stem has bottomed in
the mount, further rotation of the stem (use a wrench) expands
the inner core of the mount, raising its upper surface.
Figure 1-3 Coolant tank (representative)
Figure 1-2 Lifting holes
Figure 1-1 Lift with slings and spreaders

4PM-1440E-LB 11-13-17 V1 Copyright © October 2017 Quality Machine Tools, LLC
INITIAL CHECKS
Read Section 3 if unsure about any item in the following
1. Visually check the entire machine for possible distur-
bance in shipping, including the motor, Vee belts and
external gears under the belt cover left of the headstock.
Replace the belt cover.
2. Check oil level (sight glasses) in the headstock, the
saddle feed gearbox, and the apron. See Section 4.
3. If a chuck or faceplate is installed, check tightness of the
six Camlocks on the spindle nose, Section 3.
4. Lower the chuck guard, photo on page 1.
Figure 1-5 Slide-out chip tray
Figure 1-6 Footbrake microswitch
LEVELING
Make sure the lathe is in its permanent location. The following
procedure ensures that the lathe bed is in the same state as it
was when the lathe was checked for accuracy in manufacture
— level from end to end along the bed, and from front to back.
Do not change speed when the motor is running.
CLEANUP
Metal surfaces may have been protected by thick grease and/
or paper. Carefully remove these using a plastic paint scraper,
disposable rags and a light-oil such as WD-40.
CHIP TRAY
Check that the chip tray, Figure 1-5, can be pulled forward
without snagging coolant hoses and worklight wiring. Use ca-
ble ties if necessary.
SAFETY INTERLOCKS
The lathe will not run if: 1. The footbrake switch fails to close
when the foot treadle is released (brake OFF), Figure 1-6; or
2. The belt cover left of the headstock is removed, allowing the
microswitch to open (FAQs page 2); or 3. The chuck cover is
up.
In other words, no warping.
Make sure all leveling mounts and/or shims are properly
weight bearing, rmly in contact with the oor. Check and ad-
just level from end to end using a precision machinist’s level,
if available. If not, use the most reliable level on hand. Check
and adjust level front-to-back across the bed using a matched
pair of spacer blocks to clear the Vee tenons on the bed ways.
The blocks need to be at least 1/4 inch thick, ground or other-
wise accurately dimensioned. Alternatively, check for level on
the ground surface of the cross-slide as the saddle is traversed
from end to end. See also "Aligning the Lathe" in Section 4.
POWER & OTHER CONNECTIONS
As shipped, the PM-1440E-LB is set for 220 V. If your supply is
nominally 240 V, it may be desirable to alter connections to the
24V transformer in the electrical box.
Read Initial Checks, following, before connecting power
If the lathe did not come with a pre-installed power cord, con-
nect to the power source using 12 AWG (minimum) 3-wire cord
through a strain relief bushing sized for the electrical box ports.
Depending on installed options and other factors, the entry
point shown in Figure 1-7 may not be available. Connect the
ground wire (PE) to the grounding plate at bottom left. Connect
L1, L2 to the left-most two terminals on the bottom terminal
strip (the wires may be marked L, N instead of L1, L2).
Figure 1-7 Electrical box inputs/outputs
This conguration may vary depending on installed options, etc.
220Vac
Power
Motor
24Vac
worklight
Coolant Front
panel
Motor
control
switches
Foot
brake
DRO
power
BEFORE connecting power, do the following:
Figure 1-4 Top-adjusting
leveling mount (optional)

5Copyright © October 2017 Quality Machine Tools, LLCPM-1440E-LB 11-13-17 V1
5. Set the H-L gear levers to the lowest spindle speed, 70
rpm. Make sure the gears are properly meshed by "jig-
gling while shifting" — rotate the chuck back and forth by
hand while moving the levers into position. Make certain
that the motor control lever is set to OFF, mid-travel,
Figure 1-8.
6. Set the Saddle Feed Direction lever to its center (OFF)
position, Figure 1-9.
7. Check that there are no clamps or locks on moving parts.
8. Check that the footbrake treadle is released (UP).
9. Set the saddle and cross-slide to approximate mid-travel.
10. Connect 220 Vac power. Set the main power switch to
ON, FAQs page 2. The power ON lamp should light,
Figure 1-9, unless a circuit breaker in the electrical box
has tripped or one of the interlock switches is open (be
sure the Emergency Stop (E-Stop) button has not been
pushed in (it should pop out when twisted clockwise).
11. Shift the motor control lever DOWN. The spindle should
turn Forward, counter clockwise, viewed at the chuck
(nose) end. The control system can be rewired for
DOWN = Reverse, see the electrical diagram, Section 5.
12. Check the emergency function by pressing the E-Stop
button. The motor should stop. If this doesn’t happen,
the E-stop function is defective, and needs attention.
13. Reset (twist) the E-Stop button to restore power.
14. Check that the chuck guard switch stops the motor when
the guard is swung up.
15. Check that the belt cover interlock stops the motor when
the belt cover is removed.
Figure 1-8 Motor control lever
Mid-travel OFF, DOWN Forward, UP Reverse
TEST RUN PROCEDURE
Run the spindle for a few minutes, forward and reverse, at a
selection of the available 8 speeds.
The saddle feed gearbox should also be run at this time, but
rst make certain that the leadscrew and feed shaft oilers at
the tailstock end have been lubricated.
Also note: In initial tests, because the saddle and cross-slide
should rst be exercised manually, the power feed and split-
nut levers on the apron should be disengaged — see Section
3.
After the initial test run, with 20 additional hours of machine
time, drain and rell all gearboxes with the lubricants specied
in Section 4.
ALIGNING THE LATHE
The most important attribute of a properly set up lathe is its
ability to “machine parallel”, to cut a cylinder of uniform diame-
ter over its entire length. In other words, no taper.
Leveling of the lathe is a part of this, see earlier in this section.
Equally important is the alignment of the center-to-center axis
with the lathe bed, as seen from above. [Vertical alignment is
nowhere near as critical, rarely causing taper unless the lathe
is damaged or badly worn.] For more information see the nal
pages of Section 4, Servicing the Lathe.
Figure 1-9 Feed direction lever
Set to OFF
Power
ON
light
16. Check that the footbrake stops the motor.
17. Return the motor control lever to OFF, mid-travel. The
motor should stop.
18. Shift the motor control lever UP. The spindle should
Reverse, clockwise rotation, viewed at the chuck (nose)
end. The control system can be rewired for UP = For-
ward, see the electrical diagram, Section 5.

6PM-1440E-LB 11-13-17 V1 Copyright © October 2017 Quality Machine Tools, LLC
Section 2 FEATURES & SPECIFICATIONS
MODEL PM-1440E-LB Lathe
General information
This is a gap-bed lathe designed for day-in, day-out use in the larger model shop. Distance between centers is
40in., swing over the bed 14 in., spindle bore 2 in., internal taper MT6. With a 3 HP motor and an all-up weight
of 1800 lb, the PM-1440E-LB is a robust heavy-duty machine. The geared headstock provides 8 spindle speeds
from 70 to 2000 rpm. A quick-change saddle feed gearbox provides a full range of leadscrew ratios for U.S. and
metric screw cutting, together with an independent power feed for both saddle and cross-slide. The power feed
shaft is driven through a friction clutch that allows the saddle to be stopped precisely at any point along the bed.
The spindle nose is D1-5 Camlock.
A treadle-operated drum brake stops the spindle very quickly, even at the highest speeds. A circulating coolant
system is installed in the right hand stand cabinet.
PM-1440E-LB Floor plan: dimensions approximate (not to scale)

7Copyright © October 2017 Quality Machine Tools, LLCPM-1440E-LB 11-13-17 V1
PM-1440E-LB SPECIFICATIONS
Dimensions, approximate overall, incl. stand
Width 71-1/2 in. x Height 51 in. x Depth 31 in. (full range
cross-slide motion)
Spindle centerline to oor: 46 in.
Weight, approximate:1800 lb net
Power requirement 220 Vac, 60 Hz, 1Ø, 12A max
Motor 3 HP 1Ø
Work envelope
Headstock center to tailstock center 40 in. max
Swing over bed 14 in. diameter
Swing over cross-slide 9 in. diameter
Swing in gap 20 in. diameter
Gap insert length 8-3/4 in.
Spindle face to tailstock quill face 43-1/4 in. max
Saddle travel along bed 38-1/2 in.
Cross-slide travel 7 in.
Compound (top slide) travel 3-3/4 in.
Drive system
VFD drive with 2-speed gearbox)
Low range, rpm 70 to 300
High range, rpm 460 to 2000
Saddle drive, thread cutting Leadscrew 8 tpi
Inch threads Choice of 34, from 4 to 56 TPI
Metric threads Choice of 26, from 0.4 mm to 7 mm pitch
Saddle drive, turning operations Choice of feed rates from 0.002 to 0.0548 in./spindle rev
Cross-slide drive, facing operations Choice of feed rates from 0.0007 to 0.0187 in./spindle rev
Spindle
Chuck/faceplate attachment D1-5 Camlock
Internal taper MT6
Spindle bore 2 in. diameter
Spindle length, LH end to chuck mounting face 16-1/2 in. overall
Spindle length, LH end to chuck face (typical) 19-1/4 in. approx.
Tailstock
Internal taper MT4
Quill travel 4 in.
Work holding (typical)
3-jaw chuck, 8 in.
4-jaw chuck, 8 in.
Faceplate
Center rest (steady rest) capacity Up to 3 in. diameter
Follower rest capacity Up to 1 in. diameter

8PM-1440E-LB 11-13-17 V1 Copyright © October 2017 Quality Machine Tools, LLC
Everyday precautions
• This machine is intended for use by experienced users familiar with metal-
working hazards.
• Untrained or unsupervised operators risk serious injury.
• Wear ANSI-approved full-face or eye protection at all times when using the
machine (everyday eyeglasses are not reliable protection against ying par-
ticles).
• Wear proper apparel and non-slip footwear – be sure to prevent hair, clothing
or jewelry from becoming entangled in moving parts. Gloves – including tight-
tting disposables – can be hazardous!
• Be sure the work area is properly lit.
• Never leave chuck keys, wrenches or other loose tools on the machine.
• Be sure the workpiece, toolholder(s) and machine ways are secure before
commencing operations.
• Use moderation: light cuts, low spindle speeds and slow table motion give
better, safer results than “hogging”.
• Don’t try to stop a moving spindle by hand – allow it to stop on its own.
• Disconnect 220 Vac power from the lathe before maintenance operations
such as oiling or adjustments.
• Maintain the machine with care – check lubrication and adjustments daily
before use.
• Clean the machine routinely – remove chips by brush or vacuum, not com-
pressed air (which can force debris into the ways).
No list of precautions can cover everything.
You cannot be too careful!

9Copyright © October 2017 Quality Machine Tools, LLCPM-1440E-LB 11-13-17 V1
Section 3 USING THE LATHE
MAIN CONTROLS
Figure 3-1 Main control panel & gearbox
Before connecting power to the lathe, be sure the Motor Con-
trol Lever on the apron is set to OFF, Figure 3-2.
• Connect the lathe to a 220 Vac outlet.
• Turn ON the main power switch (back of the headstock,
Figure 3-3).
• Turn ON the 24V master switch, Figure 3-1 (5). If all the
interlocks are closed the System Ready lamp should light,
Figure 3-1 (4).
• Select the desired spindle speed.
• Operate the Motor Control Lever to run the spindle in the
desired direction.
If this is the rst-time use, check that the following interlocks
function correctly:
• E-Stop button
• Chuck guard
• Belt cover (to the left of the headstock)
• Footbrake
Before doing ANYTHING, check the installa-
tion instructions and power-up procedure in
Section 1
STOP the motor before changing spindle
speed OR feed direction OR feed speed
Don't use JOG unless the gears are fully
meshed
(1) High-Low range selector (2) Spindle speed selector (3)
Saddle/cross-slide feed direction (4) System Ready light (5)
24V Master switch (low voltage control circuit) — must be
ON, as shown, for the lathe to function (6) Coolant switch
(7) Emergency E-Stop button — must be OUT for the lathe to
function (8) Jog push-button (9) When set to N as shown, this
knob disengages the leadscrew, engages the feed-shaft drive.
Figure 3-2 Motor control lever
Mid-travel OFF, Down FOR-
WARD, Up REVERSE
Figure 3-3 Main power switch

10PM-1440E-LB 11-13-17 V1 Copyright © October 2017 Quality Machine Tools, LLC
SPINDLE SPEEDS
The PM-1440E-LB has an eight-speed headstock gearbox
with two shift levers, LH and Speed Selection, Figure 3-1.
Before changing speed, use the Motor Control lever to STOP
THE MOTOR, then move the shift levers to the desired setting.
This may need a little patience because it is not always possi-
ble to go directly from one mesh to another. Move the spindle
back and forth by hand while trying to ease the lever into its
detent (meshed) position. Don’t use the JOG button in this
process — this may cause gear damage.
FEED DIRECTION
The lever below the speed selectors on the front panel, Figure
3-1 (3) determines whether the saddle feed is right to left — the
usual direction for turning and thread cutting — or reversed.
The selected direction applies to both the leadscrew and
the saddle/cross-slide power feed.
Before changing feed direction, STOP THE MOTOR. Hand-
turn (joggle) the spindle while feeling for the mesh, as above.
To disengage the power feed completely, set the Direction le-
ver to its mid-position.
SPINDLE SPEED (RPM)
H RANGE 1255 2000 755 460
L RANGE 190 300 115 70
JOG
"Jog" is momentary-type push-button, Figure 3-1 (8), active
only if the Motor Control lever is in the mid-travel (OFF) posi-
tion, Figure 3-2. Press the button briey to "nudge" the spindle
forward by a few degrees. Jog can be used to reposition the
chuck and/or workpiece, especially when low spindle-speed
gearing makes hand rotation dicult.
The control system can be rewired for "Reverse Jog", see the
electrical diagram, Section 5.
ENGAGING THE POWER FEED
(For normal turning and facing operations)
To activate the feed shaft: 1. Set the Direction lever, Figure 3-1
(4), to the left, and; (2) Set the upper right knob on the gear-
box to N, Figure 3-1 (9). Selections 1-2-3-4 are used only for
thread cutting with the leadscrew).
APRON CONTROLS
The power feed lever on the apron, Figure 3-4, is active only
when the feed shaft is rotating. The split-nut lever engages
the leadscrew, and is used only for thread cutting).
When engaging the power feed, move the lever gently, feel-
ing for the gears to mesh as you go. If the gears don’t engage
at the rst try, use the appropriate handwheel to jog the saddle
or cross-slide, whichever one you wish to move under power.
The rate of power feed relative to spindle speed is set by se-
lector knobs on the gearbox, together with external change
gears on the end face of the headstock, Figure 3-5. Two pair-
ings are commonly used: 30T upper/60T lower, and 60T up-
per/60T lower. Feed rates are listed in Figure 3-6.
Figure 3-4 Apron controls
When the power lever is neutral — neither up or down — the pow-
er feed is disengaged. Test for this by gently turning the saddle and
cross-slide handwheels. Move the power feed lever RIGHT & UP to
engage the Saddle feed. Move the lever LEFT & DOWN to engage
the Cross-slide feed. The split-nut lever, used for thread cutting, can
be engaged only when the power feed lever is neutral.
Figure 3-5 30T/60T power feeding setup
Shown here are 30T upper, 60T lower, with the 127T
center gear acting only as an idler. The other option
for power feeding is 60T upper, 60T lower, again
using the 127T gear as an idler, Figure 3-6. Dimen-
sions are wrench sizes. To adjust the support casting
position, loosen hex nut (1) and clamp screw (2).
For U.S. TPI thread cutting use the same setup,
with dierent upper and lower gears.
19 mm
17 mm
11 Copyright © October 2017 Quality Machine Tools, LLCPM-1440E-LB 11-13-17 V1
Figure 3-6 Power feed rates (inches per spindle rev)
For any given selection, saddle motion is approximately 3 times cross-slide motion.
FEEDSHAFT CLUTCH
The clutch shown in Figure 3-7 disengages the power feed if
the saddle or cross-slide hits an obstruction when power feed-
ing, thus minimizing the potential for damage. This could be
the result of either an accidental event, or deliberately stopping
the saddle at a precise location set by the saddle stop, Figure
3-8.
T S R V T S R V
A D 0.0187 0.0175 0.0140 0.0112 0.0094 0.0087 0.0070 0.0056
B D 0.0094 0.0087 0.0070 0.0056 0.0047 0.0044 0.0035 0.0028
A C 0.0047 0.0044 0.0035 0.0028 0.0024 0.0022 0.0017 0.0014
B C 0.0024 0.0022 0.0017 0.0014 0.0012 0.0011 0.0009 0.0007
T S R V T S R V
A D 0.0548 0.0512 0.0411 0.0328 0.0274 0.0256 0.0205 0.0164
B D 0.0274 0.0256 0.0205 0.0164 0.0137 0.0128 0.0102 0.0082
A C 0.0137 0.0128 0.0102 0.0082 0.0069 0.0064 0.0051 0.0041
B C 0.0069 0.0064 0.0051 0.0041 0.0034 0.0031 0.0025 0.0020
SADDLE FEED
Inches/spindle revolution
CROSS-SLIDE FEED
Inches/spindle revolution
EXTERNAL GEAR SWAPPING
The 120T and 127T gears in Figures 3-5 are called transpos-
ing gears. They allow a standard-thread leadscrew — in this
case 8TPI — to cut metric threads. For U.S. (TPI) thread cut-
ting there is no transposing requirement — the 127T gear
acts only as an idler, transferring drive directly from the head-
stock to the gearbox.
Any change to the drive train typically calls for one or both
of the upper and lower gears to be exchanged for a larger or
smaller gear. This will require the transposing gears to be re-
positioned. The procedure for this is:
1. Remove the hex nuts from the upper and lower gear shafts.
2. Remove the upper and lower gears, washers and keys.
3. While holding the gear support casting (quadrant) with one
hand, loosen its anchor nut and clamp screw. Allow the
casting to swing downward.
4. Loosen the hex nut securing the transposing gear axle to
the support casting.
5. Install the lower gear.
6. For power feeding or U.S. (TPI) thread cutting, bring
the larger transposing gear (127T) into mesh with the low-
External
gears
er gear, running a scrap of printer paper (about 0.004")
trapped between the two to set them at the correct sepa-
ration. For metric thread cutting, mesh the smaller trans-
posing gear (120T) with the lower gear, Figure 3-9.
7. Tighten the transposing gears in position, then remove the
paper scrap. Check again for working clearance between
the gears.
8. Install the upper gear.
9. Swing the gear support casting upward to mesh the 127T
gear with the upper gear, again using a paper scrap for
separation.
10.Tighten the gear support casting.
11. Lubricate the gears.

12PM-1440E-LB 11-13-17 V1 Copyright © October 2017 Quality Machine Tools, LLC
Figure 3-7 Feed shaft clutch
SADDLE STOP
The stop assembly, Figure 3-8, has a micrometer-style collar
graduated in 0.001 in. divisions. It can be clamped at any point
along the lathe bed (two M6 socket head screws on the under-
side secure the clamp plate to the block). A set screw at the
front locks the barrel.
THREAD CUTTING
KEY FACTS TO REMEMBER ...
TPI threads
See Figures 3-5, 3-6. For inch thread cutting, the 127T larger
gear is an idler, transferring the drive from the upper change
gear to the lower change gear.
Metric threads
The upper change gear engages the 127T gear. The smaller
of the transposing gears, 120T, drives the lower change gear,
Figure 3-9.
For metric threads the split-nut on the apron must be left
engaged throughout the entire process.
COMPOUND SETUP FOR THREAD CUTTING
Thread cutting on the lathe is unlike most other turning oper-
ations, for two reasons: 1. The cutting tool must be precisely
ground with an included angle of 60 degrees for most Ameri-
can and metric threads, and; 2. It is mostly preferable to feed
the tool into the workpiece at an angle so it cuts mostly on the
left ank of the thread, Figure 3-10. The correct angle relative
to the cross-slide (zero degrees) is debatable — should it be
29, 29-1/2 or 30 degrees? Many machinists prefer 29 degrees
because it holds the cutting tool marginally clear of the right
ank of the thread, close enough for cleanup of the ank while
at the same time avoiding appreciable rubbing.
The clutch comprises a pair of spring loaded steel balls bear-
ing on a detent disc driven by the saddle feed gearbox. Spring
pressure is adjusted by two set screws on either side of the
feed shaft, arrowed in Figure 3-7. Setting the spring pressure
is a process of aiming for the best compromise between too
high — damaging feed pressure — and too low, stopping pre-
maturely.
Setting the clutch to work reliably with the micrometer saddle
stop is a good example of such a compromise: start with low
spring force, then work up in small increments until the saddle
stops in the same location (say ± 0.002”, assuming a constant
depth of cut and feed rate).
Figure 3-8 Saddle stop
Figure 3-9 Metric thread cutting setup
The upper gear meshes with the 127T gear,
but the lower gear is ipped — hub inward
— so that it engages the 120T gear.

13 Copyright © October 2017 Quality Machine Tools, LLCPM-1440E-LB 11-13-17 V1
Figure 3-10 Setting up the compound for 30oinfeed
1440E-LB
CUTTING PROCEDURE FOR TPI THREADS
This procedure assumes that a single point thread cut-
ting tool will be used, and that the threading dial, Fig-
ure 3-11, has been pivoted forward to engage its worm
wheel with the leadscrew.
The threading dial cannot used for metric threads!
The split-nut on the apron must be left engaged
throughout the entire process.
For metric and UNC/UNF threads the tool is ground to
60o (included angle). It is installed so that its anks are
exactly 30o either side of the front-to-back axis, ideally
with the compound oset as Figure 3-10. Single-point
threads are cut in 10 or more successive passes, each
shaving a little more material o the workpiece.
Engage the leadscrew by setting the upper right
gearbox knob to N, Figure 3-1 (9).
To make the rst thread-cutting pass the leadscrew is
run at the selected setting (table at right), and the sad-
dle is moved by hand to set the cutting tool at the start-
ing point of the thread. With the tool just grazing the
workpiece, the split-nut lever is lowered to engage the
leadscrew. This can be done at any point, provided the
split-nut remains engaged throughout the entire multi-
pass thread cutting process.
When the rst pass is completed, the tool is backed
out clear the workpiece (using the cross-slide), and
the spindle is reversed to bring the saddle back to the
starting point. The cross-slide is returned to its former
setting, then the tool is advanced a few thousandths by the
compound for the next pass. Each successive pass is done in
the same way, each with a slightly increased infeed setting of
the compound.
Many users working on U.S. threads save time by disengag-
ing the split-nut at the end of each cutting pass, reversing the
saddle by hand, then re-engaging, usually by reference to the
threading dial.
If the TPI number is divisible by 2 re-engagement can be done
at any line on the threading dial.
Gear shifters
V-4 V-1 V-1 V-1 V-1 V-1 V-2 V-1 V-3
er
gear 60 60 60 60 40 40 56 40 60
er
gear 60 54 57 60 44 46 54 52 63
A-D 4 4-1/2 - 5 5-1/2 - 6 6-1/2 7
B-D 8 9 9-1/2 10 11 11-1/2 12 13 14
A-C 16 18 19 20 22 23 24 26 28
B-C 32 36 38 40 44 46 48 52 56
Figure 3-12 Threads per Inch (TPI)
Figure 3-11 Threading dial
When not in use, the dial may be swung
clear of the leadscrew to minimize wear
GEAR SELECTIONS FOR TPI
THREADS

14PM-1440E-LB 11-13-17 V1 Copyright © October 2017 Quality Machine Tools, LLC
Gear shifters
R-4 R-1 S-3 T-4 V-1 R-3 T-1 V-3 V-3
er
gear 56 60 60 30 60 60 30 60 56
er
gear 60 60 60 60 60 60 60 60 63
A-D 7.0 6.0 - 5.0 - 4.5 4.0 - -
B-D 3.5 3.0 - 2.5 - 2.25 2.0 1.8 1.6
A-C 1.75 1.5 1.4 1.25 1.2 - 1.0 0.9 0.8
B-C - 0.75 0.7 - 0.6 - 0.5 0.45 0.4
Figure 3-14 Metric thread pitches (mm)
For all other TPI numbers every engagement, including the
rst, must at the point where a specic line on the threading
dial comes into alignment with the datum mark. If not, the sec-
ond and subsequent passes will be out of sync. In some cas-
es, Figure 3-13, there is a choice of lines for re-engagement,
but in every case the process calls for careful timing.
Typical depths of cut per pass vary from an initial 0.005” or so,
to as little as 0.001”, even less. A nishing pass or two with
increments of only 0.0005” — or none at all, to deal with the
spring-back eect, can make all the dierence between a too-
tight thread and one that runs perfectly.
Assuming that the compound is set over at between 29 and
30 degrees, the total depth of cut is approximately 0.69 times
the thread pitch, P (this equates to a straight-in thread depth of
0.6 times P). There may be a need for a few thousandths more
in-feed than 0.69P, almost certainly not less.
GENERAL RULES FOR THE THREADING DIAL
1. Divide the TPI value by 2: If this gives an EVEN whole
number, example 12/2, re-engage at any line on the dial,
also mid-way between the lines.
1. If the ÷ 2 result is an ODD whole number, examples 10/2,
14/2, re-engage at any line on the dial, but not mid-way
between the lines.
2. If the TPI value is a whole number not divisible by 2, ex-
amples 7, 13, re-engage on the start line, or any line at
right angles to it.
3. If the TPI value is fractional, but becomes a whole number
when multiplied by 2, example 4-1/2, re-engage only on
the start line, or its diametrical opposite.
If in doubt, re-engage on the start line!
Figure 3-13 Threading dial visualization for selected U.S. threads
GEAR SELECTIONS
FOR METRIC
THREADS
The threading dial
cannot be used
for metric thread
cutting — leave the
split nut engaged!

15 Copyright © October 2017 Quality Machine Tools, LLCPM-1440E-LB 11-13-17 V1
TAILSTOCK
The tailstock leadscrew has a 10 TPI thread, with 4 inch travel.
A graduated collar on the tailstock handwheel reads 0.001”/
division. The collar also has 127-division metric graduations,
displaying "true metric" motion of 0.02 mm per division.
To remove tooling from the tailstock taper (MT4) turn the hand-
wheel counter-clockwise (handle end view) until resistance is
felt, then turn the handle a little more to eject the tool. Con-
versely, to install a taper tool make certain that the quill is out
far enough to allow rm seating.
For taper turning the tailstock may be oset by adjusting set
screws on either side, Figure 3-16. To move the tailstock to
the front, for instance, the screw on the lever side would be
unscrewed, then the opposing set screw would be screwed in
to move the upper assembly.
A visual indication of the oset is provided by a scale on the
back surface, but this is not a reliable measure for precise
work. In practice, the only way to determine the oset precisely
is to "cut and try' on the workpiece, or scrap stock, homing in
on the correct degree of oset in small increments.
The same issues arise when re-establishing "true zero" of the
tailstock, in other words returning it to the normal axis for rou-
tine operations. One way to avoid cut-and-try is to prepare in
advance a bar of (say) 1" diameter quality ground stock, with
precise center drillings at both ends (do this by indicating for
zero TIR in a 4-jaw chuck, not in a 3-jaw unless known to be
predictably accurate). The prepared bar can then be installed
between centers and indicated along its length.
Figure 3-16
Tailstock
LOCKING THE SLIDES
When face-cutting large diameter surfaces, for instance, it is
often desirable to lock the saddle, Figure 3-17. Less frequently
it can be helpful to lock, or at least stien, sliding motion of the
compound, Figure 3-18.
If a DRO system is installed the Y axis scale blocks access to
the cross-slide lock screw. Osetting the DRO with stand-o
bushings may allow the hidden lock screw to be replaced by a
hex head screw accessible from above, Figure 3-19.
Figure 3-17 Saddle lock screw (representative)
Figure 3-18 Compound lock screw (representative)
CROSS-SLIDE & COMPOUND
The cross slide and compound both have 10 TPI leadscrews,
with 100-division graduated collars, Figure 3-15. Each division
represents a true motion of 0.001”. On the cross-slide dial,
only, this shows as 0.002” per division, meaning that a 0.001”
depth of cut reduces the diameter of the workpiece by 0.002”.
The collars also have 127-division metric graduations, display-
ing "true metric" motion of 0.02 mm per division on the com-
pound, 0.04 mm on the cross-slide.
Figure 3-15 Cross-slide and compound dials

16PM-1440E-LB 11-13-17 V1 Copyright © October 2017 Quality Machine Tools, LLC
Figure 3-19
STEADY & FOLLOWER RESTS
The hinge-type steady rest, Figure 3-20, can be mounted any-
where along the lathe bed. It makes possible cutting opera-
tions on long, slender workpieces between centers, or held at
one end by chuck. The steady rest is often used in combina-
tion with the saddle-mounted follower rest, Figure 3-21.
To set the ngers on the workpiece, rst swing open the upper
casting. Make certain that all three ngers are freely adjustable
by thumbwheel. If not, loosen and re-lock the set screws (ar-
rowed). Raise the two lower ngers to just touch the workpiece
— not deecting it — then close and secure the upper casting.
Lower the top nger to just touch the workpiece, clamp the
frame, then apply oil at the point of contact.
The follower rest is secured to the saddle with two 8 mm
socket head screws. Adjust the follower ngers as described
for the steady rest.
Figure 3-20 Steady rest (representative) Figure 3-21 Follower rest (representative)

17 Copyright © October 2017 Quality Machine Tools, LLCPM-1440E-LB 11-13-17 V1
CHUCKS & FACEPLATE
The spindle nose on the PM-1440E-LB accepts D1-5 Camlock
chucks, faceplates and other work holding devices.
A D1-5 chuck or faceplate is held by six threaded studs, each
with a D-shape crosscut to engage a corresponding cam in
the spindle nose. The function of the cams is to pull the chuck
backplate inward to locate its internal taper rmly on the spin-
dle nose.
Alongside each stud is a stop screw, the head of which ts
closely in a groove at the threaded end of the stud. The func-
tion of the stop screw is not to clamp the stud in place, but
instead to prevent it from being unscrewed when the chuck is
out on the bench. If the studs were not pre-installed, screw
them into the threaded holes to bring the reference line as
close as possible to the back surface of the chuck/faceplate,
with the stop groove aligned with the stop screw hole.
All stop screws must be present & fully tightened!
Camlock action can jam any stud lacking a stop
screw — a serious problem.
Figure 3-22 D1-5 faceplate
TO INSTALL A CHUCK
Disconnect the 220V supply from the lathe!
D1-5 chucks and faceplates are heavy, some more than 30
lb. They will cause serious damage if allowed to fall. Even if a
chuck is light enough to be supported by one hand, the lathe
bed should be protected by a wood scrap, as Figure 3-24.
Some users add packing pieces, even custom-made cradles,
to assist “straight line” installation and removal.
Before installing make certain that the mating surfaces of the
chuck/faceplate and spindle are free of grit and chips.
The cams on the spindle are turned with a square-tip wrench
similar to the chuck key (may be same tool in some cases).
Recommended procedure:
1. Select the high speed range Hto allow easier hand rotation
of the spindle.
2. Turn the spindle by hand, checking that all six cam markers
are at 12 o’clock.
3. While supporting its full weight, install the chuck without
tilting, see Figure 3-25, then gently turn each of the cams
clockwise — snug, rm, but not locked in this rst pass.
4. Check that each of the cam markers lies between 3 and
6 o’clock, between the two Vees stamped on the spindle,
Figure 3-26.
5. If any cam marker is not within the Vees, rst be sure
that there is no gap between chuck backplate and spin-
dle ange. Also, remove the chuck to inspect the studs —
burrs can be a problem, hone if necessary. If there are no
visible problems, the stud in question may need ad-
justment as follows:
Figure 3-24 Protect the lathe bed
• Remove the stop screw from the stud.
• If the cam marker in question can’t get to the rst Vee (3
o’clock), back the stud OUT one full turn, then replace the
stop screw.
• If the cam marker goes beyond the second Vee (6 o’clock),
screw the stud IN one more turn, then replace the stop
screw.
• If the markers are correctly aligned, repeat the tightening
sequence as step 3, light force. Repeat the sequence two
more times, rst with moderate force, then fully tighten.
Figure 3-23 The Camlock system

18PM-1440E-LB 11-13-17 V1 Copyright © October 2017 Quality Machine Tools, LLC
Figure 3-25 Installing a Camlock chuck
Figure 3-26 Cam in locked condition
TO REMOVE A CHUCK OR FACEPLATE
Disconnect the 220V supply from the lathe!
Protect the lathe bed, as Figure 3-24. While supporting its
weight, turn each of the cams to 12 o’clock, Figure 3-25, then
remove the chuck. If the chuck does not come free, try tapping
the backplate gently with a soft (dead blow) mallet.
GAP BED
An 8-3/4 in. long section of the bed at the headstock end can
be removed to allow turning of diameters up to approximately
20 in., Figure 3-27.
To remove the gap insert back out the pusher screw one or
two turns, then remove the four large socket head screws se-
curing the insert to the bed. To minimize cosmetic damage, cut
through the paint and ller along the joint between insert and
bed using a sharp knife or pointed scraper.
Jack out the two taper pins using a hex key.
Before re-installing the insert, be certain that all mating surfac-
es are scrupulously clean. Set the insert in place, lightly tap in
Figure 3-27 Gap insert
Representative
insert (taper pin lo-
cations may vary)
the two locating pins, then install the four large bolts (snug, but
not fully tightened). Jack the insert to the right with the pusher
screw to close the gap, if any, between the ground surfaces
of the bed ways at the join (a visible parting line may be ac-
ceptable, but a discontinuity that snags the saddle is not). If a
satisfactory join cannot be achieved, it may be necessary to
remove and reinstall the insert from scratch.

19 Copyright © October 2017 Quality Machine Tools, LLCPM-1440E-LB 11-13-17 V1
COOLANT SYSTEM
The coolant system is typically used with water-miscible
(emulsied) cutting uid. It can also be used with lightweight
neat cutting oil straight from the can. Synthetic cutting uids
are not recommended due to their potential for corrosion and
other undesirable eects on the lathe and the coolant pump.
If you use water-miscible cutting uid, bear in mind that the
ratio of product to water is important — too much water causes
excessive corrosion and other problems. Check the mix from
time to time using a refractometer. If this is not available, make
up a small batch according to the product directions, then re-
place with a fresh batch when the old one becomes unusable
due to reduced performance, oil/water separation, or bad odor.
Disposal of used cutting uid can be a problem. It is about 95%
water, so its volume can be drastically reduced by evaporation
in an open tank. The residue may then be handled like any
other waste oil.
Figure 3-30 Coolant pump, RH stand cabinet (representative)

20PM-1440E-LB 11-13-17 V1 Copyright © October 2017 Quality Machine Tools, LLC
Section 4 SERVICING THE LATHE
Disconnect power before any maintenance operation!
Remove all machining debris and foreign objects before lubricating ANYTHING! If need
be, any oil is better than no oil – but use the recommended lubricants when you can.
HEADSTOCK GEARBOX DRAIN & REFILL
Take time to prepare. 4 quarts is a lot of oil to clean up!
GENERAL
Aside from abrasive particles and machining debris, lack of
proper lubrication is the main cause of premature wear. Rotat-
ing parts are easy to lubricate, sliding parts are not. Gibs are
tightened for the best compromise between rigidity and slide-
ability, which means practically zero gap between the ways. It
is not obvious which are the bearing surfaces on the various
dovetail surfaces — some of the interfaces look like bearing
surfaces, but are simply narrow gaps.
Every few hours of operation: 1. Apply the recommended way-
oil with a dedicated short-bristle brush such as the type used
for applying ux; 2. Use a similar brush to apply oil or grease to
the leadscrews; 3. Apply oil to the ball oilers, see below.
The spindle runs on sealed, pre-lubricated roller bearings re-
quiring no routine attention.
Recommended lubricants
Gearboxes: ISO 68, such as Mobil DTE Heavy/Medium circu-
lating oil. Approximate quantities required:
Headstock 4 quarts
Saddle feed gearbox 2 quarts
Apron 1 quart
Ball oilers: ISO 68 way oil, such as Mobil Vactra No. 2, or
equivalent.
Machine ways (dovetails): ISO 68 way oil, such as Mobil Vac-
tra No. 2, or equivalent.
External change gears: light general purpose grease, NLGI
No. 2, or equivalent.
Leadscrews: ISO 68 way oil, such as Mobil Vactra No. 2, or
equivalent.
BALL OILERS
Use a pump-type oil can, preferably with a exible spout tipped
with a soft tube. The ID of the tip should be large enough to
seat on the oiler's brass ange, more than spanning the spring-
loaded steel ball. When the oil can tip is rmly pressed onto the
brass surface oil pressure will displace the ball, allowing oil to
ow into the bearing. Before oiling check that the ball is not
stuck – press it lightly with a probe.
Figure 4-2 Headstock sight glass & drain plug
Figure 4-1 (representative)
1. Run the lathe for a few minutes to warm the oil if neces-
sary.
2. Remove the ll plug on the top surface of the headstock,
Figure 4-1.
3. Remove the external change gears if necessary for ac-
cess to the drain plug, Figure 4-2.
4. Place a drain pan (2-gallons minimum) on a stool or other
support at about the height of the chip tray.
5. Fold a sheet of card stock to make a Vee-shape drain
channel. This will be pressed against the headstock below
the drain plug, angled downward into the drain pan; trim
the upstream end of the Vee so that it seals against the
headstock.
6. With the drain channel in place, remove the drain plug.
7. Allow the oil to drain completely. Replace the drain plug,
then add just a few ounces of oil.
8. When satised that the headstock is oil-tight, add oil to the
halfway mark on the sight glass (about 4 qts).
9. Replace the ll plug.
Table of contents
Other Precision matthews Lathe manuals

Precision matthews
Precision matthews PM-1440-2SM User manual

Precision matthews
Precision matthews PM-1440BV User manual

Precision matthews
Precision matthews PM-1440GS User manual

Precision matthews
Precision matthews PM-1440GT User manual

Precision matthews
Precision matthews PM-1236T User manual

Precision matthews
Precision matthews PM-1236 User manual

Precision matthews
Precision matthews PM-1127VFI-LB Installation guide

Precision matthews
Precision matthews PM-1228VF-LB User manual

Precision matthews
Precision matthews PM-1127VF-LB User manual

Precision matthews
Precision matthews PM-1022V User manual