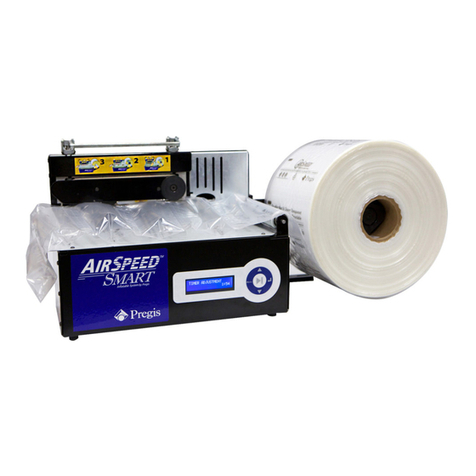
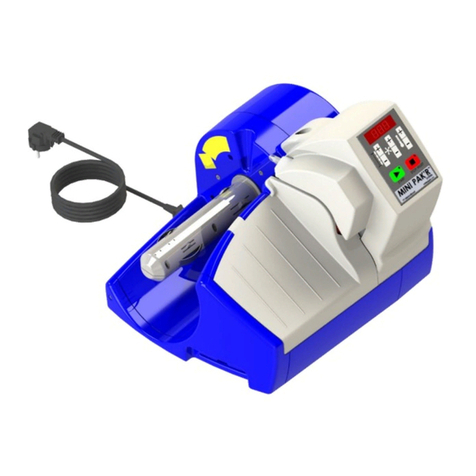
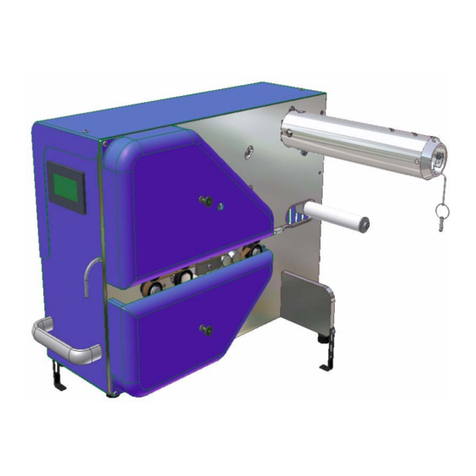
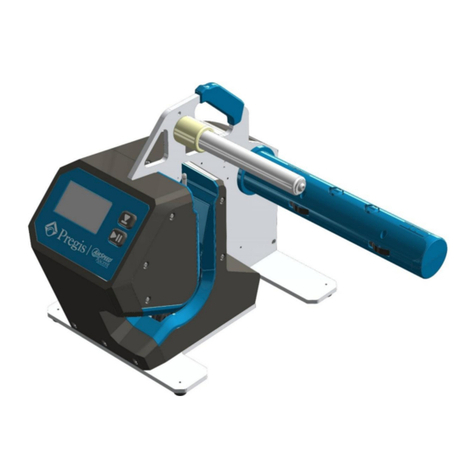
Pregis AirSpeed MINI PAK'R User manual

USER MANUAL
REVISION 4.2
minipakr.com
www PREGIS.COM

MINI PAK’R Machine User Manual Page -1-
ENGLISH
Ocial agency certications, declaration documents, and RoHS position statements are
available upon request.
If your products is marked as shown on the left, it has been tested and complies with
UL 963, UL Standard for Sealing and Marking Equipment and CAN/CSA-C22.2 No. 64-M91 Standards
for Hosuehold Cooling and Liquid Heating Appliances.
This product is in conformity with the essential requirements of European Directive 1999/5/EEC and
the following standards: EN 300-330-2 V1.1.1, EN 61000-6-3(2001) + A11 (2004), EN 6100-6-2(2001),
EN61000-3-2 (2000), EN61000-3-3 (1995), EN 60204-1 (1997), EN 60950-a (2002), EN 1050 (1997),
EN 292-1 (1991), and EN 292-2 (2002).
This product is compliant with Directive 2002/95/EC, Restricition of Hazardous Substances.
Disposal: Power tools, accessories and packaging should be sorted for environmental-friendly recycling.
Only for EC countries: Do not dispose of power tools into household waste!
According to the European Directive 2002/96/EC on waste electrical and electronic equipment and
its incorporation into national law, products that are no longer suitable for use must be separately
collected and sent for recovery in an environmentally-friendly manner
Congratulations on your purchase of the MINI PAK’R®Machine! You
now own the world’s only retail, on-demand Air Cushion Machine! You can
now produce a wide variety of air cushions just by loading a roll of lm and
pressing the Start button!
The MINI PAK’R Machine:
Saves valuable space - eliminates the need to store traditional
bubble and other packaging materials.
Fits anywhere - its small footprint means it’s perfect for pack-
and-ship stores or small packing operations. Wall mount
accessory is also available.
Is versatile and easy to operate - RFID technology automatically
adjusts MINI PAK’R Machine settings, including air ll level and
seal temperature, based on the lm roll you install.
Is reliable - the MINI PAK’R Machine is virtually maintenance free.

MINI PAK’R 제조기 사용자 설명서 -2- 페이지
Korean/한국어
MINI PAK’R Machine User Manual Page -3-
ENGLISH
Box
Contents
MINI PAK’R Machine User Manual Page -2-
ENGLISH
Table of
Contents
As you unpack the box, you will nd the following:
• MINI PAK’R®Air Cushion Machine
• Power Cord (USA or EUR version, depending on country of purchase)
• Spare parts: Two (2) Teon Seal Belts
• Quick Start Guide
• User Manual
• Warranty Registration Card: Please complete this card and return within
4 weeks of date of purchase.
EUROPE
OR
Box Contents................................................................................................................ 3
Technical Data ............................................................................................................. 4
Safety .............................................................................................................................. 5
Mini Pak’r Machine Parts- External....................................................................... 6
Mini Pak’r Machine Parts- Internal........................................................................ 7
Loading a Film Roll................................................................................................. 8-9
Basic Operation ................................................................................................... 10 -11
Machine Settings
Length Control ..................................................................................................... 12
Air Control.............................................................................................................. 13
Temperature Control.......................................................................................... 13
Maintenance
Replacing Blades............................................................................................ 14-15
Replacing Belts..................................................................................................... 16
Routine Maintenance.........................................................................................16
Display Error Codes.................................................................................................. 17
Troubleshooting Guide .......................................................................................... 18
Warranty Notice ..................................................................................................19-20
Contact and Ordering Information ....................................................................21
Legal Page...................................................................................................................22
USA USER MANUAL
WARRANTY REGISTRATION CARD
QUICK START GUIDE
SPARE SEAL BELTS

MINI PAK’R 제조기 사용자 설명서 -4- 페이지 -5- 페이지
Korean/한국어
Table of
Contents
MINI PAK’R Machine User Manual Page -5-
ENGLISH
Safety
Instructions
MINI PAK’R Machine User Manual Page -4-
ENGLISH
The MINI PAK’R Machine creates air cushions on-demand for use as cushioning,
protective wrap, and general transport packaging. Strict compliance with the safety
instructions are required to ensure personal safety (See Safety Instructions in this manual).
Specication
Film Roll Product Precongured lm for MINI PAK’R Machine
Production Rate 7.5 meters per minute (25 ft./minute)
Power Rating Model # MMP01MNPKR ( Item # 4075536 ) - 120V 3.15A
Model # MMP02MNPKR ( Item # 4075540 ) – 230V 1.6A
Machine Dimensions 33cm (13”) wide X 36cm (14”) long X 28cm (11”) tall
Recommended Power Fuse
5mm X 20mm, Slow-Blow: 110V 3.15A, 230V 1.6A
Maximum Roll Diameter Up to 175mm (6.9”)
Width of Roll Up to 400mm
Machine Weight 6 kg (13.5 lbs.)
!
To ensure the personal safety of operating personnel and/or users of this machine, the
instructions below must be followed at all times.
1. Avoid all contact with internal electrical components.
2. In case of emergency, press the red STOP button. The machine will stop. Once a fault
has been corrected, the machine can be restarted following the directions below.
3. If the machine is not used for any length of time, the Power Switch must be turned OFF
at the rear of the machine.
4. During Installation and Maintenance, the Power Switch must be in the OFF position,
with the Power Cord disconnected.
5. All safety and protection measures must be tted and adequately maintained in
accordance with Iocal regulations.
6. Only trained and qualied service personnel may maintain any electrical and or
mechanical part of the machine.
7. Machines are supplied preset and fully tested. Any loss arising from production
downtime and failure of the machine caused by incorrect operation, poor or faulty
maintenance, or the use of materials other than those provided by
Pregis shall void the terms of the warranty.
8. During machine operation, NEVER touch the lm at its point of entry into the
machine. Do not attempt to guide the lm into the machine. Injury may result.
9. Under no circumstances may any installed safety feature be overridden.
10. After loading the Film Roll, the machine will automatically adjust to the right seal
temperature for the lm. Any contact with the heating element must be avoided
(or any part in direct contact with the heating element) since it may remain hot
for several minutes after the machine has been switched OFF.
Technical
Data

MINI PAK’R 제조기 사용자 설명서 -6- 페이지
Korean/한국어
MINI PAK’R Machine User Manual Page -7-
ENGLISH
Table of
Contents
MINI PAK’R Machine User Manual Page -6-
ENGLISH
Table of
Contents
How the MINI PAK’R Machine Works
• Load any approved MINI PAK’R Film Roll onto Film Roll Holder (7).
• The right side of the Film is guided onto the Air Fill Nozzle (8) and pulled through the machine.
• The Seal Belts (10 and 13) and Driver Rollers (12) advance the lm.
• Air is injected by the Air Pump (14) through the Air Fill Nozzle (8), creating Air Cushions.
• The inated Air Cushions are sealed by the Hot Sealing Bar (11).
Internal Parts
Air Fill Nozzle
Belt Release Lever
Upper Teon Seal Belt
Hot Sealing Bar
Lower Teon Seal Belt
Air Pump
Drive Rollers
8
7
9
10
11
13
12
14
Film Roll Holder
1
2
3
4
5
6
7
Power Cord, Power Switch,
Fuse
Air Filling Tube
Control Panel
Upper Belt Cover
Lower Belt Cover
Quick Reference Guide
Film Roll Holder
External Parts
• The right edge of the lm is then cut from the Air Fill
Nozzle (8) by the Slitting Blade.
MINI PAK’R®
Parts

MINI PAK’R 제조기 사용자 설명서 -8- 페이지
Korean/한국어
MINI PAK’R Machine User Manual Page -9-
ENGLISH
Table of
Contents
MINI PAK’R Machine User Manual Page -8-
ENGLISH
Table of
Contents
STEP 3: Threading the Film
• Slip the Air Channel
over the end of the
Air Fill Tube.
Pull the lm down
the Air Fill Tube
until it stops, then
press and hold the
Start Button to
advance the lm
automatically.
Pull the lm
down the
Air Fill Tube
and through
the Sealing
Mechanism.
OR
Advance Film Manually Advance Film Automatically
Air Channel
Air Fill Tube
3 STEPS
STEP 1: Connecting Power
• Insert provided Power Cord
into the rear of the machine.
• Plug Power Cord into a
dedicated, grounded outlet.
• Switch machine power ON (I).
STEP 2: Loading a Film Roll
• Push Film Roll onto Film Roll Holder (with
the lm feeding o the top of the roll as
shown) until it seats rmly.
Rear of MINI PAK’R Machine
400mm wide lm
200mm wide lm
Loading a
Film Roll Serial Label
ON/OFF Switch
Accessory Port
Power Cord • Pull to unwind 18 inches
(45cm) of lm. Open the
Air Channel at the right
side of the Film Roll.

MINI PAK’R 제조기 사용자 설명서 -10- 페이지
Korean/한국어
MINI PAK’R Machine User Manual Page -11-
ENGLISH
MINI PAK’R Machine User Manual Page -10-
ENGLISH
Display
Set Air Fill Level
Set Seal Temperature
Red LED
Stop Button
• Stop Production
• Reset MINI PAK’R
machine after error
is corrected
Set Length Control per use
(measured in feet or
meters, depending on
country of purchase)
Initially, the display will show “sty” (Standby). Once the lm
is loaded, the MINI PAK’R Machine will detect the roll. The
green LED on the Start Button will begin ashing. A ashing
green LED indicates that the Machine is warming to the
correct seal temperature. The Control Panel will display seal
temperature while adjusting.
When the correct temperature is reached, the green
LED will remain solid green. The display will show “rdy”
(Ready). The MINI PAK’R Machine is ready for production.
Press the Start Button to begin making Air Cushions.
When the green LED remains steady green,
and the Display reads “rdy” (Ready), press
and release the Start Button again to begin
production. The Air Pump will force air into
the lm, and after a few seconds the Drive
Motor will advance the inated Air Cushions
through the Seal Bar and past the Slitting
Blade. Air Cushions will emerge at the front
of the MINI PAK’R Machine.
Press the Stop Button to stop production.
The MINI PAK’R Machine is factory set
in continuous mode, and will create Air
Cushions until the Film Roll is empty. To
create a xed length of Air Cushions, use
the Length Control buttons (next page).
If the MINI PAK’R Machine is not used for
90 minutes, it will enter “Standby” mode.
The Display will read “Sty”. To resume Air
Cushion production, press the Reset Button.
The Seal Bar will begin heating. Press the
Start Button again when the green LED
remains steady green and the Display reads
“rdy” to resume Air Cushion production.
Start Production
Standby mode
Basic
Operation
Start Button
• Warm up MINI PAK’R
Machine
• Start production of Air
Cushions
Green LED
Blinks while warming up
Solid when ready.

MINI PAK’R 제조기 사용자 설명서 -12- 페이지
Korean/한국어
MINI PAK’R Machine User Manual Page -13-
ENGLISH
Table of
Contents
MINI PAK’R Machine User Manual Page -12-
ENGLISH
Table of
Contents
Length Control
Length Control sets the length of Air Cushions to be produced each time you press the
Start Button. You have 2 options:
Changing MINI PAK’R Machine Settings
The MINI PAK’R Machine automatically chooses the correct air and temperature settings
for the Film Roll you have loaded. You do not need to adjust Machine settings manually.
However, if the automatic settings are not optimal, the Control Panel allows you to change
the following settings.
Continuous Mode
Fixed Length
Length Control at the factory is preset at continuous production.
Press the Start Button and the machine will run the lm until the
Film Roll is empty or the Stop Button is pressed. The Machine will
display the length of Air Cushions produced.
If you want to produce a xed length of Air Cushions, press the
+ Button until the desired length is displayed. The Machine will
count down the length of Air Cushions yet to produce.
To change from Fixed to Continuous mode, press the - Button
until the Display shows ”- - -”
Air Control
Air Control regulates the amount of air
in the Air Cushions.
If you want fuller Air Cushions, press
the + Button.
If you want less full Air Cushions, press
the - Button.
Temperature Control
NOTE on Length Control Display
Model # MMP01MNPKR ( Item # 4075536 ) – 120V 3.15A – will display length units in FEET.
Model # MMP02MNPKR ( Item # 4075540 ) – 230V 1.6A – will display length units in METERS.
Machine
Settings The Temperature Control regulates the temperature of the Seal Bar that
fuses the front and back lm sheets together.
If the Air Cushions become at, and upon inspection the Heat Seals are
leaking air, increase the Temperature Control by pressing the + Button.
If the Air Cushions become at because the seals are burned through
at the seal line as evidenced by holes in the Air Cushions, decrease the
Temperature Control by pressing the - Button.
NOTE: After changing the Temperature Control
setting, the MINI PAK’R Machine may take a few
moments to establish the new seal temperature.
During heat-up or cool down, green LED will
ash until the correct temperature has been
achieved.
If Air Cushions continue to show poor seals and
produce at cushions, contact us for assistance.

MINI PAK’R 제조기 사용자 설명서 -14- 페이지
Korean/한국어
MINI PAK’R Machine User Manual Page -15-
ENGLISH
Table of
Contents
MINI PAK’R Machine User Manual Page -14-
ENGLISH
Table of
Contents
Replace the Slitting Blade Cartridge:
• If the lm jams frequently.
• After 50 Film Rolls have been processed.
• If the Blade is not cutting the lm properly or is
making a very rough cut.
3
2
1 Turn Power OFF, unplug Power Cord, then wait
10 minutes for Seal Bar to cool. Open Belt Cover
with Slotted or Phillips Screwdriver.
Remove Slitting Blade
Cartridge and dispose of
properly.
Replacing Blades
!
Risk of Burn!
Before opening
Covers, turn Power
OFF, unplug the
Power Cord, and
wait 10 minutes for
Seal Bar to cool.
Maintaining
the MINI-PAK’R
Machine
Replace the Slitting Blade:
• If the lm jams frequently.
• After 50 Film Rolls have been processed.
• If the Blade is not cutting the lm properly or is
making a very rough cut.
3
2
1.5
mm
hex
1 Turn Power OFF, unplug Power Cord, then wait
10 minutes for Seal Bar to cool. Open Belt Cover
with Slotted or Phillips Screwdriver.
Remove Thumbscrew
then Blade Assembly.
Replacing Blades
!
Risk of Burn!
Before opening
Covers, turn Power
OFF, unplug the
Power Cord, and wait
10 minutes for Seal
Bar to cool.
Remove Blade with 1.5mm Hex
Wrench. Flip Blade over or Replace
Blade if both sides of Blade have
been used. Reinstall Blade
Assembly.
To reinstall newly ordered, red cartridge, slide
front end of cartridge into the Fill Tube. Push the
cartridge toward the tube until you feel the back
snap into place. 3

MINI PAK’R 제조기 사용자 설명서 -16- 페이지
Korean/한국어
MINI PAK’R Machine User Manual Page -17-
ENGLISH
Table of
Contents
MINI PAK’R Machine User Manual Page -16-
ENGLISH
Table of
Contents
3Push spring-loaded
rollers toward front of
Machine to loosen either
Seal Belt. Remove Seal
Belt and replace it.
Replace both Seal Belts.
Replace the Seal Belts when:
• The lm jams frequently.
• The lm does not advance with drive motor running.
• The machine is producing very poor seals even after
adjustment of the seal temperature.
1Turn Power OFF, unplug Power
Cord, then wait 10 minutes for Seal
Bar to cool. Open Belt Cover with
Slotted or Phillips Screwdriver.
2Lift Belt Release
Lever to loosen
Seal Belts.
Tighten Seal Belts by
locking Belt Release
Lever in place.
4
Replacing Seal Belts
Weekly Maintenance: If necessary, clean the Seal Belts and the Drive Rollers. Warm water and mild detergent are recommended.
Monthly Maintenance: Check the entire MINI PAK’R Machine for damage. Replace worn or damaged parts, if necessary, and/or
contact your distributor.
Routine Maintenance
Display
Code
Error Action
E1 Cover Open Make sure covers are closed.
E2 Jam/end of roll In case of jam, open Belt Cover and remove jammed lm carefully.
E3 Temp. too high Contact your distributor or Pregis for assistance.
E4 Temp. too low Contact your distributor or Pregis for assistance.
E5 Temp not rising Contact your distributor or Pregis for assistance.
E6
No roll detected Press STOP/RESET. This may clear the error. If not, Display will show “Sty” (Standby
state). Advance the lm slowly at the front of the Machine so the Film Roll rotates. The
display should change to show the seal temperature, and then “rdy” (Ready state). If
the error can’t be cleared, contact your distributor or Pregis for assistance.
E8 Thermocouple Error TC is broken or not connected.
E9 Invalid Tag Error RFID Tag for a dierent machine is detected.
E10 Temperature Measurement
Error
Initialization Error. Press reset and repower the machine.
E11 Temperature Timeout Temperature reading initialization timed out.
If the Display shows an Error Code, and the red LED ashes, consult the chart below to
determine the cause. Clear the problem as described below then press the STOP/RESET
Button to resume normal operation.
Error Codes
Display
Error Codes

MINI PAK’R 제조기 사용자 설명서 -18- 페이지
Korean/한국어
MINI PAK’R Machine User Manual Page -19-
ENGLISH
MINI PAK’R Machine User Manual Page -18-
ENGLISH
MINI PAK’R® Air Cushion Machine, Accessories, and Customer Kits Limited Warranty
The MINI PAK’R Air Cushion Machine, accessories and customer kits are under warranty
against defects in material and worksmanship for a period of one year from the date you
purchased that product, as stated on your sales or delivery receipt. This
warranty applies only if you are the original end-user purchaser and is not transferable.
You will be asked to provide proof of purchase as a condition of receiving warranty service.
For MINI PAK’R Machines, accessories, and customer kits under this warranty, Pregis
will, at its sole option, repair or replace any defective part or product with a functionally
equivalent new or factory-reconditioned part or product. Replacement parts and products
are warranted to be free from defects in material and workmanship for 90 days or for the
remainder of the applicable warranty period for the parts or products they are replacing
or in which they are installed, whichever is longer. Pregis will have no obligation to repair
or replace any parts or products until you return the defective product to Pregis. You
will be responsible for all transportation risks and costs in connection with this warranty
service.
Exclusions
This Limited Warranty does not apply to (1) expendable or consumable parts, including
injector blades and Teon seal belts and tape; (2) normal wear from regular use of the
MINI PAK’R Machine; (3) any product with the serial number removed; (4) any MINI PAK’R
Machine that has been operated with non-authorized lm; or (5) any product if damaged
or defective due to (a) accident, misuse, abuse, contamination, improper or inadequate
maintenance or calibration or other external causes; (b) software, interfacing, parts or
supplies not supplied by Pregis; (c) loss or damage in transit; or (d) modication or service
by other than Pregis or an authorized service provider.
Warranty
Notice
Trouble Possible Problem Solution
No power to MINI PAK’R machine Power Cord unplugged
Circuit Breaker OFF
Power Switch OFF
Fuse is blown
Belt Cover(s) open
Plug Power Cord into MINI PAK’R Machine and outlet
Turn Circuit Breaker ON at Electrical Panel
Turn Power Switch ON
Replace Fuse
Tighten Belt Cover Screw with Screwdriver
Film won’t advance Film Roll installed backwards
Non-MINI PAK’R lm installed
Turn Film Roll around (page 8)
Install MINI PAK’R Film Roll
Air Cushions do not hold air Air Fill Tube not inside lm
Air Pump not working
Seals leaking
Too much air ll
Reload lm onto Air Fill Tube (page 9)
Contact technical service for assistance
Adjust seal temperature (page 13)
Reduce air ll (page 13)
Film jams frequently Blade is dull
Drive Belts are worn
Replace or Reverse Blade (page 14-15)
Replace both Drive Belts (page 16)
Machine won’t stop automatically Length Control set to continuous Press + or - Length Control Buttons to set desired
length of Air Cushion production (page 12)
Troubleshooting

MINI PAK’R 제조기 사용자 설명서 -20- 페이지
Korean/한국어
MINI PAK’R Machine User Manual Page -21-
ENGLISH
MINI PAK’R Machine User Manual Page -20-
ENGLISH
Non-Warranty Repairs
For service that Pregis performs that is not covered under this Limited Warranty, Pregis will charge its standard time and
materials rates. Customer will be responsible for all transportation risks and costs in in connection with this service.
Limitations of Warranty/Local Laws
EXCEPT AS EXPRESSLY SET FORTH IN THIS LIMITED WARRANTY, PREGIS MAKES NO OTHER WARRANTIES OR
CONDITIONS, EXPRESS OR IMPLIED, INCLUDING ANY IMPLIED WARRANTIES OF MERCHANTABILITY AND FITNESS FOR
A PARTICULAR PURPOSE. PREGIS EXPRESSLY DISCLAIMS ALL WARRANTIES AND CONDITIONS NOT STATED IN THIS
LIMITED WARRANTY. ANY IMPLIED WARRANTIES THAT MAY BE IMPOSED BY LAW ARE LIMITED IN DURATION TO THE
APPLICABLE WARRANTY PERIOD.
Some states or countries do not allow a limitation on how long an implied warranty lasts or the exclusion or limitation of
incidental or consequential damages for consumer products, or of a consumer’s statutory rights. In such states or countries,
some exclusions or limitations of this Limited Warranty may not apply to you.
Contact and
Ordering Info United States and Canada: 888-454-5895
Europe: 00800 888 888 44
Visit minipakr.com for sales and service information.

MINI-PAK’R 用戶手冊 第-C1-
中文版 -简体
CHINESE
祝贺你现在拥有世界上惟一经零售购买,并可在线即时生产的 MINIPAK’R™气垫机!你现
在只需安装气垫塑膜卷并按下“启动” 按钮,就可以制作各式各样的空气垫.
MINI PAK’R气垫机的优点:
节省了宝贵的空间,无需储存传统的泡泡粒及其他包装材料.
节省空间-它细小的外形最理想用于快递服务业或小型包装
服务业.安装合适配件之后,气垫机也可挂墙使用.
它灵活,易于操作-RFID的技术会根据所安装的气袋塑膜,
自动调整MINI PAK’R气垫机的设置,包括填补空气水平
和焊封温度.
可靠性! MINI PAK’R机乎是免维修

MINI-PAK’R 用戶手冊 第-C3-
中文版 -简体
CHINESE
MINI-PAK’R 用戶手冊 第 -C2-
中文版 -简体
CHINESE
包装箱内容 包装箱内附件如下:
MINI PAK’R®气垫机
• 电源线(根据客户采购的需求,备有美国或欧洲电源线) 备件:两条(2)
聚四氟乙烯焊封带
• 快速操作指南
• 用戶手冊
• 设备维修登记卡:请于购买后4周内填写此卡然后寄回到 Pregis.
欧洲
或
美国 用戶手冊
设备维修登记卡
快速操作指南
备用焊封带
包装箱内容 3
技术数据 4
安全指示 5
MINIPAK’R气垫机-外部零件6
MINIPAK’R气垫机-内部零件7
安装气袋塑膜卷 8-9
基本操作 10 -11
机器设定
长度控制 12
气流控制 13
溫度控制 13
维修
更换刀片 14-15
更换焊封带 16
日常维修 16
显示错误代码 17
故障排除指南 18
保修期注意事项 19-20
联系和订购信息 21
法律页 22
目录

MINI-PAK’R 用戶手冊 第-C5-
中文版 -简体
CHINESE
MINI-PAK’R 用戶手冊 第 -C4-
中文版 -简体
CHINESE
!
为确保人身安全,操作人员和/或使用者使用这部机器时,必须遵守如下 说明:
1. 严格避免接觸一切內部的電子零件.
2. 遇有紧急情况,立刻按下红色停止按钮,该机器就立刻停止工作. 一旦发生故障,经排
除后,按照如下安全说明方可开始工作.
3. 如果机器不是在工作中,电源必须关闭,开关按钮在机器的后方.
4. 在安装和维修期间,必须关闭电源,及拔掉电源线.
5. 必须依照当地法规,遵守所有的安全和保护措施.
6. 只有接受過訓練的合格人員才可維修氣墊機的任何電器和/或 械部分.
7. 所有气垫机在出厂前已充分调整和测试,如操作者不正确运作, 保养不善,或使用非
FP国际公司所指定物料而导至机器损坏, 本公司所提供的保用服务将自动失效.
8. 当机器在运作中,塑膜正自动进入气垫机时,不可触摸塑膜, 不要试图引导塑膜进入
机器内.而导至身体损伤.
9. 在任何情况下,都不可修改安装气垫机的安全措施.
10. 装上塑膜卷后,机器会自动调整到正确的密封温度,应避免直接 或间接接触发热器,
该机器关掉电源后仍会保持高温至数分钟.
安全说明!
MINI PAK’R 气垫机可以“在线即时生产制造”缓冲气垫,防护包装 及一般运输包装,操作者
一定要严格遵守安全说明进行操作,以确保人 身安全(详见本手册的安全说明)
详细内容
生产速度 7.5公尺/分钟(25英尺/分钟)
电源要求 型号# MMP01MNPKR-120V 3.15A
型号# MMP02MNPKR- 230V 1.6 A
机器尺寸 33cm (13”) 寬X36cm (14”) 长X 28cm
(11”) 高
电源保险丝 5mm x 20mm,慢速: 110V 3.15A, 220V,
1.6A
塑膜卷的最大直径 175mm (6.9”)
塑膜卷的最大寬度 400mm
气垫机重量 6 kg (13.5 lbs.)
技术数据

MINI-PAK’R 用戶手冊 第-C7-
中文版 -简体
CHINESE
MINI-PAK’R 用戶手冊 第 -C6-
中文版 -简体
CHINESE
MINI PAK’R 是如何工作
• 在支架上安装本公司标准的塑膜(7)
• 把塑膜的右侧通过喷气嘴(8)引进气垫机内
• 焊接带(10和13)和滚筒卷轴(12)会带动塑膜
• 气泵(14)把空气注入喷气嘴(8)而制成空气垫
• 焊封棒会把已充气的气垫塑膜焊封(11)
• 最后喷气嘴(8)内的刀片把塑膜右边切开 Internal Parts
喷气嘴
焊封带解松杆
上层聚四氟乙烯焊封带
焊封棒
下层聚四氟乙烯焊封带
气泵
滚筒卷轴
8
7
9
10
11
13
12
14
塑膜支架
1
2
3
4
5
6
7
电源线,电源开关 电源保险丝
充氣管
控制板
上层皮带盖
下层皮带盖
快速參考指南
塑膜支架
外在零件
MINI PAK’R
零件

MINI-PAK’R 用戶手冊 第-C9-
中文版 -简体
CHINESE
MINI-PAK’R 用戶手冊 第 -C8-
中文版 -简体
CHINESE
步驟 3: 穿引塑膜
沿着空气通道 拉动
塑膜直到 它受到了
阻力 而停止,然后 按
着启动按钮, 塑膜便
会自动前进.
沿着空气通道
拉动塑膜进入
焊封装置.
或
人工牽引塑膜 自动启动塑膜前进
空气通道
喷气管
• 拉出18英寸(45cm)的塑膜,
在塑膜的右侧,把气孔打开.
• 引导塑膜的空气,
通道进入喷气管.
3个步骤
步骤 1: 连接电源
步骤 2: 安装塑膜卷
MINIPAK’R的背面
400mm (寬) 塑膜
200mm (寬) 塑膜
安装塑膜 • 将电源线插到机器后方
• 将电源线插到一个专用
的接地电源 插座
• 打开气垫机电源
• 把塑膜卷推进塑膜支架,然后拉出塑膜放
在气垫机上(如图)
标签
电源开关
附件端口
电源线

MINI-PAK’R 用戶手冊 第-C11-
中文版 -简体
CHINESE
MINI-PAK’R 用戶手冊 第 -C10-
中文版 -简体
CHINESE
当绿色指示灯保持常亮状态,并显
示“rdy” (待命),再按动一下启动按
钮,便开始生产. 气泵将空气充进塑
膜,几秒钟后,驱动马达 便会启动将
气垫通过焊封棒和刀片.气垫将 会在
MINI PAK’R的前方出来.
按下停止键就停止生产.MINI
PAK’R 已经在厂内事先调整了”连
续模式”, 气垫机会不断生产塑膜直
至塑膜卷 完全耗尽.只要采用长度
控制按钮, 就可以生产固定长度的
空气垫(下一页)
若MINIPAK’R不经使用越过90分
钟, 气垫机将会进入待命状态.显示
屏将展 示“sty”(待命).按下重置按
钮,便会 恢复生产气垫.焊封棒开始
供应热能. 当绿色指示灯保持常亮
状态时,显示屏 并显示“rdy”,即可
恢复工作状态.
开始生产
待命模式
基换本焊封
操带 作
每次使用时
首先设定长度单位
(英尺或公尺)
显示屏
设定充气标准
设定焊封溫度
红色指示灯
停止按钮:
停止生产
更正错误后
恢复 MINI PAK’R设置
首先,显示屏将展示“sty”表示(待命).只需将塑膜装上,
MINI PAK’R气垫机的自动感应装置会自检测到塑膜卷
的存在.在启动按钮上的绿色指示灯将开始闪动.绿色指
示灯闪动显示,气垫机是正在提升温度至正确的焊封温度.
在 调 整 时 ” 控 制 面 板 ”上 会 显 示 焊 封 温 度 .
当达到正确温度时,绿色指示灯将会保持常亮状态.显
示屏将展示”rdy”(待命).这表示MINIPAK’R气垫机可
以投入生产.按下启动按钮便可以即时制造气垫.
綠色的指示燈
• 闪动:表示温度正在升高
• 固定:表示可启用
启动按钮
• 提升MINI PAK’R的温度
• 开始脱 生下产翼气形垫螺

MINI-PAK’R 用戶手冊 第 -C12-
中文版 -简体
CHINESE MINI-PAK’R 用戶手冊 第-C13-
中文版 -简体
CHINESE
空气控制
空气控制即调节气垫中的空气量.
如你想充入更多的气体,即按
下+按钮.
如你想充入较少量气体,即按下
-按钮
温度控制即调节焊封棒温度,使其能够达到熔合塑膜正反两面
的温度.
如果气垫出现扁平状态或气体不足,并监测到有空气泄漏, 即焊
封棒的温度较低,请按下+按钮以增加温度.
如果气垫的扁平状况,是因为加热焊封进行时焊封被烧穿,通过在
气垫的焊封线可见多个小洞,请按下-按钮以降低温度.
溫度控制
注意:在改变温度设定后, MINI PAK’R需要几
分钟的时间将其调整到新设定的焊封温度,在
温 度升高或降低时,在达到正确温度之前绿色
指示 灯会持续闪动.
如果气垫的封口不合格或气垫气体不足,请与
Pregis联系.
长度控制
每次按下启动按钮后, 长度控制设定将会生产出设定长度的气垫, 您有如下
两种选择:
修改MINI PAK’R内置设定
根据您的使用在机器上安装塑膜卷,MINI PAK’R机器会自动选择正确的塑
膜空气和温度摄制. 你不需要人工调整设定, 如果自动设定并非标准或理
想 状态, 操作者可在控制面板上修改如下设置.
连续的模式
机器在出厂之前已经调整为“连续生产模式,你只需按下
启动按钮,气垫机会连续生产制造塑膜直到塑膜卷用完,
如你按下停止按钮,机器会立即停止工作.
固定长度
如果你想制造固定长度的气垫,只要按下+按钮,直到所 需
要的长度显示出来为止,在制作进行时,显示屏会显示 所
制造气垫的倒数长度.要改变从固定到连续模式,按着
“-“按钮直至显示屏显示”---”为止.
型号# MMP01MNPKR (120V, 3.15A, USA)将显示英尺为长度单位.
型号# MMP02MNPKR (230V, 1.6A, EUR) 将显示公尺为长度单位.
要注意長度控制顯示器
机器设置

MINI-PAK’R 用戶手冊 第-C15-
中文版 -简体
CHINESE
MINI-PAK’R 用戶手冊 第 -C14-
中文版 -简体
CHINESE
如果有以下这种情况发生,即需要更换刀片:
• 如果塑膜频繁堵塞
• 气垫机已经使用超过50卷塑膜
• 如果刀片不能妥善切割塑膜
3
2
1 关闭电源,拔掉电源线,
并等待10分钟让焊封棒降温.
用一字或十字形螺丝刀打开前盖
脱下翼形螺钉及刀片组件.
匣式刀片只适用以下MINI PAK’R
!
小心熨伤!
打开盖子之前
必须关掉电源
并拔掉电源线
并等待10分钟
让焊封棒降温
用1.5m m六角扳手除下刀片,
倒装刀片后即可用刀片的另
一面.若刀片两面都已经使
用过,便要更换新刀片.之后
请重装刀片组件.
如果有以下这种情况发生,即需要更换匣式刀片:
• 如果塑膜频繁堵塞
• 气垫机已经使用超过50卷塑膜
• 如果刀片不能妥善切割塑膜
3
2
1 关闭电源,拔掉电源线,
并等待10分钟让焊封棒降温.
用一字或十字形螺丝刀打开前盖
换上新匣式刀片并把旧刀片妥善弃置.
匣式刀片只适用以下MINIPAK’R
!
小心熨伤!
打开盖子之前
必须关掉电源
并拔掉电源线
并等待10分钟
让焊封棒降温
MINI-PAK’R
的保养
把新匣式刀片前端推进喷气管沟内,
然後把匣轻轻压入沟内扣紧。
3
1.5
mm
hex
Table of contents
Other Pregis Industrial Equipment manuals
