Priefert RC22SP User manual

www.priefert.com 800-527-8616
RC22SP Steer Pusher
Installation Instructions
AI_RC22SP_v1-0623.indd

AI_RC22SP_v1-0623.inddii
Congratulations on choosing the “RC22SP Steer Pusher.”
Priefert’s Roping Chute Steer Pusher is designed to keep steers “pushed”
toward the front of the chute, eliminating the need for additional chute
personnel to help keep steers “pushed up” and ready for the next run. This
feature makes it a “must have” for producers and arenas that will be hosting
competitions.
To use, simply lift the handle to raise the steer pusher out of the way as the
steer enters the chute, then lower the handle to set the push plate in place.
Priefert’ Roping Chute Steer Pusher also includes a break system that holds the
pusher in any position and a pin latch which allows you to lock the push bar in
the “up” position when it is not needed.
Made with quality products, the RC22SP Steer Pusher is designed to perform
dependably and provide years of service.
REMEMBER SAFETY FIRST!
Be Alert - Eliminate unsafe habits and risky behavior,
recognize hazards as they exist and read and follow these Operational
Instructions to successfully operate the
Priefert RC22SP Steer Pusher.
READ AND UNDERSTAND THESE INSTRUCTIONS
BEFORE BEGINNING INSTALLATION.
Follow all safety warnings and recommendations.
Additional information is provided in the Appendix
at the end of this manual.
Using this manual:
This manual provides information necessary to safely, eectively install and
operate your RC22SP Steer Pusher. This manual also provides manufacturer’s
recommendation of proper use and operation. Read these instructions
completely prior to beginning installation, and follow the recommendations to
help ensure safe and ecient operation.
The information contained herein was current at the time of printing. These
instructions are a compilation of engineering data and eld experience, and are
designed to help you with proper safety, operation and adjustments.
Your model may vary in design and conguration from those shown in this
manual. There is a possibility that some illustrations in our manuals were of
prototype models. Design of production models may vary in detail from those
shown in our manuals.
Priefert Manufacturing maintains an ongoing program of continuous product
improvement. Therefore, Priefert reserves the right to make improvements
or modications in design, or specication changes without incurring any
obligation to replace said items on units previously sold.
Your RC22SP Steer Pusher has an instructional DVD, and this manual available
online in PDF format. Both have been designed to assist you in achieving
optimal results with your Steer Pusher.
Terminology
“NOTE:” provides the operator a brief summary of information that will assist in
operating the equipment.
“NOTICE:” denotes that the following content has signicance in the operation
or maintenance of the equipment.
“REMINDER:” provides information previously addressed, but important
enough to address again for equipment or assembly familiarization.
“Left” or “Right” as used in this manual is determined by facing forward
into the arena, as the direction the chute will operate while in use.
“Header Side” for left, and “Heeler Side” for right, may also be used.
Owner Assistance
If customer service or repair parts are required, contact Priefert
Manufacturing to reach our trained personnel who will assist you with repair
parts and equipment needed to service your Steer Pusher or your RC22.
The parts on your RC22SP or RC22 have been specically designed and should
only be replaced with genuine Priefert parts. Therefore, should you require
replacement parts, contact our Support Center.
Customer Service
Priefert Manufacturing wants you to be satised with your new RC22SP. If for
any reason you are not satised with the equipment, the following actions are
suggested:
Contact your Priefert Ranch Equipment dealer and discuss any problems that
you may be experiencing. Allow them the opportunity to assist in correcting
any problems that you may be experiencing.
For further assistance contact:
Priefert Manufacturing
Attention: Customer Service
2630 South Jeerson
P.O. Box 1540
Mount Pleasant, Texas 75456-1540
1-800-527-8616
Web-site address:
www.priefert.com
sales.priefert.com

AI_RC22SP_v1-0623.indd iii
Safety Alert Symbols
The SAFETY ALERT SYMBOL indicates there is a potential hazard
to personal safety involved and extra safety precaution must be taken. When
you see this symbol, be alert and carefully read the message that follows it. In
addition to design and conguration of equipment, hazard control and accident
prevention are dependent upon the awareness, concern, prudence and proper
training of personnel involved in the operation, transport, maintenance and
storage of equipment.
Owner/operator can prevent, and may be responsible for accidents or injuries
occurring to other people, themselves, and/or property and equipment.
Thoroughly read and understand the installation, operation, references and
other material supplied with the RC22SP. If the installer or operator cannot
read English, it is the owner’s responsibility to explain this material to them.
We strongly recommend that children are not allowed to operate or play
on or with this equipment. Do not allow untrained people to operate or
service equipment.
Caution
Be familiar with handling livestock prior to use of this equipment.
Working with livestock carries inherent risk of injury or death.
Livestock Safety
One of the most important issues for consideration when handling livestock
is safety. Although considered domesticated animals, working with livestock
carries with it an inherent risk of danger. It is important to understand that
livestock have both instincts and habits, known as behavior patterns, that are
based on actions that make them the most comfortable. These instincts and
habits allow them to react to changes in their environment.
Many instincts and habits are strong and potentially dangerous. Using common
sense, practicing caution, and understanding livestock behavior can greatly
reduce a handlers risk and enable him or her to work safely with livestock. This
article will detail some important livestock behaviors as well as cautionary tips
to practice when handling livestock.
Livestock Behaviors
• Animals who are used to being around other livestock can become frightened
and agitated when separated, becoming dangerous and dicult to handle.
• The maternal instinct is also very powerful. Many times these instincts
are not evident in an animal’s behavior until shortly after giving birth. It is
important to recognize these behavior patterns and use appropriate caution.
• Another behavior pattern that livestock may exhibit is a territorial instinct.
Feed time is when this instinct is most readily observable.
• A valuable behavior is the instinct to follow the leader. Often times, all
that is required is to begin one animal moving and the rest will follow.
• Livestock exhibit the most activity at sunrise and sunset. In contrast, livestock
are the most inactive during night and at midday.
• The ight zone is one of the most important principles regarding livestock
behavior and safe handling. It is an animal’s personal space. Livestock will
react in a variety of ways according to a handlers activities relative to their
ight zone. For example, livestock will face a handler and maintain a safe
distance, when the handler is outside their ight zone. In contrast, livestock
will turn away from a handler who enters their ight zone. Individual animals
will have ight zones of varying size. Working from the edge of the ight
zone will generally keep livestock calm and manageable.
• The point of balance is another important behavioral principle to understand.
An animal’s point of balance is located at their shoulders. An animal will
move depending on a handlers position relative to their point of balance.
This principle can be used to calmly and easily encourage livestock through
crowding pens, chutes, and squeezes. For example, when a handler stands
behind the animal’s point of balance, the animal will move forward. When
the handler stands in front of an animals point of balance, the animal will
stop or back up. To encourage an animal forward, simply walk towards the
animal, crossing the point of balance, and it will move forward.
Precautionary Measures
The following are precautionary measures that are recommended to anyone
when working with livestock.
Be alert. It is impossible to fully know or predict an animals actions. Always be
aware of what is happening around you. This is particularly important when
handling livestock at sunrise and sunset when livestock are most active.
Keep animals together. Livestock will be more calm and cooperative when
in groups. When alone, they quickly become agitated and frightened making
them dangerous and dicult to handle.
Carefully approach animals. Because of the placement of their eyes, cattle
have approximately a 270 degree range of vision. Despite their range of vision,
cattle have poor depth perception, and are unable to see behind them. To
reduce risk, always announce yourself when approaching an animal.
Leave yourself an out. Never enter small enclosed areas with livestock. If
unavoidable, always be sure there is always a fast and easy method of escape.
Avoid quick movements and loud noises. Livestock can startle and frighten
easily. Move slowly and deliberately around livestock. Be careful not to create
excess noise.
Be patient. When working with livestock in a crowding pen, chute, or squeeze,
prodding an animal when it has no place to go is dangerous. Animals can react
quickly and violently.
Respect livestock. Do not fear them. Underestimating an animal’s size,
strength, and speed can result in serious injury. Always consider mature males
to be dangerous. Be aware of animals who are sick, injured, or otherwise
frightened.
Remember that livestock draw upon past experiences and treatment when
reacting to a situation.
DANGER: Indicates an imminently hazardous situation, which, if not
avoided, will result in death or serious injury. This signal word is limited to
the most extreme situations, typically for machine components that, for
functional purposes cannot be guarded.
WARNING: Indicates a potentially hazardous situation which, if not
avoided, could result in death or serious injury, and includes hazards that
are exposed when guards are removed. It may also be used to alert against
unsafe practices.
CAUTION: Indicates an imminently hazardous situation, which, if not
avoided, may result in minor or moderate injury. It may also be used to alert
against unsafe practices.
NOTICE: Indicates failure to observe may cause property or equipment
damage.
NOTE: Provides helpful information to the operator.
BE AWARE OF SIGNAL WORDS: A signal word designates a degree of level of hazard seriousness.

AI_RC22SP_v1-0623.inddiv
Features
Tools Needed
Parts List
•
Fits any RC19M or RC22M.
•
Innite Locking System.
•
Bolt-on design for easy installation.
•
Easy to use, simply lift the handle to raise the steer pusher out of the way as the steer
enters the chute, then lower the handle to set the push bar in place.
•
Adjust to the ideal position for any size steer.
Ratchet or
Impact Wrench & Socket Set
Dead-Blow
Hammer
WD-40
LUBRICANT
STEER PUSHER PARTS
RC98SP-2018-P Steer Pusher Assy
RC98SPC
SP820
FM 5/32.1-1/4 ROLLPIN
Latch Pin w/Chain
Spring
Roll Pin
FB101.50ZPG5
FN10ASLN
/" x 1/" Bolt
/" ST Lock Nut
FB083.50ZPG5
FN08ASLN
/" x 3/" Bolt
/" ST Lock Nut
FB081.50ZPG5SHLD
/" x 1/" Bolt w/Shld
FB081.50ZPG5
FN08ASLN
/" x 1/" Bolt
/" ST Lock Nut
FB101.00ZPG5 /" x 1" Bolt
FB040.75ZPG5
FN04ASLN
/" x /" Bolt
/" x ST Lock Nut
RC98SPBA-P Bracket Assembly
RC22SPLREL-P Trip Latch Handle
G300 Small Red Grip
P0601.50011.81-P Connecting Link
P0601.50012.5-P Accuating Link
LB01 Latch Box
G100 Red HG Handle
Combination
Box-end Wrenches
/" /" /"
& Two /8"
Left
Control Ear
Right
Control Ear
Main
Handle

AI_RC22SP_v1-0623.indd 1
Congratulations . . . . . . . . . . . . . . . . . . . . . . . . . . . . . . . . . . . . . . . . . . . . . . . . . . . . . . . . . . . . . . ii
Using This Manual . . . . . . . . . . . . . . . . . . . . . . . . . . . . . . . . . . . . . . . . . . . . . . . . . . . . . . . . . . . . . ii
Terminology . . . . . . . . . . . . . . . . . . . . . . . . . . . . . . . . . . . . . . . . . . . . . . . . . . . . . . . . . . . . . . . . .ii
Customer Service . . . . . . . . . . . . . . . . . . . . . . . . . . . . . . . . . . . . . . . . . . . . . . . . . . . . . . . . . . . . . ii
Safety Alert Symbols . . . . . . . . . . . . . . . . . . . . . . . . . . . . . . . . . . . . . . . . . . . . . . . . . . . . . . . . . . . iii
Signal Words . . . . . . . . . . . . . . . . . . . . . . . . . . . . . . . . . . . . . . . . . . . . . . . . . . . . . . . . . . . . . . . . iii
Livestock Safety . . . . . . . . . . . . . . . . . . . . . . . . . . . . . . . . . . . . . . . . . . . . . . . . . . . . . . . . . . . . . . iii
Livestock Behaviors . . . . . . . . . . . . . . . . . . . . . . . . . . . . . . . . . . . . . . . . . . . . . . . . . . . . . . . . . . . iii
Precautionary Measures . . . . . . . . . . . . . . . . . . . . . . . . . . . . . . . . . . . . . . . . . . . . . . . . . . . . . . . . iii
Features . . . . . . . . . . . . . . . . . . . . . . . . . . . . . . . . . . . . . . . . . . . . . . . . . . . . . . . . . . . . . . . . . . . iv
Parts List . . . . . . . . . . . . . . . . . . . . . . . . . . . . . . . . . . . . . . . . . . . . . . . . . . . . . . . . . . . . . . . . . . .iv
Tools Needed . . . . . . . . . . . . . . . . . . . . . . . . . . . . . . . . . . . . . . . . . . . . . . . . . . . . . . . . . . . . . . . . iv
RC22M Part Identication . . . . . . . . . . . . . . . . . . . . . . . . . . . . . . . . . . . . . . . . . . . . . . . . . . . . . . . . 1
RC22SP Installation . . . . . . . . . . . . . . . . . . . . . . . . . . . . . . . . . . . . . . . . . . . . . . . . . . . . . . . . . . . . 2
Step 1 - Replace Trip Latch Handle . . . . . . . . . . . . . . . . . . . . . . . . . . . . . . . . . . . . . . . . . . . . . . . . . . .2
Step 2 - Install Connecting Bracket Assembly . . . . . . . . . . . . . . . . . . . . . . . . . . . . . . . . . . . . . . . . . . . .2
Step 3 - Install Install Steer Pusher Asembly . . . . . . . . . . . . . . . . . . . . . . . . . . . . . . . . . . . . . . . . . . . . .2
Step 4 - Install Latch Box . . . . . . . . . . . . . . . . . . . . . . . . . . . . . . . . . . . . . . . . . . . . . . . . . . . . . . . . .3
Step 5 - Install Control Links . . . . . . . . . . . . . . . . . . . . . . . . . . . . . . . . . . . . . . . . . . . . . . . . . . . . . . .3
Appendix . . . . . . . . . . . . . . . . . . . . . . . . . . . . . . . . . . . . . . . . . . . . . . . . . . . . . . . . . . . . . . . . . . 4
Suggested References. . . . . . . . . . . . . . . . . . . . . . . . . . . . . . . . . . . . . . . . . . . . . . . . . . . . . . . . . . .4
Warranty . . . . . . . . . . . . . . . . . . . . . . . . . . . . . . . . . . . . . . . . . . . . . . . . . . . . . . . . . . . . . . . . . . . 5
Table Of Contents
Trip Latch HandleGate Return Handles
Rear Gate
Rear Gate Handles
Chute Spine
RC22M
Part Identication
Safety Labels
D125 D250
D215 D964
Your Steer Pusher comes equipped with all safety labels in place.
They were designed to help you safely operate your implement.
Read and follow their directions:
• Keep all safety labels clean and legible.
• Replace all worn, damaged or missing labels. To order new labels
contact customer service.
• Some new equipment installed during repairs may require new
safety labels to be axed to the replacement component. When
ordering new components make sure the correct safety labels
are included in the request.
To install new labels:
a.Clean surface where the label is to be placed and wipe dry.
b.Peel backing from the label.
c. Press rmly onto the surface.
d.Squeeze out air bubbles with the edge of a credit card.
Front Gate
Caution
PRIOR TO INSTALLATION: Be sure to read the
Operators Manual provided with the Roping
Chute, and understand the operations of the
Chute this Steer Pusher will be installed on.
If the Operators Manual for the chute is not available,
contact Priefert Customer Service listed at the begining
of this Manual to obtain a copy.

AI_RC22SP_v1-0623.indd2
Fig 3 -
Separate
Connecting
Bracket
Fig 4 -
Install Bracket
on Spine,
Bump Until
Tabs Align
Fig 1 - Remove Latch Handle
Fig 8 - Attach Side Supports
Fig 6 - Slide Assembly Under Spine
RC22SP Installation
Step 1 - Replace Trip Latch Handle
Start by pushing Trip Latch Handle to
release front gate.
Use a Ratchet wrench or Impact and
Box-end wrench to remove the upper
and lower Latch Handle bolts, and
remove Latch Handle (Fig 1).
Replace with the new Latch Handle
included, then reinstall using upper &
lower Latch Handle Bolts just removed (Fig 2). Snug bolts only. Check to
see that Trip Latch moves freely and returns.
NOTE: DO NOT OVER-TIGHTEN as this will prevent the movement of the Trip Latch.
Step 2 - Install Connecting Bracket Assembly
Locate Connecting Bracket Assembly and use a Dead-
Blow Hammer to break loose and separate Bracket
Assembly pieces (Fig 3).
Install curved upper bracket over Roping Chute spine
with mounting plate facing left and towards the back of
the chute.
Place at bracket plate back onto locking tabs under
upper bracket & spine.
Then use the Dead-Blow Hammer to bump into
position until bolting tabs align (Fig 4).
Insert /" x /" bolt & nut (Fig 5). Do Not Tighten at this
time to allow for movement during remaining assembly.
NOTE: The following steps will be easier with assistance of another person.
It may also be necessary to move main Steer Pusher Handle up or down for alignment.
Step 3 - Install Steer Pusher Assembly
Carefully lift & slide the Steer Pusher Assembly
into rear opening, under the release mechanism
and spine of roping chute (Fig 6) and over top side
rails of chute, with side supports facing towards
the rear chute doors. Align with rear mounting
holes on the top rails (Fig 7).
NOTE: Install Fasteners But Do Not Tighten any bolts
or nuts at this time to allow for movement during
remaining assembly.
Attach side supports with /" x 1/" Bolts & /"
Lock Nut (Fig 8).
Attach side mounting brackets with /" x 3/"
Bolts & Lock Nuts (Fig 9).
Latch Handle Bolts
Fig 1 - Remove Latch Handle
Fig 2 - Replace Latch Handle
Fig 5 -
Insert
Bolt & Nut
Fig 7 - Install Over Top Rails w/Side Support
Facing Rear Doors Fig 9 - Attach Side Mounting Brackets
Continued next page

AI_RC22SP_v1-0623.indd 3
Fig 13 - Connect Latch Box Arm
Fig 19 - Main Handle Lock Pin
Fig 12 - Attach Latch Box
Fig 10 - Mounting Bracket Attached Fig 11 - Pusher Assembly Installed
Step 3 - Install Steer Pusher Assembly continued
Repeat attachment of side support and
mounting bracket on opposite side (Fig 10),
so pusher assembly is mounted to top rails of
chute (Fig 11)
Securely tighten these six (6) bolts & nuts
with Ratchet or Impact Wrench and Socket.
Step 4 - Install Latch Box
Attach Latch Box to mounting plate of
Bracket Assembly(from Step 2), using
four (4) /" x 1/" Bolt w/Shld (Fig 12).
NOTE: Do Not Over-Tighten.
Over-tightening will damage Latch Box.
Bump Bracket Assembly along spine with
Dead-Blow Hammer to align arm of Latch Box
to mounting hole on rear of spine and attach with one (1) remaining /" x 1/" Bolt w/Shld and tighten (Fig 13).
Do Not Tighten Bracket Assembly At This Time.
Step 5 - Install Control Links
Locate the oset Actuating Link , and
with the oset from outer to inner, attach
to the actuating arm of the Latch Box
with /" x 1/" Bolt & /" ST Lock Nut
(Fig 14). Connect other end to left control
ear on pusher assembly (Fig 15).
Locate the Connecting Link , and attach
to right control ear on pusher assembly
with /" x 1/" Bolt & /" ST Lock Nut .
Attach other end to the Bracket Assembly right side with /" x 1" Bolt .
(Fig 16 Assembled Links, Reverse Angle Shown).
Tighten these connections until snug, then loosen by 1/2 turn to allow
free movement.
Lift Steer Pusher Main Handle to full upright
lock position and hand-tighten Bracket
Assembly with two (2) /" wrenches (Fig 17).
Lubricate all moving parts with light spray
lubricant such as WD-40 (Fig 18).
Pull Main Handle Lock Pin to release,
actuate handle several times to distribute
lubricant and check operation (Fig 19).
If necessary, loosen top linkage to provide
free movement. Assembly is complete.
Hand-Tighten Bolt
on Bracket Assembly
Fig 14 - Attach Actuating Link
Fig 15 - Connect Actuating Link
to Right Control Ear
Fig 16 - Connecting Link Attached (Reverse Angle)
Fig 17 - Tighten Bracket Assembly Bolt
Fig. 18
-
Lubricate All Moving Parts

AI_RC22SP_v1-0623.indd4
References
1. Jill Webster Ph.D., & Mark Gonzalez; Livestock Safety; Agricultural Systems Technology and Education, Utah State University Extension; Utah State
University , <http://extension.usu.edu/les/publications/factsheet/AHS-11.pdf>
Suggested References
Priefert assumes no liability for the use or misuse of information provided in the following references:
PRCA, prorodeo.com; Rodeo Terminology, 2021
https://www.prorodeo.com/prorodeo/rodeo/rodeo-terminology
The Team Roping Journal; Stupid is Scary: Safety First with Jake Barnes, 2021
https://teamropingjournal.com/horse-care/stupid-is-scary-safety-rst-with-jake-barnes
PRCA, prorodeo.com; Livestock Welfare Rules, 2021
https://www.prorodeo.com/prorodeo/livestock/livestock-welfare-rules
AQHA, American Quarter Horse Association; Roping Tips: Using Your Seat and Legs, 1999, 2000
https://www.aqha.com/-/roping-in-your-mind-s-eye
Equine Wellness, How to prepare your horse for roping, 2020
https://equinewellnessmagazine.com/horse-roping/
Appendix

Limited Warranties:
Priefert Manufacturing Company, Inc., (“Priefert”) 2630 South Jeerson, P.O. Box 1540, Mount Pleasant, TX 75456-1540,
warrants for one (1) year from the purchase date to the original non-commercial, governmental, or municipal purchaser
(“Purchaser”) and warrants for six (6) months to the original commercial or industrial purchaser (“Purchaser”) that the product
purchased are free from defects in material or workmanship. Priefert will replace or repair, free of charge to the original
purchaser any part(s) found, upon examination at our factory, to be defective under normal use and service due to defects in
material or workmanship, provided that the original purchaser:
a. Noties Priefert in writing of any defect in material or workmanship within the above specied warranty period.
b. Returns must be routed through an authorized Priefert dealer or distributor from whom the purchase was made.
c. Purchaser is responsible for cost of shipping.
In no event will Priefert be held liable under this warranty unless written notice is received and failure must have occurred
within the warranty period. Genuine Priefert replacement parts and components will be warranted for 90 days from date of
purchase, or the remainder of the original equipment warranty period, whichever is longer.
is limited warranty does not apply to any part of the product which has been subjected to improper or misintended use,
negligence, alteration, modication, or accident, damaged due to lack of maintenance or use of wrong oil or lubricants, or
repairs that have been made with parts other than those obtainable through Priefert, or which has served its usual life. is
limited warranty does not apply to any expendable item such as blades, shields, guards, or pneumatic tires, or other trade
accessories since these items are warranted separately by their respective manufacturers, except as specically noted in your
Operator’s Manual.
Except as provided herein, no employee, agent, Dealer, or other person is authorized to give any warranties of any nature on behalf
of Priefert. Only Priefert is authorized to make any representation to the purchaser concerning “normal” use and service for its
product as described in the Operator’s Manual, or in authorized printed materials or stickers axed to the product.
If aer examination of the product and/or part(s) in question; Priefert nds them to be defective under normal use and service
due to defects in material or workmanship,
Priefert will:
1. Repair or replace the defective product or part(s); if Priefert has made several reasonable number of attempts in repairing
the product and/or part(s) to conform to the warranty; then
2. Priefert will replace part(s) or product.
3. Purchaser is responsible for any labor charges exceeding a reasonable amount as determined by Priefert and for returning
product and/or part(s) to the Dealer, whether or not the claim is approved. Purchaser is responsible for the transportation
cost for the product or part(s) from the Dealer to the factory.
e choice of remedy shall belong to Priefert. Repair or replacement are the only remedies against Priefert under this limited
warranty.
Limitation of Liability:
1. Priefert disclaims any express (except as set forth herein) and implied warranties with respect to the product including, but
not limited to, merchantability and tness for a particular purpose.
2. Priefert makes no warranty as to the design, capability, capacity, or suitability for use of the product.
3. is warranty shall not be interpreted to render us liable for injury or damages of any kind or nature to person or property.
Priefert will not be liable for any special, incidental or consequential damages based upon breach of warranty, breach of
contract, negligence, strict tort liability, or any other legal theory. Such damages include but are not limited to loss of crops,
loss of savings or revenue, cost of capital, loss of use of equipment, facilities or services, down time, expense or loss incurred
for labor, supplies, substitute machinery, rental, and claims of third parties including customers, and injury to property.
Supplementary:
1. Proper venue for any lawsuits arising from or related to this limited warranty shall be only in Titus County, Texas.
2. Priefert may waive compliance with any of the terms of this limited warranty, but no waiver of any terms shall be deemed
to be a waiver of any other term.
3. If any provision of this limited warranty violates any applicable law and is held unenforceable, then the invalidity of such
provision shall not invalidate any other provisions.
4. Applicable law may provide rights and benets to purchaser in addition to those herein.

AI_RC22SP_v1-0623.indd6
www.priefert.com
Table of contents
Other Priefert Farm Equipment manuals
Priefert
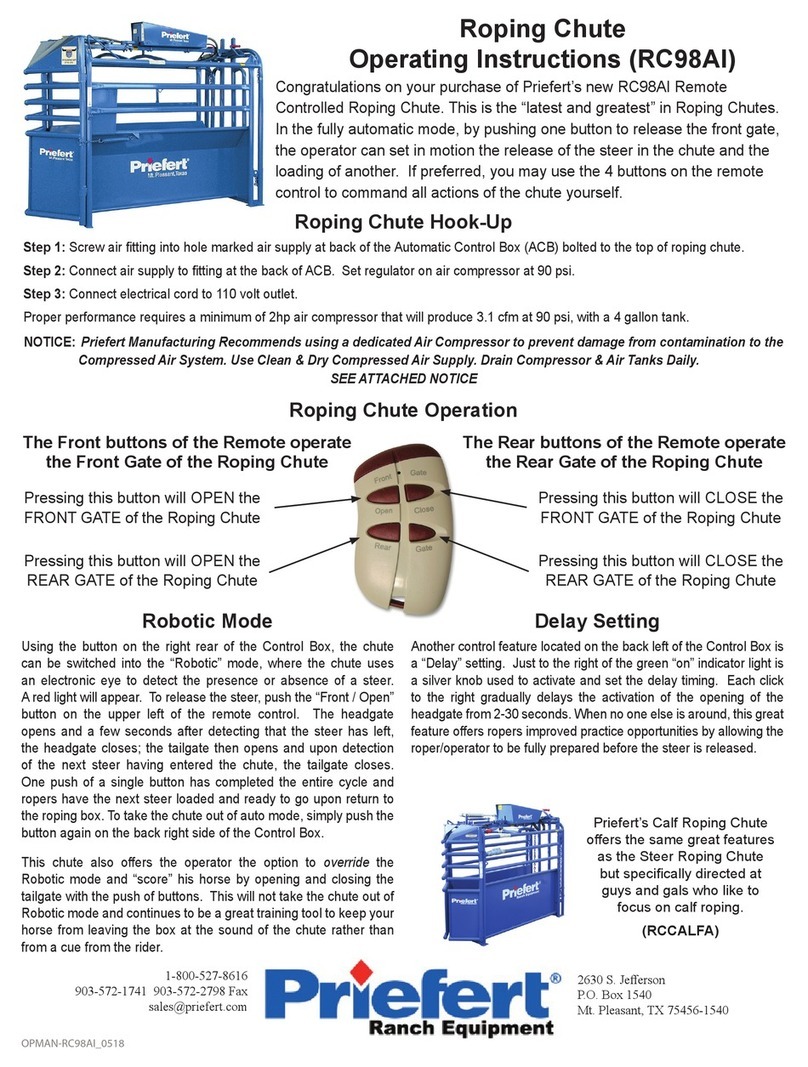
Priefert RC98AI User manual

Priefert
Priefert Horse Walker User manual
Priefert
Priefert Calf Table User manual

Priefert
Priefert Calf Table User manual
Priefert
Priefert AWF300 User manual
Priefert
Priefert RC98SCOREAI User manual
Priefert
Priefert RC98 User manual
Priefert
Priefert 91 Specifications

Priefert
Priefert Q36 User manual

Priefert
Priefert 04 Owner's manual
