Pro's Kit SS-331 User manual

SS-331
LCD Desoldering Station
User’s Manual
1st Edition,
©2014 Copyright by Prokit’s Industries Co., Ltd.

1
Description
SS‐331designedforleadfreedesolderingespecially.Thequick
heatingandstrongpowerareforconvenientandclearsoldering/
desolderingalltypesofDIPcomponents.
Reasonablestructure,singlehandoperationandstrongabsorbing
powercanbeeasyremovaloftheresidualsolderfromthe
one‐sidedortwosidedofthePCB.
Thistoolisusedinthefieldsofelectronicresearch,teachingand
production,especiallyintherepairinganddesolderingonthe
electronicappliancesandcommunicationequipments.
1. ControlUnit
Thedesolderingironguniscontrolledautomaticallybythe
micro‐processor.Thedigitalcontrolelectronicsandhigh‐quality
sensorandheatexchangesystemguaranteeprecisetemperature
controlatthesolderingtip.Thehighestdegreeoftemperature
precisionandoptimaldynamicthermalbehaviorunderload
conditionsisobtainedbythequickandaccuraterecordingofthe
measuredvaluesinaclosedcontrolcircuit,andthisdesignis
especiallyforthelead‐freeproductiontechniques.
2. DesolderingIrongun
Desolderingirongunwithapowerof60W(Heatuprating130W)
andawidespectrumofsolderingtipscanbeusedanywherein
theelectronicsfield.
Thehighpowerandguntypedesignmakethisirongunsuitable
forfinedesolderingwork.Theheatingelementismadeofceramic
andthesensoronthedesolderingtipcancontrolthedesoldering
temperaturequicklyandaccurately.

2
TechnicalSpecification
Voltage220~240VAC
PowerConsumption140W
Temperature160°C~480°C
VacuumPressure600mmHg
HeatingElementCeramicHeater
Accessories
Sparetipx3(0.8(onthegun)1.0/
1.3mm)
Cleaningtoolx3(0.7/0.9/1.2mm)
Filterspongex4(φ20.8x1+φ16.8x3)
CertificateCE,GS,RoHS
StationSize(mm)225x160x130
Weight(kgs)2.5
OperatingInstruction
Caution:Makesurethatthefourscrewswhichareusedtofasten
theDiaphragmpumpareremovedfromthecontrolsystembefore
use.Otherwiseseriousdamagesmaybecausedtotheuserand
thesystem.
1. Placethedesolderingirongunintheholderseparately.Then
connecttheplugtothereceptacleonthestationandturn
clockwisetotightentheplugnut.Checkthatthepowersupply
iscorrespondingtothespecificationonthetypeplateandthe
powerswitchisonthe“OFF”position.Connectthecontrol
unittothepowersupplyandswitchonthepower.Thena
self‐testiscarriedoutinwhichalldisplayelementsare
switchedonbriefly.Theelectronicsystemthenswitcheson
automaticallytothesettemperatureanddisplaysthisvalue.
2. Thedisplayandtemperaturesetting

①. Showstheactualtemperatureofthedesolderingtip.
②. Showsthesettingtemperature:Pressingthe“UP”or
“DOWN”buttoncanswitchthedigitaldisplaytotheset
pointdisplay.Theset‐pointcanbechangedfor±1℃by
tappingthe“UP”or“DOWN”button.Pressingthebutton
willchangetheset‐pointquickly.Thedigitaldisplaywill
returnautomaticallytotheactualvalueandtheironwill
reachtothesettingtemperaturequickly.
③. ℃/℉display:Switchingthetemperaturedisplayfrom
℃to℉bypressingthe“℃/℉”buttonandthenthe
electronicsystemwilldisplaytheactualtemperature①and
settingtemperature②in℉,andviceversa.
④. Whentheactualtemperatureonthesolderingtipisless
thantheset‐point,“HEATON”willdisplayandmakethe
desolderingtipheatingup.
⑤. Whentheabsoluteoffsetismorethan±10℃between
theactualtemperatureandtheset‐pointonthesoldering
tiporthenozzle,“WAIT”willdisplay.Itmeansthatthe
temperatureelectroniccontrolsystemisnotinthestable
situation,weshouldwaitamomenttoletthe“WAIT”
disappear.
⑥. When“ERROR”display,theremaybeatroubleonthe
3

4
SafetyInstruction
1. Themanufacturerassumesnoliabilityforusesotherthan
thosedescribedintheoperatinginstructionsorfor
unauthorizedalterations.
2. Theoperatinginstructionsandcautionsshouldberead
carefullyandkeptinaneasilyvisiblelocationinthevicinityof
thecontrolsystem.Non‐observanceofthecautionswillresult
inaccidents,injuryorriskstohealth.
Caution
1. Thepowercordonlycanbeinsertedinapprovedpower
socketsoradapters.
2. HighTemperature
Thetemperatureofthesolderingtipwillreachashighasaround
400℃(752℉)whenthepowerswitchison.Sincemishandling
mayleadtoburnsandfire,besuretocomplywiththefollowing
precautions:
①. Donottouchmetallicpartsnearthesolderingtip/
nozzle.
②. Donotusethissystemneartheflammableitems.
③. Adviseotherpeopleintheworkareathattheunitcan
reachaveryhightemperatureandshouldbe
consideredpotentiallydangerous.
④. Turnoffthepowerswitchwhiletakingbreaksandwhen
finishingusing.
⑤. Beforereplacingpartsorstoringthesystem,turnoffthe
powerandletitcooldowntotheroomtemperature.
⑥. Warning:thistoolmustbeplacedonitsstandwhennot
inuse.

5
⑦. Afiremayresultiftheapplianceisnotusedwithcare,
therefore:
1) Becarefulwhenusingtheapplianceinplaceswhere
thereiscombustiblematerial.
2) Donotapplytothesameplaceforalongtime.
3) Donotuseinpresenceofanexplosiveatmosphere.
4) Beawareheatmaybeconductedtocombustible
materialsthatoutofsight.
5) Placetheapplianceonitsstandafteruseandallow
ittocooldownbeforestorage.
6) Donotleavetheapplianceunattendedwhenitis
switchedon.
3. Takecareofyourtools
Donotusethetoolsforanyapplicationsotherthansoldering
ordesoldering.
Donotraptheironagainsttheworkbenchorotherwise
subjecttheirontosevereshocks.
Donotfilethesolderingtiptoremovetheoxide,pleasewipe
thetiponthecleaningsponge.
Useonlyaccessoriesorattachmentswhicharelistedinthe
operationmanual.Useofothertoolsandotheraccessories
canleadtoadangerofinjury.
Pleaseturnoffthepowerbeforeconnectingordisconnecting
thesolderingiron.
4. Maintenance
Beforefurtheruse,safetydevicesorslightlydamagedparts
mustbecarefullycheckedforerror‐freeandintended
operation.Inspectmovingpartsforerror‐freeoperationand
thattheydon’tbind,orwhetheranypartsaredamaged.
Damagedsafetydevicesandpartsmustberepairedor
replacedbyaqualifiedtechnician,solongasnothingelseis
indicatedintheoperationmanual.Useonlyaccessoriesor

6
attachmentswhicharelistedintheoperationmanual.Useof
othertoolsandotheraccessoriescanleadtoadangerof
injury.
5. Keepchildrenatadistance
Warning:thisapplianceisnotintendedforusebyyoung
childrenandinfirmpersonsunlesstheyhavebeen
adequatelysupervisedbyaresponsiblepersontoensure
thattheycanusetheappliancesafely.
Warning:Youngchildrenshouldbesupervisedtoensurethat
theydonotplaywiththeappliance.
Unusedsolderingtoolsshouldbestoredinadrylocation
whichisoutofthereachofchildren.Switchoffallunused
solderingtools.
6. Protectyourselfagainstelectricalshocks
Avoidtouchinggroundedpartswithyourbody,e.g.pipes,
heatingradiatorsandsoon.Thegripofantistaticdesigned
solderingtoolisconductive.
7. Workenvironment
Donotusethesolderingtoolinamoistorwetenvironment.
Thesolderingironshouldbeplacedontheholderafter
finishedusing.
8. Observethevalidsafetyregulationsatyourworkplace.

SS-331 數顯吸焊台
概述
SS-331 特別為無鉛吸焊而設計。快速升溫和大功率的特點使其可
以方便快速的焊接/拆焊所有類型的 DIP 元器件。
合理的結構,單手操作和強大的吸焊功率能夠輕鬆的從 PCB 一面
或兩面除去殘餘錫渣。
目前已廣泛的應用於電子科研,教學以及生產等單位,特別是家
電維修和通訊器材維修人員所不可缺少的首選專用工具。
1. 控制單元
吸焊槍由微處理器自動控制。數位控制裝置和高品質的感測器及
加熱交換系統保證對烙鐵頭的溫度進行精確的控制。通過快速準
確的記錄閉和控制回路測量可以獲得作高的溫度精度和帶負載狀
況下最佳熱量轉遞性能,特別適合用於無鉛制程工藝。
2. 吸焊槍 (5SS-331-DG)
吸焊槍的功率為 60W(額定加熱功率 130W),可以配各種尺寸
的烙鐵頭(U系列),廣泛應用於電子領域。
大功率和細長外形設計使這個電烙鐵適合做精密的焊接操作,發
熱芯採用陶瓷發熱材料製作,頂端溫度感測器設計其特點在於能
夠快速並準確的控制焊接溫度。
7

技術規範.
電壓220~240VAC
消耗功率140W
溫度160°C~480°C
真空吸力600mmHg
發熱原件陶磁發熱芯
配件吸嘴 x 3(0.8(裝在吸槍上)1.0/ 1.3mm)
通針 x 3( 0.7/ 0.9/ 1.2mm)
過濾棉 x 4 ( 20.8mm x1 + 16.8mm x3)
認證CE,GS,RoHS
尺寸(mm)225x160x130
重量(kgs )2.5
操作說明:
1將吸焊槍放置在支架上。然後將插頭插入插座順時針方向鎖
緊螺母。檢查供電電源符合本產品的規格並確認總電源開關
處於 OFF 的位置。接通控制系統的電源並打開電源開關。系
統進行自檢,所有的液晶顯示都暫時被點亮。電子系統自動
打開並迅速達到設定的溫度值。
2顯示幕和溫度設置:
數位顯示說明:
①. 顯示吸焊烙鐵頭的實際溫度。
8

9
②. 顯示的是設定溫度,通過按“UP"或“DOWN"鍵來改變設定
值。輕壓單下“UP"或“DOWN"鍵設定值將以±1℃變化,持
續按下“UP"或“DOWN"鍵設定值將會快速改變。 改變設
定值後,電子系統自動工作,顯示溫度會迅速到達設定值。
③. ℃或℉溫度,通過按“℃/℉"按鈕切換攝氏或華氏溫度,切換
後電子系統會自動顯示的攝氏或華氏實際溫度①和設定溫度②
數值。
④. 當烙鐵頭實際溫度小於設定溫度時顯示“HEAT ON"表示電
子系統對烙鐵正在加熱。
⑤. 當烙鐵頭實際溫度與設定溫度的絕對偏差大於±10℃時顯示
“WAIT",表示電子控溫系統還沒到達穩定狀態,請稍做等
待,待“WAIT"不顯示時即可正常使用了。
⑥. 顯示“---"則表示系統有故障,或者是電烙鐵沒有正確連接到
控制系統。
3安全操作說明
3.1 製造商對於超出操作說明中所到的其他使用或未經授
權的更改,不負任何責任。
3.2 應仔細閱讀操作說明及警告並將其放置在控制系統附
近,如不遵守這些警告,將有可能發生意外事故,人體
傷害或健康傷害。
4警告及注意事項
4.1 電源線只能插入經認證過的電源插座或適配器中。
4.2 小心高溫:在開機狀態下,烙鐵頭或熱風槍焊嘴的溫度可以
達到大約 400℃(752℉)左右,由於不正確的操作可能
會造成燒傷或引起火災,故應確保遵守以下預防措施:
不要讓金屬部件接觸到焊嘴和烙鐵頭;
不要在易燃物品附近使用該系統;
告知工作區域中的其他人員此設備會達到非常高的
溫度應注意識別其潛在的危險性;
在休息及使用完後應關閉總電源
在更換零件或儲存前,應關閉總電源並讓其冷卻到

10
室溫
警告:不用時一定要將此工具放置在特定的支架上。
如使用不當可能會引起火災,因此
在有易燃物品的場所使用該設備一定要小心;
不要長時間在同一位置使用該設備;
不要在有爆炸性氣體的場所使用;
要知道熱量有可能會引燃不在視線範圍內的可燃
物質;
使用完畢後要將器具放置在特定的支架上,且要
在冷卻後方可收藏起來;
離開時必須要關閉電源開關。
4.3 愛護工具
不要將此設備用於焊接或脫焊以外的其他操作。
不要在工作臺上敲打電烙鐵或熱風筒或其他嚴重的撞
擊。
不要銼烙鐵頭上的氧化層,請使用浸水的清潔棉擦除氧
化層。
確保使用操作說明上列明的附件或配件,使用其他的工
具或其他配件使本系統損壞或會有受傷的危險。
在接通或斷開錫槍前應先關閉電源。
4.4 工具保養
在使用前,應仔細檢查安全裝置或有輕微損害的零件無故
障及在指定操作狀態。檢查活動的零件無故障操作,並且
沒有繞線及零件損壞。已損壞的安全設備及零件都應由有
資格的專業人員進行維修或更換。只使用操作說明中列出
的配件。如果使用其他工具或配件有可能對操作人員造成
傷害。
4.5 放置在兒童接觸不到的地方
警告:老人和兒童必須在監護人在場確保可安全使用的情
況下方可使用該設備。
警告:應確保兒童在沒有監護的情況下無法接觸到該設

備。
4.6 不用的焊接工具應存放在乾燥的,兒童接觸不到的地方。
而且應該關閉所有未在使用狀態下的焊接工具的電源。
4.7 避免遭受電擊
避免用身體接觸接地零件,如:烙鐵管,散熱器等。抗靜
電設計的焊接工具的把手是導電的。
4.8 工作環境
不要在潮濕的環境中使用焊接工具。電烙鐵及熱風槍用完
後要放回到支架上。
4.9 遵守工作場所中的安全操作規定。
寶工實業股份有限公司
PROKIT’S INDUSTRIES CO., LTD.
http://www.prokits.com.tw
E-mail:[email protected]s.com.tw
©2014 Prokit’s Industries Co., LTD. All rights reserved 2014001(C)
11
Other Pro's Kit Soldering Gun manuals
Pro's Kit
Pro's Kit SS-968 User manual

Pro's Kit
Pro's Kit SS-257 User manual
Pro's Kit
Pro's Kit SS-956 User manual
Pro's Kit
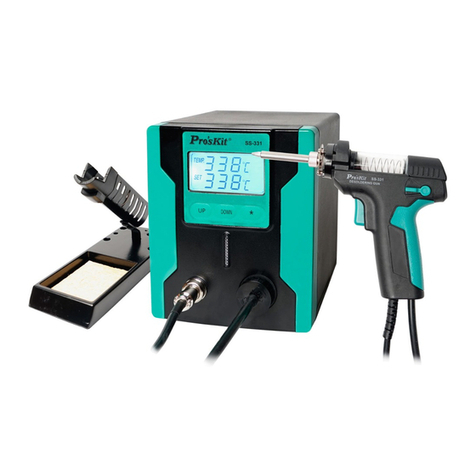
Pro's Kit SS-331B User manual
Pro's Kit
Pro's Kit SN-396 User manual
Pro's Kit
Pro's Kit SS-256 User manual
Pro's Kit
Pro's Kit SS-979B User manual
Pro's Kit
Pro's Kit SS-256E User manual

Pro's Kit
Pro's Kit SS-955 User manual
Pro's Kit
Pro's Kit SS-257 User manual
