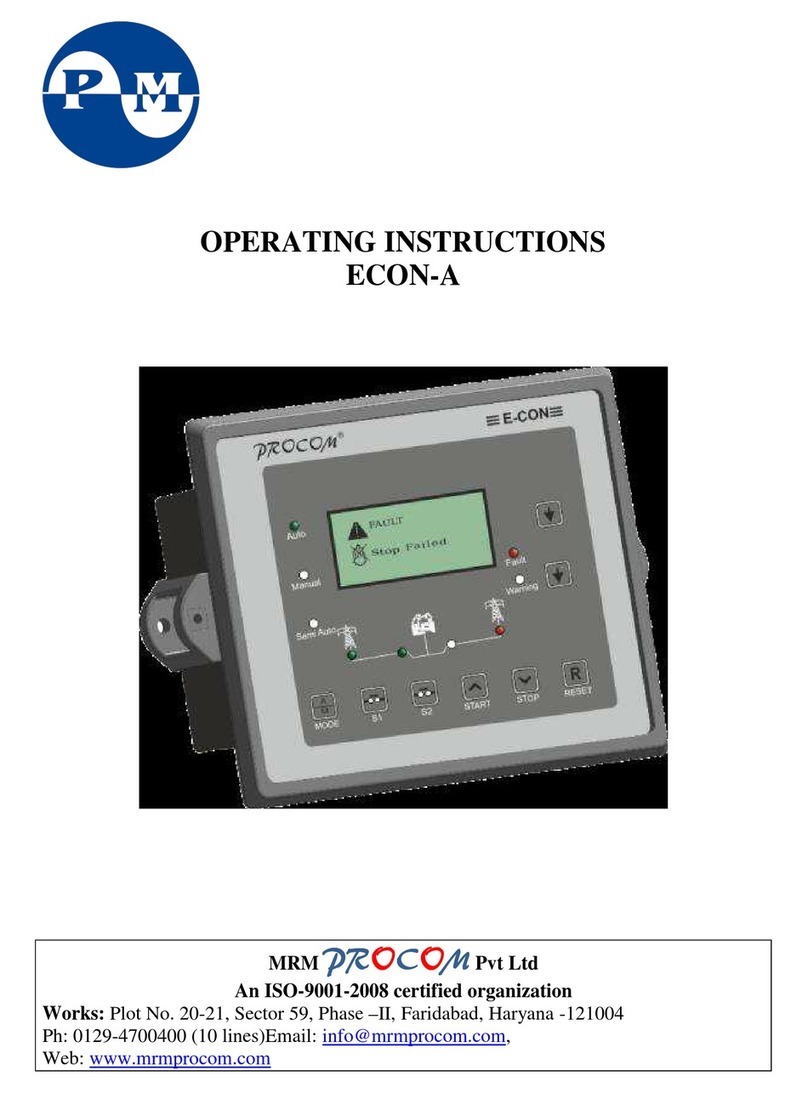
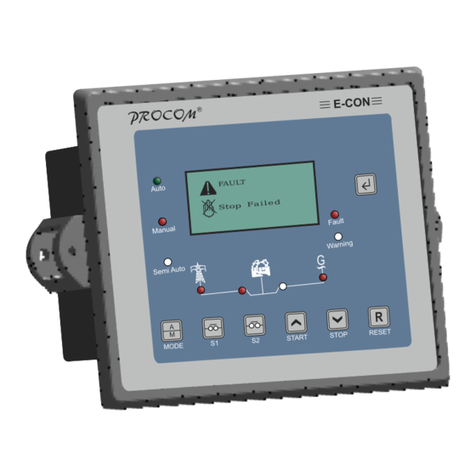
Procom ECON-F User manual

OPERATING INSTRUCTIONS
ECON-F(GC)/F(4C)

Operating Instructions Page - 1
INDEX
1. Introduction
2. Protection, Supervision Salient features
3. Digital Output
4. Digital Input
5. Indication
6. Front Panel Switch
7. Setting Procedure
8. Technical Specification
9. Analog Channel Data
10. Wiring Diagram
11. Dimensional Drawing

1.0 Introduction
lECON- F(GC)/F(4C) is an Engine Control / Protection Unit for engines
used for NON DG applications.
lThe controller can measure signals from either MPU or charging
alternator to calculate RPM.
lECON provide choice of Varity of sensor selection from predefined
selection chart
lIn critical operation it is possible to disable or debar tripping of engine via
an external digital input.
l128x64 pixel graphical display enhance convenience in configuration of
controller.
2.0 Protection, Supervision Salient Features
Protection
Low Lube Oil Pressure(LLOP)l
High Water Temp. (HWT)l
Fuel Level l[In ECON-F(4C)only]
Emergency off l
Oil Temperature .l
Charging Alternator Fail/V-Belt failurel
Display and Measurement
Battery Voltagel
Engine Run Hourl
RPMl
Oil Pressure in KG/cm2l
Water Temp in degree centigradel
Oil Temp in degree centigradel
Fuel Level in % l[In ECON-F(4C)only]
Service Hourl
3.0 Digital Output
Seven digital output (Six negative and one positive) are available, four
output contacts programmable
.
Start/Crank (Battery Negative)l
Charging Alternator (Battery positive)l
Solenoid (Battery Negative)l
Annunciation 1 (Battery Negative)l
Annunciation 2 (Battery Negative)l
Annunciation 3 (Battery Negative)l
Annunciation 4 (Battery Negative)l
Hooter (Battery Negative)l
Page - 2
Operating Instructions

Page - 3
4.0 Digital Input
ECON can measure / detect three Analog, seven digital and one pulse
input. These inputs are as mentioned below.
1. Fuel Sensor : Resistive sensor can be connected to fuel sensor
terminal(1). Pre Programmed sensor value (Listed in TABLE 5.1) can
be assigned to fuel input [In ECON-F(4C)only]
2. LLOP Sensor : Resistive sensor can be connected to LUBE OI
PRESSURE terminal(2). Pre Programmed sensor value (Listed in
TABLE 5.1) can be assigned to LOP input
3. HWT Sensor : Resistive sensor can be connected to Water
Temperature terminal(3). Pre Programmed sensor value (Listed in
TABLE 5.1) can be assigned to WT input
4. Oil Temp sensor : resistive sensor can be connected to Oil Temp
sensor terminal (4). Pre Programmed sensor value (Listed in TABLE
5.1) can be assigned to Oil Temp input
5. LLOP Switch : Oil pressure switch can be connected to LOP switch
terminal (8) . The input is activated on connection of DC negative at
terminal no. 8. on activation stop command is issued to the engine and
the fault is indicated on front LED.
6. HWT Switch : Water Temperature switch can be connected to HWT
switch terminal (9) . The input is activated on connection of DC negative
at terminal no. 9. on activation stop command is issued to the engine
and the fault is indicated on front LED
7. Oil Temp Switch : Oil Temp level switch can be connected to Oil Temp
level switch terminal (10) . The input is activated on connection of DC
negative at terminal no. 10. on activation stop command is issued to the
engine and the fault is indicated on front LED
8. Emergency Off : The input is activated on connection of DC negative
at
terminal no. 11. on activation stop command is issued to the engine and
the fault is indicated on front LED
9. Protection Debar : The input is activated on connection of DC negative
at terminal no. 12. on activation ECON disable trip function on all the
faults.
10. Remote Start : ECON issues start command to engine on receipt of
DC negative at remote start terminal
11. Remote Stop : ECON issues stop command to engine on receipt of DC
negative at remote stop terminal
5.0 Indication
Listed below are the two LED indication available on front of ECON-F/P
Warning : Blinks in case of sensor open or on low fuel warning
Operating Instructions

Page - 4
6.0 Front Panel Switch
ECON – F/4C has four switch provided on its front panel. Switch can h
more than one functions assigned to them. The table below describes the
operation of these
7.0 Setting Procedure / Menu
ECON is user/site configurable. User can view all parameters, fault history,
events no. of start/stop and can also edit, system parameter (password
protected), engine / generator parameter, annunciation setting,RS485
parameter clock and password. Following is the sequential procedure to
edit. view all the menu and submenus
Press “R” & “Enter“ switch simultaneously.
The LCD shall display, “System Parameter”
1. System Parameter
lSystem parameter are password protected.
lTo enter “system parameter” press “Enter”.
lECON will request for password, LCD will display “ Enter Password”
lSystem parameter can be edited by entering correct password or else
can be viewed by entering “0” as password.
2. Engine / Generator Parameter
lTo go to next menu after system parameter, press “Increment”.
lThe LCD shall display “Generator Parameter”.
lGenerator parameter can modified / viewed by pressing “Enter”.
(for setting details pls refer table 5.1)
Switch
Symbol
Switch
Function
Description
Increment
/Start
Programming Mode: It is used to increment
the value of the parameters under
programming. & it is used to issue the crank/
start command to DG
Decrement
/Stop
Programming mode: It is used to decrement
the value of the parameter under programming
&. It is used to issue the stop command to DG
Next
Normal operation mode: In this mode, it is
used to change the parameters being displayed
on LCD.
Programming Mode: Next key is used to
select the next parameter to be programmed.
Reset
Either to reset the fault / Or press enter and
reset together to select programming mode.
Operating Instructions

3. Annunciation Setting
l To go to next menu after generator parameter, press “Increment”.
l The LCD shall display “annunciation setting”.
l Annunciation settings can modified / viewed by pressing “Enter”.
(for setting details pls refer table 5.1)
4 RS-485 Parameter In ECON F (4C) only
l To go to next menu after Annunciation Setting, press “Increment”.
l The LCD shall display “ ”.RS-485 parameter
l can modified / viewed by pressing “Enter”.RS-485 parameter
(for setting details pls refer table 5.1)
5. Display History
l To go to next menu after annunciation press “Increment”.
l The LCD shall display “Display History”.
l Trip record / history can be viewed by pressing “Enter”.
l ECON keep a record of last 32 tripping with date and time stamp.
l Tripping records are updated on first in first out basis
6. Display Event
l To go to next menu after history press “Increment”.
l The LCD shall display “Display Event”.
l Display Event can be viewed by pressing “Enter”.
l ECON keep a record of last 32 event with date and time stamp.
l Event record is updated on first in first out basis.
7. Display Start Stop
l To go to next menu after event press “Increment”.
l The LCD shall display “Display Start / Stop”.
l Start Stop can viewed by pressing “Enter”.
l ECON keep a record of last 100 start and stop event with date and time
stamp.
l Start/ stop record is updated on first in first out basis.
8. Reset Service Alarm
l To go to next menu after Start-Stop press “Increment”.
l The LCD shall display “Reset Service Alarm”.
l Service due hour can be reset by pressing start button after entering in
to this menu.
9. Adjust Clock
l To go to next menu after Service Alarm press “Increment”.
l The LCD shall display “Adjust Clock”.
l Time can be modified / viewed by pressing “Enter”.
Page - 5
Operating Instructions

Page - 6
10. Reset Password
l To go to next menu after annunciation press “Increment”.
l The LCD shall display “Reset Password”.
l Password can be modified by pressing “Enter”
l ECON will request for the present password, after feeding correct
password change password will be requested and the password will be
replaced by new password on pressing start button..
Parameter Mode
Parameter
Options/Limits
Description
Default Setting
A. System Parameter
System parameters are the parameters which are programmed once
during initial installation and does not require frequent changes. As these
are critical parameter and hence are password protected. It is possible to
view system parameter without knowing the password but editing is
possible only after entering correct password
All system parameters are listed below along with their default value and
minimum / maximum variation range. Values can be increased or
decreased by pressing up/start and down/stop button respectively . Next
parameter can be selected by pressing next button
Solenoid
Type
1: Pull to Start
2: Pull to Stop
Pull To Start
In this mode fuel solenoid
contact changes from Open
to Close at the time of
cranking and remains close
till the genset is running. For
stopping the generator this
contact opens.
Pull To Stop
In this mode fuel solenoid
contact remains open at the
time of cranking and till the
genset is running. For
stopping the generator this
contact closes for a user
programmed time.
Pull to Stop
Operating Instructions

LLOP
Sensor
1: Type A
2: Type B
3: M&M
4: MNEPL
5: VE
6: TMTL
7: HUAFANG
8: TATA
9: GC(VDO)
10:
GC(Murphy
11: MVD
12: Disabled
Select the installed sensors. If
no sensor is installed select
“Disabled”
Type A
Oil Temp
Sensor
1: Type A
2: Type B
3: M&M
4: MNEPL
5: VE
6: TMTL
7: HUAFANG
8: TATA
9: GC(VDO)
10:GC(Murph
y
Select the installed sensors. If
no sensor is installed select
“Disabled”
Type A
Fuel
Sensor
1: Type A,
2: Sam-0,
3: Sam-1,
4: Disabled*
Select the installed sensors. If
no sensor is installed select
“Disabled”
Type A
HWT
Sensor
1: Type A
2: Type B
3: M&M
4: MNEPL
5: VE
6: TMTL
7: HUAFANG
8: TATA
9: GC(VDO)
10:GC(Murph
y
Select the installed sensors. If
no sensor is installed select
“Disabled”
Type A
Page - 7
Operating Instructions

Sensor
Open
1: Warning
2:Fault
3: Disabled
The action to be taken if the
sensor is found to be open.
Warning
Pulses/Re
volution
1-300
No of pulses, from Magnetic
Pickup unit or W point of
charging alternator, in one
revolution of the engine. This
shall be used to calculate the
RPM.
132
Page - 8
Operating Instructions
Start Stop
Config
1: Separate
keys
2: Only Start
key
This parameter decides as to
how the remote start and stop
shall be done. Option 1:
Separate keys is selected
than a single pulse on remote
start shall the engine and
another pulse on remote stop
shall stop the engine. The
duration of these pulses
shall be more than 200msec.
Option 2: In this option the
engine shall be stated and
kept working till Remote start
is pulled low. As soon as the
pin is released the engine
shall stop. To attempt a new
start cycle, after the engine
fails to start, the remote start
pin must be released for some
time and again pulled low.
* Option 2 should not be
selected if the start and stop
functions are to be executed
from front keys.
Separate
keys
B. Engine/Generator Parameter
All the Engine programmable parameters are listed below along with their
default value and minimum / maximum variation range. Values can be
increased or decreased by pressing up/start and down/stop button
respectively . Next parameter can be selected by pressing next button.

Maximum
RPM
600-4000
Maximum allowed RPM of
Engine. Engine running at speed
above this is treated as over
speeding and a fault
is registered and engine stopped.
1600
Minimum
RPM
600-4000
Minimum allowed RPM of
Engine.running at speed below
this is treated as over speeding
and a fault is registered and
engine Stopped.
1400
RPM
Delay
1-999 Sec
Duration for which engine is
allowed to operated outside the
set RPM limits. If it continues to
operate beyond the limits for
more than the
set time a fault condition is
registered and engine stopped.
5
Pick Up
RPM
80-1000
The engine stalling RPM. This
parameter defines the RPM
above which the engine will not
stall and
hence can be treated as running.
This is used to detect the engine
running condition after crank.
1000
Service
Due Hour
10-999Hrs
Service due warning is generated
after the engine has logged these
many hours.
250
Oil temp
Trip Level
40-250oC
The maximum OIL temperature
up to which the engine is allowed
to operate.
o
95 C
Oil temp
trip delay
1-999Sec
Monitoring time for the Oil temp
level to avoid false tripping of the
engine.
10
UUU
Page - 9
Operating Instructions

Fuel Warn
Level #
25 %
Monitoring value of fuel level below
which fuel level warning is
generated.
Disable*
11-80 %
Fuel Warn
Delay #
10 Sec
Monitoring time of fuel level after
which fuel level warning is
generated.
1-999Sec
Fuel Trip
Level #
15 %
Monitoring value of fuel level below
which fuel level trip is generated.
10-80 %
Fuel Trip
Delay #
10 Sec
Monitoring time of fuel level after
which fuel level trip is generated.
1-999 Sec
LLOP Trip
Level
0.4-
2
8.5Kg/cm
The minimum lubricant oil pressure
on which the engine is allowed to
operate. A drop of pressure below the
set limit shall trigger a fault condition
thereby stopping the engine
2
1.0Kg/cm
Page - 10
Operating Instructions
LLOP
Trip Delay
1-999
Sec
Duration for which the low lubricant
oil pressure can be tolerated.
5
HWT trip
level
o
40-250 C
The maximum coolant
temperature up to which the engine
is allowed to operate.
o
95 C

Page - 11
HWT Trip
delay
1-999 Sec
The duration for which the engine
is allowed to operate at
temperature higher than the
above set maximum temperature
5
ChgAlt-
Vbelt
1-999Sec
Disabled
While the engine is running and
the Charging alternator pin is not
pulled low for this duration it is
assumed that either the charging
alternator or V-Belt has failed
thereby generating a fault ondition
and stopping the engine.
Disabled
Crank On
Time
1-10 Sec
The maximum duration for which
the engine can be cranked
continuously. In case engine fails
to start another attempt to start
shall be attempted after some
time.
5
Hooter
On Time
1-999 Sec
Duration for which the hooter
shall be . This setting is only
available if the hooter is assigned
to an DO.
15
Solenoid
On Time
1-60 Sec
The duration for which the Pull
solenoid can be continuously
energized while trying to stop the
engine.
22
Operating Instructions
Auto
Scroll
1: Enabled
2: Disabled
Can be used to stop/start the
automatic scrolling of the display
parameters.
Enabled
C. Annunciation Setting
It is possible to freely assign digital outputs to different fault. There are four
(ANN1 , ANN2, ANN3 and ANN4) field programmable output.
It is also possible to assign same digital output to more than one fault( e.g.
ANN1 can be assigned to fuel fault and HWT fault both, in this case ANN1
will activate on both the faults.

Ann oil
temp
fault
1: No Annunciation
2:On DO Ann1
3:On DO Ann2
4:On DO Ann3
5:On DO Ann4
If desired, the oil temp fault can
be announced at one of the
annunciation Digital Output.
No
Annun-
ciation
Ann
Fuel
Fault
1: No Annunciation
2:On DO Ann1
3:On DO Ann2
4:On DO Ann3
5:On DO Ann4
If desired, the Low Fuel fault
can be announced at one of the
annunciation Digital Output.
No
Annun-
ciation
Ann
HWT
Fault
1: No Annunciation
2:On DO Ann1
3:On DO Ann2
4:On DO Ann3
5:On DO Ann4
If desired, the High water
temperature fault can be
announced at one of the
annunciation Digital Output.
No
Annun-
ciation
Ann
LLOP
Fault
1: No Annunciation
2:On DO Ann1
3:On DO Ann2
4:On DO Ann3
5:On DO Ann4
If desired, the LLOP fault can
be
announced at one of the
annunciation Digital Output.
No
Annun-
ciation
Ann
RPM
Fault
1: No Annunciation
2:On DO Ann1
3:On DO Ann2
4:On DO Ann3
5:On DO Ann4
If desired, the Over/Under
speed fault can be announced
at one of the annunciation
Digital Output.
No
Annun-
ciation
Announce
Unit
OK
1: No Annunciation
2:On DO Ann1
3:On DO Ann2
4:On DO Ann3
5:On DO Ann4
If desired, the healthiness of the
controller can be announced at
one of the annunciation Digital
Output
No
Annun-
ciation
D. RS-485 Parameter #
Device Id
Modbus device ID
1
1-247
Baud Rate
RS 485 Communication Baudrate
9600
1200
2400
4800
9600
19200
Page - 12
Operating Instructions

Parity
RS 485 Communication Parity Bits
None
Even
Odd
None
Stop Bit
RS 485 Communication Stop Bits
1
1
2
E Reset Service Alarm
Press INC to Reset
Press DEC to esc
F Adjust Clock
Automatic real time based DG Start
& Stop (Manual Controller
Configuration) RTC Time and Date
can be easily entered
00.00
00.00
DD/MM/YY
YY
G Reset Password
Three digit password protection for
system settings
Password can be change easily.
8.0 Technical Specification
AC voltage withstand 330 VAC, Continuously, (Phase to
neutral)
Frequency Range 40-70 Hz
Measurement Accuracy
Voltage & Current ± 2%
Frequency ± 0. 05 Hz.
Surge 1.2/50Usec 2.5KV
Auxiliary Voltage 8-35V/DC OR 50-300 V AC/DC
Contact Rating 230 VAC, 5A
Humidity 95 %
Page - 13
Operating Instructions
• 9.0 Analog Channel Data
9.1 High Water Temperature Sensors Data :

Continues on Next Page
Temp.
Resistance in ohms
In °C
Type A
Type B
M&M
MNEPL
VE
Huafang
TATA
GC
(VDO)
GC
(Murphy)
TMTL
Water
0
3282
1525
3282
3282
2363
2900
3192.6
3417
10613
3512
5
2765
1319
2765
2765
1873
2199
2461.1
2609
7764
2707
10
2247
1112
2247
2247
1383
1684
1914.6
2011
5743
2106
15
1730
906
1730
1730
1111
1301
1502.7
1564
4292
1653
20
1212
700
1212
1212
839
1015
1189.2
1227
3240
1308
25
1036
570
1036
1036
683
798
948.4
970
2469
1043
30
860
440
860
860
527
632
762.1
773
1898
838
35
684
365
684
684
434
505
616.7
621
1472
678
40
508
287
508
508
340
406
502.5
520
1050
552
45
426
260
426
426
283
327
412
438
885
453
50
343
232
343
343
226
247
340
356
720
374
55
291
205
291
291
190
214
282.1
288
560
310
60
238
178
238
238
154
187
235.5
220
410
259
65
203
151
203
203
131
154
197.6
183
360
217
70
167
123
167
167
107
120
166.6
145
300
183
75
144
96
144
144
92
101
141.2
128
240
155
80
120
69
120
120
76
85
120.2
110
193
132
85
104
62
104
104
66
74
102.8
95
160
113
90
88
54
88
88
55
62
88.3
80
145
97
95
77
46
77
77
48
55
76.2
71
120
83
100
66
38
66
66
41
47
66
61
100
72
105
58
35
58
58
36
41
57.4
52
90
63
110
50
31
50
50
30
36
43.8
45
80
55
115
45
27
45
45
27
31
38.5
40
70
48
120
39
23
39
39
23
27
33.9
34
55
42
125
34
19
34
34
21
24
30
30
45
37
130
30
15
30
30
18
21
26.6
27
38
33
135
27
11
27
27
16
18
23.7
23
33
29
140
25
0
25
25
14
15
21.1
21
29
26
145
23
0
23
23
12
12
18.9
18
25
23
150
21
0
21
21
10
10
16
22
20
Operating Instructions Page - 14

9.1 High Water Temperature Sensors Data :
S.No
.
Temperature in °C
Resistance in ohms
TMTL AIR3C
TMTL AIR1C
1
80
300
300
2
85
279.3
273.1
3
90
258.5
246.2
4
95
237.8
223.8
5
100
217
208.5
6
105
201.3
193.1
7
110
185.5
177.7
8
115
169.8
162.3
9
120
154
146.9
10
125
138.3
131.5
11
130
122.5
116.2
12
135
106.8
100.8
13
140
91
85.4
14
145
76.3
70
15
150
61.5
57.3
16
155
46.8
44.7
17
160
32
32
18
165
30.3
30.3
19
170
28.5
28.7
20
175
26.8
27
21
180
25
23.6
22
185
22.3
20.2
23
190
19.5
16.8
24
195
16.8
13.4
25
200
14
10
26
205
13
27
210
12
28
215
11
29
220
10
Operating Instructions Page - 15

9.2 Low Fuel Sensors Data :
Operating Instructions Page - 16
S.No.
Fuel in %
Resistance in ohms
Type A
Sam_0
Sam_1
Electronics
Linear
1
0
0
14
10
10
10
2
5
5
18
18.5
19.5
18.5
3
10
10
22
27
29
27
4
17
17
29.5
35.5.
38.5
35.5
5
20
34
37
44
48
44
6
25
51
55.5
52.5
57.5
52.5
7
30
68
74
61
67
61
8
35
85
92
69.5
76.5
69.5
9
40
102
110
78
86
78
10
45
110.5
124.5
86.5
95.5
86.5
11
50
119
139
95
105
95
12
55
127.5
149
103.5
114.5
103.5
13
60
136
159
112
124
112
14
65
144.5
165
120.5
133.5
120.5
15
70
153
171
129
143
129
16
75
157.7
172.5
137.5
152.5
137.5
17
80
162.3
174
146
162
146
18
85
167
176
154.5
171.5
149.5
19
90
171.7
178
163
181
153
20
95
176.3
181
171.5
190.5
166.5
21
100
180
184
180
200
180

9.3 Low Lube Oil Pressure Sensors Data
Operating Instructions Page - 17
Pressure
Resistance In Ohms
2
In Kg/cm
Type A
Type B
M&M
MNEPL
Volvo
TMTL
Huafang
TATA
GC
(VDO)
GC
(Murphy)
0
10
10
10
10
15
10
10
10
10
240
0.5
16.5
20
16.5
20.5
19.5
21
20
20.5
20
214
1
23.5
30
23.5
31
24
32
30
31
30
189
1.5
30.2
40
30.2
41.5
28.5
43
40
41.5
41
166
2
37
50
37
52
33
54
50
52
52
147
2.5
49.5
58.7
49.5
70
40.5
62.7
58.7
61
61
129
3
62
67.5
62
88
48
71.5
67.5
70
70
115
3.5
74.5
76.2
74.5
106
54.5
80.2
76.2
79
79
102
4
87
85
87
124
61
89
85
88
88
91
4.5
96
93.5
96
142
63.5
97.7
93.5
97
97
81
5
105
102
105
160
66
106.5
102
106
106
71
5.5
114
110.5
114
178
72.5
115.2
110.5
115
115
61
6
123
119
123
196
79
124
119
124
124
51
6.5
133.5
127.2
133.5
214
82
132.7
127.2
132
132
41
7
143
135.5
143
232
85
141.5
135.5
140
139
31
7.5
152.5
143.7
152.5
250
87.5
150.2
143.7
148
146
24
8
162
152
162
268
90
159
152
156
152
20
8.5
171.5
159
171.5
286
95
167.7
159
164
159
16

Page - 18
10.0 Wiring Diagram
Operating Instructions

11.0 Dimensional Detail
Table of contents
Other Procom Controllers manuals
Popular Controllers manuals by other brands

Atomic Workshop
Atomic Workshop Zombie Leaflet
Cass Technology
Cass Technology CASTLE S SERIES Technical operation guide
Controlli
Controlli MVT5 Series Mounting instructions

Wiznet
Wiznet WizFi360 Series quick start guide

Aprimatic
Aprimatic ST450N Fitting instructions
Leviton
Leviton SGVSM-00W Dimension Guide
SECOP
SECOP 101N07 Series operating instructions

Cisco
Cisco 2504 Getting started guide
Johnson Controls
Johnson Controls VMA1617 installation guide
SMC Networks
SMC Networks AR20S 02E-Y 15V Series Operation manual

Compur Monitors
Compur Monitors Statox 501 Operation instructions
IEI Technology
IEI Technology VWBOX-E133 user manual
