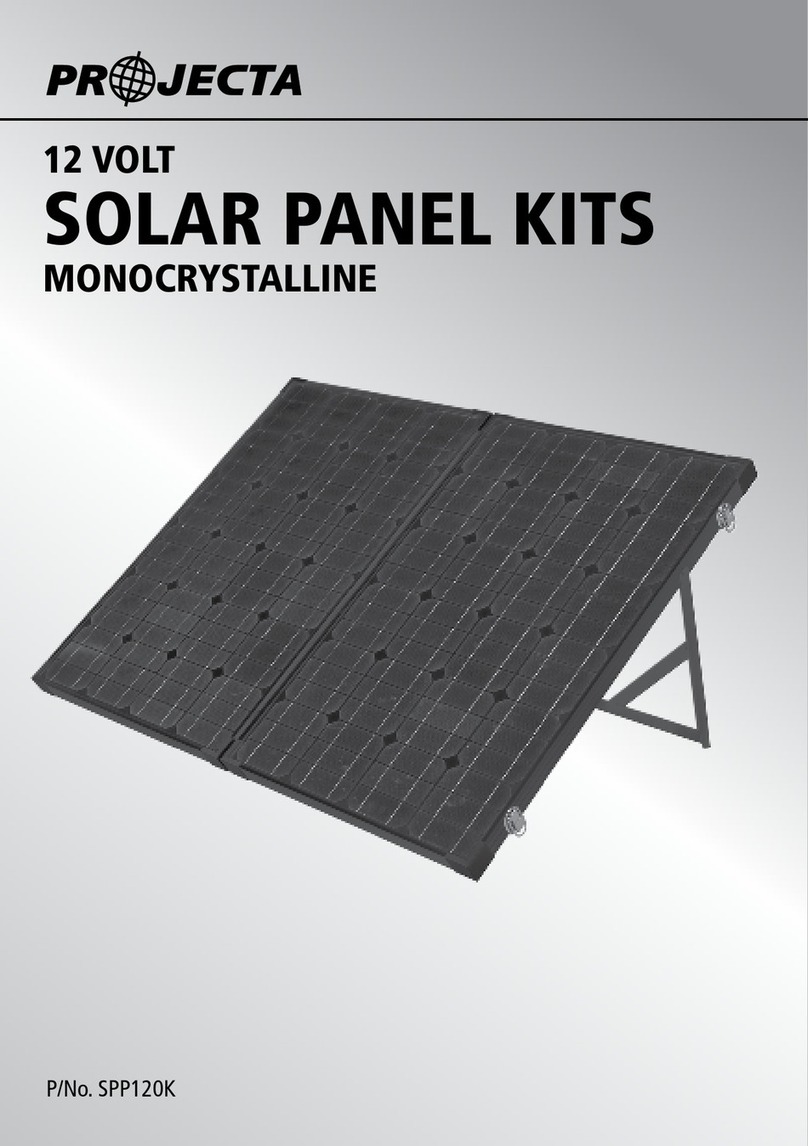
Projecta SPP160K User manual

MONOCRYSTALLINE
12 VOLT
SOLAR PANEL KITS
P/No. SPP160K

2
WARNING
SOLAR PANEL
• For installations with lead acid batteries, avoid sparks or flames near the batteries and
always use proper eye protection
• Given sufficient light, solar panels always generate energy even when they are disconnected
• Accidental ‘shorting’ of the terminals or wiring can result in sparks causing personal injury or a
fire hazard
• Do not scratch or bend solar panels
• Do not disassemble the solar panel
• When mounting solar panels at a height adhere to all relevant safety regulations
• Do not walk on modules
• Do not attempt to increase module output by concentrating light on its surface with mirrors
• Be sure to use components (cables, fuses, etc) greater than 25% of solar panel’s maximum
current ratings
• When storing the Solar panel kit do not pack heavy items on top the Solar panel bag
• Do not disassemble the controller. Take to a qualified person if the unit requires repairing
FEATURE OVERVIEW
SOLAR PANEL
Compact and Powerful – Monocrystalline solar panels are manufactured from a solar cell that
is cast from silicon. These cells are more efficient at producing power than an amorphous panels,
so the size of the panel is smaller yet produces greater output power.
Heavy Duty Frame – Corrosion resistant frames are constructed to withstand wind speeds in
excess of 130 km/h in typical ground mounted applications. The frames are black anodized and
the corner connection has a strong mechanical resistance to weather.
Convenient Carry Bag – This durable padded bag protects your solar panel during storage
and transportation.
Carry Handle & Safety Latches – It is easy to carry the solar panels whilst out of the bag with
the carry handle and using the safety latches to keep the solar panels closed shut.
5 Meter Lead with Battery Clamps – 5 meter battery leads are connected to the solar panels
with battery clamps, so all you have to do is connect to the battery.
Fold Away Support Legs – The convenient support legs fold out from the rear to allow
easy mounting on flat ground. The legs place the panels at an optimum angle for maximum
performance.

3
P/No. SPP160K
TYPE MONOCRYSTALLINE
RATED POWER 160W
OPEN CIRCUIT VOLTAGE 22.6V
SHORT CIRCUIT CURRENT 10.2A
PEAK POWER VOLTAGE 17.0V
PEAK POWER CURRENT 9.42A
TEST CONDITIONS 1000W/m2, 25˚C
BATTERY CONNECTIONS Battery Clamps
SPECIFICATIONS
SOLAR CONTROLLER
Advanced MCU – Features control pulse width modulated (PWM) technology, high efficiency
operation.
Multi-Chemistry – Target for Gel, AGM, Conventional lead-acid (WET) and Calcium Batteries.
5 Stage solar controller – Built in regulator to prevent your battery from being overcharged.
Overcharging occurs when the charge voltage is unregulated. This can result in premature
battery failure.
The regulator also prevents your battery from being under charged, in the solar energy field,
battery undercharge always occurs, especially on some Conventional lead – acid or Calcium
batteries; The unit provides an automatic Equalization feature for deeply drained Conventional
lead acid batteries or Calcium batteries.
It keeps the battery fully charged by using a process called “floating”. This means the controller
will stop charging when the battery is full and will automatically start charging the battery as
required. This process will also reduce water loss and help prevent the battery from ‘drying out’.
Multi-Chemistry – Suitable for charging Gel, AGM (Sealed), Conventional lead-acid (WET) and
Calcium batteries.
Discharge Protection – Protects your battery from discharge at night. Under low light or no
light conditions the solar panel voltage could be less than the battery voltage. The unit contains
a special circuit which prevents current flowing back from the battery and into the solar panel.
LED Indicators – Coloured LED’s to easily indicate the operational status and battery conditions.
Unit Protection – Protects against reverse polarity, short circuit, over temperature, over voltage, etc.
BATTERY TYPE SELECTION
Please check your battery manufacturer’s specifications to select correct battery type.
The unit provides 4 battery types for selections: Gel, AGM, WET (conventional lead acid),
and Calcium.
There is a DIP switch at the back of the solar charge controller, this Dip switch is used for
presetting your battery type. Please refer to Figure 1.1 to make DIP switch setting for the
proper battery chemical; the factory default setting is at AGM battery type.

4
Figure 1.1: Battery Type Setting via DIP switch
CHARGING STAGES
Soft Charge (Level 1) – When batteries suffer an over-discharge, the controller will softly
ramp the battery voltage up to 10V.
Bulk Charge (Level 2) – Maximum current charging until batteries rise to Absorption level.
Absorption Charge (Level 3) – Constant voltage charging.
Equalization Charge* (Level 4) – Only for WET battery or Calcium battery type, when the
battery is deeply drained below 10V, it will automatically run this stage to bring the internal cells
as an equal states and fully complement the loss of capacity.(Gel and AGM battery do not run
Equalization charge).
Float Charge (Level 5) –
Battery is fully charged and
maintained at a safe level.
A fully charged battery
has a voltage of more
than 13.6 Volts. Level 1
Level 2
Level 3
Level 4*
Level 5
The 3 LED’s indicate the charging Fault Charge Full
status and Fault connection Red Blue Green
Solar Power Present – ON Slow Flash Slow Flash
No battery connected
Battery reversed ON Fast Flash Fast Flash
Solar panel reversed OFF OFF OFF
Soft start charging OFF Slow Flash OFF
Bulk, Absorption OFF ON OFF
Equalisation charging
Float charging OFF OFF ON
Solar panel weak Slow Flash OFF OFF
At night no charge OFF OFF OFF
Slow flash = 1 Hz flash, Fast flash = 3 Hz flash
LED OPERATION

5
SOLAR CONTROLLER SPECIFICATIONS
1 Electrical Parameters
1-1 Rated solar panel amps – SPP160K 10.2 Max. AMP
1-2 Normal input Solar cell array voltage 15–22 VDC
1-3 Max. solar cell array voltage (output has no load) 25 Max. VDC
1-4 The controller lowest operating voltage (at solar or battery side) 8V Min VDC
1-5 Standby current consumption at night 5 Max mA
1-6 Maximum voltage drop-Solar panel to battery 0.25 Max. VDC
2 Charging characteristics
2-1 Minimum battery start charging voltage 3 Min VDC
2-2 Soft start charging voltage 3-10 +/-0.2 VDC
2-3 Soft start charging current (50% PWM duty)
2-4 Bulk charge voltage 10-14.0 +/-0.2 VDC
2-5 Absorption charging voltage at 25oC
• Gel type battery 14.1 +/-0.2 VDC
• AGM type battery (default setting) 14.4 +/-0.2 VDC
• WET type battery 14.7 +/-0.2 VDC
• Calcium type battery 14.9 +/-0.2 VDC
2-6 Absorption transits to Equalizing or Float condition:
• Charging current drops to 0.5 +/-0.1 AMP
• or Absorption charging timer timed out 4 Hour
2-7 Equalization charging active
• Only for WET or Calcium battery
• Battery voltage discharged to less than 10 +/-0.2 VDC
• Automatic equalizing charging periodical 28 Day
2-8 Equalization charging voltage 15.5 +/-0.2 VDC
2-9 Equalization charging timer timed out 2 Hour
2-10 Float charging voltage 13.6 +/-0.2 VDC
2-11 Voltage control accuracy +/- 1%
3 Protection
3-1 Against reverse polarity or short circuit at panel side
3-2 Against reverse polarity or short circuit at battery side
3-3 No reverse current from battery to solar at night
3-4 Over temperature protection during charging 65 oC
3-5 Transient over voltage protection with TVS or varistor
4 Electrical parts
4-1 Input output terminal M4 terminals
4-2 Temperature sensor port (Press and Release type) DA 250-350 2P
5 Physical Parameters
5-1 Controller material Plastic, Standard ABS
5-2 Power terminal maximum stranded wire size #12 AWG stranded-3 mm2
5-3 Mounting Vertical wall mounting
5-4 IP grade IP22
5-5 Net weight Approx. 250g
6 Environmental characteristics
6-1 Operating temperature -25 ~ 50oC
6-2 Storage temperature -40 ~ 85oC
6-3 Operating Humidity range 100% no condensation

6
INSTALLATION & CONNECTION
STEP 1 Locate the panel in the best position
Locate the panel in a position where it is exposed to the sun for the majority of the day.
For best results use a northern orientation. The panel will function in the horizontal or hung
position, however for best performance tilt the panels so they directly face the sun.
STEP 2 Connect to the battery
Connect the 5 meter lead to the battery,
Red clamp to the positive (+) terminal and
Black clamp to the negative (-) terminal.
MAINTENANCE
Periodically inspect the electrical and mechanical connections. Make sure they are all tight and
free from corrosion. If necessary clean the surface of the solar panels with a soft damp cloth.
Mild detergent can also be used. Any dirt or residue on the glass may effect performance.

7
FREQUENTLY ASKED QUESTIONS
Q. Can the solar panel be mounted on a flat roof or wall?
A. Yes. It is fine to mount the panel on a horizontal surface such as a roof or on a vertical surface
like a wall as long as the panel receives full sun for a reasonable period of the day. You will
however gain better performance if the panel is tilted toward the sun and faced in a northerly
direction, since this enables the maximum amount of solar energy to reach the panel.
Q. What current output can I expect?
A. The current output of the solar panel is based mostly on the available solar energy (sun rays).
The current ratings given in the specifications table are based on the ‘ideal’ sunlight conditions.
In reality this may be achieved only on a very bright sunny day. The normal current output will
therefore be a little lower. If the panel is shaded or if it is a very hot day the output will
decrease further.
Q. Will it charge my flat battery & how long will it take?
A. The SPP160K will charge a flat battery (above 9V) 500-1800CCA (Automotive) with a charge
time of 7-35Hrs.
Q. I am going on a 4WD trip, will 160 Watts be enough?
A. It really comes down to how many appliances are drawing power from your battery.
For example:
Most people when they go away would run a Fridge, and a couple of lights to cook with etc.
We need to work out how much power would be used in a day.
Energy consumption per day
If we say we get around 10 hours of solar energy from the panels per day (for summer months).
We can then calculate what size and how many panels we need.
45 Amps ÷ 10 hours = 4.5 Amps per hour
So the SPP160K solar panel kit produce 10.2 Amps an hour, this should be more than
enough.
Appliance Current use/hour (Ah) Total time of use/day (Hours) Total Current per day (Amps)
Fridge 1.5 24 36
3 Lights 3 3 9
Grand Total 45
Table of contents
Other Projecta Solar Panel manuals
Popular Solar Panel manuals by other brands
Roger Technology
Roger Technology B71/PBX Instruction and warnings for the installer

Erco
Erco ES-610 Original Operator's Manual
Owens Corning
Owens Corning VentSure Solar Attic Exhaust Fan Additional Solar Panel... installation instructions
MEMC
MEMC MEMC-P270AMA installation manual
Solar Technology
Solar Technology STP010 user manual

Bauer
Bauer ECOSOL BOX Installation and user manual
