J
K
L
M
H
I
5 6
Forward/Backward Trim
• If your Cloud Rider™ HD 2.0 drifts forward, push
and release the TRIM button backward
repeatedly until the motion stops and proper
flight is maintained (see diagram J).
• If your Cloud Rider™ HD 2.0 drifts backwards,
push and release the TRIM button forward
repeatedly until the problem is resolved.
Right/Left Trim
• If your Cloud Rider™ HD 2.0 drifts left, push and
release the TRIM button rightward repeatedly
until the motion stops and proper flight is
maintained (see diagram K).
• If your Cloud Rider™ HD 2.0 drifts right, push and
release the TRIM button leftward repeatedly
until the problem is resolved.
Right/Left Spin Trim
• If your Cloud Rider™ HD 2.0 spins counter
clockwise, push and release the TRIM button
rightward repeatedly until the motion stops and
proper flight is maintained (see diagram L).
• If your Cloud Rider™ HD 2.0 spins clockwise, push
and release the TRIM button leftward repeatedly
until the problem is resolved (see diagram M).
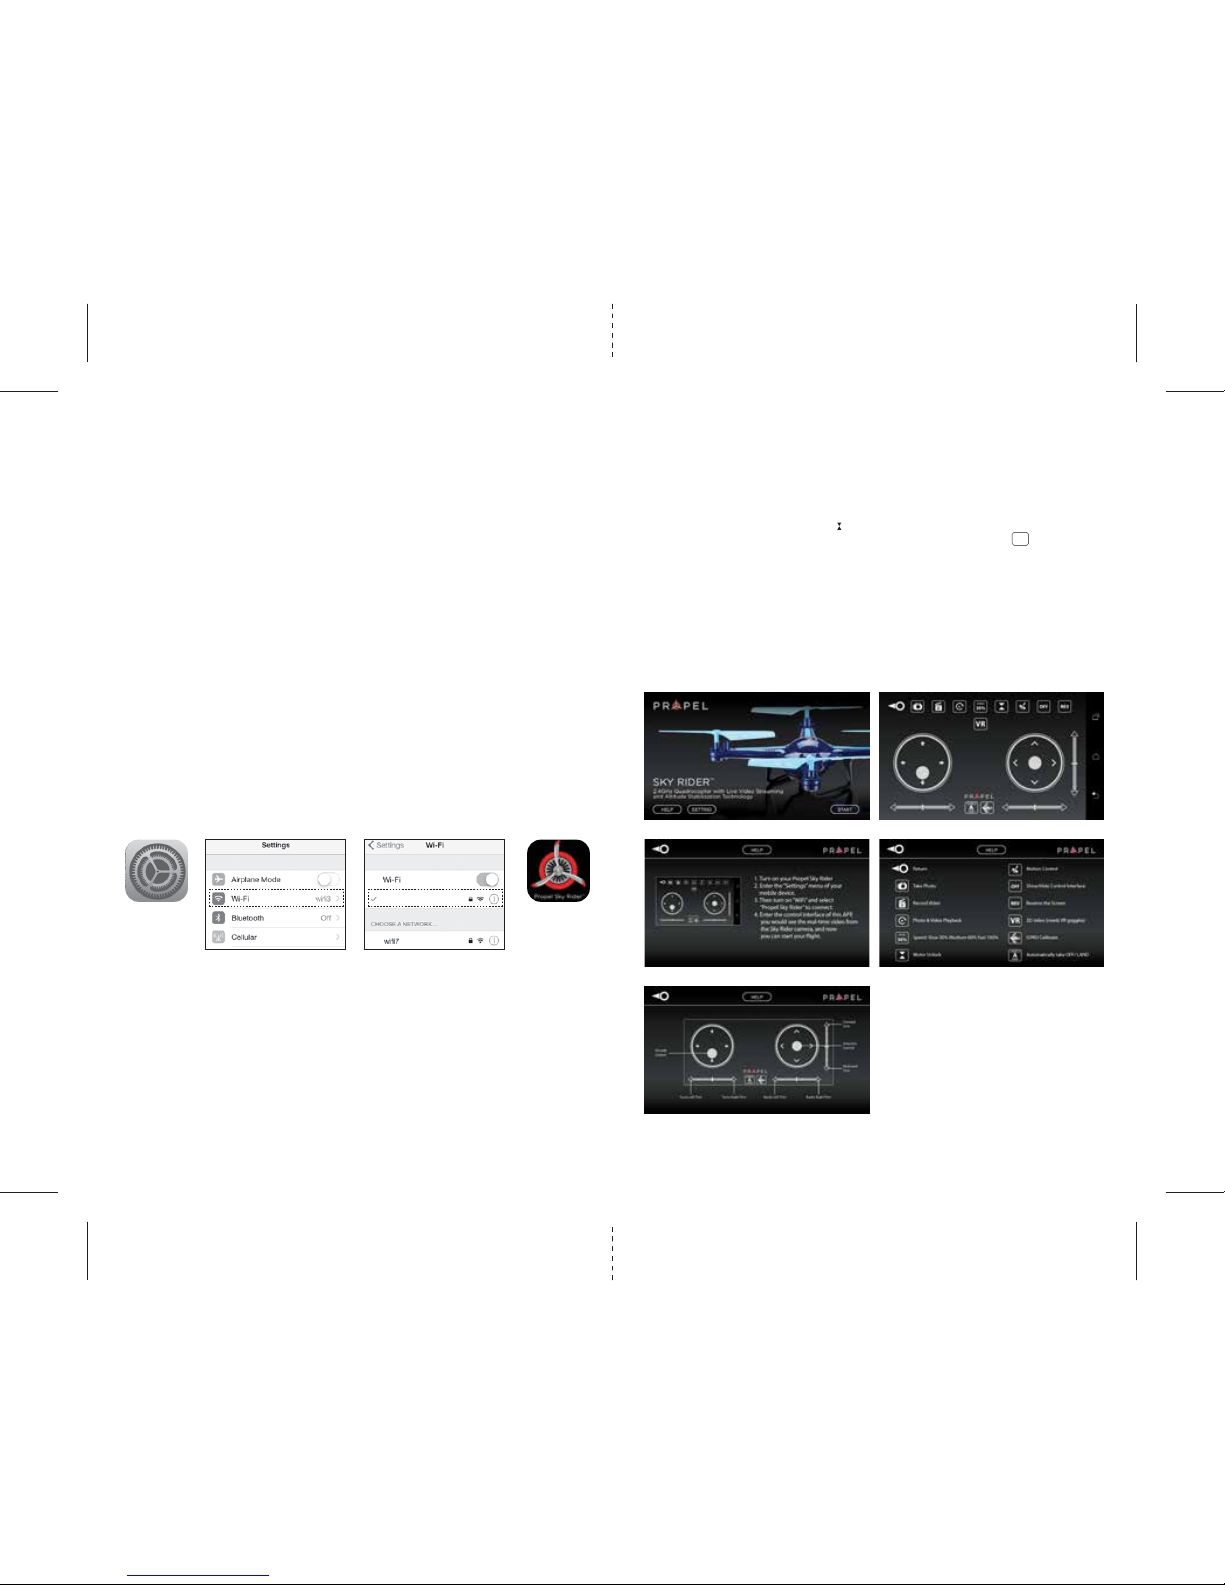
4 CHANNEL FLIGHT CONTROL
Below is a list of basic flight functions for your long-range remote control Cloud Rider™ HD 2.0. While
learning to fly your Cloud Rider™ HD 2.0 it is best to start with a large space until you get used to the
basic controls.As you master flying your Cloud Rider™ HD 2.0 you can move to more advanced
maneuvering techniques. Practice makes perfect! Once you have these basic steps down you can move to
the next level.
SPEED SELECT BUTTON
The Cloud Rider™ HD 2.0 has 3 speed settings; SLOW, MEDIUM and HIGH. The default setting when you first turn on
your Cloud Rider™ HD 2.0 is the SLOW speed mode.To increase the speed simply push the Speed setting button.(see
remote diagram on pg 3) You will hear two beeps indicating your Cloud Rider™ HD 2.0 has changed to MEDIUM
speed mode. To increase the speed again simply push the Speed setting button one more time and you will hear
three beeps indicating your CLOUD MASTER™ has changed to HIGH speed mode.Push the Speed setting button
again and you will hear one beep indicating your Cloud Rider™ HD 2.0 speed changed back to SLOW speed mode.
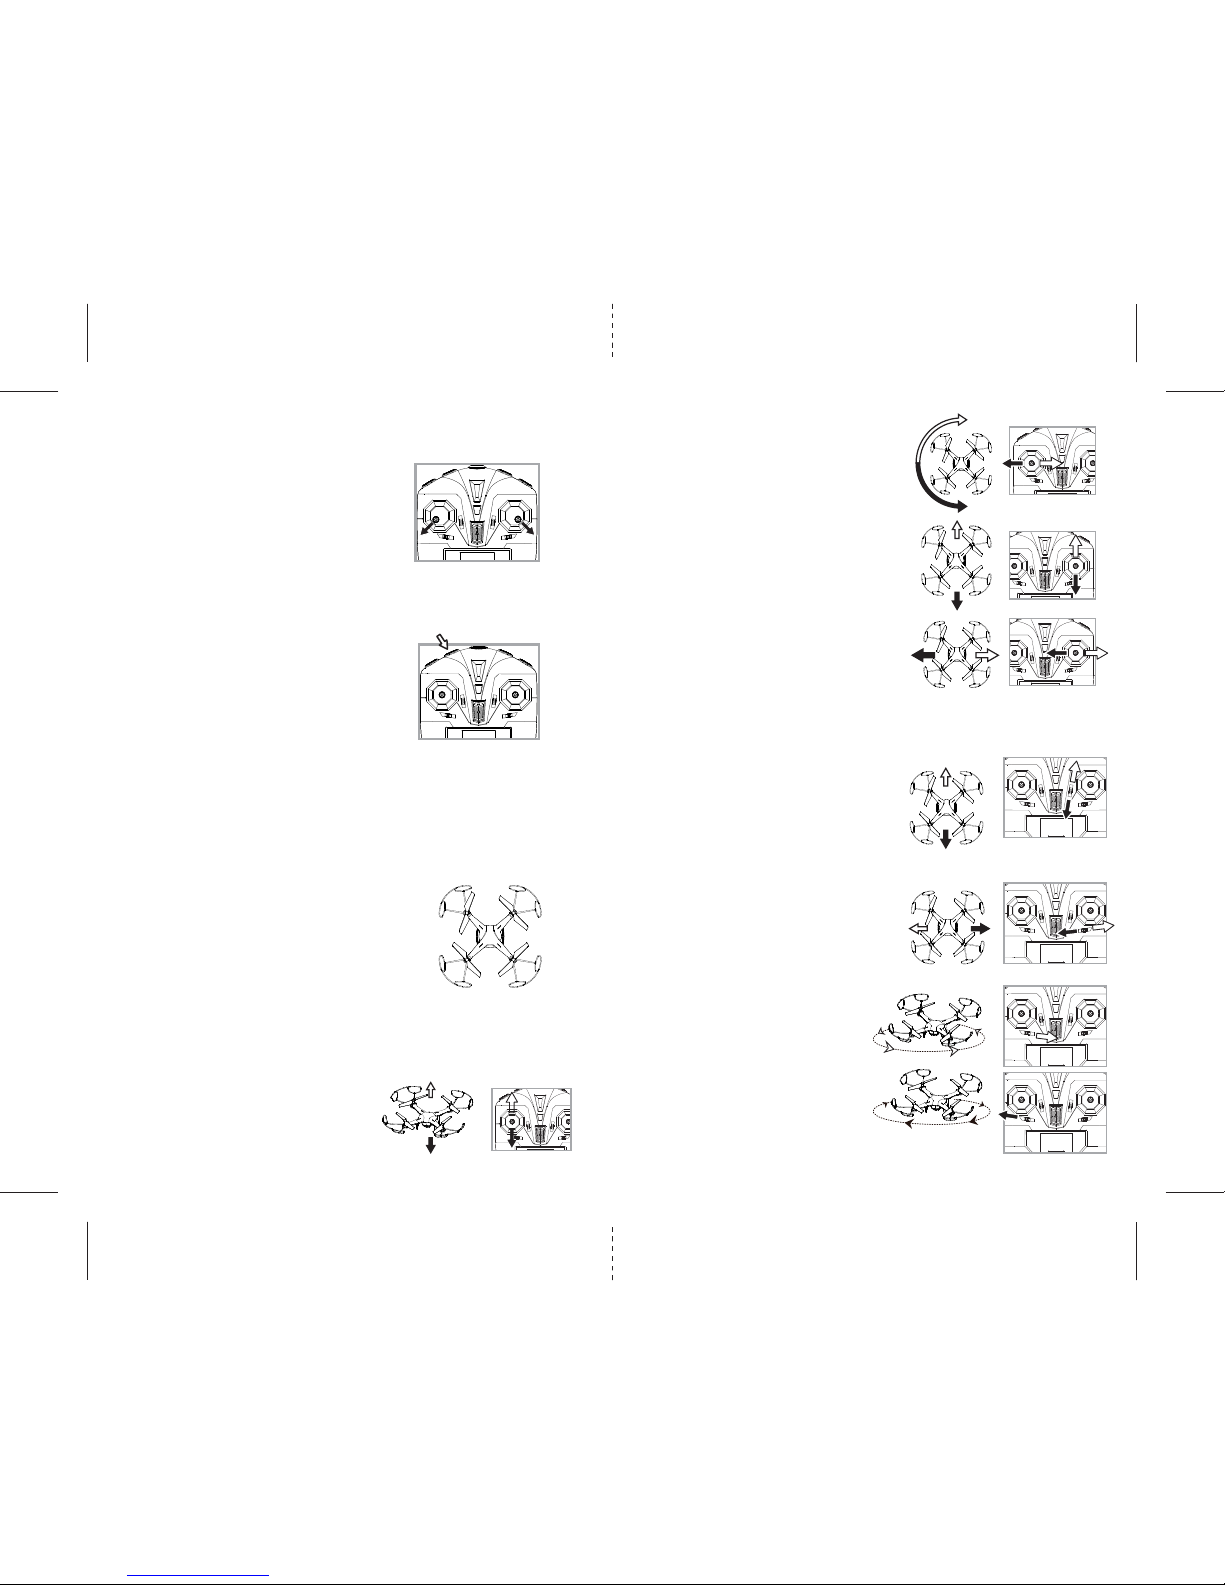
Move the right Direction Stick up while in flight
and the Cloud Rider™ HD 2.0 will move forward.
Move the right Direction Control down while in
flight and the Cloud Rider™ HD 2.0 will move
backward (see diagram H).
Move the right Direction Control left and the
Cloud Rider™ HD 2.0 will bank to the left.
Move the right Direction Control right and the
Cloud Rider™ HD 2.0 will bank to the right
(see diagram I).
Move the leftThrottle stick up to increase the
speed and the Cloud Rider™ HD 2.0 will
accelerate and ascend.
Move the left Throttle stick down to decrease the
speed and the Cloud Rider™ HD 2.0 will
decelerate and descend (see diagram F).
Move the leftThrottle stick left and the
Cloud Rider™ HD 2.0 will rotate left.
Move the leftThrottle stick right and the
Cloud Rider™ HD 2.0 will rotate right (see diagram G).
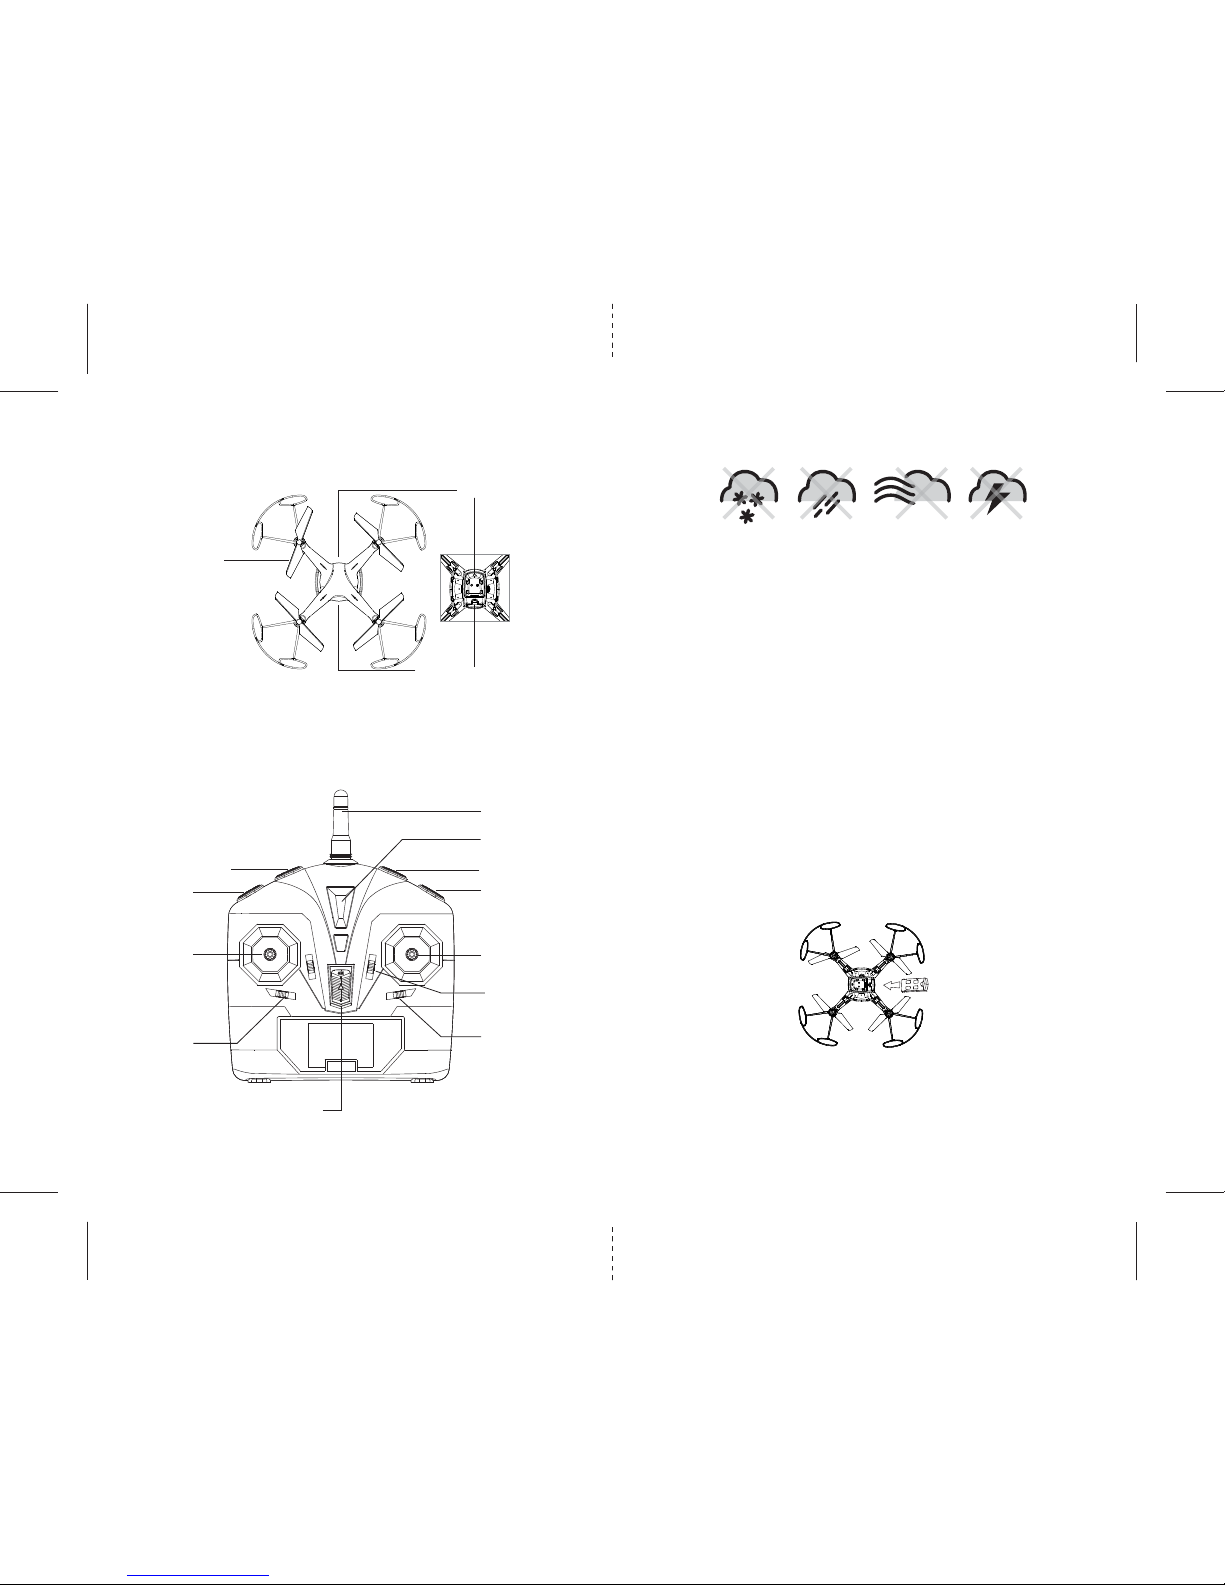
RECOGNIZING THE FRONT & REAR OF THE Cloud Rider™ HD 2.0
ADJUSTING TRIM
From time to time you may have to adjust the TRIM buttons to ensure the Cloud Rider™ HD 2.0 will hover
in mid-air and respond accurately to your commands (make all trim adjustments while the drone is in air).
G
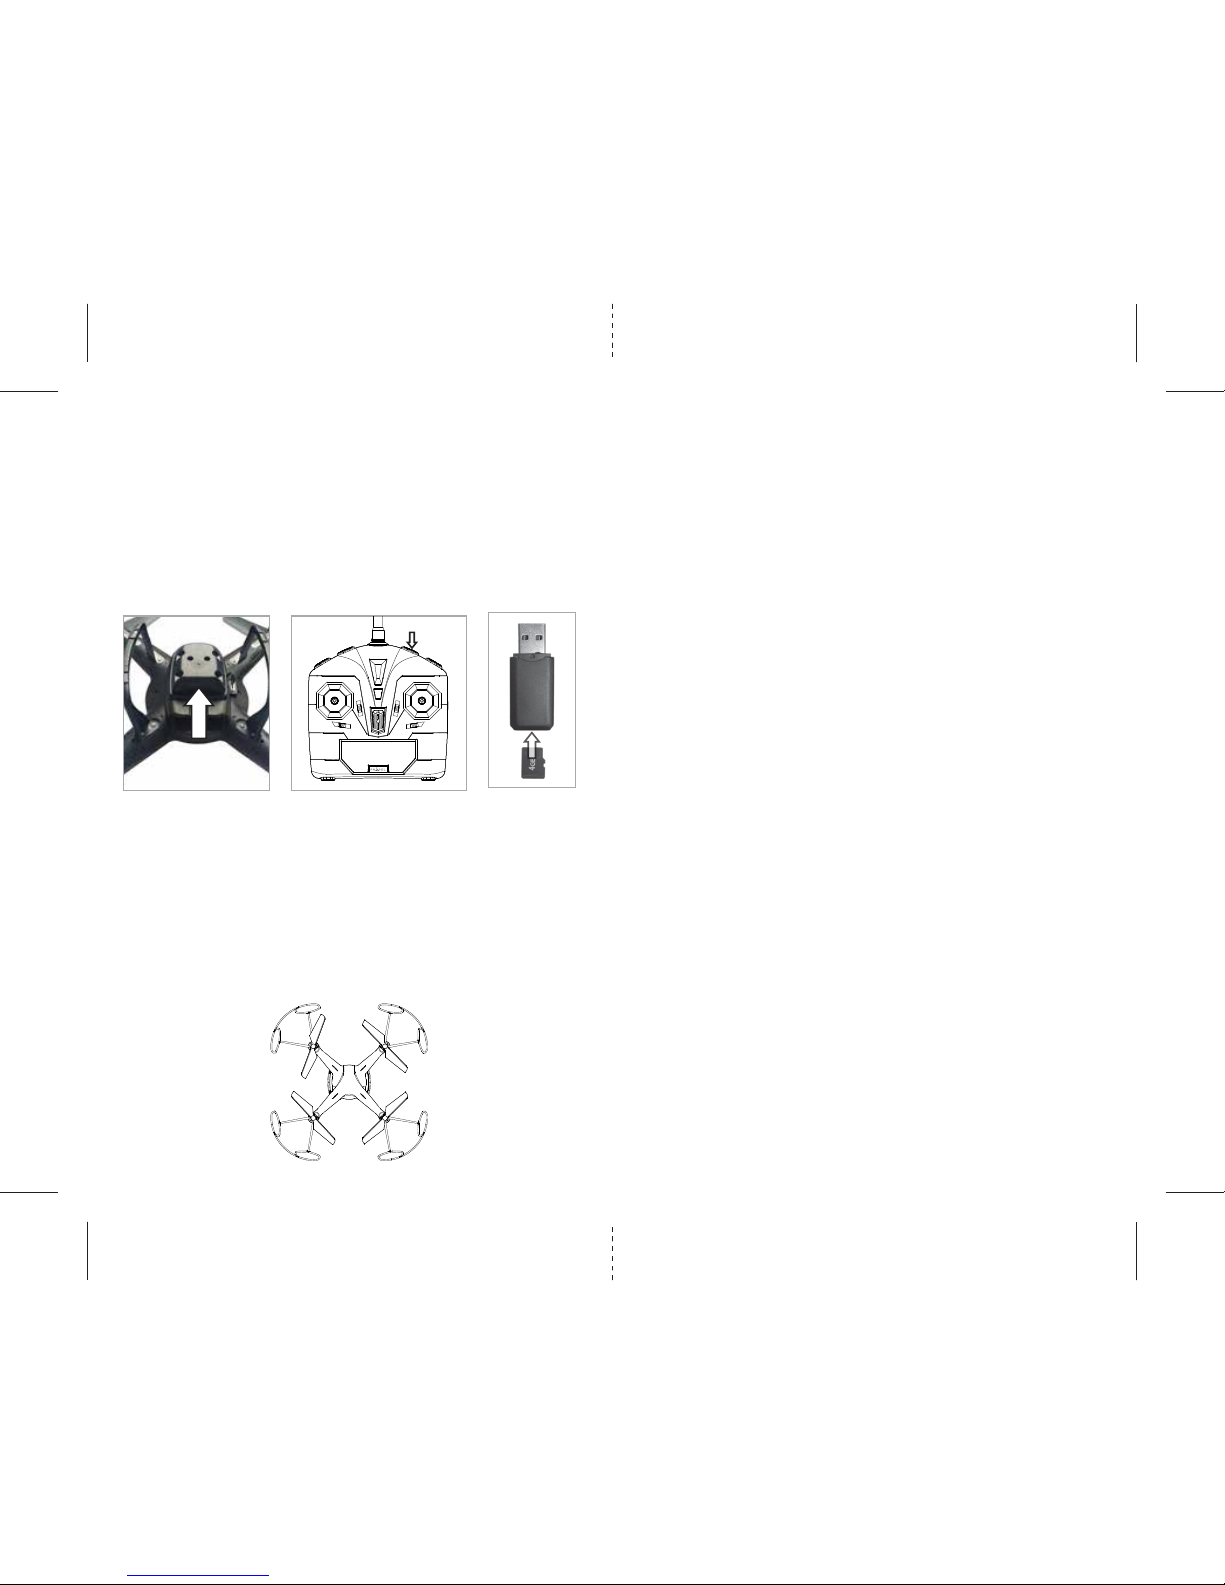
HOW TO START/STOP ROTORS
FRONT
E
REAR
F
Even though the Cloud Rider™ HD 2.0 has four rotors there is
still a front or "forward" facing direction and "Rear" or
“backward” facing direction. The front of the Quadrocopter
displaysWHITE LED lights and the back of the Quadrocopter
displays RED LED lights when activated (see diagram E).
AUTO START/LAND BUTTON
T
he Cloud Rider™ HD 2.0 has an auto start/land feature which allows you to
start/land automatically. Simply press the AUTO START / LAND button on
the top right of the controller and your Cloud Rider™ HD 2.0 will begin
taking off/landing(see diagram below).
NOTE:You can still control the direction while auto starting/landing
to avoid obstacles.
Make sure you have properly synced the Cloud Rider™ HD 2.0 and
the power stays on.
•
To start the rotors simply move the two control sticks both down and
out (see diagram), hold until the rotors start spinning. Now release
both sticks to the neutral position and push the trottle up to take off.
• To sotrp the rotors, after starting them you can simply wait about 10
seconds, and they will stop automatically. Or move both sticks down
and out again to stop immediately. stop the rotors afer take off,
you can simply pull the throttle all the way down and land .