08
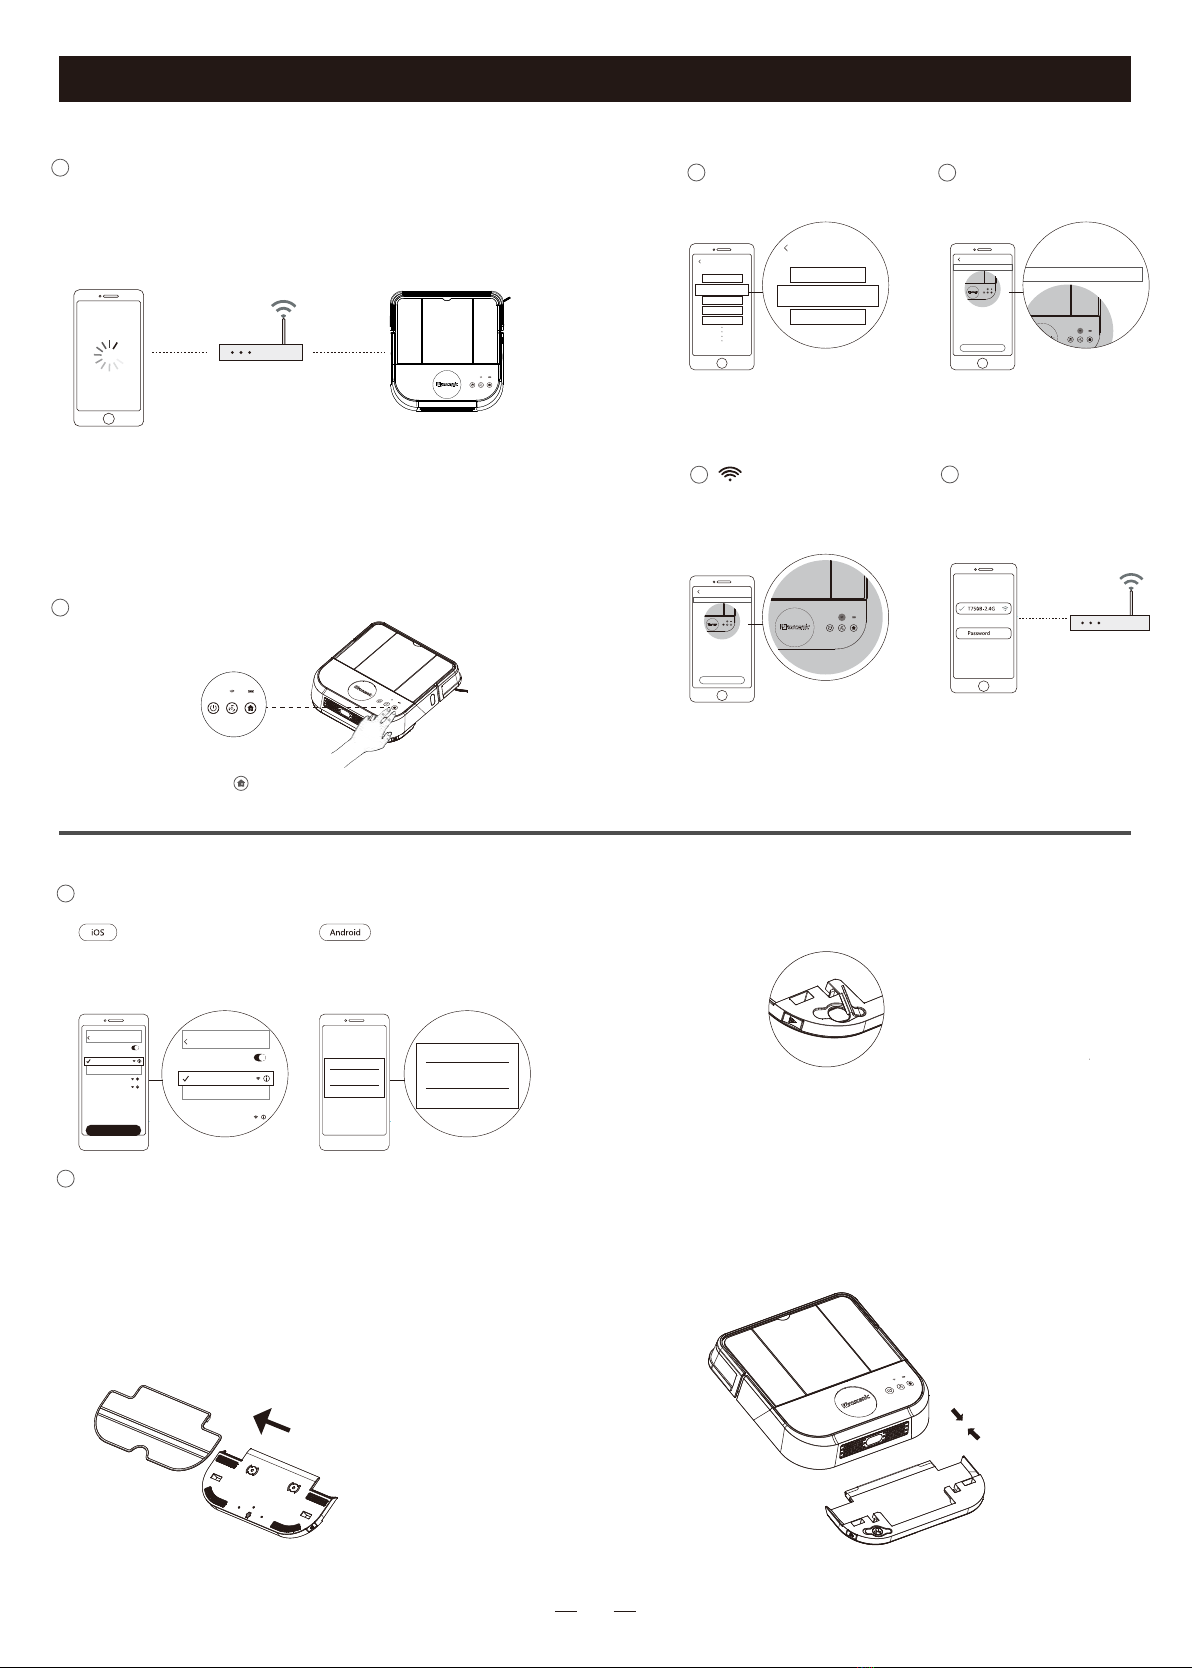
Note:
·When power indicator turns solid green,the battery has been fully
charged.Start auto cleaning by pressing on the robot or APP.
·After completing the network configuration, you can use the APP to
remotely enable cleaning, scheduled cleaning, and etc.
·Robot will not start clean when the battery is too low;
·Please take away all wires on the ground before cleaning to avoid
power failure or damage to furniture.
·When the battery is low in the middle of cleaning, the robot will
automatically return to the charging stand.
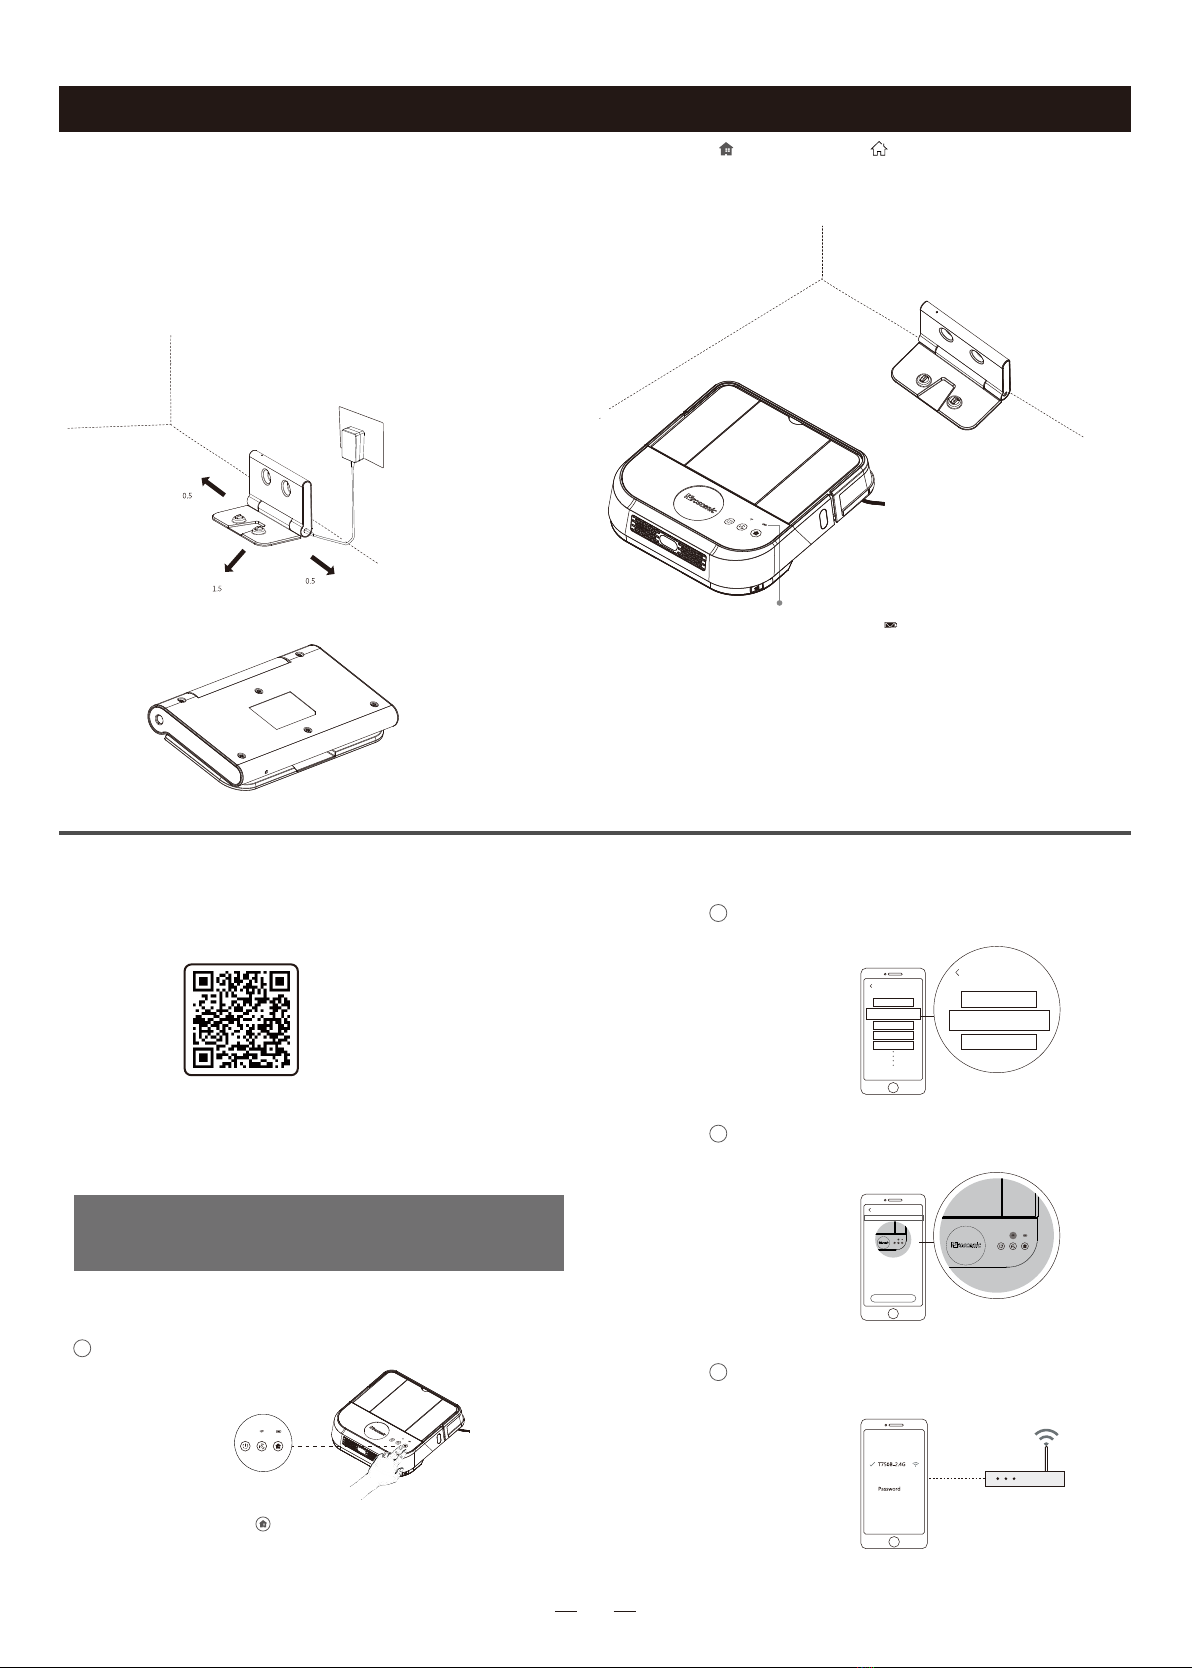
2m
2m
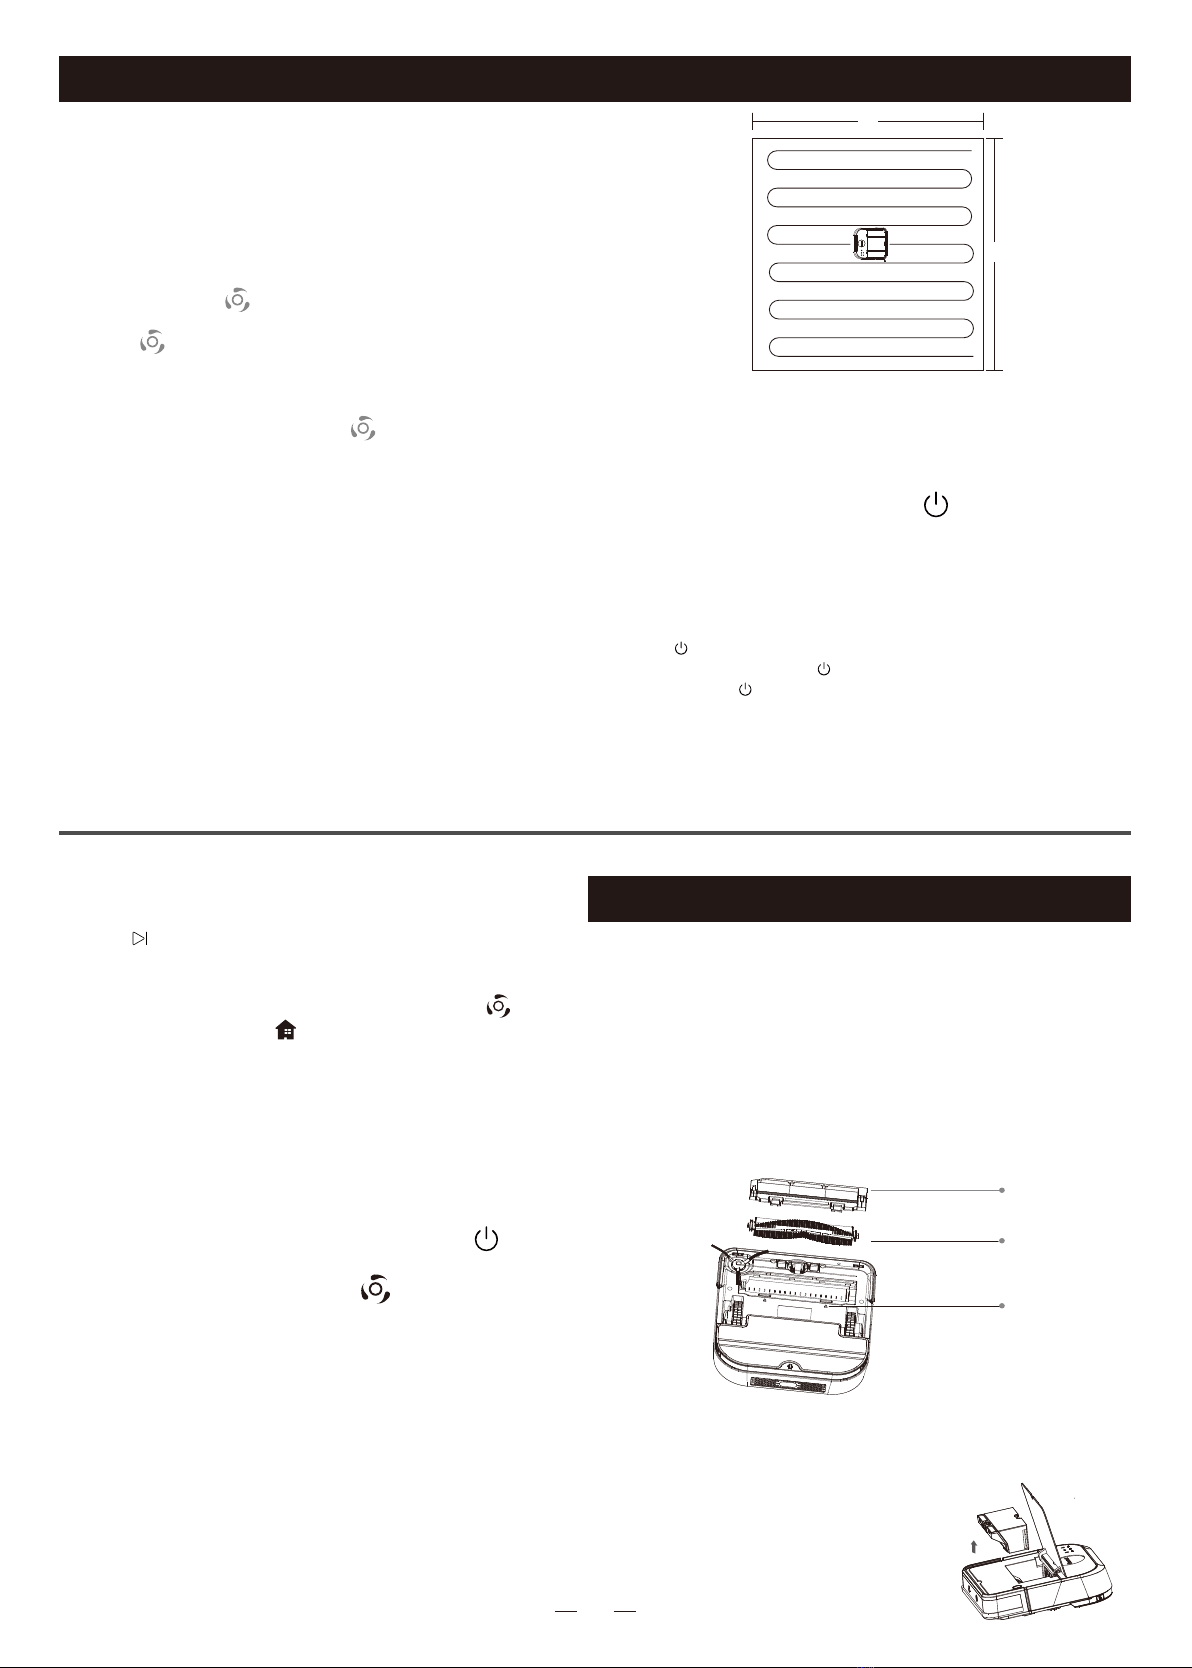
Robot starts by scanning the house, generating
maps, and intelligently dividing the house into
different sections. In each section, the robot will
firstly clean in a zigzag pattern,and then clean
along the wall. The robot completes the cleaning
of each section in an efficient and orderly way.
After cleaning, The device will automatically return
to its base to get charged.
4.Sleep
In order to save power, you can turn the robot into
sleep mode from standby mode.
a.Press on the remote control to make robot enter or exit sleep mode.
b.You can also press and hold on the robot surface to make robot enter sleep
mode, and press on the robot surface to make robot exit sleep mode.
c.Robot will automatically enter sleep mode if no command is received for more
than 5 minutes.
d.The robot will not automatically enter sleep mode while being charged by
charging base.
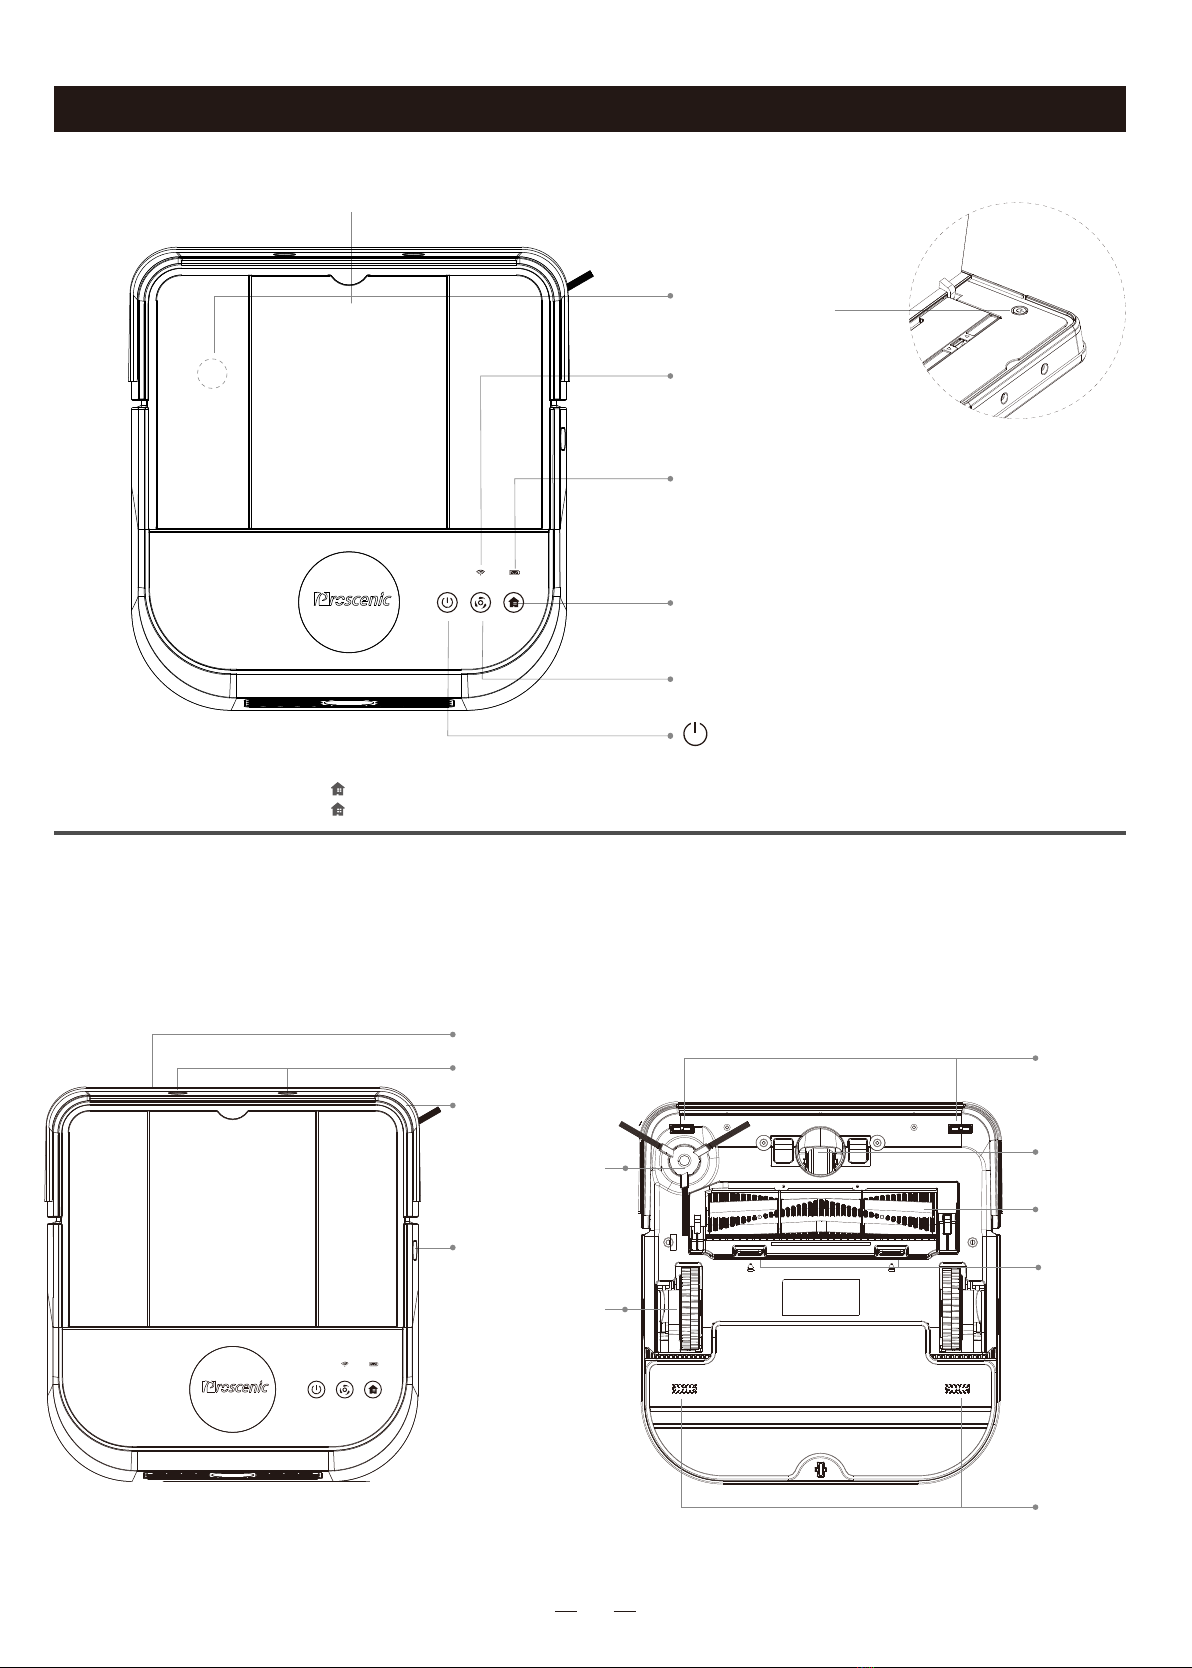
1.Power on/off
Press the power switch to power on/off the robot.
(The power button is under the robot cover.)
2.Start auto cleaning
a.Make sure the power switch is on.(The power button is under the robot
cover.)
b.In standby mode, press on the robot or remote control to start cleaning.
c.In sleep mode, you have to switch the sleep mode into standby mode firstly,
then press to start auto cleaning.
3.Standby
Standby means robot has its power switch on,
waiting for the user's operation. It can be changed
to standby mode by one of the following methods:
During robot cleaning, press on the robot surface
or the remote control to enter standby mode.
Main Brush
·See troubleshooting for solutions,in Page 10.
No operation after 5 minutes in failure state,the robot will automati-
cally enter sleep mode.
5.Pause
6.Failure State
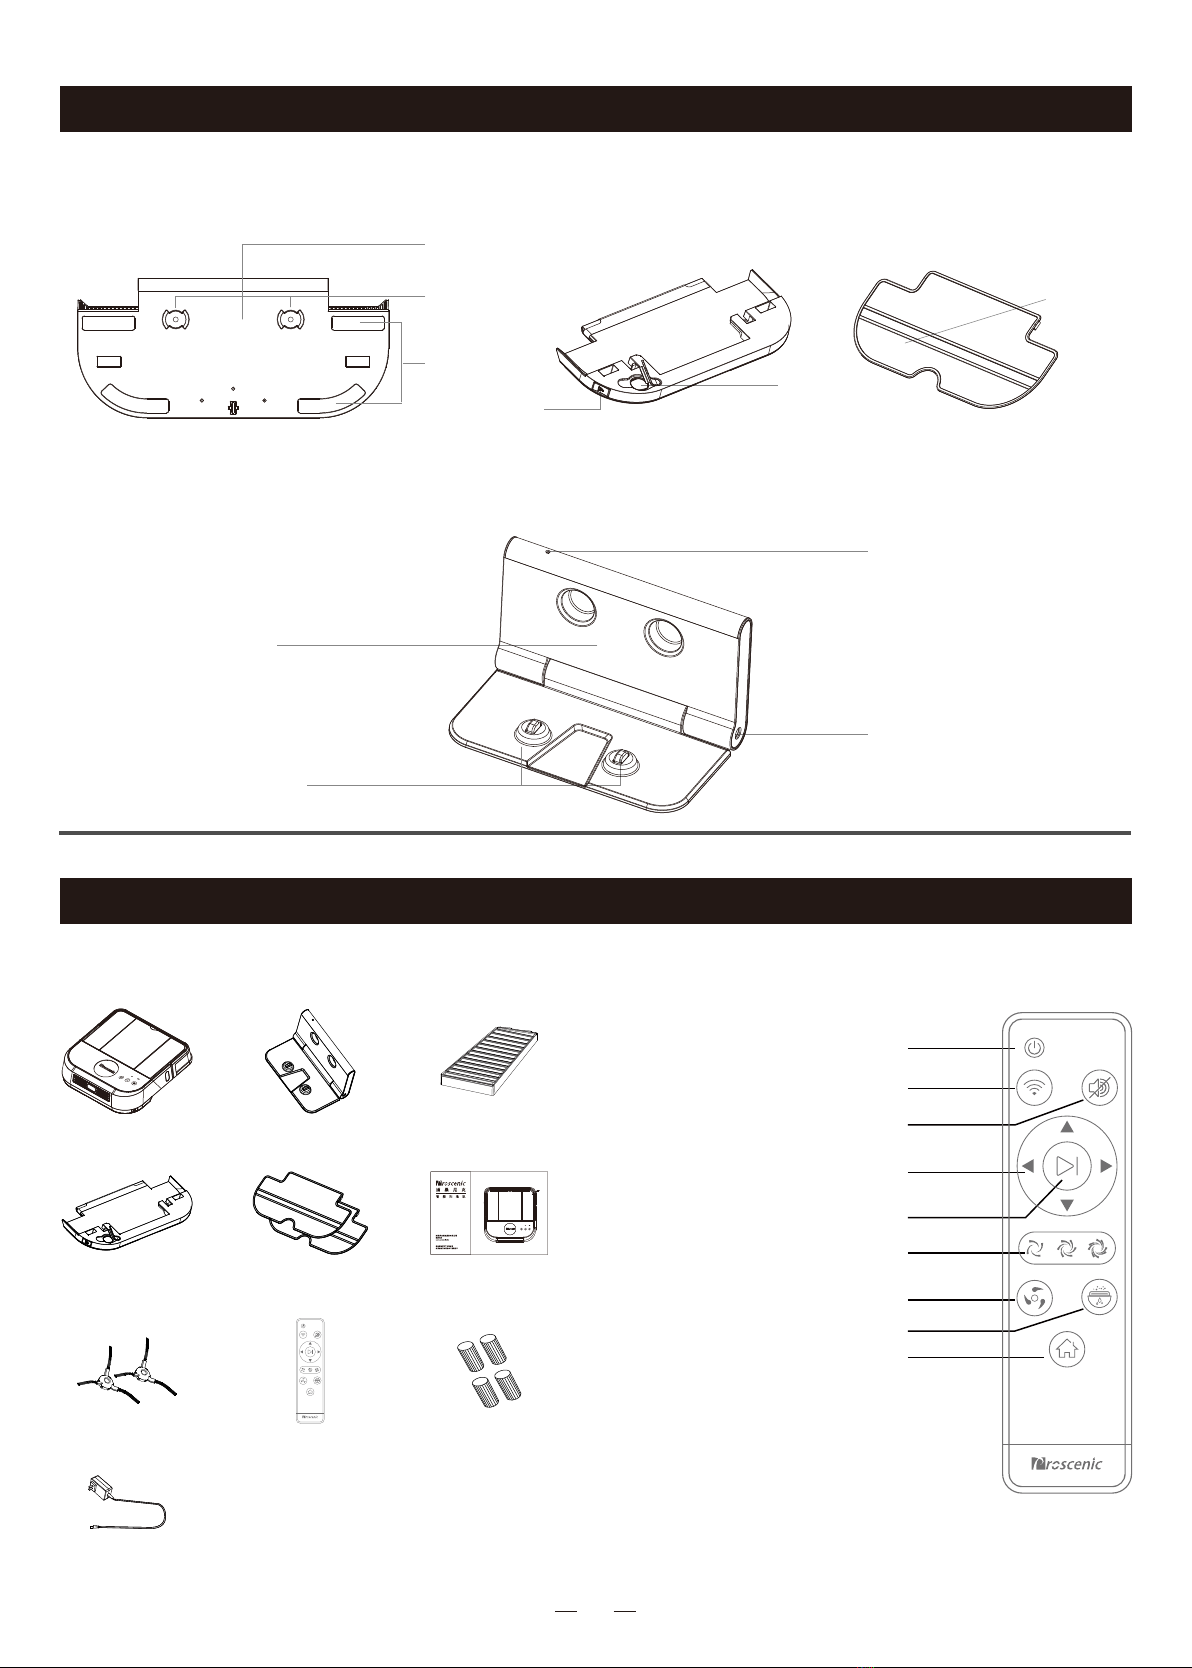
When the robot has an error, Clean Button " "
or Recharge Button " " blinks, and you will
also hear a voice prompt.
8.Vacuum Suction Strength
Choose quiet, standard, or strong mode by app
or remote control. The default is standard mode.
7.Disassemble the water tank in the middle
of cleaning.
If you want to add water in the middle of clea-
ning, please stop the robot by pressing
of the robot.After adding water and reassemble
the water tank,please press to continue
cleaning.
9.DND mode(Do-not-disturb mode)
During the DND period, the robot does not aut-
omatically resume work and actively play the vo-
ice. DND mode is enabled by default in the fact-
ory, and its opening time is 22:00-07:00.Please
disable DND mode by app.
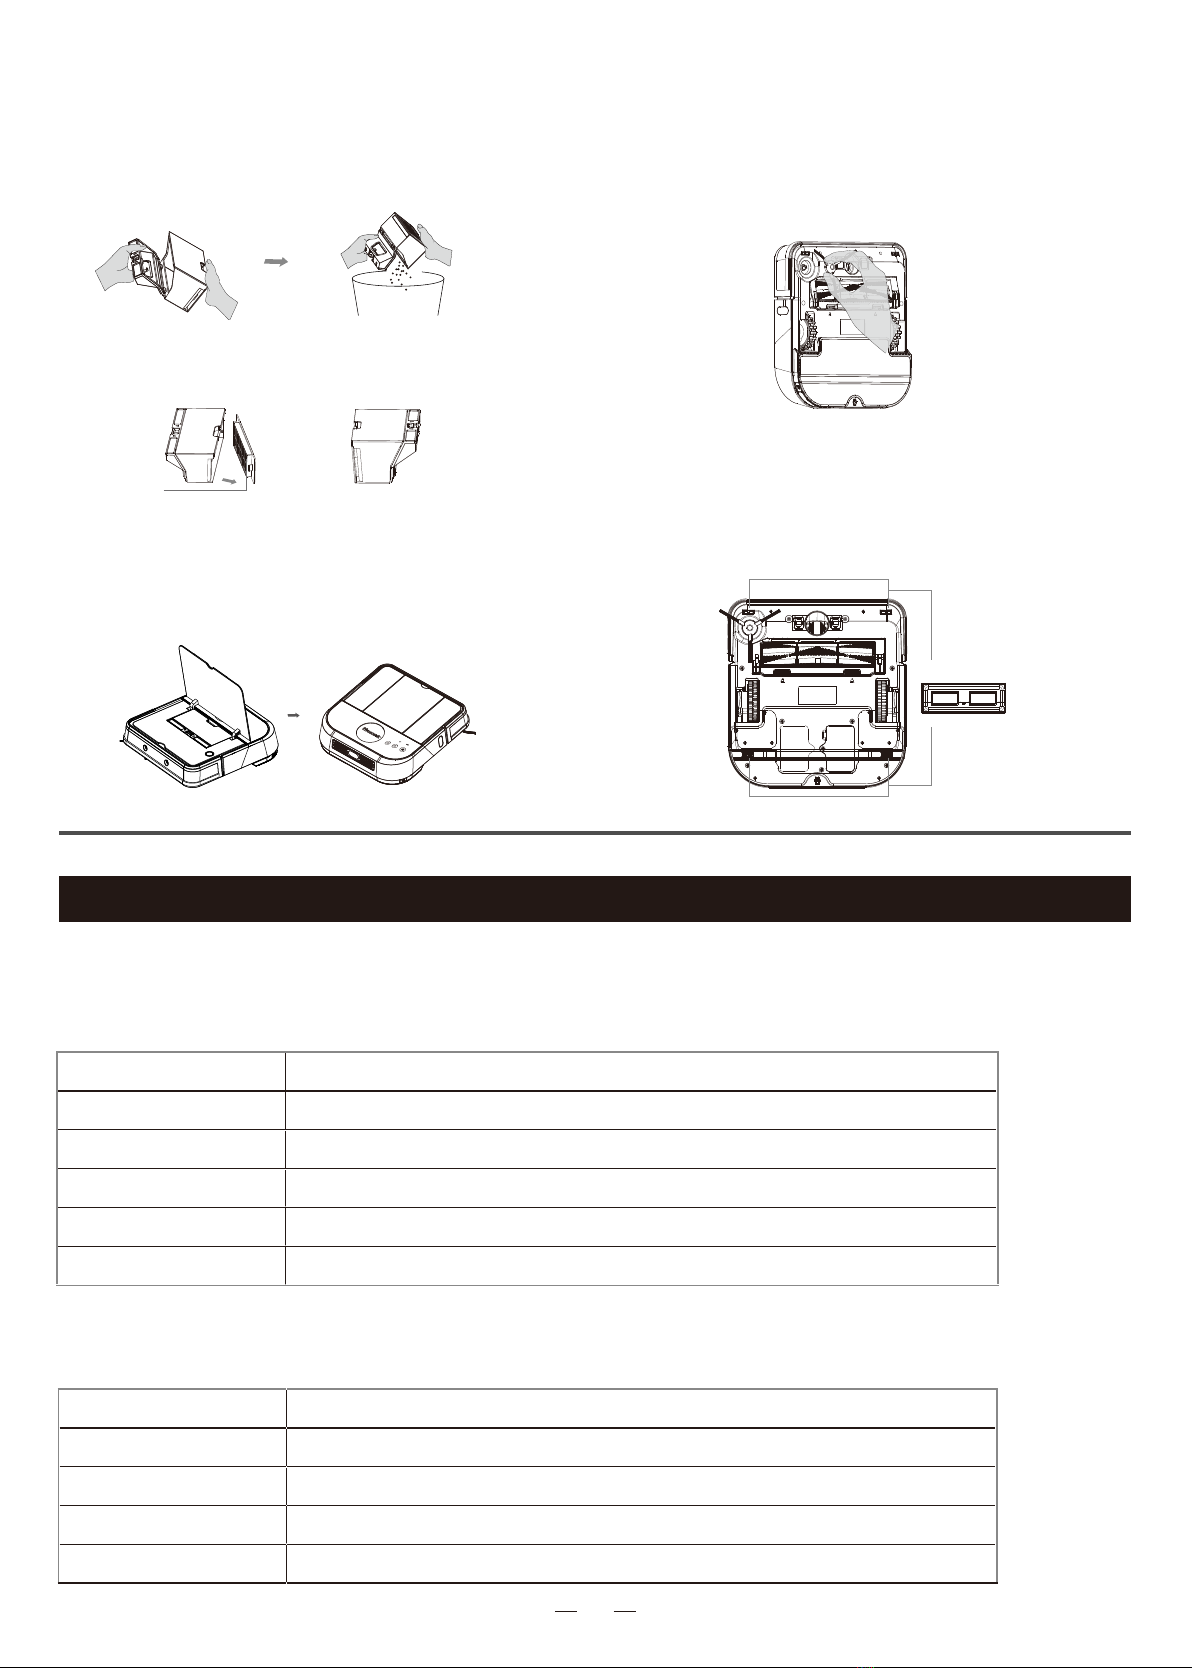
Clean Dust Bin and Filter
Take out and disassemble the roller brush kit
as shown in figure below, and clean it with soft
cleaning cloth or tool. (The roller brush axle is
washable.)
Note:Recommended to change the main brush per 6-12 months to
ensure the cleaning effect.
1. Open the robot cover
and take out the dust bin.
Brush Cover
Main Brush
Buckles
Press to pause the robot from cleaning.
Product Operation
Product Maintenance