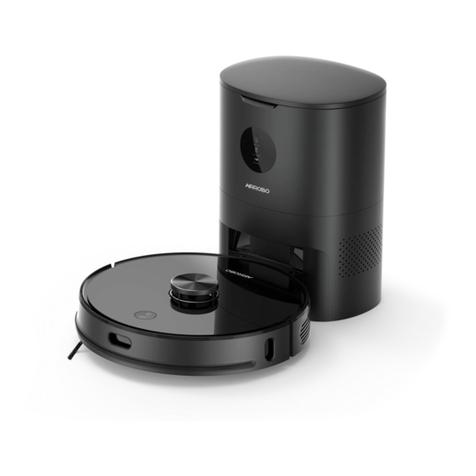
Proscenic M8 PRO User manual

M8 PRO
Instruction manual
Uživatelský manuál
Užívateľský manuál
Használati utasítás
Bedienungsanleitung
Proscenic Technology Co., Ltd.
Service support
Web:www.proscenic.com
E-mail:support@proscenic.com
V9.3.1


Introduction
Dear customer,
Thank you for purchasing our product. Please read the following instructions carefully before first use and keep this user manual for future
reference. Pay particular attention to the safety instructions. If you have any questions or comments about the device, please contact the
customer line.
www.alza.co.uk/kontakt
+44 (0)203 514 4411
Importer: Alza.cz a.s., Jankovcova 1522/53, Holešovice, 170 00 Praha 7, www.alza.cz
EN

Product descriptions
Robot
Laser ranging sensor
Speaker Button
Infrared recharge/anti-collision sensor
Anti-collision sensor
Dust box release button
Dust collection port
Time-of-fl ight (ToF) sensor / infrared
auxiliary recharge sensor
Laser head cover pressure sensor
Infrared auxiliary recharge sensor
Air outlet 2-in-1 Dust bin & water tank
Charging/dust collecting pole piece

• Press and hold the“ "button for 5 seconds during the
power-on process
Robot
Start/Stop Button
Recharge button
Network Confi guration
Force-shutdown button
Dust collector pairing mode
•Long press to turn on / off
• Short press to start / pause cleaning
• Short press to start/pause recharging
• Solid blue light: Working normally/pause/standby
•Flashing blue light: Is powering on/confi guring network/
upgrading fi rmware
• Flashing yellow light: Low battery/recharging
• Flashing green light: Charging
• Solid green light: Fully charged
•Quick fl ashing red light: Abnormal/Error
•Light off : Off /sleep
• While the power is on, press and hold the and keys
simultaneously for 5 seconds
•Short press to turn off

Host and sensor
Universal wheel
Cliff sensor
Charging pole piece
Right drive wheel
Rolling-brush cover
Side brush
Left drive wheel
Rolling-Brush

2-in-1 Dust bin & water tank
Dust box release button
Dust bin buckle
Dust box
Filter mesh bracket
Primary fi lter
Filter sponge
HEPA fi lter
Dust box fl ip
Dust collection port
Paste area
Mop cloth
Dust collection port
Release button
Water inlet
Dust bin buckle
Mop cloth holder
Buckle
Charging/dust collecting pole piece

Dust collector unit
Paste area
Dust bag handle
Fan fi lter
Mop cloth
Flip cover sealing ring
Dust collection port
Release button
Power interface
Infrared lens
Charging/Dust collection clips
Dust collector port
Water inlet
Air outlet
Display panel
Dust bin buckle
Dust collection duct cover
Flip cover
Buckle
Dust bag

Dust collector unit
Start/Stop Button
Home button
Fan indicator
Charging indicator
Dust bag indicator
• Short press: Start auto cleaning / pause cleaning
• Press and hold for 3s: Start spot cleaning
• Short press: Return to collect dust and charge
•Press and hold for 3 seconds: Return to collect dust and then
continue to clean from the place where it left off last time
• Solid green light: Collecting dust
•Red light fl ashes quickly: Fan overheating / fan error / The dust
collector is not covered
•Green light breathing and fl ashing: Charging
• Solid green light: Fully charged / Powered on
• Solid green light: The dust bag is full / the dust duct is blocked
•Red light flashes quickly: The dust bag is not installed / not
installed in place

Installation Notes
Install dust collector
1. The dust collector should be placed on fl at ground more than 6cm away from the wall.
2. Ensure there is a space of more than 1.2m at the front, and more than 0.5m on both sides of the dust collector.
The dust collector unit is designed to collect dust and charge the robot cleaner. When the cleaning is completed, the robot
vacuum automatically returns to the dust collector, which collects all the dirt and dust and recharges the robot vacuum
automatically.
A new bag is required to install in the dust collector once it is fi lled with dust and dirt.
About your Dust Collector
6cm from the wall

1. Press and hold the both buttons and on the dust collector simultaneously for 5 seconds: The dust collector enter the pairing mode, the three indicators of
the dust collector fl ash green.
2. Press and hold the button for 5 seconds on the robot: The robot enter pairing mode, the indicators of the robot fl ash green.
3. Place the robot at the dust collector to charge, and the voice prompts that the pairing is successful.
Instructions for use
Instructions for robot
Instructions for dust collector
Pairing of dust collector and robot (Paired in default factory settings)
Power on / off
Start/Stop Button Home button
Start / pause Sleep
Charging
Short press: Start auto cleaning / pause cleaning
Press and hold for 3s: Start spot cleaning
Under the power on state, short press the “ ” button to start the whole house
cleaning.
Press any key to pause while cleaning.
Note: It is recommended to let the sweeping robot start cleaning from the dust
collector.
When the battery is too low, the cleaning will not start.
Please charge and then start cleaning.
When the power is insufficient during the cleaning process, the robot will
automatically return to the dust collector unit for charging.
After the battery is fully charged, it will automatically return to the interrupted
location to continue cleaning.
If there is no operation for more than 20 minutes, the robot will automatically
enter the sleeping mode.
Note:
The machine will not enter the sleeping mode when charging.
It will automatically shut down after the power runs out while sleeping.
Short press: Return to collect dust and charge
Press and hold for 3 seconds: Return to collect dust and then continue to clean
from the place where it left off last time
Press and hold the “ ” button to power on, and the robot enters the standby
mode. After booting, press and hold the “ ” button to shut down.
Note: When the machine is charging on the dust collector, it will automatically
turn on, and it cannot be turned off during charging.
Automatic recharging: The robot will automatically return to the dust collector
unit to charge after the cleaning is completed or when the battery is low. Manual
charging: Press the “ ” button to start recharging. after the machine is
powered off , you can manually put the machine back to the dust collector unit to
charge.
Note: Please make sure the charging pole piece is in good condition.

Connect to the mobile client
② Scan the QR code below, or search for “Proscenic”
in the mobile app store to download the app, register
and login to the account.
① The phone is connected to WiFi.
④ Press and hold the “ ” and “ ” keys for 5 seconds to
enter the network configuration.
⑤ Select the connected WiFi of the phone
and enter the WiFi password.
⑦ Return to the APP and wait for the distribution
network to complete.
⑥ Go to the mobile phone WLAN list and select and connect
the “Proscenic-XXXX" device hotspot.
③ Choose the sweeping robot “M8 PRO’’
on the home page to add a device.
Add device
Add device
Set up
Select WiFi...
Configure network
WLAN
WLAN
Proscenic-XXXX
Proscenic-XXXX
XXXXXXXX
XXXXXXXX
Set up
Select WiFi...
WLAN
WLAN
XXXXXXXX
XXXXXXXX
Password
Password

Remote control
Recharge button
Arrow key
Start/Pause button
Mute button
Max button
Less than or equal to 3-6 meters
Note:
1. To ensure the eff ectiveness of the remote control, it is
recommended to point it towards the front part of the machine.
2. The available distance of the remote control is 3-6 meters.
Mopping mode
Spot cleaning
Gear (+)
Gear (-)

Install the 2-in-1 Dust bin & water tank
① Place the mop pad onto the mop attachment and secure it to
the Velcro strips. Slip corners of the mop pad over the plastic
tabs at the rear of the mop attachment.
② Slide the mop attachment into the dustbin as shown in the
fi gure below until you hear a click confi rming that it is locked in
place.
⑤ Install the dustbin with the mop attachment
still installed into the machine according to the
fi gure below.
④ Open the water fi ll cap on the dustbin and
fi ll with water,close the cap.
Please Note:
1. To avoid carpet while mopping, set up virtual boundaries on the Proscenic APP.
2. To avoid leakage, install the mop attachment on the dustbin before fi lling with water.
3. Make sure to empty any leftover water from the tank after mopping.
③ Remove the dustbin from the machine with
the mop attachment still installed.

Routine maintenance
2-in-1 Dust bin & water tank (recommended weekly)
① Press the dust box release button and take out the dust box.
③ Take out the primary fi lter, sponge and HEPA fi lter, clean the
garbage on the surface with a cleaning brush, rinse the fi lter and
dust box with water and then dry.
② Open the dust box and dump the garbage in the dust box.
④ Tear off the mop cloth, rinse with water and dry in the sun.

⑤ Pour out the remaining water in the water tank and dry the
water tank. 1. Flip the main unit and pull out the universal wheel upwards.
2. Clean the hair and dust on the wheel, axle and support.
3. Reinstall the universal wheel and press it tight.
Note: Wash with water, dry it and put it back.
⑥ After the fi lter, dust box, mop cloth and water tank are all
dried, put them back together for next use.
Universal wheel
(recommended to be cleaned monthly)
Wheel body
Axle
Support

Install the 2-in-1 Dust bin & water tank
① Place the mop pad onto the mop attachment and secure it to
the Velcro strips. Slip corners of the mop pad over the plastic
tabs at the rear of the mop attachment.
② Slide the mop attachment into the dustbin as shown in the
fi gure below until you hear a click confi rming that it is locked in
place.
⑤ Install the dustbin with the mop attachment
still installed into the machine according to the
fi gure below.
④ Open the water fi ll cap on the dustbin and
fi ll with water,close the cap.
Please Note:
1. To avoid carpet while mopping, set up virtual boundaries on the Proscenic APP.
2. To avoid leakage, install the mop attachment on the dustbin before fi lling with water.
3. Make sure to empty any leftover water from the tank after mopping.
③ Remove the dustbin from the machine with
the mop attachment still installed.

Rolling brush (recommended to be cleaned weekly)
① Turn the main unit, press the left and right buckles, and remove the rolling-brush cover.
② Remove the rolling brush upwards and clean the entangled hair and rubbish with a cleaning brush.
③ Replace the rolling brush and insert the three legs of the rolling-brush cover into the slot, press down and fi x the buckle.
Note: Depending on the usage, it is recommended to replace the roller brush every 6-12 months to ensure the cleaning eff ect.
Rolling-brush cover
Rolling brush

Side brush (recommended weekly cleaning)
① Use a screwdriver to unscrew the side brush screw and remove the side brushe.
② After cleaning the wrap hair and rubbish on the side brush, replace the side brush.
Note: Depending on the application, it is recommended to replace the side brush for 3-6 months to ensure the cleaning eff ect.

Wipe the sensor on the main unit with a soft, dry cloth, including:
① 4 cliff sensors at the bottom of the main unit
② Wall sensor on the right side of the host
③ Infrared auxiliary recharge sensor
④ Charging pole piece on the back of the robot
The main unit and sensor (recommended to be cleaned monthly)
Infrared auxiliary
recharge sensor
Time-of-Flight (TOF) sensor
/ infrared auxiliary recharge sensor
Cliff sensor
Charging/
dust
collecting
pole piece
Other manuals for M8 PRO
2
Table of contents
Languages:
Other Proscenic Vacuum Cleaner manuals
Proscenic
Proscenic 790T User manual
Proscenic
Proscenic BL828 User manual
Proscenic
Proscenic RobbyPro User manual

Proscenic
Proscenic Wash Vac F20 User manual
Proscenic
Proscenic M8 PRO User manual
Proscenic
Proscenic P8 User manual
Proscenic
Proscenic CocoSmart 880L User manual

Proscenic
Proscenic M8 PRO User manual
Proscenic
Proscenic 850T User manual

Proscenic
Proscenic M8 User manual
