Proscenic BL828 User manual

Please keep this user manual in your sight, read it thoroughly and carefully
before using this product.
User Manual
BL828 APPLICABLE TO 790T

Contents
1
Safety Instructions -------------------------------------------------2-7
Product Features ----------------------------------------------------8-9
Humanized Designs-----------------------------------------------------8
Washable Dust bin -----------------------------------------------------8
Automatic Navigation -------------------------------------------------9
Product Components ---------------------------------------------10-14
Main Body and Accessories -------------------------------------------10
Main Body Diagram ---------------------------------------------------11
Dust Bin and Roller Brush Kit -----------------------------------------12
Docking Station and Remote Control ----------------------------------13
Display Panel ----------------------------------------------------------14
Product Operation -----------------------------------------------15-20
Battery Charging ------------------------------------------------------15
Power on/Standby/Sleep Mode ---------------------------------------16
Scheduling --------------------------------------------------------16-18
Cleaning Modes----------------------------------------------------18-19
Dual Modes Switching(Vacuuming and Sweeping)--------------------20
Water Tank Installation------------------------------------------------20
Product Maintenance---------------------------------------------21-22
Cleaning Side Brushes--------------------------------------------------21
Cleaning Dust Bin and Filters-------------------------------------------21
Cleaning Sensors and Wheels ------------------------------------------22
Cleaning Charging Poles -----------------------------------------------22
Cleaning Suction Passage and Dust Sensor----------------------------22
Cleaning Roller Brush Kit --------------------------------------------23
Product Specifications-----------------------------------------------24
Battery Replacement-------------------------------------------------24
Trouble Shooting-----------------------------------------------------25
--------------- -------------------------------------26
Mobile APP Quick Start
2
Before using this product, please read the safety instructions and follow all regular
safety precautions. Warranty service is not applicable to any damage caused by
violation of instructions.
sweeping robot is a sophisticated product which is
restricted for indoor cleaning only. DO NOT use the robot for non-cleaning purpose.
Please refer to user manual.
Safety Instructions
Warning Sign
*3. Possible Property Damage:Damage to furniture, valuable objects and injuries
to pets.
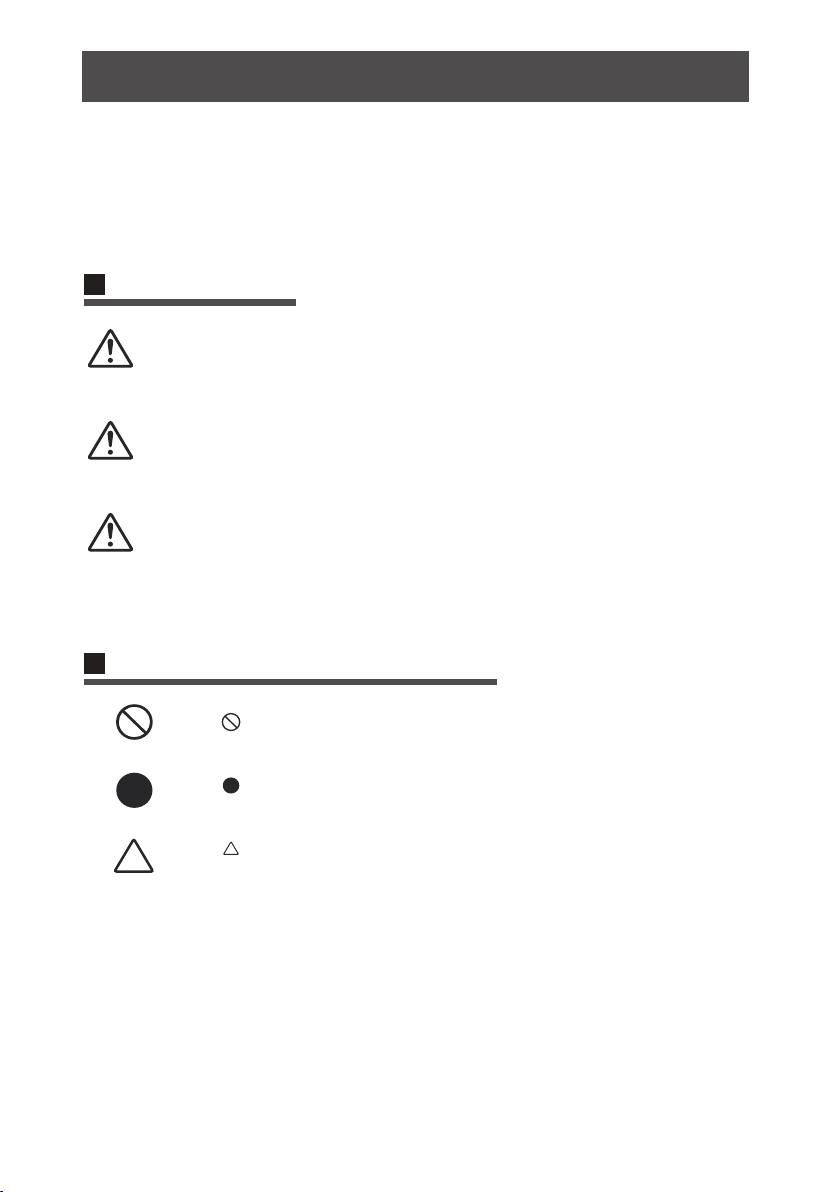
Graphic and Sign explanation
It indicates prohibited behavior. Detailed content refer to the
sign or the explanation of the sign.
It indicates enforcement behavior. Detailed content referto the
sign or the explanation of the sign.
It indicates attention (including warning) content. Detailed
content refer to the sign or the explanation of the sign.
Danger
It indicates that any violations of instruction or improper
operation are probably to cause casualties or
severe injuries,
Caution
It indicates that any violations of instruction or improper
operation are probably to cause casualties or severe
injuries
It indicates that any violations of instruction or improper
operation are probably to cause injuries to people and
damage to property.
Notice
*1. Possible Severe injuries: Blindness, Burns, Electricity Injury, Fracture, Poisoning
and other severe injuries that leave sequela and lead to longterm hospitalization.
*2. Possible Injuries: Burns, and electricity wound that does not require hospitaliza
-tion.
Proscenic

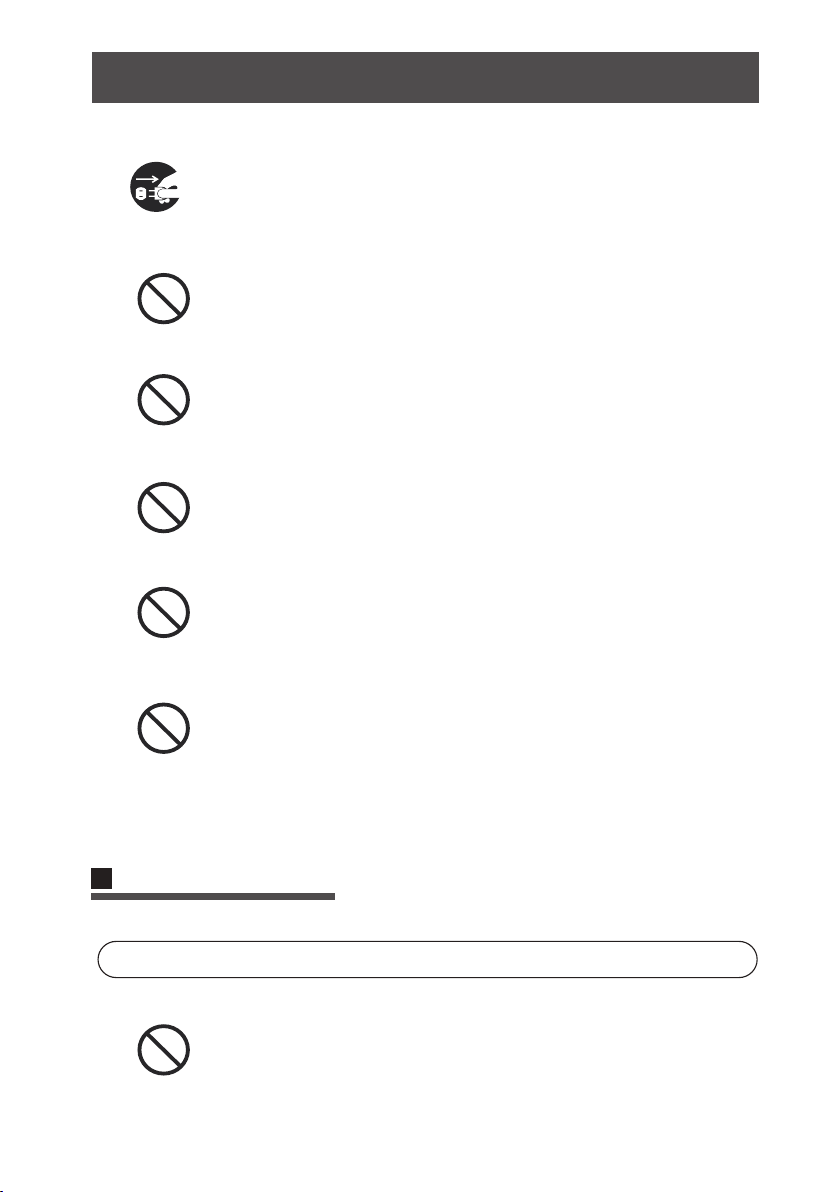
Only authorized technicians can disassemble the product.
Users are not allowed to disassemble, repair or modify the
product. Otherwise it may possibly cause electric shock,
malfunction and leading to injuries.
Prohibit dismantling battery case
Dismantling battery case may cause damage or leakage of
battery that leads to fire or explosion.
Prohibit using metal or other conducting substance to con
-nect battery postive and negative ends. It will lead to short
circuit and cause explosion.
When there are dust accumulations on the metal terminals
of the power plug and surrounding, be sure to clean the
dust with dry cloth.Otherwise it may lead to electric shock,
over temperature or fire.
Do not use power adapter with AC inverter.
Otherwise it may lead to over heated, malfunction or fire.
Safety Instructions of Product, Charging dock,
power adapter and other accessories.
Warning
No Disassembling
Prohibited
Prohibited
Prohibited
Clean Dirt
Alternating
Current
The adapter must use an alternating voltage from 100-240
Vac. Please plug in the socket correctly and avoid children's
touch.
Only use the original power adapter. It may cause
danger.
Prohibited
Do not destroy or modify power cord. And do not
over-bend,heat, and over-pull or press the inflexible
cord with heavy objects..Otherwise it will cause
damage to cord and lead to fire or electric shock
Prohibited
Safety Instructions
3

Safety Instructions
Never use the product under environment with volatile
substance to avoid possibility of fire and danger.
This product is a sophisticated machine for indoor use
only.
Do not use this product under flammable or combustible
environment.Use this product under propane gas, gasoline
and other flammable gas, dust environment; it will lead to
explosion or fire.
Do not wash and do not leave this product in wet or mois
-ture environment.
Do not wash main body, charging device and virtual wall.
Washing or soaking will cause internal short circuit.
Do not sit on top of this product.
Do not allow adults, children or animals to sit on this product
to avoid damage to the product or falling down.
Prohibited
Only use the
product indoors.
Prohibited
DO NOT leave the product to children without supervision.
Otherwise it may cause injury.
Prohibited
Prohibited
Prohibited
To avoid stumbling, all people in the house should be notic
-ed when this product is on. Do not touch the wheels or roll
-er brush while product in operation to avoid being stumbl
-ed by the machine, especially children.
Do not touch.
Do not touch the power cord, plug or adapter with wet hands.
Otherwise, it may cause electric shock.
Do not touch.
Notice
4
Turn off the power switch when you don't need to use this
product for a long time. Battery leakage may cause fire, injury
or pollution to enviroment. Cut off power source when using
power adapter and disconnect the plug from socket. Other
-wise, it may cause fire.
Do not have the product covered or wrapped while using.
This product is for indoor use only,Do not use this product to
clean bathroom, warehouse, factory and bed etc.
Turn off the power
Prohibited
Prohibited
Prohibited
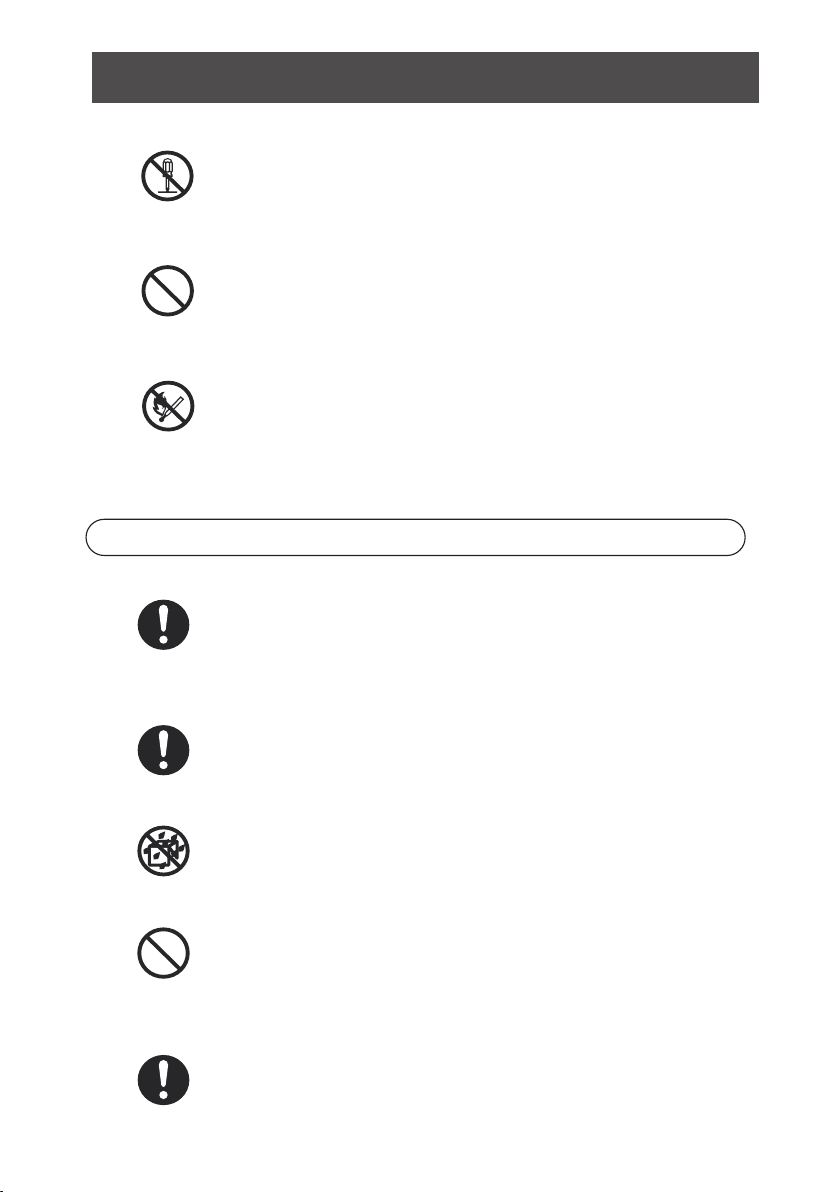
Air Outlet
Put screwdriver or other sharp objects into air outlet will
damage this product.
Prohibited
Do not wash this product.
Only dust bin, filters are washable.
Do not wash other parts of this product. Put dust bin, filers
back to main body when dry up.Do not expose the product
under the sun.
Prohibited
Charging Notice
Danger
Prohibited
Use dedicated battery and charging base only.
Use other batteries or docking station will cause leak
-age, overheating and explosion.
Safety Instructions
5
Safety Instructions
The battery mush be insulated with tapes when recycling or
disposal.Contact with other metal will lead to heating, burst
or fire. Bring the used battery to technical service center or
recycler with authorizd reseller for disposal. Or dispose the
battery according to local laws.
No Disassembling
Unplug when not using the product to avoid short circuit.
Do not dissemble the battery, otherwise, it will cause
leakage, overheating and explosion.
Prohibited
Do not keep necklace, hairpin and other metal materials
together with this product during transportation.
Prohibited
Do not throw the battery into fire or heat the battery.
Attention
Prohibited
When there is overheating during charging, stop using this
product immediately.
To extend battery's life, take out the battery and put it in
cool and dry place when not using it,
Do not immerse or wash this product
Do not use this product when there is signs of unusual (chan
-ge of color or shape).
6

We have made our best efforts to make sure the precision and completeness of this
user manual. Any mistakes or omission are found, we sincerely thank you for giving
us feedback through
Warning
Do not keep necklace, hairpin and other metal materials
together with this product during transportation.
Prohibited
Do not put the battery back to main body or charge it when
deformation, swelling and electrolyte leakage are found
from battery case.
Prohibited
Do not charge this battery on other devices
This chargeable battery is designed for this smart robot only.
Prohibited
Prohibited
Wash off the battery leakage immediately with clean water
when there is contact with skin or clothes.No measures taken
will lead to skin inflammation.Do not crash or throw the
battery.
Safety Instructions
7
It's not allowed to copy, publish or record this user manual and related material in
any searchable media or translate to any other languages without our written
authorization.

Product Features
This is an outstanding and extraordinary automatic cleaning robot which is
well equipped with not only cleaning function, double side brushes, strong
vacuuming suction, but also with interchangeable roller brush kit and vacu
-um suction kit
This product is able to automatically adjust its suction power when different
floor environments are detected. This ability not only makes cleaning more
efficient, but also helps to save more power (up to 30%)
User Friendly Design
Operation is simple and easy.
Start the robot by touch button.
Dust bin and filters can be washed
by water. Simply wash dust bin under
water after use to avoid dust blowing
in the air to cause a second pollution !
Washable Dust bin
Intelligent Suction Adjustment
8

Automatic Maps Navigation
4. The robot will return to docking station automatically after cleaning if
docking station is power on. If no docking station is detected , the robot
will return to the Start Point after cleaning.
docking station
Start Point
1. Before use, place the robot flat on floor.
2. Turn on power switch, next, touch“Clean” button on main body or the
“ON/OFF” button on remote. The display panel shows a countdown from
“5, 4, 3, 2, 1” with voice prompt “System rebuilding, please wait”
3. After countdown, background lights of buttons on main body are all on.
/Touch ”clean ” button on main body or “ON/OFF” button on remote
one more time to let the robot start cleaning.
Product Features
9
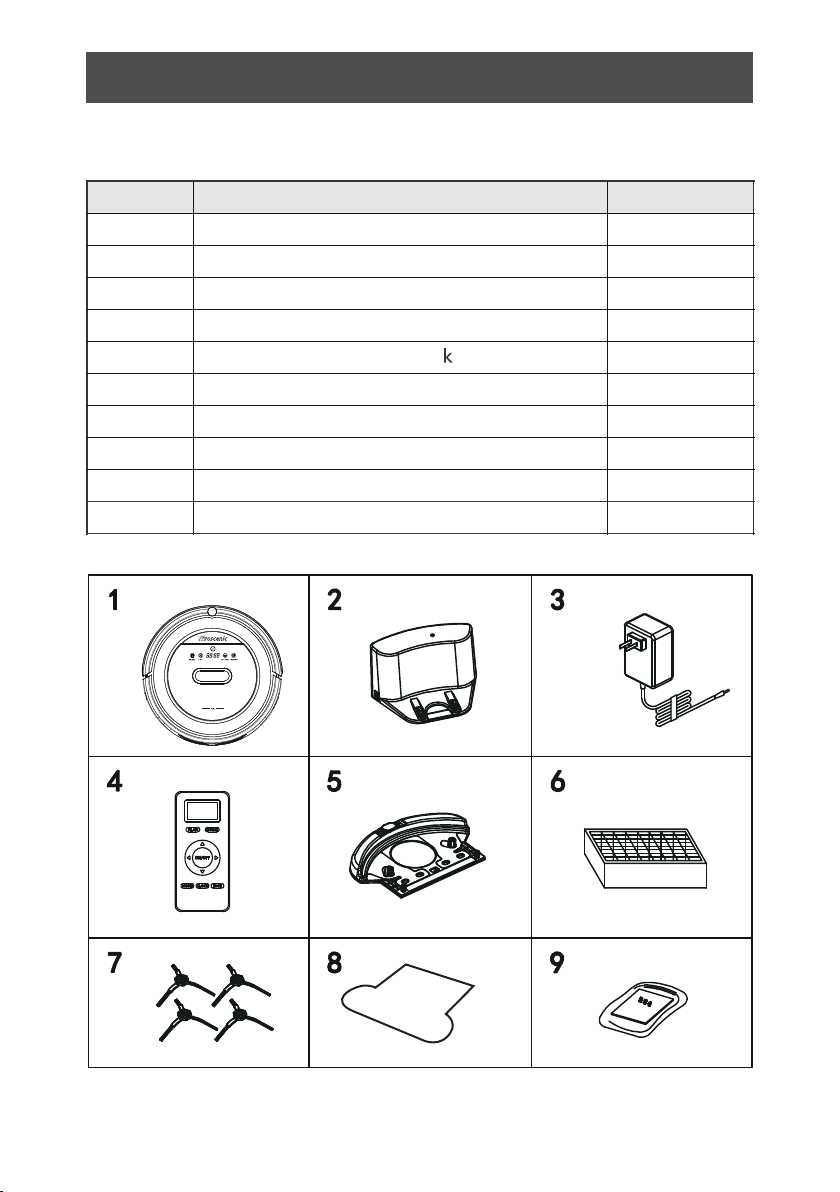
NO.
1
2
3
4
5
6
7
8
Description Quantity
Main Body
Adapter
HEPA Filter
Side Brush
Water Tan
Docking Station
1
1
1
1
1
1
4
Remote Control (battery not included)
9
10
User Manual
2
1
Main Body and Accessories
Product Components
10
PLA N HOME
ON/O FF
MODE CLO CK E DGE
Mopping cloth
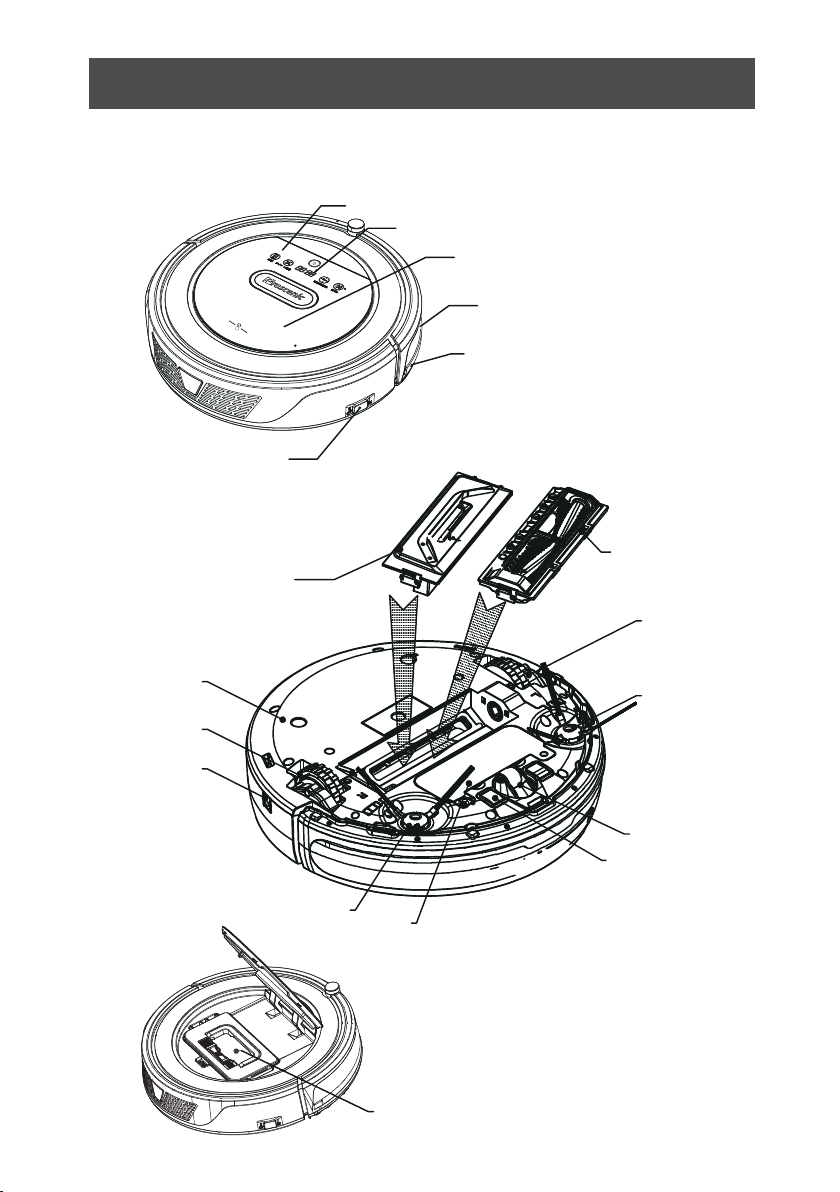
Main Body Diagram
Bumper
Bumper Strip
Power Switch
Suction Component
Roller Brush
Component
Touch Key
LED Display
Cover
Left wheel
Left Side
Brush
Front Wheel
Auto Charging
Pole
Battery Cover
Right Side Brush
Charging
Socket
Right Wheel
Bottom Cover
Dust Bin
Product Components
11
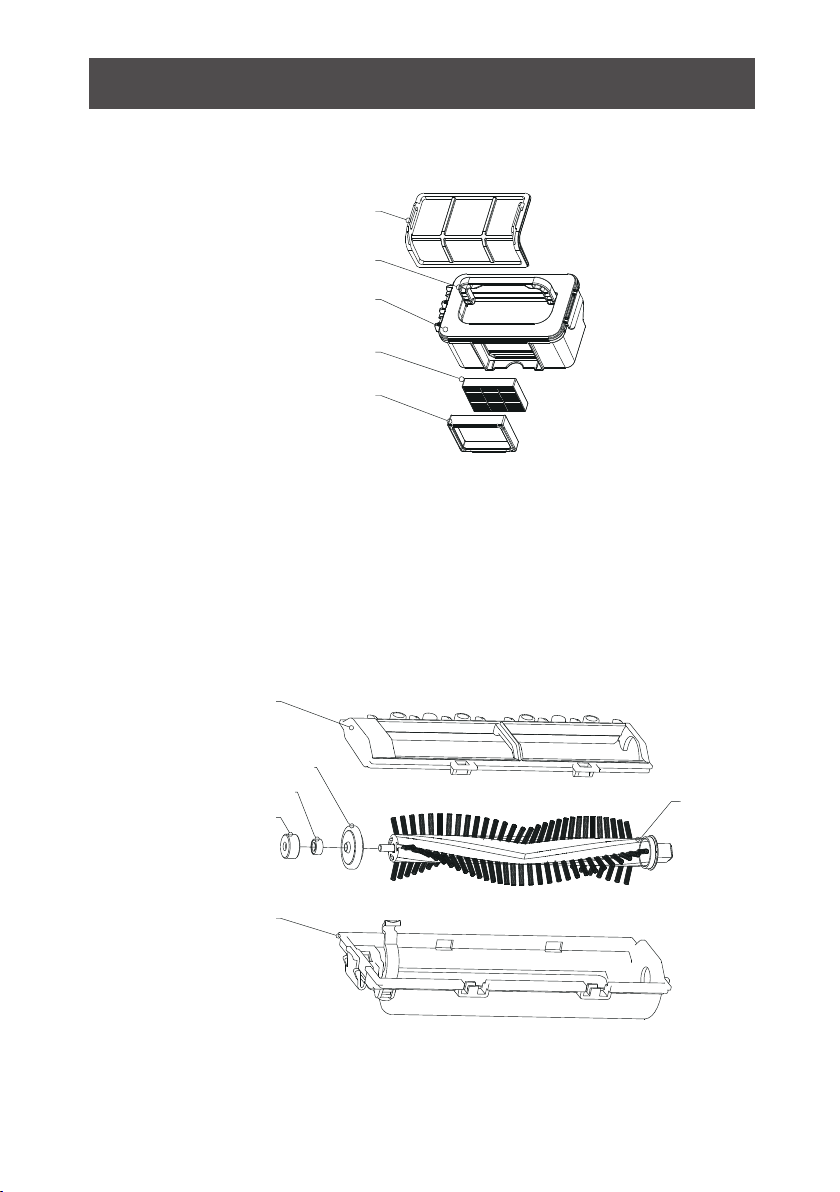
Product Components
Dust Bin Kit
Roller Brush Kit
Primary filter
Handle
Dust bin
HEPA filter
HEPA filter shelf
Roller brush coverplate
Roller brush bushing
Ball bearing
Bearing gluesheath
Roller brush holder
Roller brush
12
Product Components
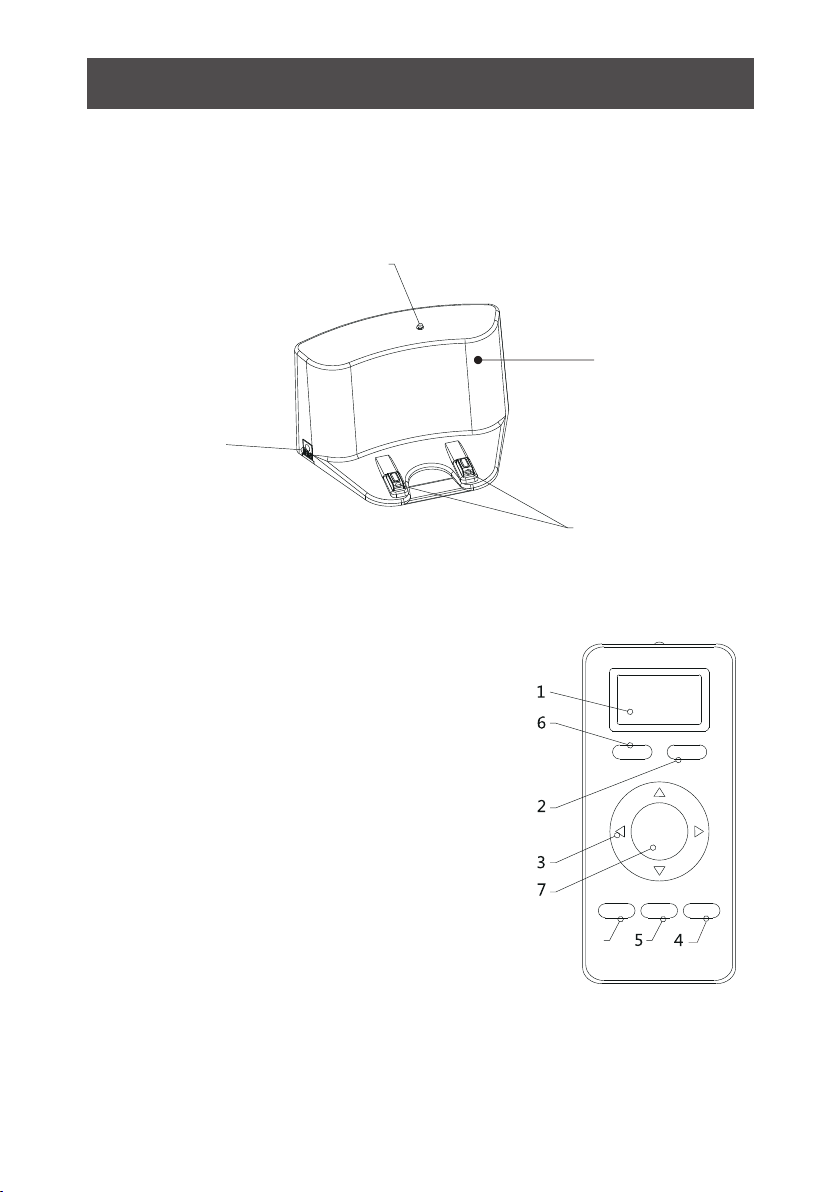
Docking Station
Charging Socket
1. Display Screen
2. Auto Charging
3. Direction Button
(Only Effective in Standby Mode)
4. Edge Cleaning
(Only Effective in Standby Mode)
5. Clock Setting
6. Schedule Setting
7. ON/OF
8. Area Cleaning
(Only Effective in Standby Mode)
Power Indicator
Top Cover
Charging Poles
Install two AAA type batteries into the remote control before use, Remove
the batteries if the remote control will be left unused for a long period.
Note:
8
Remote
13
PLAN HOME
ON/OFF
MODE CLOCK EDGE
Product Components
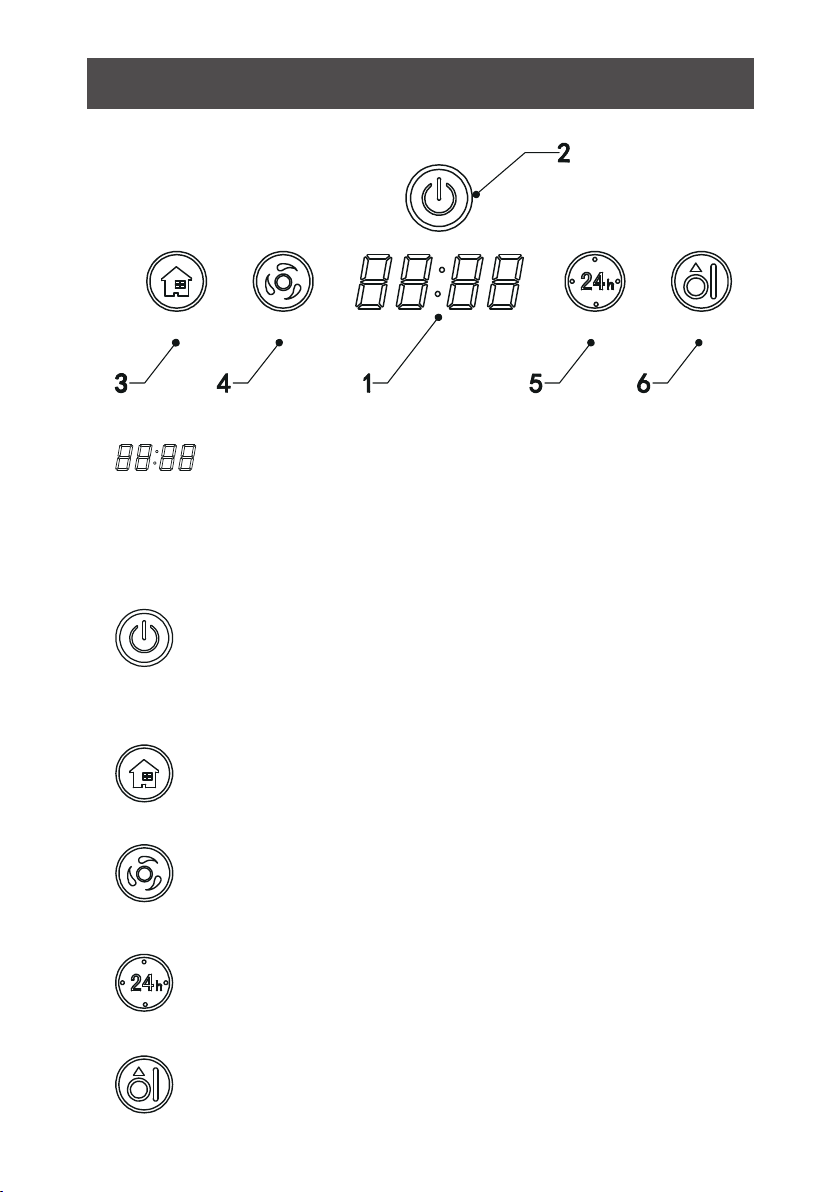
Display Panel
EDGE CLEAN
B. Confirm schedule setting in scheduling mode.
C. Start cleaning in standby mode.
A. Press this button to increase number in scheduling
scheduling
mode.
B. In other mode, press this button to start auto-homing and charg
-ing mode.
A: Press this button to decrease number in scheduling mode.
B: In other mode, press this button to start auto cleaning.
In standby/charging
charging
mode, press this button to enter/quit robot
time setting.
Hold this button to enter/quit scheduling mode.
Press this button to start edge cleaning in standby mode.
panel
it shows the time setting, charging status, and error codes by
using numbers
Button
A. Press this button to activate from sleep mode to standby mode.
In standby mode, press this button and hold it for more than 3
seconds to go into sleep mode.
14
Clean

Product Operation
Battery Charging
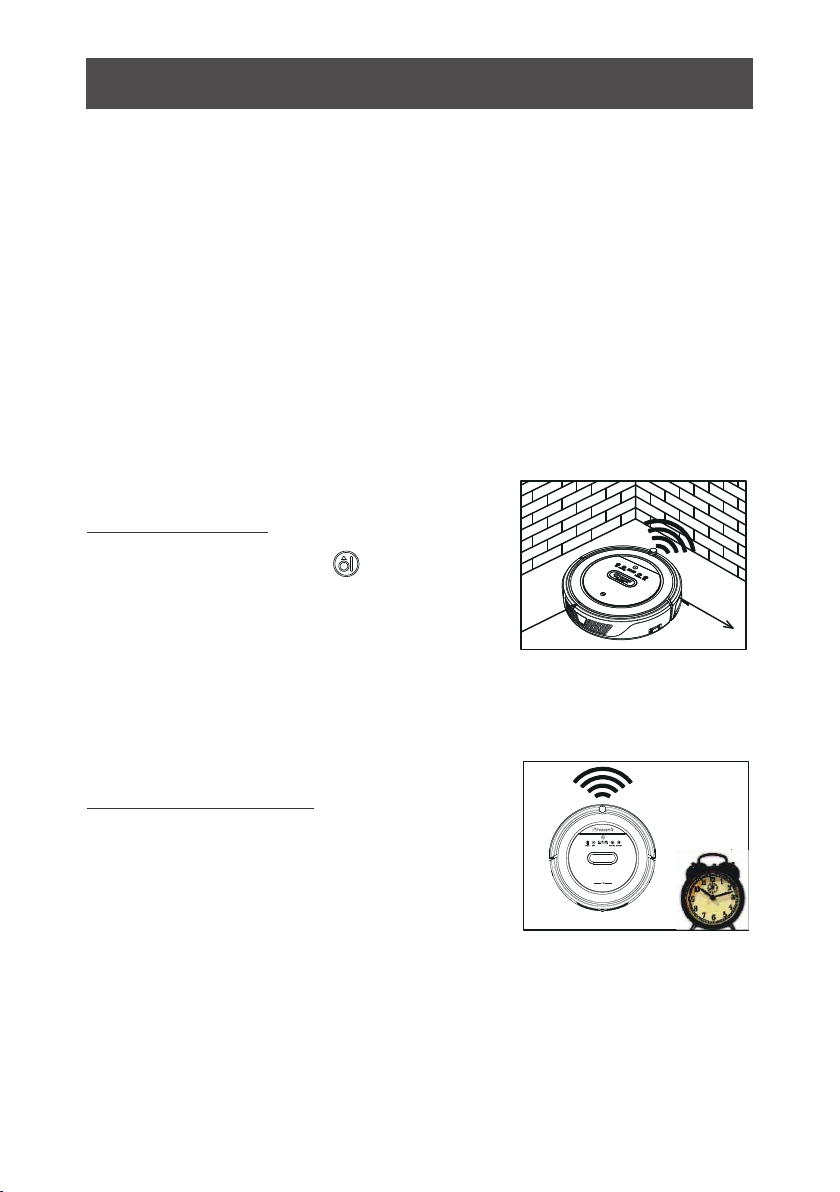
1. Docking station placement
Place docking station against the wall
and remove obstacles from within 1
meter at two sides and about 2 meters
in front of the station, as shown in the
right figure.
If the robot has been shut down, power on the robot by pressing the
power switch. side of the robot for more than 3 seconds.
2. Charge the robot in either way as shown below:
a. When robot is being charged, LED panel will gradually show 1111 from
left to right.
b. Once charging is complete, LED panel will show FULL.
c. In the standby status, the robot will broadcast voice prompt 'Please cha
-rge' when battery power is low.
d. In the working status, the robot will return to charging station automati
-cally when battery power is low.
Note:
b. Press on robot or HOME on remote control to operate the robot
to go back to the charging station for recharging as shown in Figure.b.
a. Insert the adapter into the robot and the plug at the other end to the
power socket as shown in Figure.a.
a b
For extending battery life:
a. Before first use, charge the robot for 12 hours.
b. Charge the robot as soon as possible when battery power is low.
c. The robot will return to charging station automatically when it accompli
-shes cleaning or battery power is low.
d. If the robot is not to be used for a long time, fully charge the battery be
-fore use and turn the power switch off.
e. If the robot is not to be used for more than 3 months, charge the robot
for 12 hours.
15

Product Operation
Starting Up / Standby / Sleeping / Power Off
a. During robot cleaning, press on main body to enter standby mode.
b. During robot cleaning, press ON/OFF button on remote control to po
-wer off the robot.
Note:
If robot is in sleep mode, press on main body to wake up the robot from sleep
mode, then press again, the robot will start cleaning automatically.
a. Press on main body and hold it for 3 seconds.
b. Robot will automatically enter sleep mode if no command is received
for more than 2 minutes
How to schedule the robot
1. Schedule on Display Panel on Main Body
1. Starting up
a. Make sure the power switch is on(The power switch is at the right side
of main body)
b. In standby mode, press on main body or ON/OFF on remote control
to start cleaning.
2. Standby
Standby means robot has its power switch on, waiting for the user's
operation. It can be changed to standby mode by one of the following
methods:
3. Sleep
In sleep mode, the robot can only be waken up from button on main
body or ON/OFF on remote control. In order to save power, you can turn
the robot into sleep mode from standby mode via either of the following
methods:
A. Setting robot clock (Make sure the robot is in standby or
power on status)
a. Press“Schedule”button to start clock-setting. the LED panel will
show the current system time.
b. Then the left two numbers on LED panel will flash .Press“Home”to
increase hour or clean to decrease it.
16
Product Operation
C. Cancel the scheduling
Set the scheduling time to 00:00.
c. When finish setting, with the remote pointing to the robot, press
“ON/OFF”button on remote. Display panel will show corresponding
time when it's been scheduled successfully.
d. Press button to save the setting, then press “schedule” to exit
(Before the setting is saved, if press “Schedule” to exit, the current
setting will be invalid).
c. Press to enter minute-setting mode, the right two numbers on LED
panel will flash. Press to increase it or “Clean” to decrease it.
B. Setting the scheduling time (Make sure the robot is in
standby or power on status)
a. Press “schedule” and hold it for 3 seconds to start scheduling, then
the left two numbers on LED panel will flash.
c. Press to enter minute-setting mode, the right two numbers on LED
panel will flash, press “Home” button to increase it or “Clean”
button to decrease it.
d. Press again to save the setting, then press “Schedule” button to
exit (Before the setting is saved, if press “Schedule” to exit, the
current setting will be invalid).
b.Press“Home”button to increase hour or“Clean”button to decrea
-se it.
a. Before scheduling, please set the robot time to be the same with real time.
b. The robot will start cleaning at the schedule time of Robot Clock every day.
Schedule has to be reset again after the power switch has been turned off.
Note:
2. Schedule on Remote Control
A. Scheduling Setting
a. Make sure the robot is in standby or charging status. Press“Schedule”
button on remote and hold it for 3 seconds to enter scheduling mode.
b. Then numbers on LED screen on the remote will flash. Change flash
-ing numbers by pressing “Up” or “Down” button. Press “Left/
Right”button to set next digit when finishing the setting of previous
digit.
17

Product Operation
Note:
a. During time scheduling, press “ON/OFF” on remote to set hour and minute;
press “Schedule” to enter/quit schedule setting.
Cleaning Modes
Four cleaning modes to meet your different needs.
1. Auto cleaning
For example: If current time is 8:00am, and remote setting number is 01:00. If it has
been successfully saved, the robot will start working in1 hour. It means 9:00am has
been scheduled as working time and the robot will start cleaning at 9:00am everyday.
Note:
The numbers show on remote is delay time during scheduling.
B. Cancel the scheduling
Press“Schedule”on remote to enter scheduling mode , then press
“ON/OFF” button one more time.(Display screen on main body will
show 00:00 when the scheduling has been cancelled. If not, press
“ON/OFF” one more time.
b. The “ON/OFF” on remote has the same function as “ ”on main body.
Press “Clean” on robot or “Clean” on
remote control to start auto cleaning. Robot
enters auto cleaning mode.
2. Area cleaning
Press ”MODE” on remote to enter area
cleaning.
a. Choose area cleaning “mode 1”, the
screen on remote will show “MODE 1”
and the robot will clean about 1*1m
square area line by line.
18
Product Operation
The robot will all return to its start point when
above cleaning modes completed.
b. Choose area cleaning “mode 2”, the screen on
remote will show “MODE 2” and the robot will
clean about 2*2m square area line by line.
c. Choose area cleaning “mode 3”, the screen on
remote will show “MODE 3” and the robot will
clean about 3*3m square area line by line.
d. Choose area cleaning “mode 4”, the screen on
remote will show “MODE 4” and the robot will
clean about 4*4m square area line by line.
In cleaning mode, press to enter edge
cleaning mode. The robot will clean along
the walls.
3. Edge cleaning
Schedule the robot's cleaning according
to yourneed. And our robot will start clean
-ing as scheduled.
4. Schedule cleaning
19
Other manuals for BL828
1
This manual suits for next models
1
Table of contents
Other Proscenic Vacuum Cleaner manuals

Proscenic
Proscenic RobbyPro User manual

Proscenic
Proscenic 790T User manual

Proscenic
Proscenic 850T User manual

Proscenic
Proscenic P8 User manual

Proscenic
Proscenic P9 User manual

Proscenic
Proscenic M8 PRO User manual

Proscenic
Proscenic Wash Vac F20 User manual

Proscenic
Proscenic M8 PRO User manual

Proscenic
Proscenic LDS D500 User manual

Proscenic
Proscenic BL828 User manual


