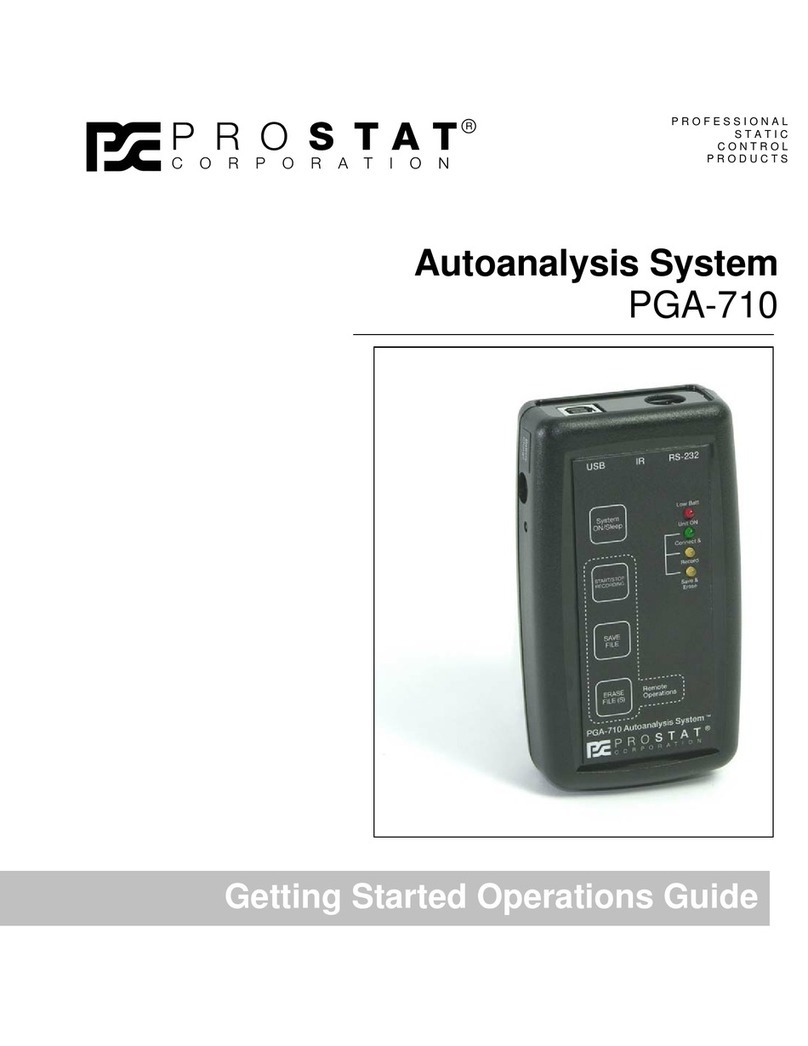
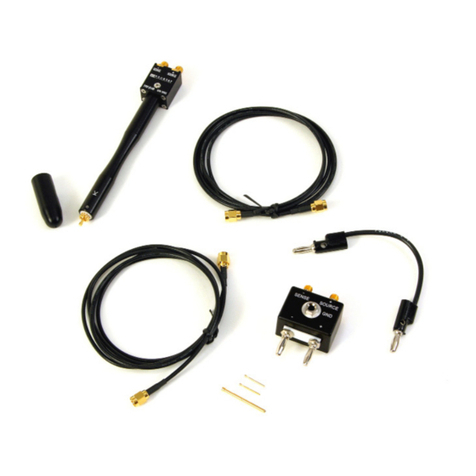
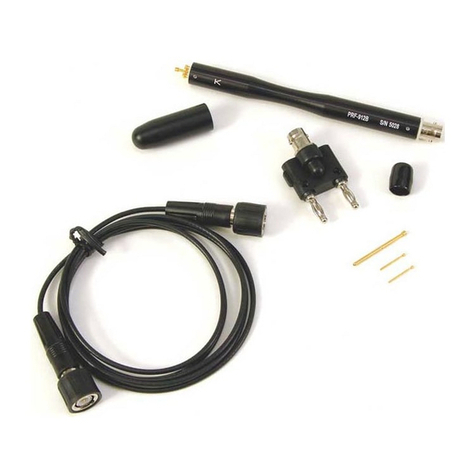
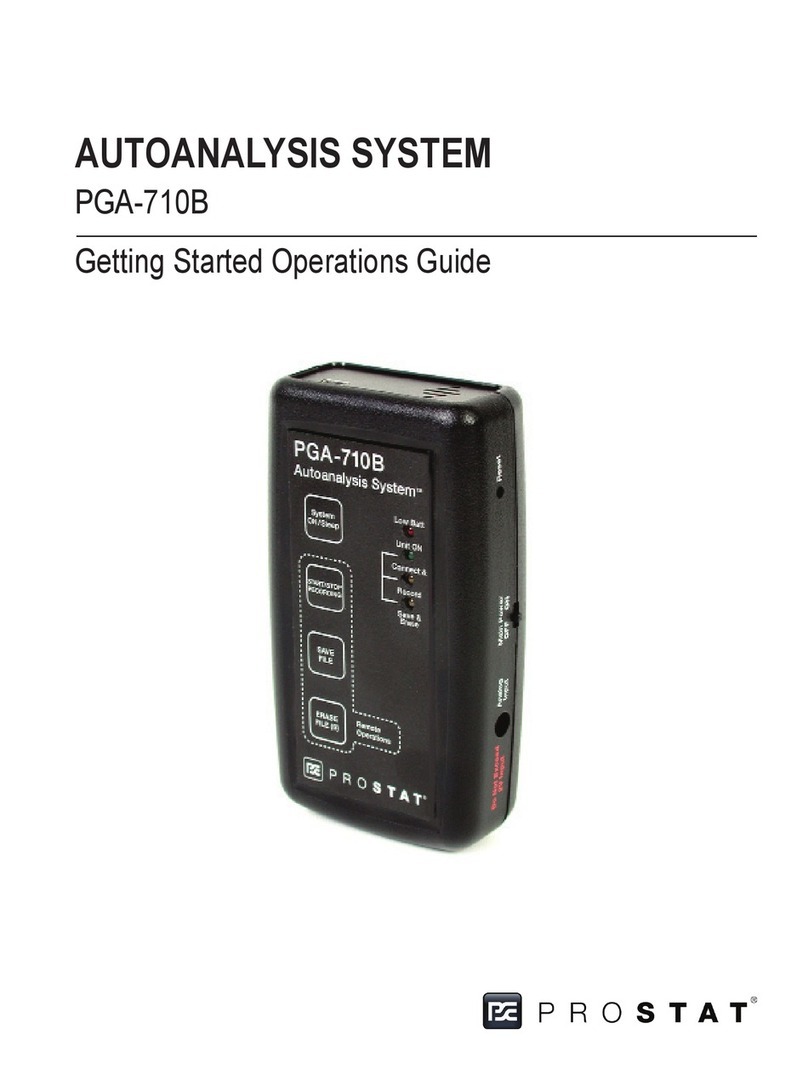
Prostat PGA-710B User manual

User Manual
PGA-710B
AUTOANALYSIS SYSTEM


PROSTAT® PGA710B AUTOANALYSIS SYSTEM
Secon Topic Page
I. ESD Control Elements 4
II. PGA-710B Autoanalysis Set Content 4
III. Cauons & Warnings 6
IV. Instrument Setup & Computer Connecon 6
V. Controls 9
VI. Preparaon for Recording Operaons 11
VII. Generang Printed Charts & Reports 23
VIII. Basics of Voltage Decay Analysis 27
IX. Recording Test Data Without Computer Connecon (Remote Tesng) 30
X. Exporng & Imporng Data to and from Excel®Spreadsheets 32
XI. Modifying XML Config File Defaults 34
XII. Warranty Informaon 38
General Specificaons 39
Applicaon Soware System Requirements 40
Table of Contents
Copyright © 2012 by Prostat® Corporaon. All rights reserved. Printed in the United States of America. No part of this
manual may be used or reproduced in any manner whatsoever without wrien permission. For informaon contact
Prostat Corporaon, 1072 Tower Lane, Bensenville, IL 60106 USA
Prostat is the registered trademark of Prostat® Corporaon

4Rev. E / October 4, 2018
PGA-710B Autoanalysis System
Product Overview
The PROSTAT® PGA-710B Autoanalyzer is an electrostac data analysis periph-
eral device for use with PROSTAT’s PFK-100 Instrument Set, which incorporates a
PFM-711A Electrostac Field Meter, CPM-720 Charge Plate Monitor and PCS-
730 Charging Source. Using the Autoanalysis System Applicaons Soware, the
PGA-710B will record, plot over me and automacally analyze body voltage
generaon, electrostac decay, voltage retenon and other electrostac events.
Its disncve Voltage Generaon analysis feature is designed to document and
calculate projected levels of typical Human Body and other voltages generated
in the manufacturing process.
It will also document and assess electrostac decay funcons, variaons in volt-
age retenon, and ambient temperature and relave humidity during each test.
Once tests and analysis are completed, this unique system will construct and
generate detailed wrien test reports.
I. ESD Control Elements
Examples of ESD Control products that can be evaluated using the PGA-710B Graphic Autoanalyzer in-
clude, but are not limited to:
Ionizaon Device and System Offset Voltage & Decay Performance
Footwear and Flooring combinaons
Worksurface Voltage Suppression
Rolling Carts
Record process equipment field voltages
Chairs (Sing and Standing Funcons)
Packaging Materials & Systems
Producon Aids & Materials
Other tests & evaluaon
II. PGA-710B Autoanalysis Set Contents
The Autoanalysis System consists of the following components:
A. PGA-710B Autoanalyzer
The Autoanalyzer is an electronic data logging device incorporang analog signal to digital conver-
sion, compung, memory, and temperature and relave humidity sensing capabilies. The Auto-
analyzer receives input from a measurement instrument, such as a Prostat PFM-711A Field Meter.
Its output is typically via USB to a computer using Windows XP or later operang system. The unit
is powered by a rechargeable lithium-ion baery.
NOTE
Do not connect a device having an input voltage greater than ±2.0 volts to the Autoana-
lyzer. Voltages over ±2.0 V may damage the device and will void the warranty. For further
informaon regarding instrument connecons contact Prostat customer service.

5
Rev. E / October 4, 2018
PGA-710B Autoanalysis System
B. PGA-710B Autoanalysis System Applicaon Soware Flash Drive
The Autoanalysis System Applicaons Flash Drive includes the necessary programs to communi-
cate with, and operate the Autoanalyzer, install analycal programs, drivers and addional Mi-
crososoware. Before opening or loading soware, please be sure to review the Autoanalysis
System Soware license agreement.
C. Documentaon
Documentaon includes this Operang Manual, a Quick Start Guide, a Product Key Number for
access to the Applicaon Soware, a Tesng Guide for Flooring and Ionizers, and a Help file link in
the Applicaon Soware.
D. Connecons & Accessories
The following cables and accessories are provided:
1. USB cable for connecon of the PGA-710B Autoanalyzer to a computer USB port. Computer is
not provided. (Part Number: PGA-710USB)
2. Shielded analog cable connects the analog output of a Prostat PFM-711A Field Meter (field
meter not provided) and the signal input of the PGA-710B Autoanalyzer (Part Number: PGA-
710AnaCab).
3. The shielded voltage measurement cable with ground is used for body voltage, body reten-
on and other measurement. Connect the green shield lead to ground to reduce the effects of
ambient electrical noise. (Part Number: PGA-710ChgGen lead)
4. Input Shorng Shunt used to “zero” the PGA-710B Autoanalyzer during normal operaons.
(Part Number: PGA-710CC)
5. Body voltage Hand Wand and Cable accessories. (Part Number: PFA-861-H)
6. Baery Charger (Part Number: PGA-710 Charger)
E. Shielded Measurement Cable
The shielded measurement cable is intented for use with the Prostat CPM-720 charge plate moni-
tor for measuring body voltage generaon, charge retenon, remote equipment and other elec-
trostac voltage sources. The signal conductor insulaon is Red and the shield insulaon is Green.
Connect the Red lead to the CPM and the object being measured. Connect the Green shield to
ground to reduce the effects of ambient electrical noise and transmied energy. Do not connect
the shield to the ground plate of the CPM.

6Rev. E / October 4, 2018
PGA-710B Autoanalysis System
Figure 1: Schemac of Test Setup
III. Cauons & Warnings
A. There are no user serviceable parts in the unit. Do not open the PGA-710B Autoanalyzer, or dam-
age the warranty seal. Only authorized Prostat technicians can provide repair and mechanical
updates. Opening the unit or damaging the seal will void the warranty.
B. To prevent low voltage shock or damage to the unit or operator, do not operate the device when
wet, or in a wet environment.
C. Do not exceed ± 2.0 volt signal input to the Autoanalyzer. Higher voltages may damage the unit
and will void the warranty.
NOTE: Contact Prostat Customer Service for informaon regarding feasibility of connecng other
than Prostat instruments and devices to the Autoanalyzer.
D. The Autoanalyzer is a precision instrument. Consider it as fragile. It can be damaged by abuse. As
with other fine instruments do not drop or cause mechanical shock.
E. The Autoanalyzer’s analycal program funcon is based on operator input and the data supplied.
Thus, the representave accuracy and value of system calculaons are based on operator input
and acons. Prostat is not responsible for data analysis results or the decisions made based on
PGA-710B Autoanalysis System data analysis.
IV. Instrument Setup & Computer Connecon
The PGA-710B Autoanalyzer connects to a Prostat PFM-711A Electrostac Field Meter via its analog out-
put lead and to a computer using USB cable. The PGA-710B and accompanying soware converts the field
meter and computer into a digital chart recording system with automac analysis and reporng features.
The USB connecon provides opmal data transfer between the PGA-710B and the computer.
A. System Compability
The PGA-710B is intended for use ONLY with computers using current versions of Windows XP,
Vista 32-bit/64-bit, Win7 32-bit/64-bit and Win8 operang systems. Note that systems other than
Windows 2003 may be required to download a Microsoupgrade (.NET plaorm) for proper

7
Rev. E / October 4, 2018
PGA-710B Autoanalysis System
operaon. The Autoanalysis System Applicaons disk includes the Microso.NET Framework 4.0
plaorm, which will be installed with operator approval. Periodically check for .NET soware up-
dates at the Microsoweb site.
Systems using Windows XP should be:
• Updated with current service pack 3 crical updates
• Download current .NET Framework 4.0 version
• Then check for, and download current updates to the .NET Framework before loading the
Autoanalysis soware.
B. Prior to Use
Charge the PGA-710B’s baery for 8-14 hours using the supplied AC/DC converter. Esmated
operang baery life is approximately 8–10 hours of operaon without connecon to USB port or
supplied baery charger. The unit charges when connected to the computer via USB.
Soware Installaon
Autoanalysis soware requires .NET Framework 4.0 installed on your computer. It can be installed either
thru Windows Update or from the installaon Flash Drive.
For your convenience, .NET Framework 4.0 will install automacally from the Flash Drive if it’s not already
installed.
Figure 2: .NET Framework 4 installaon
C. Device Drivers
This version of soware is delivered with device drivers for Windows 7 through Win10. The drivers
will install automacally from the Flash Drive once you iniate the main installaon. In the event
it didn’t install properly, you can be found them on the Flash Drive in folder Drivers. Install the file
named VCP_V1.3.1_Setup or VCP_V1.3.1_Setup_x64 located in the Drivers folder. Once complet-
ed, you can connect the device to your computer. Windows will complete the installaon of the
drivers.

8Rev. E / October 4, 2018
PGA-710B Autoanalysis System
D. Quick Start: Soware Installaon & Instrument Connecons
To load the Autoanalysis Applicaon soware:
1. Insert the Flash Drive into the computer’s USB Port
2. Select Open folder from the dialog box and double-click filename “Install.cmd”.
3. Follow the on-screen instrucons.
4. If prompted to install the .NET Frame-
work 4.0 Package, click Yes
5. Connect PGA-710B to computer via USB
cable. Refer to Figures 1 – 7.
6. Connect the PGA-710B to your PFM-
711A Field meter via analog signal cable
7. Slide PGA-710B’s baery cut offswitch
to the ON posion.
8. Press the System ON/Sleep panel
membrane pad and release when LED’s
energize.
9. Your computer should recognize NEW HARDWARE.
10. Aer installaon Prostat “Autoanalysis System” shortcut will be installed on the desk top.
NOTE: The first me the PGA-710B soware is opened, the operator has an opportunity to select
desired language and temperature display in either Celsius or Fahrenheit.
Both language and preferred temperature display can be changed at any me using the tool bar
View >Language and View >Temperature Scale
Figure 3: USB Connecon
Figure 4: Front Panel Figure 5: Analog Input & Reset

9
Rev. E / October 4, 2018
PGA-710B Autoanalysis System
V. Controls
A. Operator controls include:
1. Main Power Baery Bus Isolaon Slide Switch
(Figure 7): Isolates baery from unit electron-
ics during storage and between operang
sessions.
a. In OFF posion Baery Charging (LED 4)
remains OFF when unit charges using AC/
DC converter.
b. Note that small green LED next to Charger
Connecon will energize during charging.
See circle in Figure 7.
c. In ON posion, unit is energized in “sleep”
mode but is not operaonal unl System ON/Sleep (Pad 1) buon is pressed.
2. PAD 1 System ON/Sleep: Places unit in Normal Operaon or Sleep modes.
Figure 6: Front Panel
Pad 4: Erase
[In Remote Ops]
Pad 3: Save
[In Remote Ops]
Pad 2: Start/Stop
[In Remote Ops]
Pad 1: On/Sleep
LED 1: Low Ba.
LED 2: Unit ON
[Start/Stop]
LED 3: Computer
Connected [Save]
LED 4: Baery
Charging [Erase]
Figure 7: Main Power Baery Bus Slide
Switch Isolates Baery during Storage

10 Rev. E / October 4, 2018
PGA-710B Autoanalysis System
a. Press ON: LED’s #2 - #4 flash, then GREEN LED #2 blinks slowly to indicate unit is ON and
operang. (Figure 8)
b. Press Sleep: Press and hold pad unl LED’s #2 - #4 energize temporarily, then release pad to
place unit in standby or “sleep” mode. LED’s are OFF.
3. PAD 2 Start/Stop Recording Records data when in Remote Mode, i.e., when not connected to a
computer. Remote operaons allow recording and storage of individual test files for computer
download at a later me.
4. PAD 3 Save File when in Remote Mode. Once a remote test cycle is completed, i.e., PAD 2 is
pressed to stop recording, pressing PAD 3 saves the test data as an individual file in the unit’s
memory.
5. PAD 4 Erase File(s) when in Remote Mode.
a. Press Once erases current test before it is saved in unit memory
b. Press and Hold unl LED’s 2–4 flash rapidly in sequence Erases ALL FILES in memory
6. Reset Re-boots PGA-710B in the case of latch up. See Figure 5.
B. LED Indicators
LED indicators provide informaon in computer connect and remote operaonal modes.
1. LED 1 RED: Low Baery level. Charge baery via USB connecon to computer or using AC/DC
converter. (See Baery Consumpon in Techni-
cal Specificaons on page 39)
a. Unit operates normally during either
charging mode. During operaon more
current is used than provided by USB con-
necon. Periodically recharge baery with
the AC/DC charger.
b. Note that LED 1 does not operate, i.e.,
indicate low baery or energize, when Bat-
tery Bus Isolaon Switch is OFF.
2. LED 2 GREEN: Electronics energized and oper-
ang.
a. ON when PGA-710B is energized, i.e.,
Baery Bus Isolaon Switch is ON and System ON/Sleep pad is pressed. It blinks slowly to
indicate unit is energized and operang.
b. When in remote operaons
1) Energized when unit turned ON, blinks to indicate unit energized and operang
2) Energized when PAD 2 Start/Stop Recording is pressed
Figure 8: ON/OFF: Power up or place PGA-
710B into “sleep mode”.

11
Rev. E / October 4, 2018
PGA-710B Autoanalysis System
c. During file management in remote operaons:
1) Blinks slowly in tandem with LED’s #3 during file recording
2) Blinks fast with LED’s #3 to indicate file needs to be SAVED or ERASED
3) Blinks fast, alternately with LED’s #3 & #4 during erase of ALL FILES in memory
3. LED 3 ORANGE/YELLOW:
a. ON and Blinking when PGA-710B is connected & communicang with computer
b. When in remote operaons, energized when PAD 2 Start/Stop is pressed
c. During file management in remote operaons:
1) Blinks slowly in tandem with LED’s #2 during file recording
2) Blinks fast with LED’s #2 to indicate file needs to be SAVED or ERASED
3) Blinks fast, alternately with LED’s #2 & #4 during erase of ALL FILES in memory
4. LED 4 YELLOW:
a. ON when PGA-710B is connected to computer, energized steady ON to indicate the baery
is charging
b. LED 4 is ON when unit is ON and connected to the AC/DC charger
c. During file management in remote operaons:
1) Blinks once when file is saved
2) Blinks fast, alternately with LED’s #2 & #4 during erase of ALL FILES in memory
VI. Preparaon for Recording Operaons
A. Follow these inial steps to explore the
PGA-710B’s operaonal capabilies.
1. Connect the PGA-710B to the com-
puter via the USB cable
2. Connect the PGA-710B to the PFM-
711A Field Meter analog output
3. Energize computer and instruments
4. On computer, click “Autoanalysis
System” shortcut to start soware
5. The Session Wizard automacally opens the Start Screen. Choose from:
a. Start a New Session
b. Load Saved Session file
c. Import from Device
d. Start a New Session Wizard, or
e. Close the Start Screen
Figure 9: Autoanalysis Soware Start Screen

12 Rev. E / October 4, 2018
PGA-710B Autoanalysis System
6. Select “Start a New Session Wizard” and Click OK as in Figure 9, will open Session Wizard Test
Type screen (Figure 10). Select Test Type and provide the requested informaon to be included
in test reports. See The Session Wizard secon below for further details.
7. To open a fresh chart, simply select “Start a New Session”.
8. Press New Document symbol on the tool bar to open addional new files
B. The Session Wizard
The Session Wizard is used to enter test infor-
maon, material idenficaon, locaon and
notes. All informaon entered in the Wizard will
be included in the generated charts and test re-
ports. Informaon is entered in any of the basic
test scenarios: General Test, Voltage Genera-
on Test, and Decay Test. The Wizard consists
of an Opening Screen, Two General Informaon
Screens and Test Specialty screens for Voltage
Generaon and Decay Tests.
C. Opening Screen
The Opening Screen (Figure 10) is used to des-
ignate the type of test to be conducted. In the
illustraon at right, decay tesng is the intent of
the test.
D. General Informaon Screens
Two screens provide fields for a variety of descripve and locaon informaon that is included on
all charts and in detailed reports. The following two screens are included in all test type formats.
E. Specialty Screens: Decay Tests
Decay measurements are used primarily for ionizaon tesng. Decay tests have a beginning volt-
age where ming begins or is “Reset”, and an ending voltage where ming stops, or is “Cutoff”.
The following screens and windows are used to enter Reset and Cutofftest voltages.
1. Designate the voltages used to Start and Stop the decay me period.
Figure 10: Use the first Session Wizard Window to Des-
ignate the Type Test
Figure 11: Technician, Material and General Informaon Screens

13
Rev. E / October 4, 2018
PGA-710B Autoanalysis System
a. The Reset Voltage starts the ming calculaon period.
b. CutoffVoltage ends the ming calculaon period.
2. The Decay Window offers two means to designate Reset and CutoffVoltages.
a. Standard Reset and CutoffVoltages are (See Figure 12):
1,000 Volts – 100 Volts
1,000 Volts – 50 Volts
1,000 Volts – 10 Volts
b. Check the Custom Box to enter any two voltages for evaluaon. Figure 12.
F. Specialty Screens: Voltage Generaon Tests
Voltage generaon measurements may
take several forms. In many tests, the
movement is repeous, much like a walk-
ing measurement. The Wizard screen at
the right (Figure 13) allows the operator to
esmate the number of cycles before the
measurements begin. The number can be
changed later as necessary.
However, it is the number of operator en-
tered cycles that drive the soware’s inial
algorithm analysis. Thus, it is important to
be able to define the number of walking
steps or test cycles so that automac analy-
sis proceeds effecvely.
G. Customize Charts & Create Templates
Figure 12: Standard Reset and CutoffVoltages (le), or check the Custom Box (right) and Manually Enter
Figure 13: Enter the Number of esmated Voltage Gen-
eraon Test Cycles

14 Rev. E / October 4, 2018
PGA-710B Autoanalysis System
A new file can be configured with various indicators, voltage lines, alignment arrows, etc. One
could construct a “template” using various desirable features for future use. When a New file is
opened, record & control funcons are acvated. Use the following to add custom labels and refer-
ence lines.
1. Select Document on the menu bar and a drop down menu appears
2. Highlight Voltage Custom Labels and Click. See
Figure 14.
3. The Voltage Label Properes window opens.
See Figure 15, below.
4. Click on “Add”; 0.00 appears in the “Label Val
ues” and the “Label Properes” windows.
5. In the “Behavior” secon True indicates the
zero Label (0.00) and Line will appear in
the chart.
6. In “Colors” both Label and Line colors are
individually selected using the drop down ar
row. In Figure 15, the zero Label and Line will
be Red. To change colors press the down
arrow(s) to open the color selecon drop
down menu(s). Choose from several colors
(Figure 16) for customizing lines and labels.
7. “Value” allows different lines to be inserted in
a chart at various voltage levels. For example, we
might add colored lines at +100 and -100 volts to easily see any voltage generated peak that
“exceeds ±100 volts”.
8. Click the “Add” buon and 0.00 appears in Label Value. To create a disncve Label and Line
at +100 volts enter “100” in the Data “Value” secon. Open the Color Drop down menu for
“LabelColor” and “LineColor” and select Blue. 100 will appear in the “Label Values” window.
9. Repeat for “-100”, i.e., enter “-100” in the Data “Value” secon. Open the Color Drop down
Figure 14: Customize Chart Using Voltage Labels and
Lines
Figure 15: One can create various Chart Voltage Lines &
Labels in several colors

15
Rev. E / October 4, 2018
PGA-710B Autoanalysis System
menu and select Blue. -100 will appear
in the “Label Values” window. See Figure
17. Click OK and your plong chart re-
sembles Figure 18, on the next page.
Use the various scale adjustment arrows
to center the 0.00 Line, adjust the chart
voltage and me sweep ranges to meet
ancipated test needs. Once prepared
to your liking, and before recording data,
save the chart as a template to reduce
future setup me. For example, save the
file as “ChgGen Template1.tst”. When-
ever the file is recalled the chart sengs
are as you lethem and the file is ready
to record data and be saved with a new
name.
NOTE
Creang Test Templates are convenient and save a great deal of me. However,
once data is recorded and saved in a file it cannot be reused as a template.
Figure 16: Color Drop down Menu Used to Change Label
& Line Colors
Figure 17: In the Data secon enter Voltage Value
where a Chart Line is desired

16 Rev. E / October 4, 2018
PGA-710B Autoanalysis System
H. Set
PGA-
710B Time & Date
In preparaon to record and analyze data, confirm PGA-
710B system date and me are correct.
1. Press Edit on the menu bar to open the drop down
menu.
2. Select Device Control and a Device Control window
(Figure 19) appears on the screen.
3. With the PGA-710B energized and connected to the
computer via USB cable, Click the “Device Time” Read
buon. The Read window will display the computer’s
current date and me sengs.
4. Press the Set Device Time buon to set the PGA-
710B’s me clock to the computer.
5. Press Done to close the window.
I. Sampling Rate
The PGA-710B’s default Sampling Rate is 50 samples/second, which is suitable for most auding
and analysis applicaons. To confirm or modify the rate proceed as follows:
1. Open the Edit drop down menu.
2. Select Device Control and a Device Control window (Figure 20) appears on the screen.
3. With the PGA-710B energized and connected to the computer via its USB cable, Click the
Figure 18: New Chart with Red Zero Line and Blue Labels and lines at ±100
Figure 19: Use Edit drop down Menu to Access
Device Control Window for seng Set PGA-710B
Date & Time

17
Rev. E / October 4, 2018
PGA-710B Autoanalysis System
“Sampling Rate” Read buon. The Read window
will display the computer’s current sampling
rate.
4. To change the sampling rate, click the drop
down menu arrow as seen in Figure 21:
a. Highlight the desired rate, i.e., 50, 100 or
200 samples per second
b. Press Set
c. Press Done in the Device Control window to
complete the sampling rate change.
J. Temperature & Relave Humidity Sensor Factory Calibraon &
Adjustments
To ensure the sensor is operang based on factory design and ini-
al calibraon, all adjustments or bias must be “cleared” from the
sensor. To “clear” the soware sengs:
1. From the Edit drop down menu, select Device Control (See
Figure 22)
2. Confirm the Humidity (Rh%) Value window is set at
0.0, and click Clear
3. Confirm the Temperature (F) Value window is set at
0.0, and click Clear
4. Click Done to close the window.
Once sensors are reset, use a calibrated temperature and
humidity instrument as a reference to set the appropri-
ate bias for the most accurate temperature and humidity
mesasurements. Follow the instrucons below for srng
temperature and humidity bias.
K. Creang a Temperature or Relave Humidity Bias
If an acceptable temperature and humidity instru-
ment is available, the PGA-710B’s sensor can be
operaonally adjusted to approximate the reference
as follows (See Figure 23):
1. From the Edit drop down menu, select Device
Control
2. Enter the reference humidity in the Value win-
dow and click the Set buon
3. Enter the reference temperature in the Value
Figure 20: Use Edit Menu to Access Device Con-
trol Window to Set Sampling Rate per Second
Figure 21: Select Sampling Rate
Figure 22: Clearing Humidity and Temperature
Bias adjustments
Figure 23: Adjusng Temperature and Humidity
Bias

18 Rev. E / October 4, 2018
PGA-710B Autoanalysis System
window and click the Set buon
4. Click Done to reset the sensor and close the window
Once a new seng is entered into the soware, temperature and humidity indicaons will be based on
the exisng sensor performance plus the influence of the new net seng bias. For example, if the exisng
indicaon is 70°F and the seng input is 65°F, a -5° bias will be added to the sensor’s measurement, and it
will subsequently indicate 65°F. A similar adjustment can be made for relave humidity.
L. Open Current (Real Time) Measurement Digital Display
A lepanel area includes real me measurements of volatge,
temperature and relave humidity. To display an addional
real me measurement window showing the values of volt-
age, temperature and relave humidity during the recording
process:
1. Press Edit on the menu bar and select Current Measures.
See Figure 24 and 25.
2. Place the Current Measures window in a convenient loca-
on.
Data Recording Controls
The data recording Controls are located at the upper lecorner of
the screen. See Figures 25 and 26, below. The symbols are similar to the controls of a tradional tape
recorder (for those who may remember tape recorders). From leto
right, the controls are:
1. Preview: Green Triangle starts chart plot and indicates
magnitude of data. Data is not recorded, it allows adjust-
ments before recording.
2. Record: Pressing the Red Circle begins data entry to file.
When recording, the circle becomes Red and the plot
trace changes color.
3. Pause: The vercal Parallel Bars allow stop and start of
data entry during Playback and
when recording in General Mea-
surement and Decay test modes.
Pause does not funcon when
recording Voltage Generaon.
4. Stop: The Black Square stops either Preview or Recording funcons.
If used to Stop the Preview funcon, when Preview is pressed again
it resets the recording point to start ongoing Preview or Recording.
5. Short Cut Keys (Figure 27): Several funcon keys are assigned to
assist in chart control:
Figure 24: Access Current Measures
through the Edit Menu
Figure 25: Current Measures window
displays Voltage, Temperature and
Humidity
Figure 26: Chart Controls
are similar to those of a
tape recorder

19
Rev. E / October 4, 2018
PGA-710B Autoanalysis System
a. F5 Preview: Starts chart display of voltage and measurement
levels. NOTE: Data is not entered into the file during Preview
b. F6 Record: Begins data capture of all measurement levels
c. F7 Pause: Stops and Starts Chart recording and playback
d. F8 Stop: Ends Preview, Recording or Playback.
e. F11 Auto Balance: Will align Preview or Recorded data to center
of chart. Can also be used to automacally align Voltage, Tem-
perature or Humidity.
f. F12 Auto Min Max: Will automacally align display data to ver-
cally ulize the enre chart view using the maximum and minimum data values.
N. Auxiliary Chart Control Window
When the LePanel Control is closed to maximize the chart display the Auxiliary Chart Control
window may be opened and posioned anywhere for operaonal convenience.
1. Open this window by selecng Chart Control on the Edit drop down
menu.
2. Use the mouse to drag and posion the window in a convenient loca-
on.
Display Temperature & Humidity Data
Temperature and Relave humidity are sensed and measured by the PGA-710B. The sensor is mounted
in the boom shell opening of the case for exposure to ambient condions. It measures temperature and
humidity external to the PGA-710B. Assuming the PGA-710B is stored
in the area overnight, it requires only a few minutes for the system to
reach opmum performance.
To display temperature and, or humidity, check the Show Temperature
and Show Humidity boxes listed under Charts in the lepanel (Figure
28). The default temperature display is Celsius (°C). To display Fahren-
heit (°F) or both °C and °F:
1. Open Document drop down menu and select Appearance Opons.
The “Chart Properes” window is opened (Figure 29).
2. In the Appearance secon click TempaxesVisibility drop down menu
arrow. Select desired temperature scale(s).
The Appearance Opons, Chart Properes window (Figure 29) estab-
lishes what is to be displayed, i.e., Celsius (°C), Fahrenheit (°F) or both.
Checking, or un-checking the “Show” boxes (Figure 28, above) deter-
mines whether or not the selected items are displayed in the chart.
See Temperature & Relave Humidity Sensor Factory Calibraon & Adjustments for specificaons and set-
ng Rh or temperature bias.
Figure 27: Short Cut Key
Controls
Figure 28: Check Show Tempera-
ture and Humidity Boxes to display
related

20 Rev. E / October 4, 2018
PGA-710B Autoanalysis System
Basics of Analyzing Body Voltage Generaon
For detailed measurement suggesons, see “How to Measure” manual. Once a recorded data file is estab-
lished, use the following guidelines for analysis:
1. Trim unwanted data from beginning or ending traces by using the Edit menu and click on Trim-
ming…. A floang Edit window will open (Figure 30, below).
2. Press Trim Letab and place the cursor on the plot trace at the selected point. Repeat with
Trim Right.
3. Take care in selecng trim points to clearly define data to be evaluated by the soware.
OPERATIONAL HINT
The System’s algorithm looks for paerns in Minimum and Maximum peak
values. One needs to define the beginning and end of a set of Minimum and
Maximum peaks. Every Minimum Peak must have a Maximum Peak.
a. Posion the Letrim point to define a starng point
for the analysis. It should represent an inial
Minimum or Maximum value. Referring to Figure 30,
the Letrim cursor is placed before a Minimum peak
as shown by the circle.
b. Posion the Right trim point to define the ending
point of the analysis. It should represent a final Mini
mum or Maximum value. Referring to Figure 30, the
Right trim cursor is placed just aer a Maximum peak
as shown by the circle at the right of the figure.
IMPORTANT NOTE: Maximum Peaks are posioned ver-
cally “Highest” on the chart, while Minimum Peaks are
posioned “Lowest” on the chart.
Figure 29: Chart Properes Window
Figure 30: Trim Data Trace to Idenfy Range
of Minimum & Maximum Peaks to be used for
Analysis and reporng.
Other manuals for PGA-710B
2
Table of contents
Other Prostat Analytical Instrument manuals
