manuals.online logo
Brands
  1. Home
  2. •
  3. Brands
  4. •
  5. Vivax Metrotech
  6. •
  7. Analytical Instrument
  8. •
  9. Vivax Metrotech vCamMX User manual

Vivax Metrotech vCamMX User manual

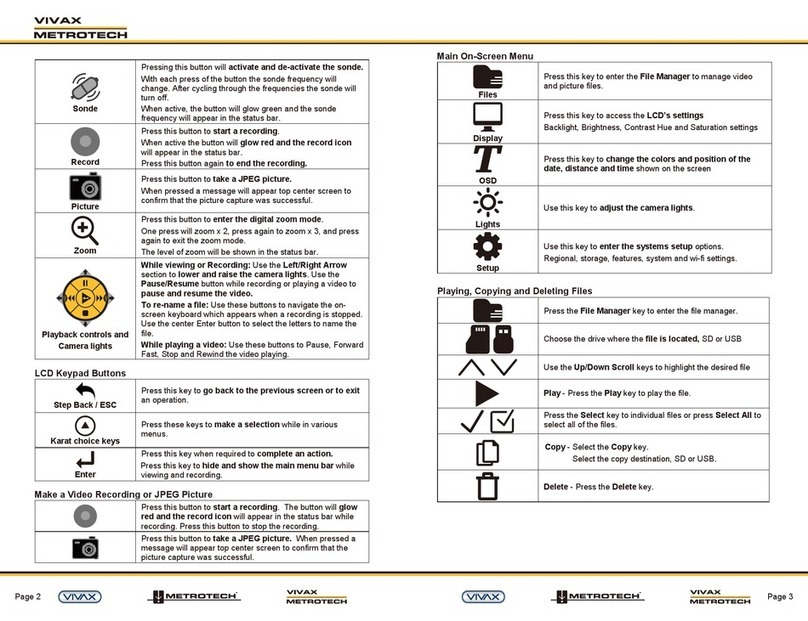
1. Press the Setup key to bring up the sub-menu.
2. Press the Features key to enter the features sub-menu.
3. Press the key corresponding to Rename to bring up the rename sub-menu.
4. Select the choices of on or off for renaming either the video files or picture files.
5. Press the key corresponding to Video or Pictures. When the key is pressed it will change the choice from white (off)
to yellow (on).
6. Press the ESC key to return to the Setup sub-menu, press again to return to the main viewing screen
11. Set the SD Card Backup Option.
By default the system records to the USB drive. When the SD Backup is active, when a picture is taken or video recording
completed a copy of the file will automatically be written to the SD card. This allows the SD card to be used as a solid
state hard drive keeping copies of the files.
1. Press the Setup key to bring up the sub-menu.
2. Press the Storage key to enter the storage sub-menu.
3. Press the key corresponding to SD Card Backup. When the key is pressed it will change the choice from white (off)
to yellow (on).
4. Press the ESC key to return to the setup sub-menu, press again to return to the main viewing screen
12. Set up Wi-fi and Hotspots
The built in Wi-fi option allows the vCamMX to connect to a wireless network or act as a Wi-fi Hotspot.
1. Press the Setup key to bring up the sub-menu.
2. Press the Features key to enter the features sub-menu.
3. Press the key corresponding to Wi-fi to bring up the Wi-fi sub-menu.
4. Press the ESC key to return to the setup sub-menu, press again to return to the main viewing screen
Reels
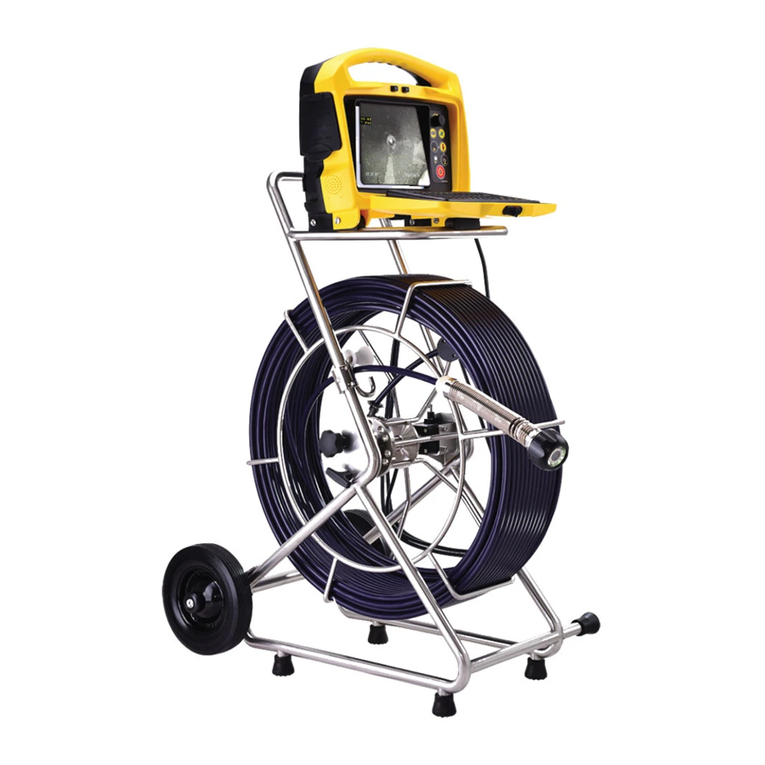
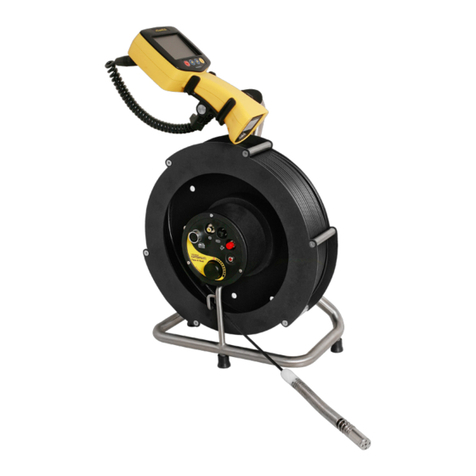
The vCamMX system comes as a complete system with control module attached or with just the MX reel only and used
with other vCam series control modules. When the unit ships as a reel only, an interconnect cable which plugs into other
vCam series control modules is provided.
Insertion Sleeve – The Insertion Sleeve is inserted into the mouth of pipe to prevent the pushrod from making direct
contact with the pipe when deploying. This prevents chafing of the pushrod jacket and the end result will be prolonged life
of the pushrod.
3. Use the Right Scroll key to navigate to the Time Format choice list.
4. Use the Up/Down Scroll keys to highlight the date/time format to use.
5. Press the Enter key to complete the selection.
6. Press the ESC key to return to the setup sub-menu, press again to return to the main viewing screen.
7. Set the Storage Options
The default drive for the vCam MX is USB. If no USB drive is inserted the system will record to the SD drive. If neither SD nor
USB is present the system will not record.
SD Backup – When the SD Backup option is active the SD card will automatically backup the USB drive.
Any pictures or videos created on the USB drive will automatically be copied onto the SD card. This allows the SD card to be
used as a solid state hard drive keeping copies of the files.
Activate the SD Backup option by:
1. Press the Setup key to bring up the setup sub-menu.
2. Press the Storage key
3. Press the key corresponding to SD Card Backup.
4. The USB with SD backup onscreen switch will change from white (off) to yellow (on).
5. Press the ESC key to return to the setup sub-menu, press again to return to the main viewing screen.
8. Set the Sonde Frequency
The vCamMX contains a choice of three sonde frequencies. The user can activate any number of the three frequencies or
turn off all three. The system has two low frequencies of 512Hz and 640Hz and one high frequency of 33 kHz.
To activate and select the frequencies:
1. Press the Setup key to bring up the sub-menu.
2. Press the Features key to enter the features sub-menu.
3. Press the key corresponding to the desired sonde frequency to use. When the key is pressed it will change the choice
from white (off) to yellow (on)..
4. Press the ESC key to return to the setup sub-menu, press again to return to the main viewing screen.
9. Set the OSD (on screen display) Options
The OSD can be set to appear at the bottom or top of the screen or can be turned off. While active, the OSD information will
appear in all recorded videos and JPEG pictures.
1. Press the Setup key to bring up the sub-menu.
2. Press the Features key to enter the features sub-menu.
3. Press the key corresponding to the OSD. When the key is pressed it will change the choice from white (off) to yellow (on).
4. Press the ESC key to return to the setup sub-menu, press again to return to the main viewing screen.
10. Set the File Rename Option
With the File Rename option the system can be set to use the system default naming scheme of MMDD_HRMMSS (month,
day, hour, minute, seconds) or prompt to manually name the file.
OFF
ON ON ON
512Hz 640Hz 33kHz OSD Rename
OFF
ON ON ON
512Hz 640Hz 33kHz OSD Rename
ON
USB with SD backup
ON ON
Videos Pictures
vCamMX System MX Reel Insertion Sleeve
™ ™ Page 3Page 2
Settings
vCamMX Quick Setup Guide V1.0
1. Install the Fuse
Install the 10 Amp - 250 Volt fuse (included) in the fuse compartment (3) on the side of the control box. The system will
operate without a fuse when using AC or DC power but the battery will not charge and the unit will turn off when the power
source is removed.
2. Charge the Internal Battery
Plug the supplied battery charger into the control modules AC/DC charging socket (2). The charging icon (1) on the left side
panel will glow red while charging and glow green when fully charged. The typical charging time to fully charge a completely
discharged battery will be approximately seven hours and provide approximately seven hours of intermittent use.
3. Turn on the system
Press and release the Power button on the control module. The button will glow green and the operating system will
boot up. Turn off the system by pressing and holding the power button.
4. Set the Language
1. Press the Setup key to enter the setup sub-menu.
2. Press the Region key to enter the setup screen.
3. Use the Up/Down Scroll Keys to highlight the desired language.
4. Press the Enter key to select the language. The updating dialog message will appear and remain until the language
change is completed. When completed the system will return to the main viewing screen.
5. Set the Distance Counter
The distance of pushrod deployed will be shown on the main screen, center screen between the time and date. The
distance measurement will appear in videos and pictures when this feature is active.
1. Press the Setup key to bring up the sub-menu.
2. Press the Region key to enter the regional sub-menu.
3. Use the Right Scroll key to navigate to the Measurement choice list.
4. Use the Up/Down Scroll key to highlight Meters or Feet.
5. Press the Enter key to complete the selection.
6. Press the ESC key to return to the setup sub-menu, press again to return to the main viewing screen.
6. Set the Date and Time
Setting the Date/Time format allows the choice of three date formats and the choice of a 12 or 24-hour time format.
Date formats available are: MM/DD/YYYY, DD/MM/YYYY and YYYY/MM/DD
Time formats available are: 12 hour (08:00PM) or 24 hour (20:00)
1. Press the Setup key to bring up the sub-menu.
2. Press the Region key to enter the Regional sub-menu.
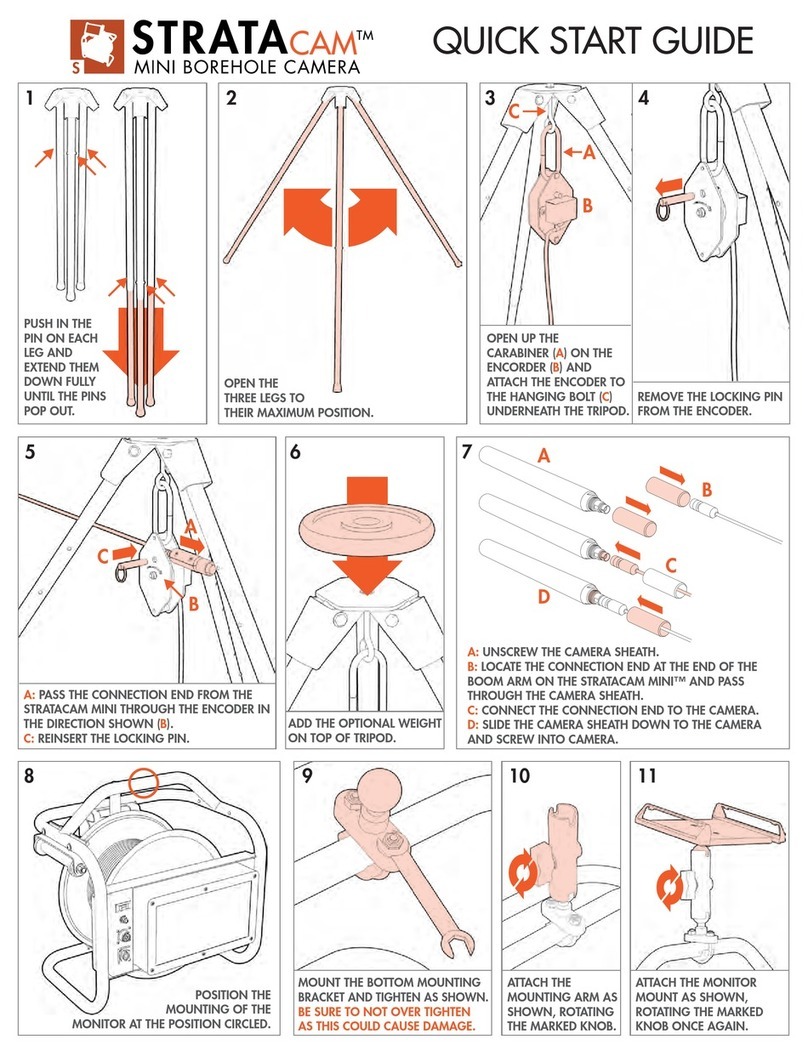
1. Use a screwdriver to unscrew and remove the fuse holder cap (3). Be sure
to use the correct size screwdriver to prevent breaking the fuse holder slot.
2. Insert the 10 Amp 250 Volt fuse into the fuse holder cap. Screw the fuse
holdercap with fuse into the control module by hand as far as possible.
1
2
3
1. Brake and Cable Guide
Unlock the brake by moving the lever to the right. Lock the drum by
moving the lever to the left.
Release the brake, rotate the drum so the spring is in the 10 O-clock
position. Pull the spring from the drum and feed the rod through the
cable guide.
2. Install the Camera
Try not to touch the green circuit board or gold pins on the spring assembly or camera head with bare hands. Touching
these will transfer oils from the fingers to these components which may lead to corrosion. Wear clean rubber gloves if
possible.
Removal: Grasp the termination spring close to the base of the camera
head. Use the other hand to turn the camera head counter-clockwise.
Turn until the camera is removed.
Installing: Remove any excess dirt that might come into contact with the
gold pins or green circuit board. Check that the O-ring is in good condition.
Grasp the termination spring close to the base of the camera head.
Present the camera head to the spring and turn the camera head clockwise
until tight. Hand tighten the camera head. Do not use any tools to tighten
the camera head.
Vivax- Metrotech Corp (Headquarters)
3251 Olcott Street,
Santa Clara, CA 95054, USA
T/Free: 800-446-3392
Tel: +1-408-734-1400
Fax: +1-408-734-1415
Email: [email protected]
Website: www.vivax-metrotech.com
Vivax - Metrotech Corp. (Ventas para
AméricaLatina)
T/Free: 800-624-6210
Tel: +1-408-734-1400
Fax: +1-408-734-5597
Website: www.vivax-metrotech.com
Email: VentasparaAmericaLatina@vxmt.com
Vivax Canada Inc. (Canada)
41 Courtland Ave Unit 6, Vaughan,
ON L4K 3T3, Canada
Tel: +1-289-846-3010
Fax: +1-905-752-0214
Email: [email protected]
Website: www.vivax-metrotech.com
Vivax- Metrotech Ltd. (UK)
Unit 18-19, Woodside Road,
South Marston Industrial Estate,
Swindon, SN3 4WA, UK
Free Phone: 0800 0281811
Tel: +44(0)1793 822679
Email: salesUK@vxmt.com
Website: www.vivax-metrotech.com
Vivax-Metrotech SAS (France)
Technoparc 1 allée du Moulin Berger,
69130 Ecully, France
Tel: +33 (0)472 53 03 03
Fax: +33 (0)472 53 03 13
Email: [email protected]
Website: www.vivax-metrotech.com
P/N:4.04.000067
Page 1Page 4 ™ ™
Vivax Metrotech AUS
1/176 South Creek Rd
South Creek Industrial Estate,
Cromer NSW 2099 Australia
Phone: +61 2 9972 9244
Fax: +61 2 9972 9433
Email: sales@vxmtaus.com
Website: www.vivax-metrotechaus.com

Other Vivax Metrotech Analytical Instrument manuals

Vivax Metrotech vLocCam User manual

Vivax Metrotech

Vivax Metrotech vLocCam User manual

Vivax Metrotech WCT vCam-5 Instruction Manual

Vivax Metrotech

Vivax Metrotech WCT vCam-5 Instruction Manual

Vivax Metrotech vCam-6 User manual

Vivax Metrotech

Vivax Metrotech vCam-6 User manual

Vivax Metrotech vCamLS Instruction Manual

Vivax Metrotech

Vivax Metrotech vCamLS Instruction Manual

Vivax Metrotech vCamMX User manual

Vivax Metrotech

Vivax Metrotech vCamMX User manual

Vivax Metrotech vCamMX-2 Instruction Manual

Vivax Metrotech

Vivax Metrotech vCamMX-2 Instruction Manual

Vivax Metrotech vCam-6 User manual

Vivax Metrotech

Vivax Metrotech vCam-6 User manual

Vivax Metrotech vCam-6 Instruction Manual

Vivax Metrotech

Vivax Metrotech vCam-6 Instruction Manual

Vivax Metrotech vCamMX-2 User manual

Vivax Metrotech

Vivax Metrotech vCamMX-2 User manual

Vivax Metrotech vCam-5 User manual

Vivax Metrotech

Vivax Metrotech vCam-5 User manual

Vivax Metrotech vCamDrain Instruction Manual

Vivax Metrotech

Vivax Metrotech vCamDrain Instruction Manual

Vivax Metrotech vCamDrain User manual

Vivax Metrotech

Vivax Metrotech vCamDrain User manual

Vivax Metrotech vLoc3-5000 Instruction Manual

Vivax Metrotech

Vivax Metrotech vLoc3-5000 Instruction Manual

Vivax Metrotech i5000 User manual

Vivax Metrotech

Vivax Metrotech i5000 User manual

Vivax Metrotech vCam-6 Installation guide

Vivax Metrotech

Vivax Metrotech vCam-6 Installation guide

Vivax Metrotech vCamMX-2 User manual

Vivax Metrotech

Vivax Metrotech vCamMX-2 User manual

Vivax Metrotech vLoc3 RTK-Pro User manual

Vivax Metrotech

Vivax Metrotech vLoc3 RTK-Pro User manual

Vivax Metrotech vCamMX-2 Installation guide

Vivax Metrotech

Vivax Metrotech vCamMX-2 Installation guide

Vivax Metrotech HL 10 User manual

Vivax Metrotech

Vivax Metrotech HL 10 User manual

Vivax Metrotech vCamLSR Instruction Manual

Vivax Metrotech

Vivax Metrotech vCamLSR Instruction Manual

Popular Analytical Instrument manuals by other brands

burkle LiquiSampler Directions for use

burkle

burkle LiquiSampler Directions for use

Spartan Tool TRAVELER LITE product manual

Spartan Tool

Spartan Tool TRAVELER LITE product manual

Parkside PLEM 50 A1 Operation and safety notes

Parkside

Parkside PLEM 50 A1 Operation and safety notes

RIDGID SeeSnake Micro Operator's manual

RIDGID

RIDGID SeeSnake Micro Operator's manual

AlcoMate Alcoscan AL2500 Operator's manual

AlcoMate

AlcoMate Alcoscan AL2500 Operator's manual

CONDTROL SMART 25 user manual

CONDTROL

CONDTROL SMART 25 user manual

Agilent Technologies ESA-E E4401B Getting started guide

Agilent Technologies

Agilent Technologies ESA-E E4401B Getting started guide

Maxwell Digital Multimeters 25801 user manual

Maxwell Digital Multimeters

Maxwell Digital Multimeters 25801 user manual

Bühler technologies GAS 222.11 Ex1 Installation and operation instruction

Bühler technologies

Bühler technologies GAS 222.11 Ex1 Installation and operation instruction

FLIR VS70 user manual

FLIR

FLIR VS70 user manual

Storch ProDist compact manual

Storch

Storch ProDist compact manual

LaserLiner DistanceMaster Compact Plus manual

LaserLiner

LaserLiner DistanceMaster Compact Plus manual

Hamamatsu ENERGETIQ LDLS EQ-77 Operation manual

Hamamatsu

Hamamatsu ENERGETIQ LDLS EQ-77 Operation manual

Telestream PRISM MPI2-25 user manual

Telestream

Telestream PRISM MPI2-25 user manual

PCE Health and Fitness PCE-IVM 3D user guide

PCE Health and Fitness

PCE Health and Fitness PCE-IVM 3D user guide

MKI MKI-FH4 manual

MKI

MKI MKI-FH4 manual

LaserLiner VideoInspector 3D manual

LaserLiner

LaserLiner VideoInspector 3D manual

RIDGID SeeSnake DVDPak2 Operator's manual

RIDGID

RIDGID SeeSnake DVDPak2 Operator's manual

manuals.online logo
manuals.online logoBrands
  • About & Mission
  • Contact us
  • Privacy Policy
  • Terms and Conditions

Copyright 2025 Manuals.Online. All Rights Reserved.