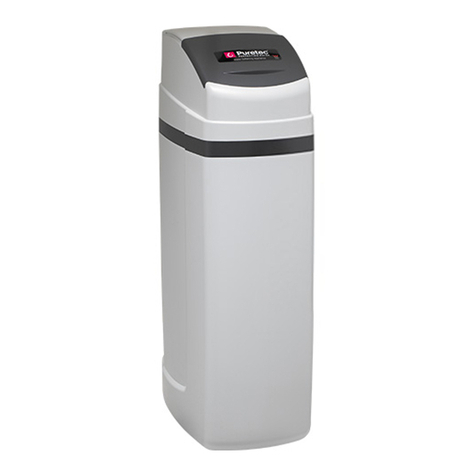
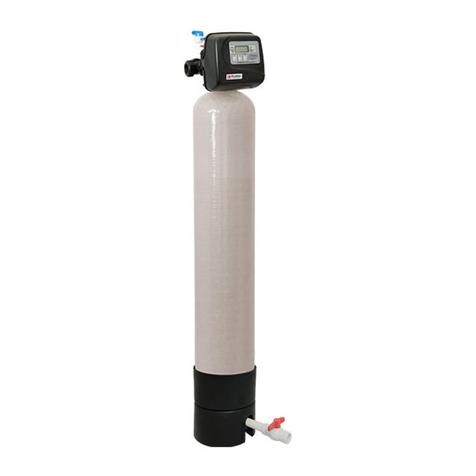
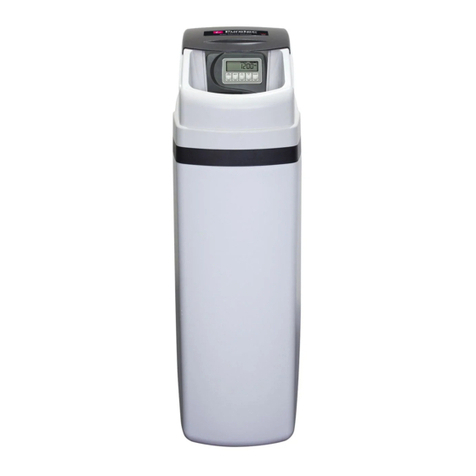
Puretec SOL-E3 Series User manual

User Guide
Volumetric Water Softening Appliance
SOL-E3 Commercial Series
For correct operation & installation, it is essential to observe these instructions.OCT2021
WMTS103:2016
Licence No. WM 74593
Australian Certication
Services
DO NOT
DO NOT USE
LIQUID SEALANTS.
SURGE PROTECTION
REQUIRED /
NO EXTENSION CORDS.
SURGE PROTECTION
REQUIRED /
NO EXTENSION CORDS.

2 Installation & Operation Manual Copyright © Puretec Pty Ltd 2021
What's Inside
What's Inside
Puretec Customer Service ............................................................................................................................3
Installation Record ............................................................................................................................................4
Before Installation..............................................................................................................................................5
Specications........................................................................................................................................................7
Model Information..............................................................................................................................................8
Exploded Diagram...........................................................................................................................................10
Valve Diagram Identication.....................................................................................................................11
Installation Procedure...................................................................................................................................12
Programming .....................................................................................................................................................17
Start-Up ................................................................................................................................................................23
Regeneration......................................................................................................................................................23
Replenishment of Salt Supply ..................................................................................................................24
Type of Salt to Use.........................................................................................................................................24
Brine Tank Clean-Out (Yearly)...................................................................................................................24
Media Replacement........................................................................................................................................24
Bypass Valve Operation - optional accessory .................................................................................25
Troubleshooting Guide ..................................................................................................................................26
Warranty...............................................................................................................................................................30

3Copyright © Puretec Pty Ltd 2021 SOL-E3 Commercial Series User Guide
Puretec Customer Service
Thank you for purchasing a Puretec Sorol Volumetric Water Soening System. Your
system is a proven performer manufactured from only quality materials and components.
It will give years of reliability and trouble free operation if maintained properly.
This user guide is designed for Puretec SOL-E3 Water Treatment Systems. Be careful to
ensure the information and illustration is applicable to your particular unit.
Caution: Do not use with water that is microbiologically unsafe or without
adequate disinfection before or aer the system.
The systems are designed for metropolitan supply water but can be used in other
situations. For other types of water supply, please contact your local Puretec dealer.
Puretec Water Soeners are designed to run economically for many years, dependent on
the initial installation and periodic maintenance.
Flush system for 5 minutes or more, aer any period of non-use, more than 2 weeks.
Note: For point of entry installations an approved dual check backow prevention device
must be installed.
When line pressure exceeds 500 kPa, a pressure limiting valve must be installed.
Note: Water soener salt not supplied.
Installation Note: A water lter system/tap, like any product, has a limited life and may
eventually fail. Also sometimes failure happens early due to unforeseen circumstances.
To avoid possible property damage, this product should be regularly examined for
leakage and/or deterioration and replaced when necessary. A drain pan, plumbed to an
appropriate drain or outtted with a leak detector, should be used in those applications
where any leakage could cause property damage, and/or the water supply should be
turned o if no one is home/present.
INSTALLATION SHOULD BE COMPLETED BY QUALIFIED TRADESPEOPLE. FAULTY
OPERATION DUE TO UNQUALIFIED PERSONS WILL RESULT IN VOIDED WARRANTY
COVERAGE.
Warning: Chlorine (free chlorine) tolerance is 1ppm - high chlorine levels permanently
damage the soening resin & is not covered under warranty. If chlorine exceeds this
limit, we recommend a carbon pre-lter such as the WH2 or CFS Series. Please refer to
Puretec for a specic recommendation. In any case, a carbon pre-lter is recommended
to protect against chlorine spikes & prolong the resin life.


4 Installation & Operation Manual Copyright © Puretec Pty Ltd 2021
Product Information
Model Number:
Serial / Batch Number:
Purchased from:
Date of Installation:
Installer / Plumber Details:
Regen Frequency: ________ Days
Water Analysis Information
Hardness: ___________ ppm / mg/L
Iron: ___________ ppm / mg/L
Manganese: ___________ ppm / mg/L
pH: ___________
TDS (Total Dissolved Salts): ___________ ppm / mg/L
Conductivity: ___________ EC / uS/cm
Chloride: ___________ ppm / mg/L
Sodium: ___________ ppm / mg/L
Installation Record
For future reference, ll in the following data:
Installation Record

5Copyright © Puretec Pty Ltd 2021 SOL-E3 Commercial Series User Guide
Before Installation
Professional Installation Required
• Installation requires shutting water o to home, cutting home water supply pipe
and using a welding torch to add piping and ttings. Specialised tools and skills are
required, this must be completed by a qualied tradesperson.
Make Sure Your Water Has Been Thoroughly Tested
• An analysis of your water should be made prior to the selection of your water
conditioning equipment. Your dealer will generally assist with this service for
you, and may send a sample to an independent laboratory for analysis and
recommendations. Enter your analysis information on page 4 for your permanent
record.
• Soeners are designed to reduce hardness but can handle reasonable amounts
of soluble iron if consideration is given to content when selecting model and
regeneration settings. For best results contact Puretec to discuss.
Install Water Conditioning Equipment Correctly
Select the location of your water soener with care. Various conditions which contribute
to proper location are as follows:
• Install as close as possible to a drain.
• Install in correct relationship to other water treatment equipment. Contact Puretec
for assistance.
• Install the soener in the supply line BEFORE the water heater. Temperatures above
40°C will damage the soener and void the warranty.
• DO NOT install the soener in a location where freezing temperatures occur.
Freezing may cause permanent damage and will also void the warranty.
• DO NOT install where water hammer conditions may occur without installing an
arrestor.
• Allow sucient space around the installation for easy servicing. Provide a non-
switched 240V power source for the control valve.
Before Installation

6 Installation & Operation Manual Copyright © Puretec Pty Ltd 2021
Before Installation
• The control valve, ttings and/or bypass are designed to accommodate minor plumbing
misalignment but are not designed to support the weight of a system or the plumbing.
• Do not use petroleum jelly, oils, other hydrocarbon lubricants or spray silicone anywhere.
A silicon lubricant may be used on the black o-rings but it is not necessary.
• Do not use pipe dope or other sealants on threads. Thread seal tape is the preferred
sealant but is not necessary on the nut connection or caps because of o-ring seals.
• All plumbing should be done in accordance with local plumbing codes. The pipe size for
the drain line should be a minimum of ⅝”.
• Avoid getting primer and solvent cement on lter system.
• Install grounding strap on metal pipes if required.
• Ensure the system is protected against high pressure and extreme temperatures.
• Chlorine (free chlorine) tolerance is 1ppm - high chlorine levels permanently damage
the soening resin & is not covered under warranty. If chlorine exceeds this limit, we
recommend a carbon pre-lter such as the WH2 or CFS Series. Please refer to Puretec
for a specic recommendation. In any case, a carbon pre-lter is recommended to
protect against chlorine spikes & prolong the resin life.
Things to Remember While Planning Your Installation:
• All installation procedures MUST conform to local plumbing codes.
• If lawn sprinklers, a swimming pool, or geothermal heating/cooling or water for
other devices/activities are to be treated by the Sorol system, a larger model MUST
be selected to accommodate the higher ow rate, treated water volume, plus the
backwashing requirements of the Sorol system. Contact Puretec for assistance.
WARNINGS
Note: Solder joints must be done prior to connecting to the valve ttings. Leave at least 6”
between the tting and solder joints when soldering pipes. Failure to do this could cause
heat damage to the ttings.
This should be carried out by a qualied tradesman.

7Copyright © Puretec Pty Ltd 2021 SOL-E3 Commercial Series User Guide
Specications
Specications
Pressure Min/Max 140 - 860* kPa
Operating Temperature Min/Max: 5 - 40 °C (protect from
freezing)
Electrical Connection: 240V / 50 Hz
Inlet/outlet Connection: 25 mm
Drain Connection: ⅝" Tube or ¾" BSP
Overow Connection: ⅝”
SOL-45 SOL-60
Width (mm) (W): 260 mm 300 mm
Height (mm) (H): 1570 mm 1525 mm
Maximum Salt Storage
Capacity: 75 kg 75 kg
*If pressure exceeds 500kPa an approved pressure limiting device needs to be tted.
(W)
430
900
(H)

8 Installation & Operation Manual Copyright © Puretec Pty Ltd 2021
Kit Type Part no. Description Qty
Tank Kit
(WTP2280-K)
WTD2130 Riser & Distributor, 1.05" x 72" (pre-installed) 1
WTP2280 Pressure Tank with Grey Base, 10" x 54" 1
WTV3030 Pressure Tank UV Collar Shield suits 2.5" 1
LBL-WTSHEAD Puretec Logo Label for Pressure Tank 1
Valve Kit
(WTV4200-K)
WTV4200 Valve Soener Volumetric E3 1
WTV5110 Valve Cover Almond (pre-installed) 1
WTV5135 Transformer & Lead Suits Auto Valves
(pre-connected)
1
- Drain Assembly 1
WTD1010 Top Screen (Click Lock) (pre-installed) 1
WTV5180 Spanner 1
WTV5070 Plastic Fitting Kit, 1" Elbow (set of 2)
(pre-installed)
1
Brine Kit
(WTB2200-K)
WTB2200 Brine Tank, Commercial, 15" x 17" x 33" 1
WTB4000 Brine Pickup Assembly (pre-installed) 1
WTB3200 Brine Well Caps, 3" (pre-installed) 2
WTB3000 Brine Well, 3.5" x 28" (pre-installed) 1
WTB5150 2 Pce Overow Kit (pre-installed) 1
KTU6BK Tubing, High Pressure, 3/8" Black 1m
KEC66 Elbow Connector, 3/8" Tube (pre-installed) 1
Media Kit
WTM7550-5L Multi-media High Performance Medium 5L 1
WTM4400-15L Resin Cation Soening 15L 1
WTM4400-25B Resin Cation Soening 25L Bag 1
Instruction Kit
(WTI-SOL45-E3)
LBL-METALLICBLANK Metallic Silver Model Label (60x100) 1
UG-SOL-E3-C Commercial SOL-E3 User Guide 1
WTV1500 Media Funnel 1
WTV5240 DLFC Washer, 10Lpm, 3/4" 1
WTV5570 Injector, White 1
SOL45-E3 Model Information
System Inclusions - Kits & Components
Vessel Media Filling Order
1st 2nd
1 x WTM7550-5L 1 x WTM4400-15L & 1 x WTM4400-25B
Model Information

9Copyright © Puretec Pty Ltd 2021 SOL-E3 Commercial Series User Guide
SOL60-E3 Model Information
System Inclusions - Kits & Components
Vessel Media Filling Order
1st 2nd
1 x WTM7550-5L 2 x WTM4400-15L & 1 x WTM4400-25B
Model Information
Kit Type Part no. Description Qty
Tank Kit
(WTP2280-K)
WTD2130 Riser & Distributor, 1.05" x 72" (pre-installed) 1
WTP2360 Pressure Tank with Grey Base, 12" x 52" 1
WTV3030 Pressure Tank UV Collar Shield suits 2.5" 1
LBL-WTSHEAD Puretec Logo Label for Pressure Tank 1
Valve Kit
(WTV4200-K)
WTV4200 Valve Soener Volumetric E3 1
WTV5110 Valve Cover Almond (pre-installed) 1
WTV5135 Transformer & Lead Suits Auto Valves
(pre-connected)
1
- Drain Assembly 1
WTD1010 Top Screen (Click Lock) (pre-installed) 1
WTV5180 Spanner 1
WTV5070 Plastic Fitting Kit, 1" Elbow (set of 2)
(pre-installed)
1
Brine Kit
(WTB2200-K)
WTB2200 Brine Tank, Commercial, 15" x 17" x 33" 1
WTB4000 Brine Pickup Assembly (pre-installed) 1
WTB3200 Brine Well Caps, 3" (pre-installed) 2
WTB3000 Brine Well, 3.5" x 28" (pre-installed) 1
WTB5150 2 Pce Overow Kit (pre-installed) 1
KTU6BK Tubing, High Pressure, 3/8" Black 1m
KEC66 Elbow Connector, 3/8" Tube (pre-installed) 1
Media Kit
WTM7550-5L Multi-media High Performance Medium 5L 1
WTM4400-15L Resin Cation Soening 15L 2
WTM4400-25B Resin Cation Soening 25L Bag 1
Instruction Kit
(WTI-SOL60-E3)
LBL-METALLICBLANK Metallic Silver Model Label (60x100) 1
UG-SOL-E3-C Commercial SOL-E3 User Guide 1
WTV1500 Media Funnel 1
WTV5270 DLFC Washer, 20Lpm, 3/4" 1
WTV5580 Injector, Blue 1

10 Installation & Operation Manual Copyright © Puretec Pty Ltd 2021
Exploded Diagram
Exploded Diagram
Valve Cover (pre-installed)
Bypass Assembly
(optional -
puchased
separately)
⅜" Black Tubing
⅜" Elbow
Connector
(pre-installed)
Brine Pickup
Assembly
(pre-installed)
Brine
Tank
2pce
Overflow
(pre-installed)
Pressure
Tank
(Vessel)
Top Screen
(pre-installed)
UV Shield
Elbow
Connectors
(pre-installed)
Drain
Assembly
Valve
Transformer
(pre-connected)
Riser &
Distributor
(pre-installed)
DLFC Washer

11Copyright © Puretec Pty Ltd 2021 SOL-E3 Commercial Series User Guide
Valve Diagram Identication
Outlet 1"
Control Panel
Inlet 1"
Brine ⅜”
Drain 5/8" Tube or
3/4" BSP Threaded
Injector Cap

12 Installation & Operation Manual Copyright © Puretec Pty Ltd 2021
Installation Procedure
⅝" Tubing for drain and
overow (refer to page 13)
A minimum of 25kg of salt
(up to 75 kg) Refer to page
21 for the type of salt to
be used.
Installation Procedure
Ensure water has been tested. Input values into Table on page 4 and the
analysis has been inspected by Puretec.
3
Water Analysis Information
Hardness ___________ ppm / mg/L
Iron ___________ ppm / mg/L
Manganese ___________ ppm / mg/L
pH ___________
TDS (Total Dissolved Salts) ___________ ppm / mg/L
Conductivity ___________ EC / uS/cm
Chloride ___________ ppm / mg/L
Sodium ___________ ppm / mg/L
130
0.3
0.1
7
275
404
121
96
✓✓
Customer Service Helpline
1300 140 140 (AU) 0800 130 140 (NZ)
✓
Extra items required:
2
Unpack the equipment. Ensure all parts are present and have not been damaged
in trasport. You should have:
1
User Guide
Automatic Timer Water Softening Appliance
SOL-E1 Commercial Series
Forcorrect operation & installation it is essential to observe these instructions.
JAN2019
Tank Kit
Instruction KitValve Kit
Bypass Assembly
(purchased separately)
Brine Kit Media Kit
Note: For a detailed part listing of kit components see individual model specications.

13Copyright © Puretec Pty Ltd 2021 SOL-E3 Commercial Series User Guide
Installation Procedure
Position the Sorol System on a level surface.
5
Install the Injector
Before attaching the valve the injector needs to be installed. Remove the injector from
the Instruction, Injector & DLFC Kit and undo the injector cap on the valve using the
spanner provided. Remove the white injector from the hole marked "DN" and replace
with the new injector provided in the kit. Replace the injector cap, tightening with the
spanner.
Injector Cap
4
O-ring
Injector Screen
Injector Plug
Injector
Spanner
Position the system on a level concrete or similar
plinth, sturdy enough for the system.
Environmental conditions
Operating temperature: 5 - 40 °C
Water conditions
Temperature: 5 - 40 °C
Pressure: 138 - 862 kPa

14 Installation & Operation Manual Copyright © Puretec Pty Ltd 2021
Installing the Bypass (optional - purchased separately)
Uninstall the plastic
ttings by turning the knob
counterclockwise.
Connect the bypass assembly followed
by the plastic ttings. Hand tighten the
knobs, do not overtighten.
Refer to page 17 for bypass operation.
7
Media Installation
The Media has been shipped separately to avoid damage in transit.
The length of the internal riser pipe is pre-set and does not need adjustment.
1. Position the system on a at surface close to a drain or a properly
trapped outlet, in a position where the system can service all lines
requiring treated water. The system should be placed far enough
away from any water heaters to avoid any hot water backow into
the system. A weatherproof power point and surge protector is
recommended.
2. Plug or cover the top end of the riser pipe in the tank making sure no
media can enter the tube.
3. Ensure that the riser pipe is sitting in the cradle at the base of the tank.
Then using a wide mouth funnel, place the media in the tank as per the
lling order on the individual model specication pages.
4. Remove the plug or cover from the riser pipe making sure you do not li
the riser pipe. Top up tank with water.
5. Place the UV shield on top of the opening of the vessel.
6. Screw valve onto the tank (hand tight is usually sucient), making sure
the distributor tube is properly inserted into the valve.
6
Installation Procedure

15Copyright © Puretec Pty Ltd 2021 SOL-E3 Commercial Series User Guide
Installation Procedure
Connecting the Sorol System
Connect the Sorol System to main plumbing. Do not solder brass adapters while
they are inserted in the control module.
8
Apply plumbing tape to
the nipple as required.
Connect the pipe work to the
valve, refer to page 9 for
identication.
FOLLOW LOCAL
PLUMBING CODES
Water
Flow
Proper DLFC orientation directs
water ow towards the washer
face with rounded edge.
Connecting the Drain Assembly
Unpack the Drain Assembly from the valve kit. Remove the DLFC washer from the
instruction & injector kit and insert the washer into the elbow connector. Note: The
numbers on the washer should be visible once inserted into the elbow. Remove the
elbow locking clip and insert the drain assembly elbow into the drain line located on
top of the valve. Secure with the locking clip.
9
Nut
Tube
Insert
Drain Line Elbow
DLFC Washer
Elbow Locking Clip
Tube

16 Installation & Operation Manual Copyright © Puretec Pty Ltd 2021
Connecting the Drain Line
10
Ensure both the drain line and overow
discharge over a tundish, gully trap or an
approved method by the local authority with an
adequate air gap of 2 times the pipe diameter
or 25 mm, whichever is larger.
Ensure drain and overow lines are not
interconnected or kinked.
The drain line must not travel more than 2.4 m
up and no more than 6 m long from the valve,
otherwise increase the diameter of the drain
line.
Either connect additional tube (tubing not
supplied) onto the 5/8” drain line from the valve
to the discharge point or alternatively, remove
the nut and connect to the 3/4" BSP male
connection.
Programming
Plug into an uninterrupted electrical outlet. Note: All electrical connections must
be connected accordingly to local codes. Gently remove almond cover. Proceed to
‘Programming’ section.
13
Connecting the Overow
Connecting Brine Line
12
11
Connect tubing onto the 5/8” overow
tting (tubing not supplied) and run the
line to the drain. Do not connect the
overow into the drain line, as it must
be a direct and separate line to the
drain. Allow an air gap as per the drain
line. Make sure the drain is not higher
than the overow.
Locate Elbow Fitting in the Brine Tank, remove black tubing and dispose. Connect 1m
length of 3/8 black tubing between Brine Line and Elbow Fitting.
OVERFLOW
BRINE
Installation Procedure
BRINE DRAIN

17Copyright © Puretec Pty Ltd 2021 SOL-E3 Commercial Series User Guide
Programming
Programming - E3
DAY
GAL
REGEN
TODAY
SET
CLOCK REGEN
NEXT
TIME
SOFTENING P M
REGEN
TODAY
OR
SET
CLOCK REGEN
NEXT
REGEN TODAY will ash
if a regeneration is
expected ‘Tonight’.
SET
CLOCK REGEN
NEXT
REMAINING
CAPACITY REMAINING
SOFTENING
SET TIME
AM
SET
CLOCK REGEN
NEXT
AM
SET TIME
SET
CLOCK REGEN
NEXT
SET
CLOCK REGEN
NEXT
continued on the next page
General Operation
When the system is operating one of two displays will be shown.
Pressing NEXT will alternate between the displays. One of the
displays is always the current time of day. The second display is
one of the following: days remaining or gallons remaining. Days
remaining is the number of days le before the system goes
through a regeneration cycle. Capacity remaining is the number
of gallons that will be treated before the system goes through a
regeneration cycle. The user can scroll between the displays as
desired.
If the system has called for a regeneration that will occur at the
preset time of regeneration, the words REGEN TODAY will appear
on the display.
When water is being treated (i.e. water is owing through the
system) the word “Soening” or “Filtering” ashes on the display if
a water meter is installed.
Set Time Of Day
The user can also set the time of day. Time of day should only
need to be set aer expended power outages or when daylight
savings begins or ends. If an extended power outage occurs, the
time of day will ash on and o which indicates the time of day
should be reset.
1. Press SET CLOCK
2. Current Time (hour): Set the hour of the day using
or buttons.
Press NEXT to go to step 3.
3. Current Time (minutes) : Set the minutes of the day using
or buttons. Press NEXT to exit Set Clock.
Press REGEN to return to the previous step.

18 Installation & Operation Manual Copyright © Puretec Pty Ltd 2021
Setup Programming
Setup Programming (MUST be performed prior to use)
Press REGEN at any time to return to the previous step.
1. Press NEXT and ▼ simultaneously for 3 seconds. If screen
in step 2 does not appear in 5 seconds the lock on the valve
is activated. To unlock press ▼, NEXT,▲, and SET CLOCK
in sequence, then press NEXT and ▼ simultaneously for 3
seconds.
2. Choose Soening using ▼ or ▲.
Press NEXT to go to Step 3. Press REGEN to exit Soener
System Setup.
3. Enter the ion exchange capacity in grains of hardness as
calcium carbonate for the system using ▼ or ▲.
SOL45-E3 = 40.0
SOL60-E3 = 55.0
Press NEXT to go to Step 4.
RETURN TO
NORMAL MODE
RETURN TO
NORMAL MODE
SOL45-E3
RETURN TO
NORMAL MODE
SOL60-E3

19Copyright © Puretec Pty Ltd 2021 SOL-E3 Commercial Series User Guide
Setup Programming
4. Enter the pounds of salt per regeneration using ▼ or ▲.
SOL45-E3 = 12.5
SOL60-E3 = 17.0
Press NEXT to go to Step 5.
5. Backwash: Select “NORMAL” using ▼ or ▲.
Press NEXT to go to Step 6.
6. Set Gallons Capacity using ▼ or ▲. Select "AUTO"
• “AUTO” (reserve capacity automatically estimated and
gallons capacity automatically calculated from grains
capacity and water hardness);
• “oFF” (regeneration based on day override).
Press NEXT to go to Step 7.
SOL45-E3
SOL60-E3
RETURN TO
NORMAL MODE
RETURN TO
NORMAL MODE
RETURN TO
NORMAL MODE
RETURN TO
NORMAL MODE
RETURN TO
NORMAL MODE
RETURN TO
NORMAL MODE

20 Installation & Operation Manual Copyright © Puretec Pty Ltd 2021
7. Set Rell option using ▼ or ▲. Select "PoST".
• “PoST” to rell the brine tank aer the nal rinse; or
• “PrE” to rell the brine tank two hours before the
regeneration time set.
Press NEXT to go to Step 8.
8. Set regenerant downow or upow using ▼ or ▲. Select "dn".
• “dn” if the regenerant is to ow downward through the
media; or
• “UP” if the regenerant is to ow upward through the media.
Prior to selecting a regenerant ow direction, verify the
correct valve body, main piston, regenerant piston, and stack
are being used, and that the injector or injector plug(s) are in
the correct locations.
Press NEXT to go to Step 9.
9. Set Regeneration Time Option using ▼ or ▲. Select
"NORMAL".
• “NORMAL” means regeneration will occur at the preset time;
• “on 0” means regeneration will occur immediately when the
gallons capacity reaches 0 (zero); or
• “NORMAL + on 0” means regeneration will occur at one of
the following:
• The preset time when the gallons capacity falls below
the reserve or the specied number of days between
regenerations is reached which ever comes rst; or
• Aer 10 minutes of no water usage when the gallon
capacity reaches 0 (zero).
Press NEXT to exit Soener System Setup.
RETURN TO
NORMAL MODE
RETURN TO
NORMAL MODE
RETURN TO
NORMAL MODE
RETURN TO
NORMAL MODE
RETURN TO
NORMAL MODE
RETURN TO
NORMAL MODE
Setup Programming
Other manuals for SOL-E3 Series
1
This manual suits for next models
2
Table of contents
Other Puretec Water Dispenser manuals

Puretec
Puretec Softrol E1 User manual

Puretec
Puretec K series User manual

Puretec
Puretec Softrol E3 User manual

Puretec
Puretec ROS2700 User manual

Puretec
Puretec SOL-E1 Series User manual

Puretec
Puretec SOL-SE Series User manual

Puretec
Puretec Sparq S4 User manual

Puretec
Puretec SOL-E1 Series User manual

Puretec
Puretec SOL-2CI Series User manual

Puretec
Puretec RO SERIES User manual