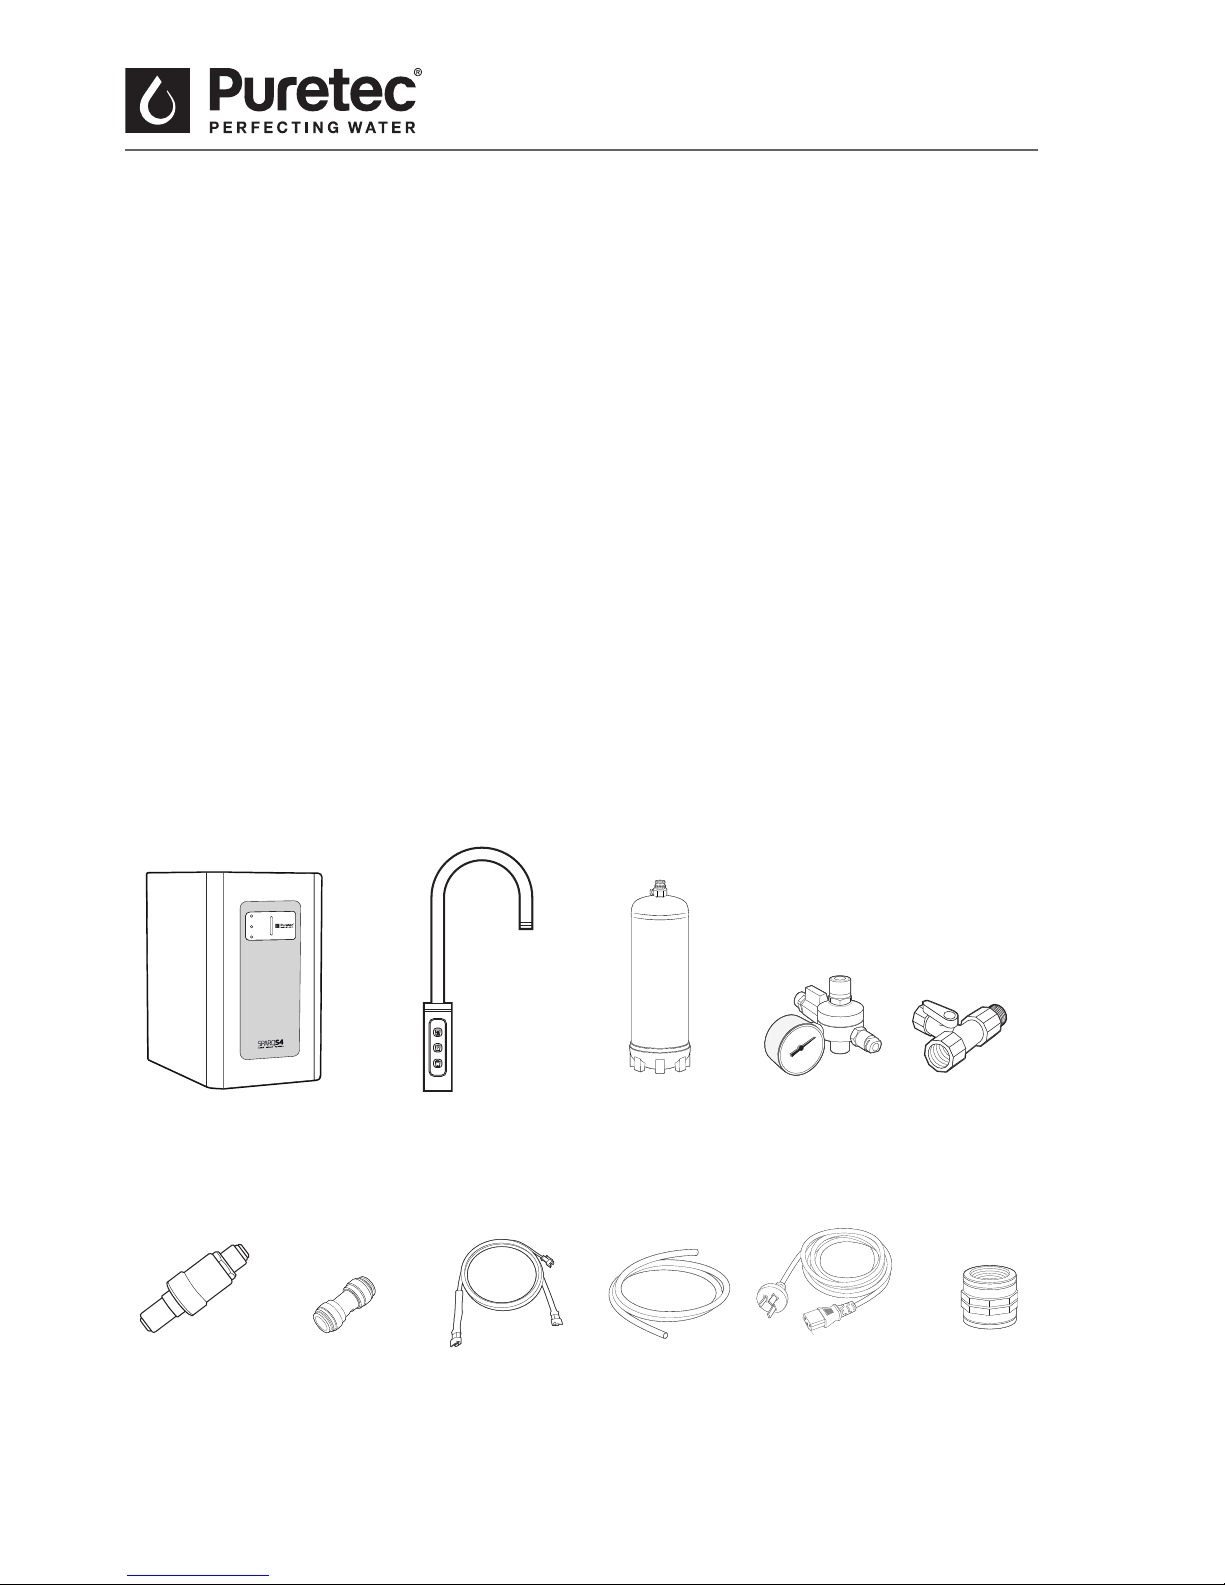
Installation
Installation Procedure
VERY IMPORTANT! These installation steps are VERY important and must be
followed in the correct sequence. Remove all packaging before installation including
tubes on the back of the unit (see g. 3 to remove tubes).
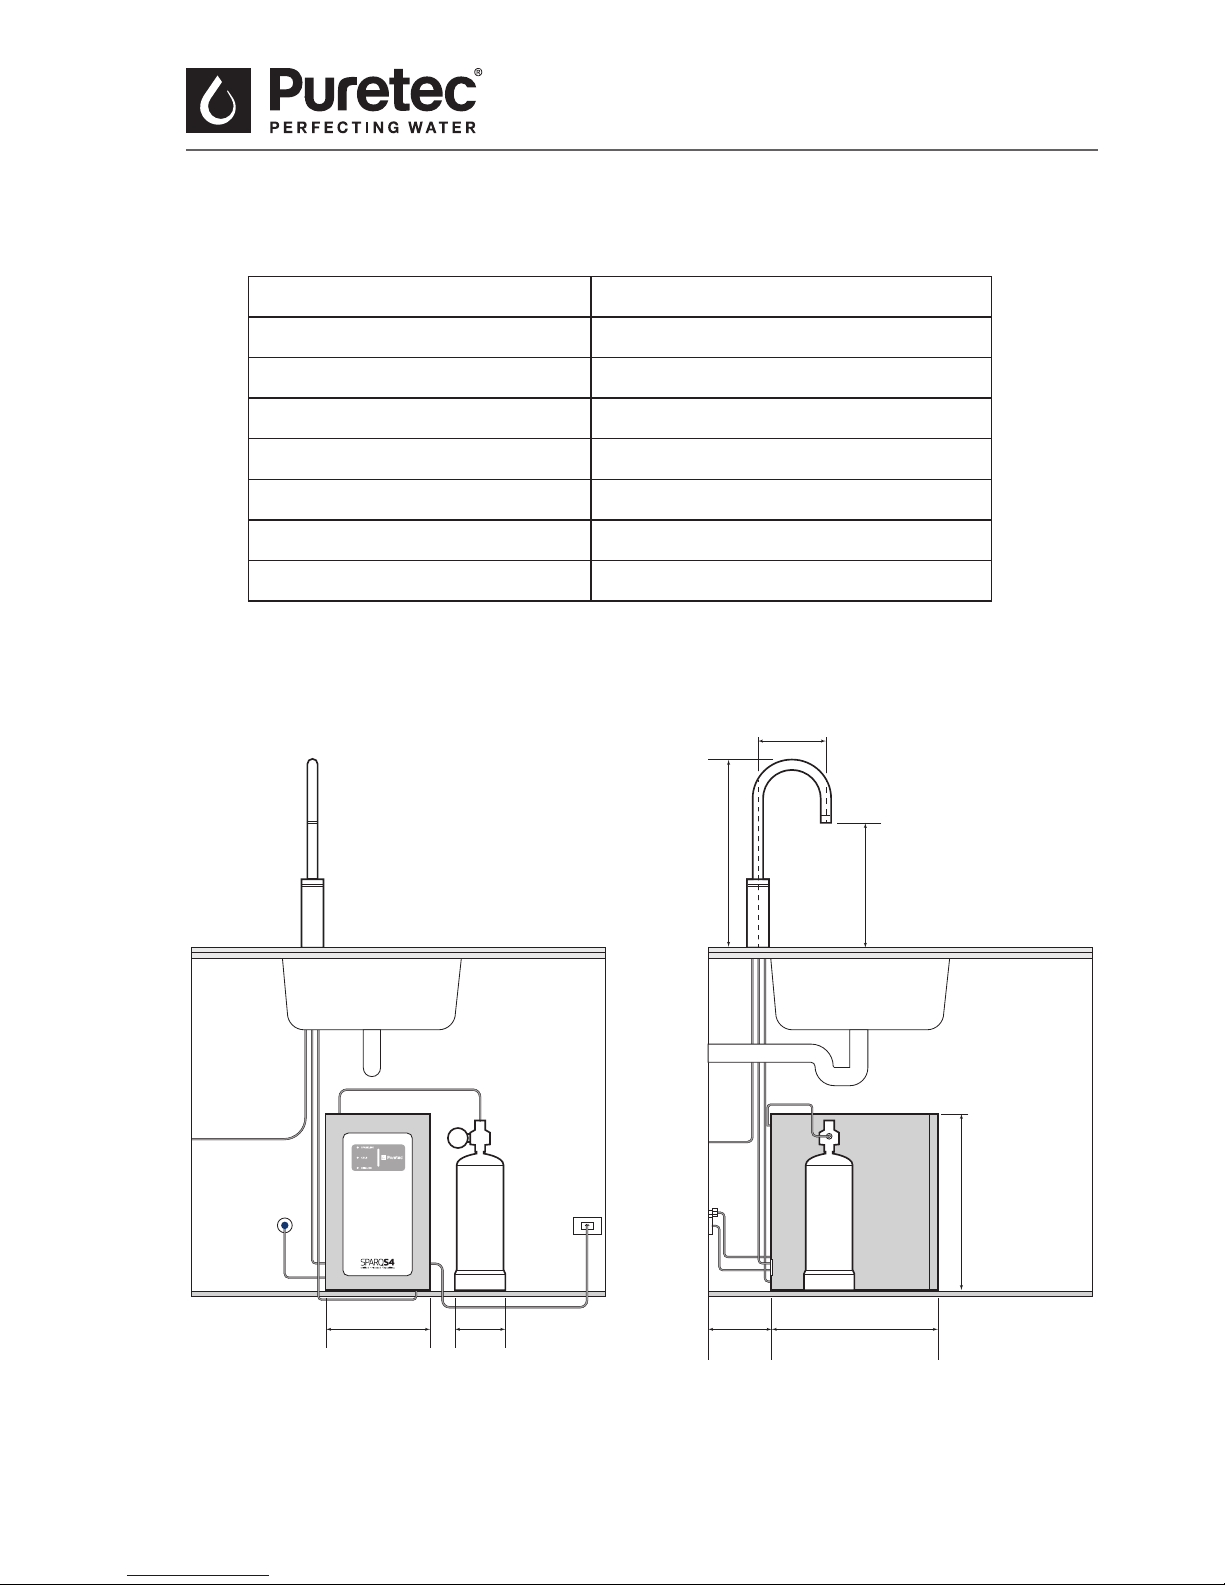
1. Select a suitable position for the tap so that it dispenses into the sink bowl with ample
clearance below the outlet and drill a 26mm hole. (Max 30mm)
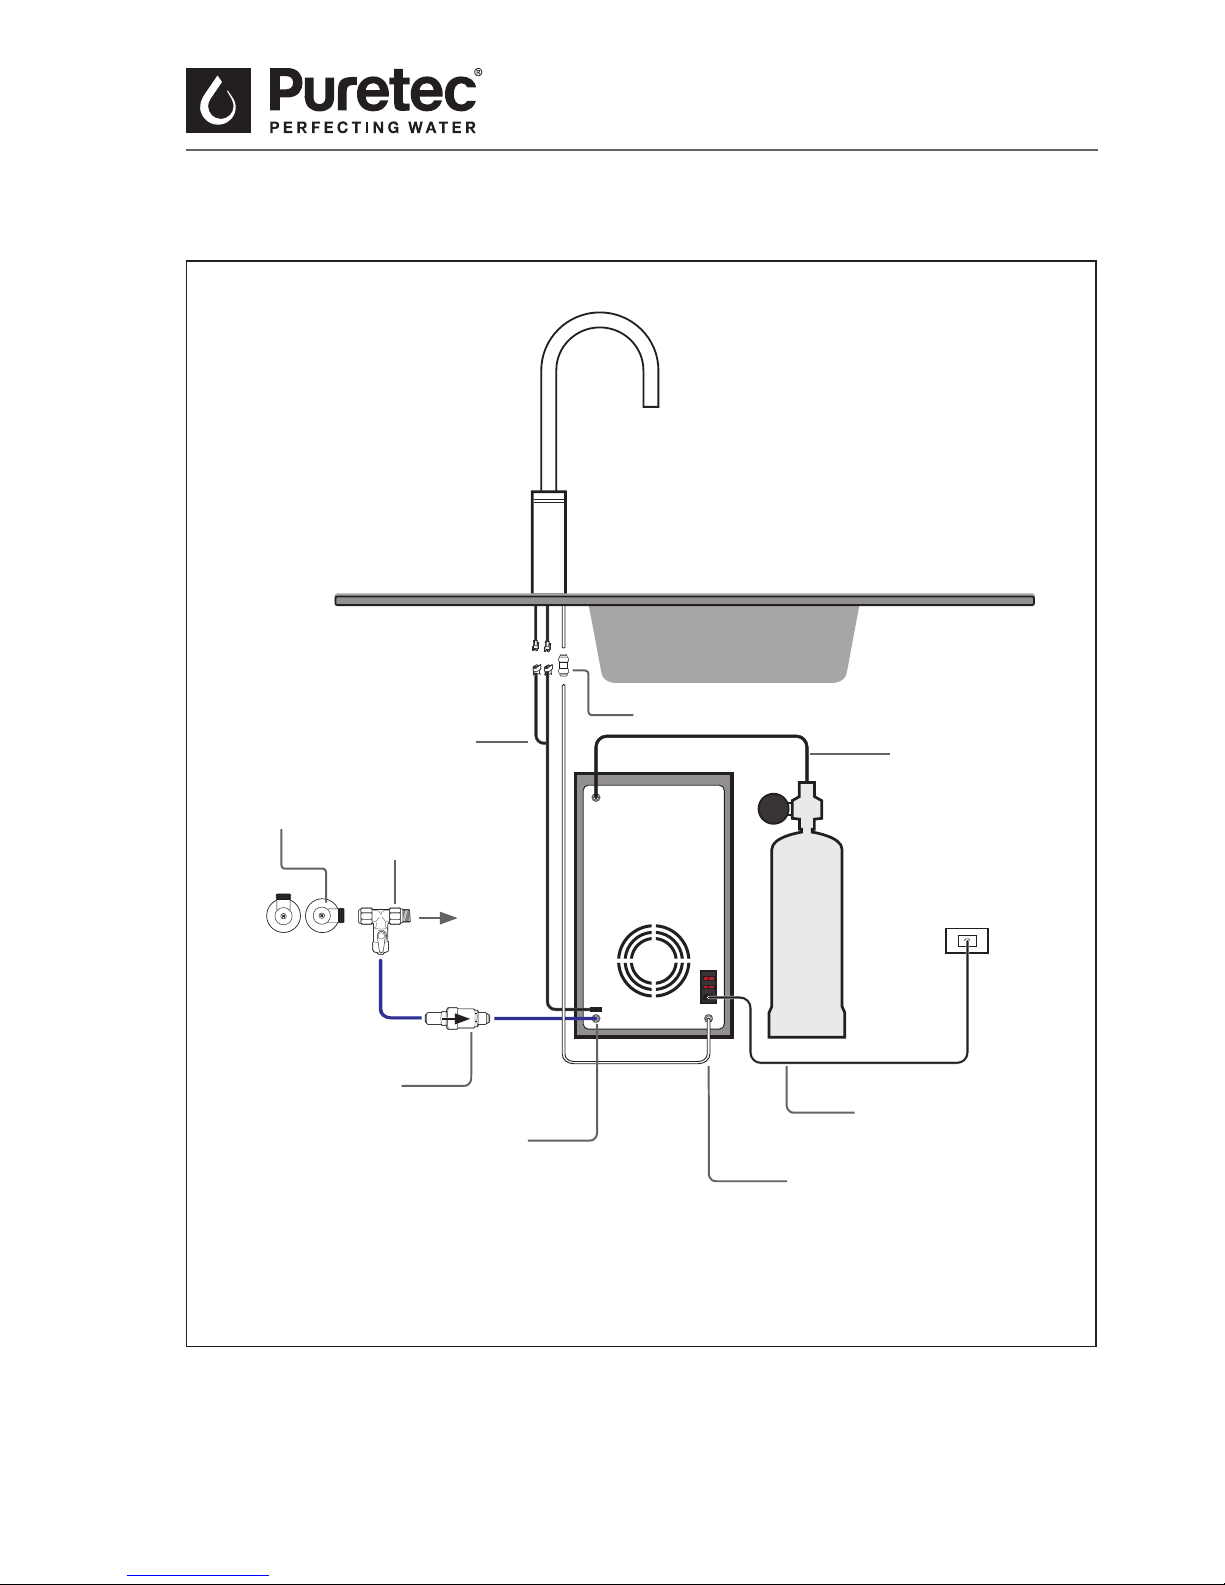
2. Isolate water supply. Uninstall the connections on the cold water line and connect the
Smart Tee™. Reinstall the previous connection to the tee valve.
3. Connect the multivalve to the Smart Tee™ with a length of BLUE tubing. Please see
Fig.2 for water ow direction.
4. Connect the straight connector to the white tube connected to the tap (see Fig.2).
5. Remove the black plastic nut from the tap thread and connect the wiring loom to the
tap (see Fig.2).
6. Feed the straight adaptor and wiring loom through the tap hole and place tap into
position.
7. Screw the tap nut and tighten making sure the tap is correctly positioned on top.
Fixing the tap to a sink may require more care to align all parts.
Note: For thin bench tops or a sink mount, use the supplied spacer, slipping it up the
thread, followed by the black nut to tighten.
8. Choose the best position for the unit with required 15 cm clearance for ventilation to
the rear and top of the unit. Remember to allow access room for changing lters and
a suitable place where water spillage will not cause damage.
9. With a length of BLUE tubing (enough length to pull out of the cupboard to change
lters if not enough height), connect the multivalve to the inlet at the back of the unit
(see Fig.2).
10. With a length of WHITE tubing (enough length to pull out of the cupboard to change
lters if not enough height), connect the straight adaptor to the water outlet.
11. Attach the wiring loom from the tap to the unit. (see Fig.2)