PurSteam PS-937 User manual

USER
MANUAL

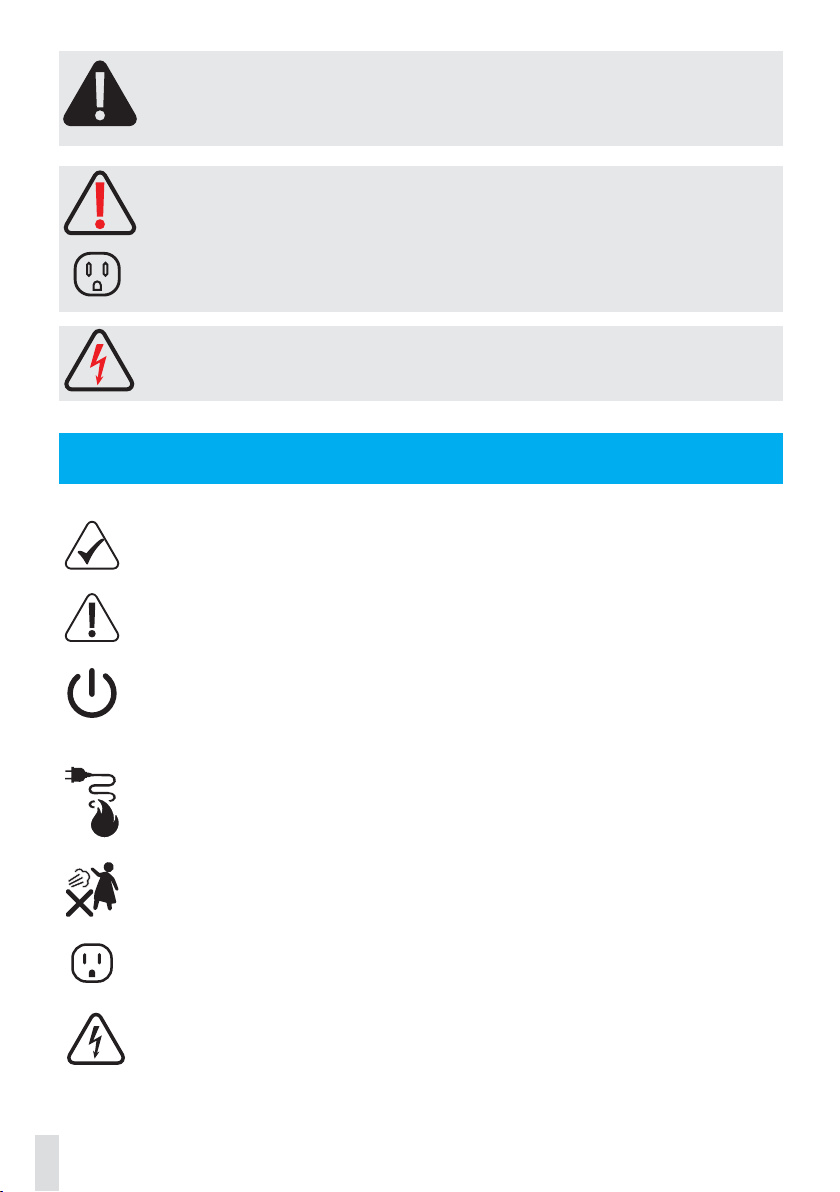
WARNING: To reduce risk of fire, electrical shock or injury, the
following necessary safety precautions should always be
followed when using an electrical appliance.
WARNING: This appliance has a polarized plug (one blade is
wider than the other). As a safety feature, this plug will fit in a
polarized outlet only one way. If the plug does not fit fully in the
outlet, reverse the plug. If it still does not fit, contact a qualified
electrician. Do not attempt to defeat this safety feature.
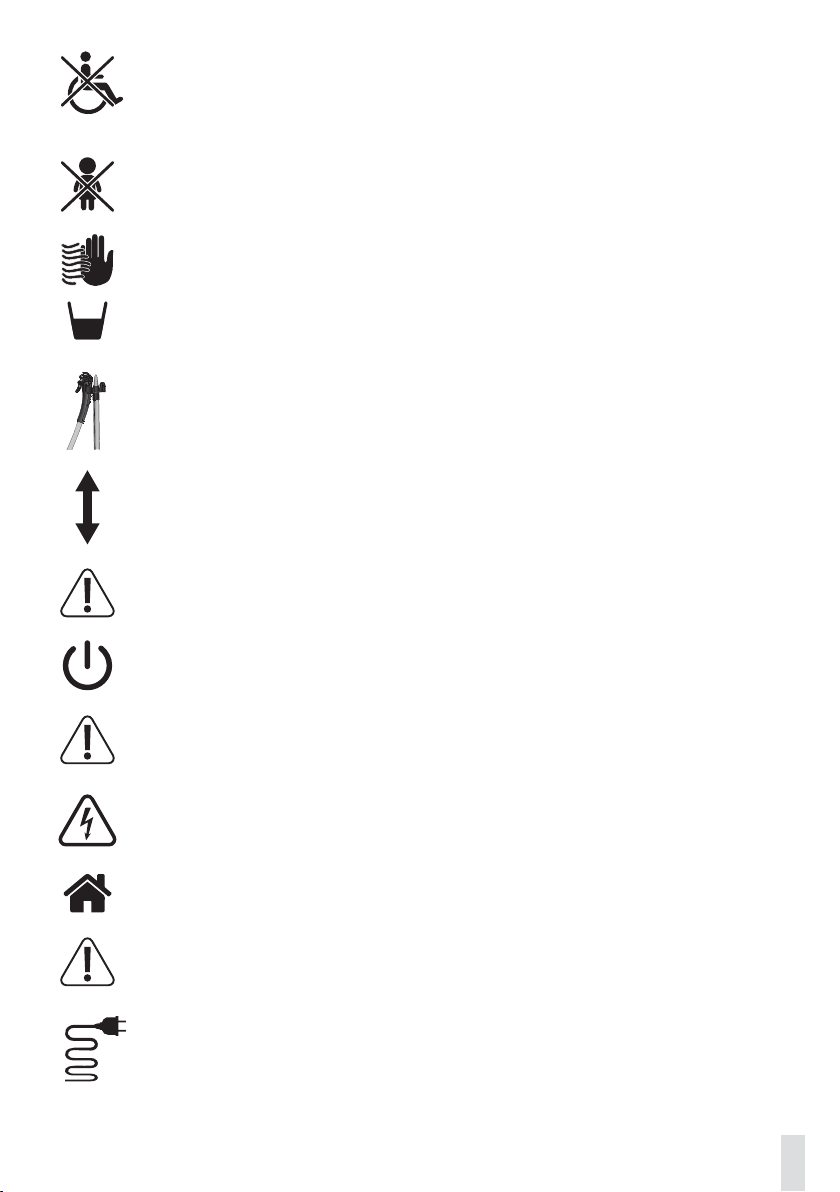
DANGER: To reduce risk of electrical shock, DO NOT IMMERSE
THE APPLIANCE IN WATER OR OTHER LIQUIDS.
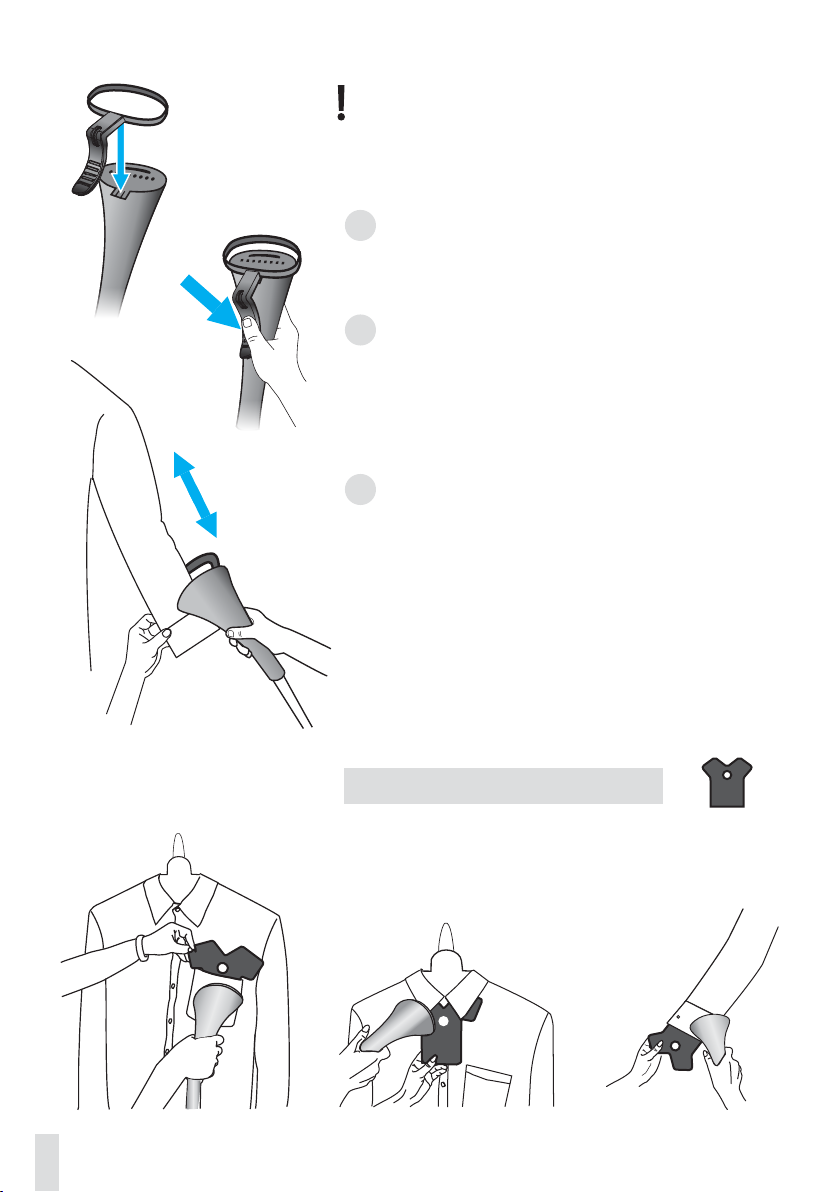
To reduce the risk of contact with hot water emitting from steam vents
check the appliance before each use by holding it away from the body
and operating the steam button.
Use the appliance for its intended purpose only.
Appliance should always be turned “OFF” before plugging or unplugging
from the outlet. Never yank the cord to disconnect from the outlet,
instead gently pull the plug to disconnect.
Do not allow the cord to touch hot surfaces. Let the appliance cool com-
pletely before storing it away. Loop cord loosely around the appliance
when storing.
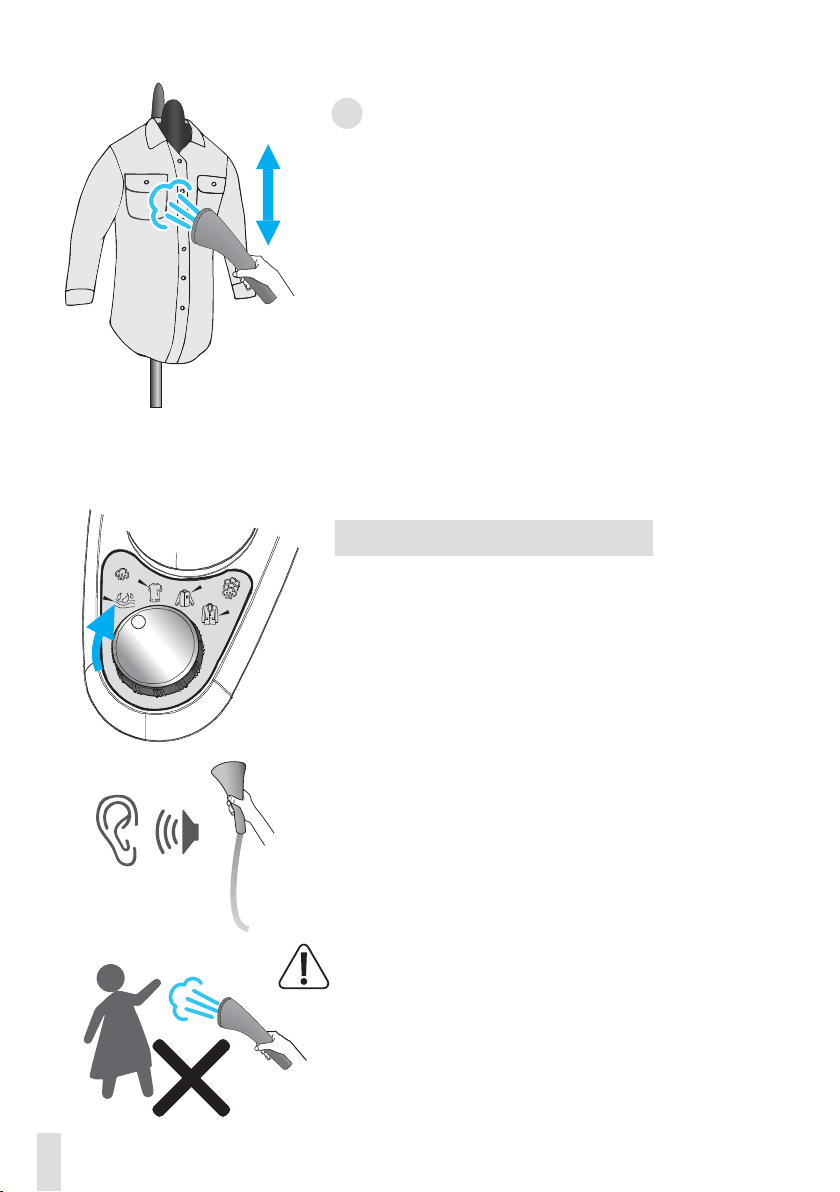
Do not direct steam at people or animals, or use steamer on garments
while they are being worn.
Always disconnect the appliance from the electrical outlet when filling
with water, emptying, or when not in use.
Do not operate the device with a damaged cord or if the appliance has
been dropped or damaged. To avoid the risk of electrical shock, do not
disassemble or attempt to repair the appliance. Contact PurSteam
Customer Service immediately. Incorrect reassembly can cause risk of
fire, injury and electrical shock to persons when the appliance is in use.
READ ALL INSTRUCTIONS BEFORE USING
1

This appliance is not intended for use by people (including children) with
reduced physical, sensory or mental capabilities, or lack of experience
and knowledge unless they have been given supervision or instruction
concerning use of the appliance by a person responsible for their safety.
Children should be supervised by the responsible person to ensure that
they do not play with the appliance.
Burns could occur from touching hot metal parts, hot water or steam.
Never pour water directly into the reservoir. Pour water in the water tank
only.
Never drop or insert any object into any opening or hose.
Always keep the hose and nozzle elevated above the water tank.
Steam only in an up and down vertical motion. Never use the steamer in
a horizontal position or tilt into a backward position; this may result in
hot water discharge.
Do not place the steam nozzle directly on any surface or the appliance
power cord while it is hot or plugged in. Use the stand provided.
When changing attachments, please make sure that the unit is OFF and
no steam is being released, in order to avoid contact with hot water.
Use caution when changing attachments, as they may contain hot water
from condensation.
The use of accessory attachments other than those provided by
PurSteam is not recommended and may result in fire, electric shock or
personal injury.
This unit is for indoor use only.
To avoid a circuit overload, do not operate another high wattage appli-
ance on the same circuit.
If an extension cord is necessary, a 15-ampere rated cord should be
used. Cords rated for less amperage may overheat. Care should be
taken to arrange the cord so that it cannot be pulled or tripped over.
2
SAVE THESE INSTRUCTIONS

PRODUCT INFORMATION
3
Pole Top
Telescopic Pole
Extension
Hanger
Holder
Steam Nozzle
Holder
Hanger
Telescopic Pole 5.5''
Hand Held
Steaming
Board
Steam
Adjusting
Knob
ACCESSORIES:

Place the base on the floor and remove the
water tank.
Install the Telescopic pole
1. Fully extend the telescopic pole. To do so,
loosen the clips on the pole by swinging
their hinges outward, and then fully extend
that section of the pole.
To lock, close/tighten the clip. Perform this
step with both clips to extend the pole fully.
Make sure the pole is securely locked in
place.
NOTE: The Telescopic Pole must be fully
extended during operation to ensure a free
flow of steam through the hose.
2. Insert the bottom of the Telescopic Pole
through the Pole Base coupling.
Then push it down in the coupling to lock
the Pole in place.
To remove the Telescopic Pole from the
Pole Base, release the clips on the pole,
press the Pole Button and take the Pole out.
Attach the Steam Hose
1. Line up the arrow marked on the hose nut
with the marking on the Hose Base.
2. Push down the Hose nut and then turn it
clockwise to tighten.
ASSEMBLY
4
1
2

5
Connect the Pole top
The Pole top has two sides:
The Steam Nozzle holder, which provides a
safe and convenient place to hang the
Steam Nozzle when not in use and the
Hanger holder, which serves as the connec-
tion point for attaching the Hanger.
1. Place the Telescopic Pole Extension on
the top of the telescopic pole. Press down
firmly until Pole Extension fits securely in
place.
2. Align the Pol top circular opening with
Telescopic Pole Extension and push it in.
NOTE: It is recommended to orient the Pole
Top, so that the Steam Nozzle holder faces
forward towards the front of the unit.
CAUTION: To prevent steam from causing
bodily injury or damage to surfaces, always
hang Steam Nozzle upright on Steam
Nozzle Holder when not in use. Do not lay
Hose on the floor.
Connecting the Hanger
The Hanger is designed to support
garments for easy, accessible steaming.
You can expand its width, which allows you
to adjust the Hanger to the clothing item you
are steaming.
Insert the Hanger into the Hanger holder by
pressing it down gently.
The hanger can be attached on either side.
2
1
Steam
Nozzle
holder
Hanger
holder

6
Connecting the Fabric Brush
The Fabric Brush is designed to brush
away particles such as lint, hairs, and loose
threads.
1. Make sure the unit is OFF and not emit-
ting any steam before attaching the Fabric
Brush.
CAUTION: Do not try to connect Fabric
Brush while the unit is emitting steam, as
this can cause burns and injury.
2. Align the Fabric Brush with the small slot
on the Steam Nozzle, then press the brush
firmly onto the Steam Nozzle.
Remove the Fabric Brush once the unit is
unplugged and completely cool by pulling it
off from the Steam Nozzle.
Connecting the Crease Clip
Crease attachment is designed to provide a
more finished look, giving structure and
creases to you dress shirts: collars,
sleeves, plackets, hems, and pants.
1. Make sure the unit is OFF and not emit-
ting any steam before attaching the Crease
Clip.
CAUTION: Do not try to connect the Crease
Clip while the unit is emitting steam, as
this can cause burns and injury.

7
NOTE: Make sure to remove the Fabric Brush
before attaching the Crease Clip as both
attachments cannot be used at the same
time.
2. To attach the Crease attachment, clip it to
the tab on the underside of the Steam
Nozzle.
3. Push on the handle to open the Crease
Clip.
Place the garment between the open
Crease Clip and the Steam Nozzle and then
release the Crease Clip handle.
4. Move the Steam Nozzle in a downwards
motion starting from the top to make pant
creases easily or to remove stubborn wrin-
kles.
Remove the Crease Clip by pulling it off
from the Steam Nozzle.
Using the Steaming Board
The "Y" shaped part is designed to help you
steam pockets, sleeves, collars, or generally
any corner of your garment.
2
3
4
For ColarFor Pockets For Corners

Water Tank
The steamer is designed to be used with tap
water. However, if the water in your area is hard,
PurSteam recommends that you mix half tap
water and half distilled water, which reduces the
hardness; you may also use bottled water or
distilled water only.
Ensure that the device is unplugged. Remove
the water tank from the base of the appliance
by pulling it upwards. Unscrew the Valve Cap
and fill the tank with water.
Close the Valve Cap and put the water tank
back into place.
IMPORTANT: Never use water that contains
additives (starch, perfume, aromatic substanc-
es, softener, etc) in the steamer. Additives
such as these can affect the properties of the
steam and lead to the formation of deposits.
USE
Only operate the steamer on the floor, clear of
any materials which may obstruct the base of
the steamer (flat and horizontal surface).
IMPORTANT: Do not operate the unit with an
empty Water Tank.
1. Plug in the power cord and turn on the power
using the foot-operated pedal. The power light
will illuminate. After approximately 60 seconds
of heating time, the unit will begin producing a
flow of steam from the Steam Nozzle.
8
Valve Cap

9
2. Place the garment onto the Hanger. Grasp
the Steam Nozzle with the steam vents point-
ing away from you. Start steaming by touch-
ing the material lightly with the Steam Nozzle
and moving it in an up/down vertical motion
beginning at the bottom of the garment and
moving upward. Repeat this step until the
fabric is wrinkle-free.
NOTE: Do not allow the hose to bend at any
time during use.
Adjusting the steam power
The steam power can be set to the desired
level with the Steam Adjusting Knob. Switch
the knob from left to right to increase the
steam power; switch the knob from right to
left to decrease the steam power.
NOTE: During use, the Hose may make a
gurgling noise. This is normal and caused by
condensation. If you hear the gurgling sound,
hold the Hose up to direct the condensation
back into the appliance.
WARNING: Never steam a garment while it is
being worn.
The Hose and Steam Nozzle may become hot
during use. This is perfectly normal. Be care-
ful and avoid any prolonged contact.
Do not allow the steamer to run dry.

CLEANING AND STORAGE
10
We recommend you follow this procedure
after each use, but at least once per week:
1. Turn OFF the unit and unplug the power
cord from the electrical outlet.
2. Allow the unit to cool (30 minutes for
complete cooling).
3. Remove the Water Tank from the unit.
Unscrew the Valve Cap and drain all remain-
ing water from Water Tank.
4. Drain all the remaining water from the
Water Reservoir through the Hose Base by
tilting the unit over a sink or a tub and pour-
ing the water out. Scale and other residues
will be rinsed out.
5. For storage convenience, you may wish
to collapse the Telescopic Pole to its most
compact height.
6. Hang the Steam Nozzle in an upright
position on the Steam Nozzle Holder when
not in use.
7. Loosely bundle the power cord and store
the unit in a cool, dry location.

11
REMOVING MINERAL BUILD-UP
To maintain maximum performance, you must descale your steamer occa-
sionally. This is standard maintenance needed for steam appliances to
remove build-up caused by high mineral content in many municipal water
supplies. The time between two descaling operations depends on the qual-
ity of the water and the frequency with which you use the appliance. We
advise you to remove the mineral build-up after 7-15 days of use but at
least once a year.
1. Ensure that the appliance has cooled down completely. Unplug the unit
and remove the steam hose from the main unit. Collapse the telescopic
pole.
2. Remove the Water Tank from the unit. Unscrew the Valve Cap and drain
all remaining water from Water Tank.
3. Drain all the remaining water from the Water Reservoir through the Hose
Base by tilting the unit over a sink or tub and pouring the water out. Scale
and other residues will be rinsed out.
4. Fill a measuring cup with 12 oz (355 ml) vinegar.
5. Pour vinegar into Water Tank, then replace Valve Cap and place Water
Tank back onto the main unit.
6. Allow the vinegar to flow into Water Reservoir / Boiler and soak for 30-40
minutes.
7. Plug the power cord into an electrical outlet and turn the main unit ON.
Allow the unit to steam until there is no vinegar left. Note: Do not steam any
clothing with this mixture.
8. Drain any remaining cleaning solution from the Water Reservoir through
Hose Base.
9. Remove and refill Water Tank to maximum capacity with fresh water and
place it back onto the main unit. Allow all fresh water to flow into the Water
Reservoir / Boiler and be steamed out. Refill and repeat as necessary until
vinegar odor has completely dissipated.
10. When finished, turn the steamer off and unplug the power cord from the
electrical outlet. Follow standard storage procedure as outlined in Cleaning
and Storage section above.

• We recommend checking the garment care label for manufacturer recom-
mendations. Test the garment on an unobtrusive area such as an inner
seam. Read the recommendations for the maintenance of the fabrics on
the labels of the clothing to be steamed.
• For most effective results, hold the Steam Nozzle within ½ inches of
fabrics, or press it directly against surfaces.
• Avoid contact between the Steam Nozzle and silk or velvet. Synthetic
materials (such as 100% nylon or polyester) are sensitive to heat and may
be damaged by exposure to hot steam. Steam is recommended for use
only on natural fibers such as cotton, linen, or wool, as well as nylon or poly-
ester blends.
• Heavy fabrics may need to be steamed longer. To remove exceptionally
stubborn wrinkles, steam both sides of the garment.
• Be careful when dealing with any delicate fabrics that may be damaged by
heat or water spots.
• Certain clothes are smoothed more easily on the reverse side. If you are
using your steamer in a position close to the ground, raise the hose
frequently to avoid the formation of condensation. You may hear a gurgling
noise if the Hose is obstructed in any way.
12
TIPS FOR SUCCESSFUL STEAMING

TROUBLESHOOTING
PROBLEM POSSIBLE CAUSE SOLUTION
When pressed, Foot
Power Switch DOES
NOT illuminate when
set to “ON” position.
When pressed, Foot
Power Switch DOES
illuminate when set to
“ON” position, but the
unit fails to heat up.
NOTE: Always allow
sufficient time for unit
to heat up and begin
producing steam.
Excessive gurgling in
Hose and Steam
Nozzle / water drips
from Steam Nozzle.
Steam output is weak
or intermittent.
Unit is not plugged in.
Household circuit
breaker / ground fault
interrupter has tripped
or blown a fuse.
Plug power cord into electrical
outlet.
Reset circuit breaker / ground
fault interrupter, or replace fuse.
For assistance, contact a
licensed electrician.
Immediately cease usage and
unplug. Contact Consumer
Service for assistance (see
below for details).
Immediately cease usage and
unplug. Contact PurSteam
Customer Service for assistance
(see below for details).
Some gurgling is a natural
effect of the steaming process.
For excessive gurgling or
dripping water, point Steam
Nozzle downward and shake
thoroughly to remove excess
water droplets or extend hose
vertically to allow water to drain
back into water reservoir.
Condensation build-up inside
hose may cause excess water
to escape from nozzle. To
prevent build-up, periodically
straighten hose during use.
Unit is damaged or
otherwise in need of
repair.
No water in unit.
Mineral build-up in
unit.
Unit is damaged or
otherwise in need of
repair.
Condensation
build-up inside of
Steam Nozzle / Hose.
Mineral build-up in
unit. Refer to Cleaning section on
Page 11 for details.
Refer to Cleaning section on
Page 11 for details.
Refer to Water Tank procedure
on Page 8 to refill unit with
water.
Refer to Water Tank procedure
on Page 8 to refill unit with water.
Refer to Cleaning section on
Page 11 for details.
Water level in Water
Reservoir is running
low.
Mineral build-up in
unit.
13

PS-937
1500W
Your satisfaction is guaranteed. If you are not completely
satisfied with our Garment Steamer and the results it brings,
we insist that you let us know. We’ll help you make the Garment
Steamer work for you, or we’ll refund your money.
Technical Specification:

2
YEAR This product is warranted to be free from defects in material and
workmanship under normal use and service for two years from the
date of the original purchase with the receipt. The manufacturer's
obligation shall be limited to repairing or replacing any part of the
product that is defective. Such warranty shall not apply to damag-
es resulting from accidents, abuse, or misuse.
If you are not happy with the product for any reason, please
feedback or questions, and we will do our best to make things
right for you!
Your purchase comes with a 100%
satisfaction guarantee from PurSteam
2-Year Limited Warranty
Cheyenne, Wyoming 82001 USA
Telephone: (888) 632-9981
Web: www.pursteam.us Made in P.R.C.
Table of contents
Other PurSteam Steam Cleaner manuals