manuals.online logo
Brands
  1. Home
  2. •
  3. Brands
  4. •
  5. Q-See
  6. •
  7. Security Camera
  8. •
  9. Q-See QTN8022D User manual

Q-See QTN8022D User manual

QTN8022D
In addition to its video surveillance functions, the QTN8022D is able to accept input
from other devices and either pass their signals back to an NVR, or utilize them to
trigger recording or alert actions when it is being used in a stand-alone role. The
camera can accept a micro SD card up to 64GB, allowing it to record still images
without the need for an NVR.
By using the audio input and output to connect both a microphone and speaker -
and with similar audio equipment on the user’s end, two-way communication can
take place. Two alarm sensors can be connected to the alarm block with a single
output to an audible alarm, an external alarm input or to a NVR. When used with an
NVR or on a network, the alarm signal can trigger recording and its signal can be
transmitted via the Cat 5e cable to an NVR.
# Item Function
1 Inside camera:
Storage
Focus,
Reset
Up to 64GB memory
Adjust camera’s zoom and focus
Reset camera if user is locked out
2 Alarm 2 Alarm inputs 1 Output
3 PT Controls Connection point for analog pan-tilt platform.
4 Power For use without POE
5 RJ45 (Ethernet)
Port
For network connectivity, video output and power input
(via POE)
6 HP (Headphones) Audio out - connect to speaker
7 Mic Input for optional microphone, using included adapter (7a)
MOUNTING THE CAMERA
The QTN8022D camera is designed to be mounted on the ceiling. The baseplate is
removable to allow for easy installation.
Use the included hexagonal wrench to unscrew
the retaining bolt half-way. This bolt is located on
the front of the camera, above the Q-See logo.
Use the self-adhesive template to locate the
holes for the mounting screws rather than the
baseplate itself to prevent damage. The large
circle on the template marks the ideal position
to drill a hole for the cables if you will be running
them inside the ceiling. The knock-out on the
back of the base can be removed if you intend to
run the cables along the wall, etc.
ADJUSTING THE LENS
The QTN8022D has a lens that can be manually
adjusted between 2.8mm and 12mm. The
2.8mm setting provides a 109° field of view.
The 12mm setting enlarges subjects by
approximately three times compared to the
2.8mm configuration, with the field of view
narrowing to 22°.
The camera is shipped in the 2.8mm position.
To adjust the lens, you will have to first remove
the camera’s dome by loosening the four screws
holding the cover in place. The screws should
not be removed from the cover.
Once the cover has been removed, you can
adjust the Focus (a) and zoom (b) using the two
knobs located on the lens body behind the LED
circuit board. You may need to loosen them
by twisting the knob counter-clockwise before
making the adjustments. Do not apply excessive
force to the knobs as they can snap off, leaving
your camera unable to be adjusted.
a
b
1
2
3
4
5
6
7
7a Once you have drilled the necessary holes, use the included screws and anchors - or
other mounting hardware as needed - to secure the base to the surface.
Connect the cables and ensure that they will not be pinched when the camera is
attached.
Attach the camera body to the base and tighten the retaining bolt.
Instructions continued on other side
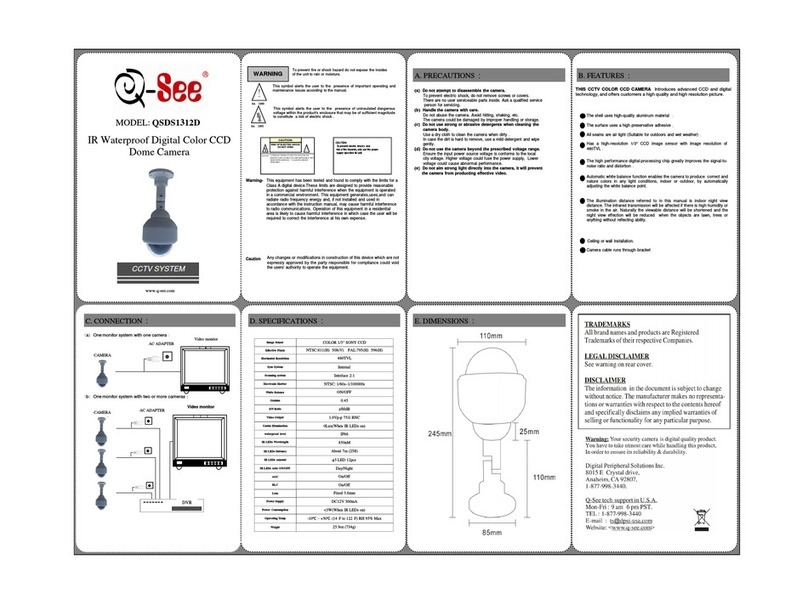
SPECIFICATIONS
Camera Type Dome
Camera Technology IP
Image Sensor size 1/3”
Image Sensor Type CMOS Sony Exmor
Image Resolution 1920 x 1080, 1280 x 720, 640 x 480, 320 x 240
Megapixels (digital) 2
Effective Pixels 1920 x 1080
Lens Size 2.8 to 12mm
Angle of View 22 to 109°
IR Cut Filter Yes
Night Vision
IR LEDS 30
Infrared Wavelength 850nM
Min Lux Illumination 0 Lux (LEDS on)
Night Vision Range Up to 100 ft
Additional Image Features
Electronic Shutter 1/30s-1/100,000s
Gain Control Auto/Manual
Wide Dynamic Range Digital
Noise Reduction 3D DNR
Audio
Audio External input
Audio Microphone Audio input G711A compression
Audio Range Depends on microphone used
Connectivity
Connector Types RJ45 POE, Audio input, Audio output, RS485
Other Connections 2.1mm power, MicroSD (64GB), Alarm in, Alarm out,
IP Protocol ONVIF 2.3
Remote Monitoring
Use as Standalone Yes
Compatible Mobile Devices iPhone, iPad, Android, Windows Phone 7.5/8
Compatible Systems NVRs
Power
Power Supply 12V 1A or POE
Power Consumption 2.76W to 6.48W (LEDs ON)
Physical
Weatherproof IP Rating IP66
Body Construction Metal
Weight 31 oz
Dimensions (WxHxD) 4.5 in x 6 in
Operating Temperature -40° to 122°F, 10% to 90% Humidity
When adjusting the zoom and focus, you should
be able to monitor the camera’s view to ensure
that the image is properly in focus and includes
the entire area that you wish to monitor. This can
be done by connecting it to an NVR where you
can remotely monitor it using a phone or tablet.
Another method is to use the temporary power/
video cable (right). The white end is plugged into
the
DC IN/CVBS
port (d). A camera tester is
connected to the yellow and red ends to show the
camera’s field of view.
SD CARD
The QTN8022D also has a slot for a Micro SD card (e)which allows the camera to
record still images when it is operating on its own network (ie; not directly connected to
the NVR with the Ethernet cable. Please see Section 3.5 of the Remote Monitoring
Guide for instructions on recording with an SD card.
RESET BUTTON
The Reset button (c) is also located inside the camera. This is only for use if the camera
becomes inoperable.
cd
e

Other Q-See Security Camera manuals

Q-See RV 060109 User manual

Q-See

Q-See RV 060109 User manual

Q-See QSWLOC User manual

Q-See

Q-See QSWLOC User manual

Q-See QC8116 Operating and maintenance instructions

Q-See

Q-See QC8116 Operating and maintenance instructions

Q-See QSICC User manual

Q-See

Q-See QSICC User manual

Q-See QV View User manual

Q-See

Q-See QV View User manual

Q-See QD6531Z User manual

Q-See

Q-See QD6531Z User manual

Q-See QD6003D User manual

Q-See

Q-See QD6003D User manual

Q-See IR DOME SERIES User manual

Q-See

Q-See IR DOME SERIES User manual

Q-See QSDS1349D User manual

Q-See

Q-See QSDS1349D User manual

Q-See QSDS1436D Installation guide

Q-See

Q-See QSDS1436D Installation guide

Q-See QSDS13358M User manual

Q-See

Q-See QSDS13358M User manual

Q-See QTH7212P User manual

Q-See

Q-See QTH7212P User manual

Q-See QD7015P User manual

Q-See

Q-See QD7015P User manual

Q-See QCN7005B User manual

Q-See

Q-See QCN7005B User manual

Q-See QD6506BH User manual

Q-See

Q-See QD6506BH User manual

Q-See QCW2MP User manual

Q-See

Q-See QCW2MP User manual

Q-See QS926C User manual

Q-See

Q-See QS926C User manual

Q-See QSICC2PK User manual

Q-See

Q-See QSICC2PK User manual

Q-See QD6523ZH User manual

Q-See

Q-See QD6523ZH User manual

Q-See QSDS14273W User manual

Q-See

Q-See QSDS14273W User manual

Q-See QSDS4936D User manual

Q-See

Q-See QSDS4936D User manual

Q-See QSLO2712 User manual

Q-See

Q-See QSLO2712 User manual

Q-See EasyView QN6401X User manual

Q-See

Q-See EasyView QN6401X User manual

Q-See QS2350C User manual

Q-See

Q-See QS2350C User manual

Popular Security Camera manuals by other brands

Lumens VC-A70HB installation guide

Lumens

Lumens VC-A70HB installation guide

Toshiba IK-64DNA Specifications

Toshiba

Toshiba IK-64DNA Specifications

Axis M3046-V user manual

Axis

Axis M3046-V user manual

Axis P5544 PTZ datasheet

Axis

Axis P5544 PTZ datasheet

Allied Vision Mako G series Technical manual

Allied Vision

Allied Vision Mako G series Technical manual

Vitek VTD-TND5RMEA quick start guide

Vitek

Vitek VTD-TND5RMEA quick start guide

LeFun C2 Quick installation guide

LeFun

LeFun C2 Quick installation guide

JVC LST0420-001B instructions

JVC

JVC LST0420-001B instructions

Vivotek NetworKam IP3111 Quick installation guide

Vivotek

Vivotek NetworKam IP3111 Quick installation guide

Visonic TOWER CAM PG2 TOWER CAM PG2 installation instructions

Visonic

Visonic TOWER CAM PG2 TOWER CAM PG2 installation instructions

FLIR Nexus Configuration guide

FLIR

FLIR Nexus Configuration guide

Vivotek FD9165-HT-A Quick installation guide

Vivotek

Vivotek FD9165-HT-A Quick installation guide

Kami W101S installation guide

Kami

Kami W101S installation guide

fontastic 253867 instruction manual

fontastic

fontastic 253867 instruction manual

ELRO CC60RIP11S user manual

ELRO

ELRO CC60RIP11S user manual

NED XCM3C4080T3 user manual

NED

NED XCM3C4080T3 user manual

Novus 800 Series user manual

Novus

Novus 800 Series user manual

D-Link DCS-4701E user manual

D-Link

D-Link DCS-4701E user manual

manuals.online logo
manuals.online logoBrands
  • About & Mission
  • Contact us
  • Privacy Policy
  • Terms and Conditions

Copyright 2025 Manuals.Online. All Rights Reserved.