Quantel Medical OPTIMIS FUSION User manual

User manual
IV - Maintenance
XL_FUSION_ME_AN_160314
1
1PR V NTIV MAINT NANC
Contact your QUANT L M DICAL or your local distributor at least every six months to carry out a preventive
maintenance visit to confirm the correct function of your system.
At each six-monthly visit QUANT L M DICAL or your local distributor will clean the optics, check the safety
filter coatings, and check general performance, alignment and calibration of the system.
At least once a year QUANT L M DICAL or your local distributor will fully re-calibrate the system and check
ground resistance and earth leakage current (in accordance with I C 60601-1).
2CAR AND MAINT NANC OF TH OPTIMIS FUSION LAS R SYST M
2.1 CL ANING AND DISINF CTION FOR PATI NT AR AS
The use of the OPTIMIS FUSION involves only brief skin contact with the patient, but attention should be
given to the possibility of cross-contamination between patients via the patient contact areas of the system.
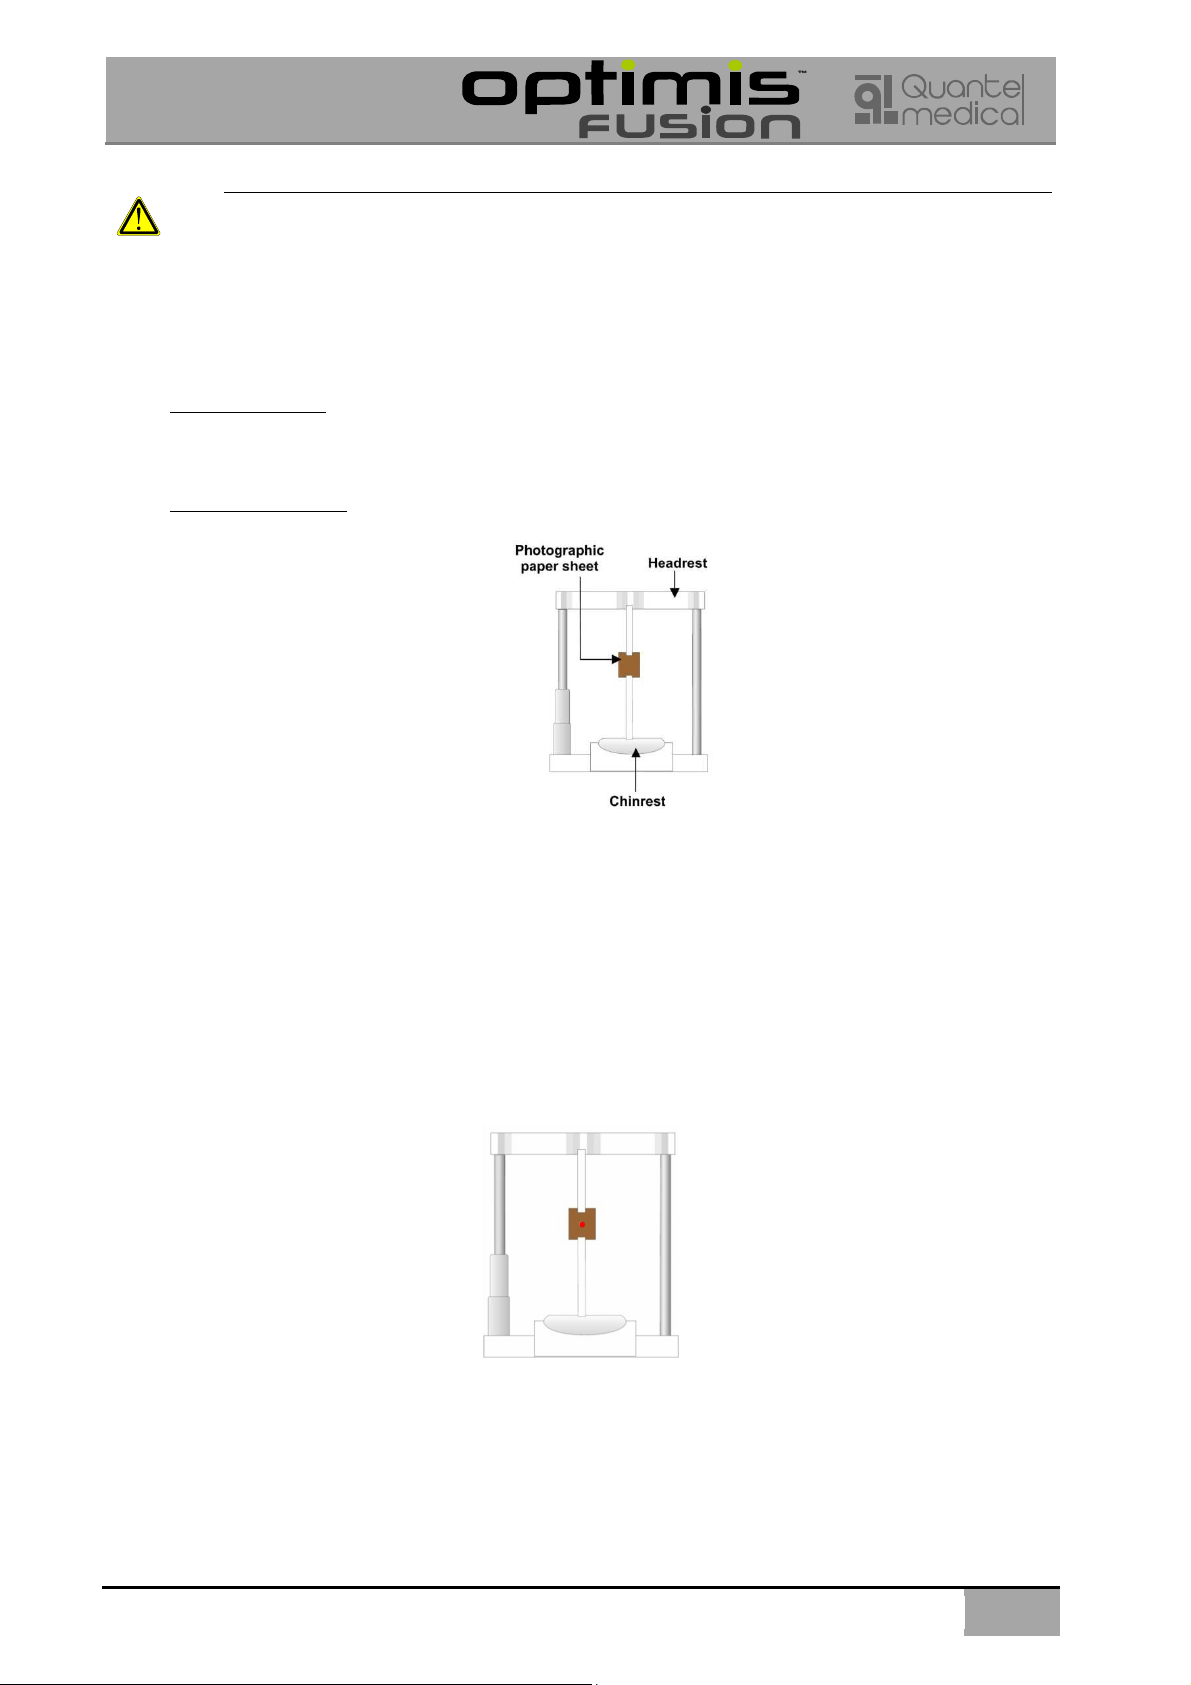
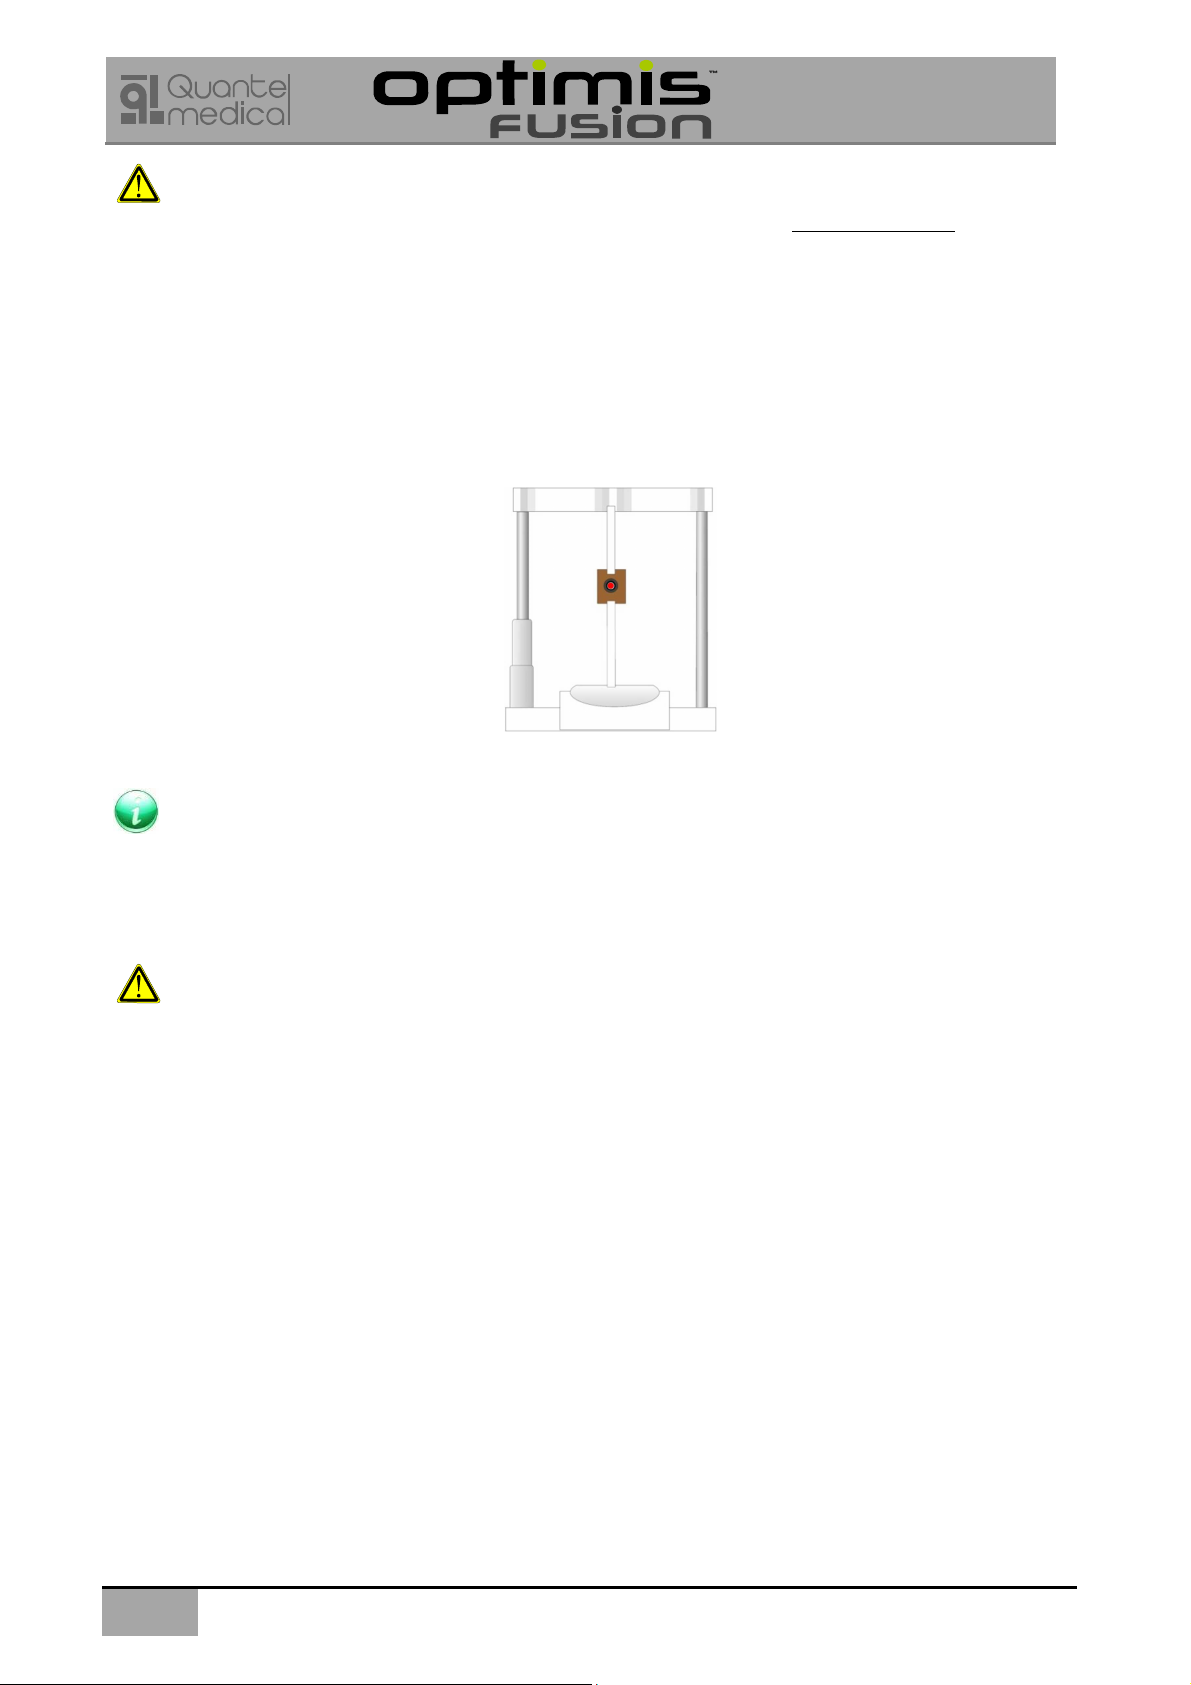
These are the chin rest, headrest and steadying handles.
2.1.1 R SPONSIBILITI S FOR CL ANING AND DISINF CTION
The health care facility where the instrument is to be used is responsible for:
1) Determining the level of cleaning and disinfection of patient contact areas required between patients.
2) Appropriate education and training for staff required to carry out cleaning and disinfection.
3) nsuring that routine cleaning and disinfection methods used in the facility are compatible with the
instrument.
4) Routine cleaning of the entire system.
2.1.2 CL ANING AND DISIF CTION OF PATI NT AR AS
Although cleaning and disinfection procedures and standards within different health care facilities may vary
considerably, the following points are provided as general guidelines:
1) Thorough cleaning of all patient contact areas is recommended for each procedure.
2) Disposable chinrest papers can also be attached to the chinrest area and changed between patients.
3) Manual cleaning can be carried out by wiping all contact areas using a suitable liquid cleaning agent
which is non-corrosive, non-toxic and Iow in residue.
2.1.3 CL ANING TH GONIOSCOPY CONTACT L NS S
The contact lenses for use with the
OPTIMIS FUSION
have a special
low
-
reflectivity coating bonded to
the lens, and they must therefore be handled carefully.
As soon as a lens is removed from the patient’s eye, thoroughly rinse it in cold or warm water to remove
salts, mucous and gonioprism solution. Wash in warm water with a few drops of clear dishwashing liquid,
then rinse with cool water and blot dry. Dry completely before storing in the case.
To effectively disinfect the lens, soak in a solution of sodium hypochlorite 1,2° chl. for a recommended
exposure time of 30 minutes. Rinse thoroughly with cool water and blot dry. Dry completely before storing
in the case.
To sterilize, use ethylene oxide gas with aeration not to exceed 125°F (52°C), following the sterilizer
manufacturer’s recommendation. Remove the lens from the case before sterilizing.
CAUTION:
Do not boil or autoclave a lens. Do not use alcohol, hydrogen peroxide or acetone on a lens, as this will
damage it and render it unusable.

User manual
IV – Maintenance
2
XL_FUSION_ME_AN_160314
2.2 MAINT NANC OF TH OPTIMIS FUSION LAS R SYST M
The QUANT L M DICAL OPTIMIS FUSION laser system has been designed to provide trouble-free operation
with a minimum of down time. As a result very little user maintenance is required.
There are four routine maintenance tasks that are explained in the next sections:
xternal cleaning of the OPTIMIS FUSION system — see Section 2.2.1
Cleaning the optics — see Section 2.2.2
Checking YAG aiming beam accuracy — see Section 2.2.3
Checking SLT aiming beam accuracy — see Section 2.2.4
2.2.1 XT RNAL CL ANING OF TH OPTIMIS FUSION SYST M
WARNING
nsure that the power is switched off and disconnect AC power before cleaning external surfaces.
All surfaces should be thoroughly dried after cleaning.
Keep the laser system external surfaces clean at any time. Only use a damp cloth and mild detergents for
cleaning. Do not use abrasive cleaners such as solvent or alcohol. Make sure the laser system (& slit lamp) is
covered with a dust cover when not in use.
2.2.2 CL ANING TH OPTICS
WARNING
nsure that the power is switched off and disconnect AC power before cleaning the optics.
The laser head objective lens and the oculars must be kept free of dust, fingerprints and other contamination
or performance will be compromised. Periodically inspect and clean these optics.
Required equipment:
- Lint free optical tissues (available from a photographic store)
- Cotton swabs
- Pure or AR grade ethanol or methanol.
Method:
1) Remove dust from the optics with an appropriate lens brush.
2) Moisten the optical tissue or Q-tip in the solvent and gently wipe it across the optical surfaces in linear
strokes. Use a very light pressure to avoid misaligning the mirrors. Do not wipe the mirrors more than one or
two times because excess wiping will only redistribute the dirt over the optical surface and cause scratches.
3) Use one tissue or one Q-tip per wipe, then discard and use a fresh one for the next wipe.
CAUTION
In case any scratching is visible do not use the laser system and call QUANT L M DICAL or your local
distributor.
CAUTION
Never use dry swabs or tissues to clean an optical surface, as this may damage the surface.
In case of any problem when cleaning the optics, contact QUANT L M DICAL or your local distributor.

User manual
IV - Maintenance
XL_FUSION_ME_AN_160314
3
2.2.3 CH CKING YAG AIMING B AM ACCURACY
WARNING
Wearing appropriate safety glasses is required for all persons present when the laser is in use.
nsure there is no refelective surfce behind the target.
The aiming and treatment beam (1064nm) coincidence should be checked on a regular basis: the following
procedure should be carried out at least every three months or as considered necessary by the user.
Required material:
Photographic paper (Kodak linagraph direct printer)
Alignment target / focusing bar
Checking procedure:
1. Attach a piece of photographic paper on the alignment target / focusing bar (See Figure 1)
Figure 1: Piece of photographic paper in position
2. Switch ON the main switch located at the back of the OPTIMIS FUSION unit. The slit lamp is automatically
turned “ON” and illuminates the target paper.
3. Turn the keyswitch to the YAG position and wait for the OPTIMIS FUSION treatment screen to be displayed
(the laser is in STANDBY status by default).
4. Swing the illumination tower on the side so that it does not obstruct the aiming beams.
5. Adjust the eyepieces to accommodate the user’s eyes.
6. View the target through the binocular (with the magnification changer set to x16).
7. Adjust the slit lamp position so that the aiming beams converge to form one spot on the paper attached to the
target. The aiming spot should be centered in the field of view and in the center of the illumination aperture.
Lock the slit lamp in this position (See Figure 2)
Figure 2: Aiming beams in focus

User manual
IV – Maintenance
4
XL_FUSION_ME_AN_160314
WARNING
If the aiming beam is not centered: do not use the système and contact QUANT L M DICAL Service
Department or your local distributor.
8. Adjust:
- Burst mode to 1 pulse
- Focus offset to 0 (30µm offset)
- Low energy
9. Press the STANDBY/R ADY button on the control module to select R ADY status and fire the laser on the
target paper.
10. Inspect the burn mark through the binoculars to check that the aiming beam spot coincides with the burn
mark (See Figure 3)
Figure 3: Burn mark after firing the treatment laser
NOT
Depending of the photographic type of paper used for the checkup: the burn mark might not clearly be
distinguished with minimum power in use. In this case, power may have to be increased step by step until
coincidence can clearly be checked.
WARNING
In case the aiming beam/treatment beams do not coincide: do not use the system on patients. Contact
QUANT L M DICAL Service Department or your local distributor.

User manual
IV - Maintenance
XL_FUSION_ME_AN_160314
5
2.2.4 CH CKING SLT AIMING B AM ACCURACY
WARNING
Wearing appropriate safety glasses is required for all persons present when the laser is in use.
nsure there is no refelective surfce behind the target.
The aiming and treatment beam (532nm) coincidence should be checked on a regular basis: the following
procedure should be carried out at least every three months or as considered necessary by the user.
Required material:
Photographic paper (Kodak linagraph direct printer)
Alignment target / focusing bar
Checking procedure:
1. Attach a piece of photographic paper on the alignment target / focusing bar (See Figure 1 in the above section
2.2.3)
2. Switch ON the main switch located at the back of the OPTIMIS FUSION unit. The slit lamp is automatically
turned “ON” and illuminates the target paper.
3. Turn the keyswitch to the SLT position and wait for the OPTIMIS FUSION treatment screen to be displayed
(the laser is in STANDBY status by default).
4. Adjust the eyepieces to accommodate the user’s eyes.
5. View the target through the binocular (with the magnification changer set to x16).
6. Adjust the slit lamp position so that the aiming beam forms only one clear, well defined spot on the paper
attached to the target (focal distance) and lock the slit lamp in this position
.
The aiming spot should be
centered in the field of view and in the center of the illumination aperture. Lock the slit lamp in this position
(See Figure 2 in the above section 2.2.3)
WARNING
If the aiming beam is not centered: do not use the système and contact QUANT L M DICAL Service
Department or your local distributor.
7. Adjust:
- Low energy
8. Press the STANDBY/R ADY button on the control module to select R ADY status and fire the laser on the
target paper.
9. Inspect the burn mark through the binoculars to check that the aiming beam spot coincides with the burn
mark (See Figure 3 in the above section 2.2.3)
NOT
Depending of the photographic type of paper used for the checkup: the burn mark might not clearly be
distinguished with minimum power in use. In this case, power may have to be increased step by step until
coincidence can clearly be checked.
WARNING
In case the aiming beam/treatment beams do not coincide: do not use the system on patients. Contact
QUANT L M DICAL Service Department or your local distributor.
Table of contents
Other Quantel Medical Medical Equipment manuals
Popular Medical Equipment manuals by other brands

Haemonetics
Haemonetics Cell Saver Elite+ Quick reference guide

baxter
baxter Colleague 3 manual

St. Jude Medical
St. Jude Medical Proclaim DRG 3664 Clinician manual

Bauerfeind
Bauerfeind uniprox JT30 instruction manual

VENUS CONCEPT
VENUS CONCEPT MP2 user manual

BioTel Heart
BioTel Heart ePatch quick start guide