manuals.online logo
Brands
  1. Home
  2. •
  3. Brands
  4. •
  5. Quoizel
  6. •
  7. Outdoor Light
  8. •
  9. Quoizel WWD8408IB User manual

Quoizel WWD8408IB User manual

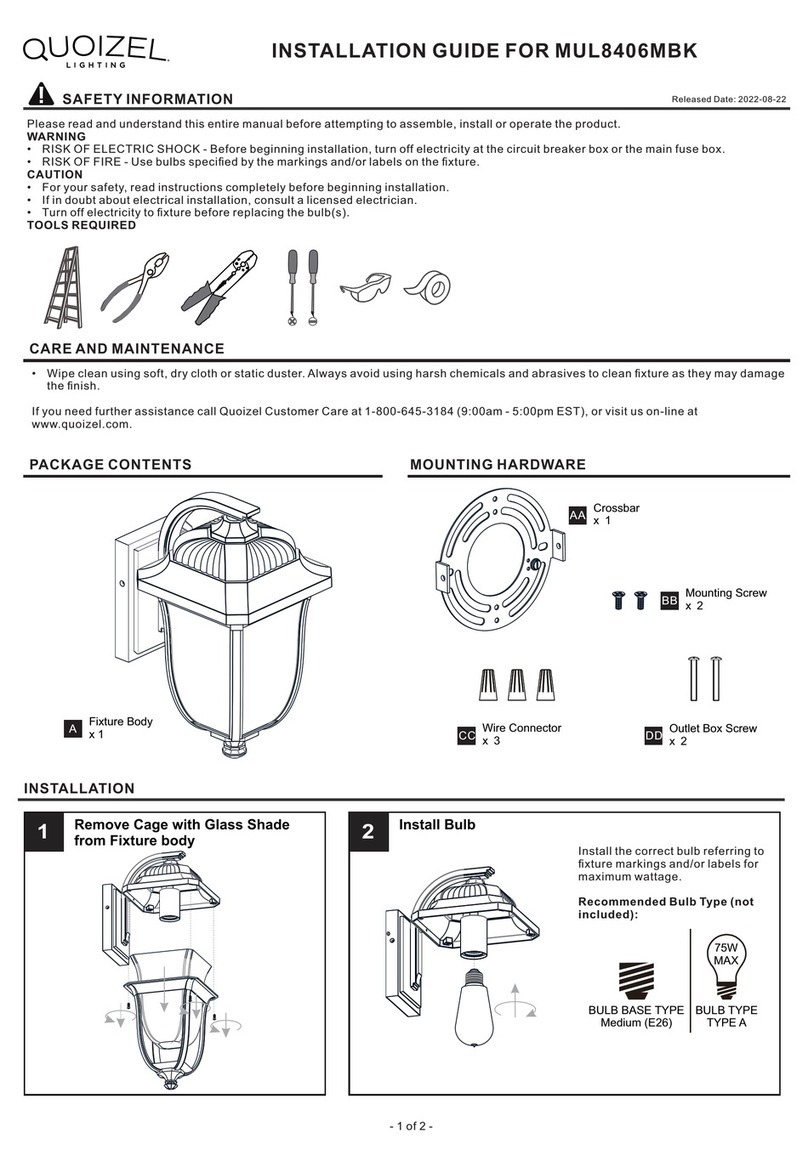
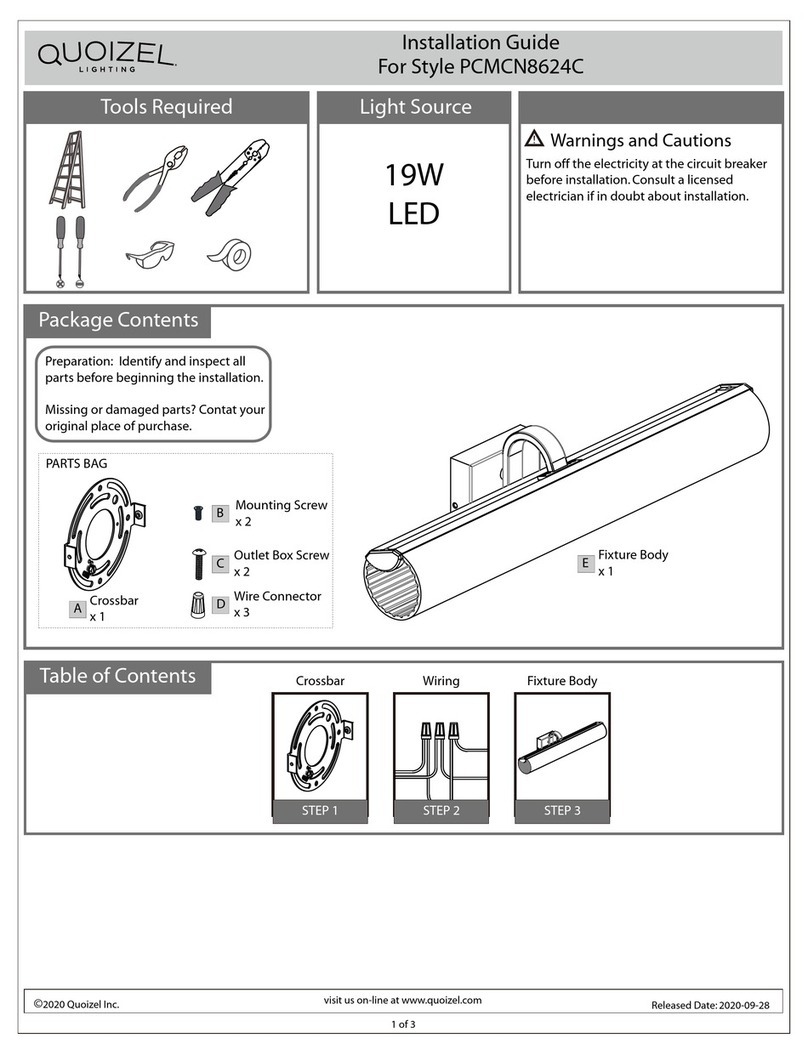
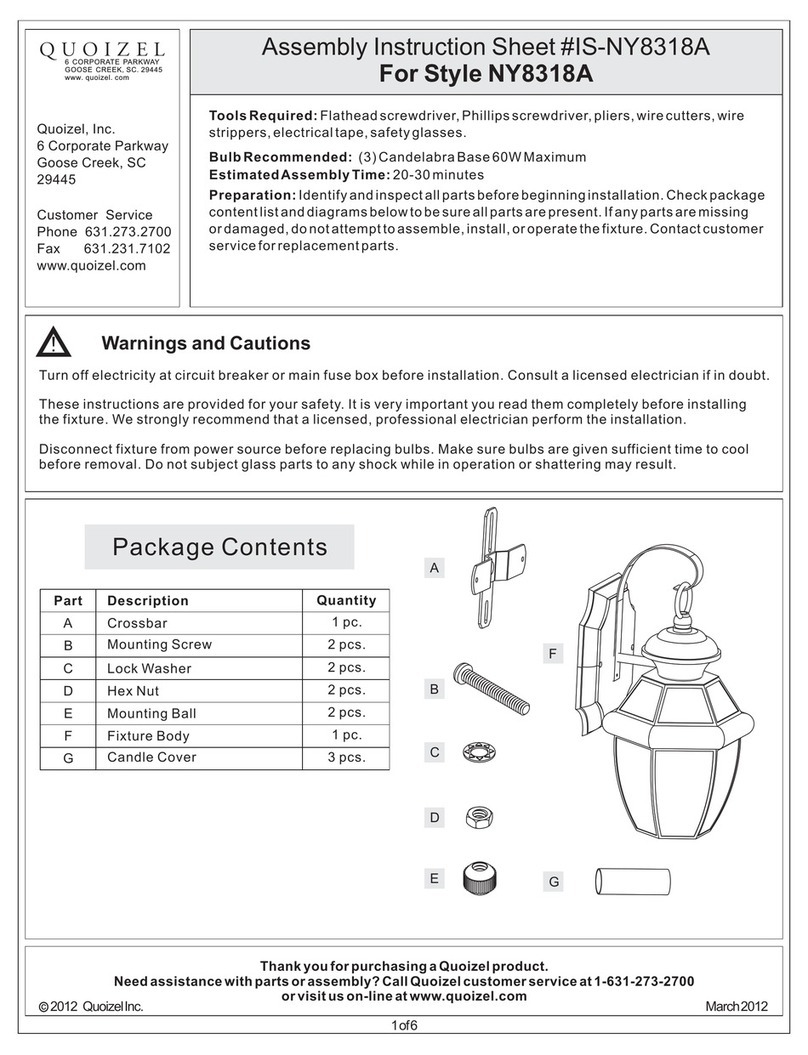
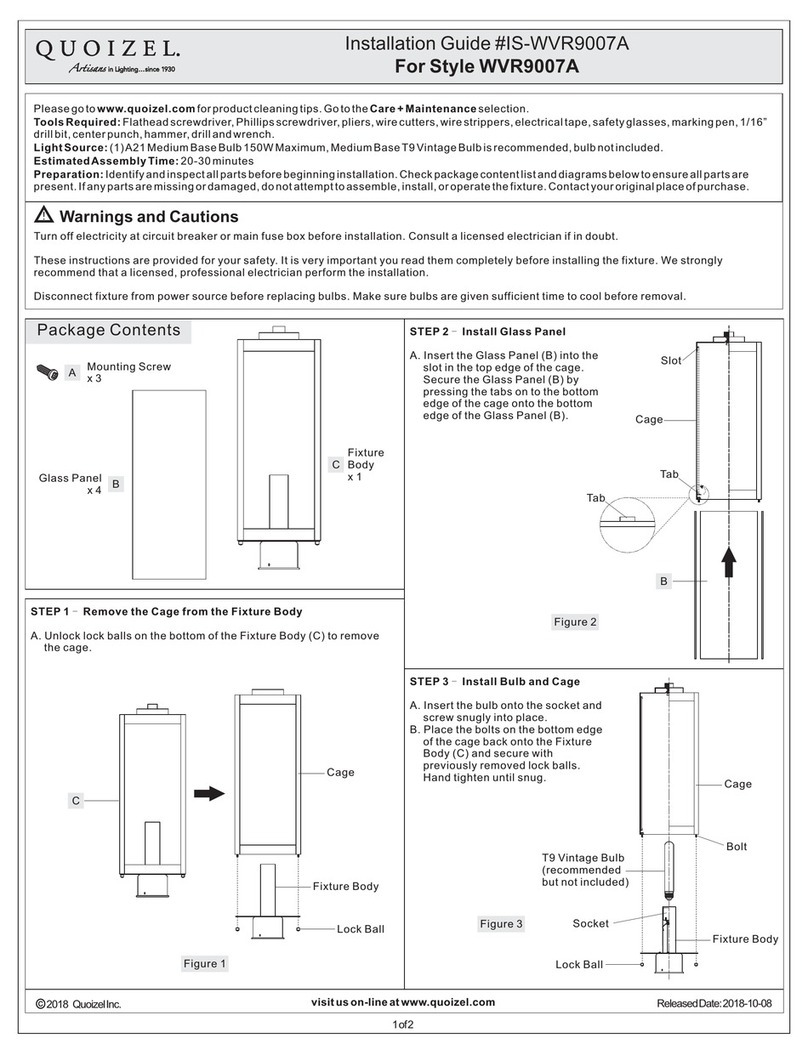
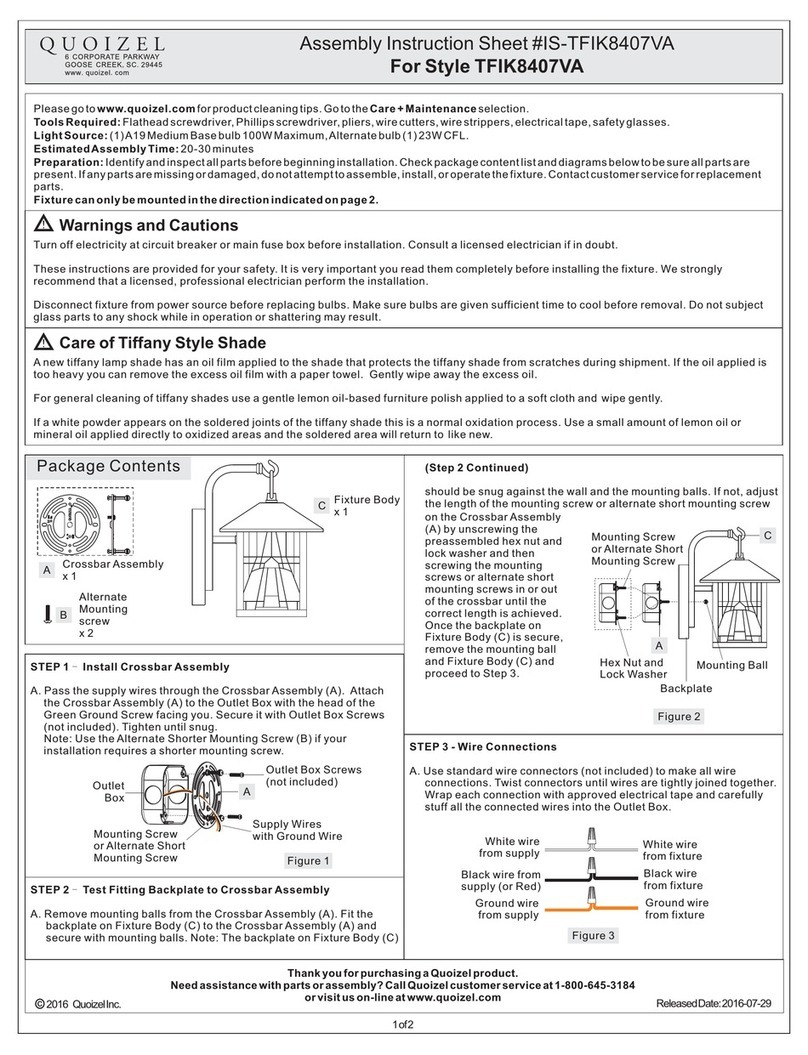
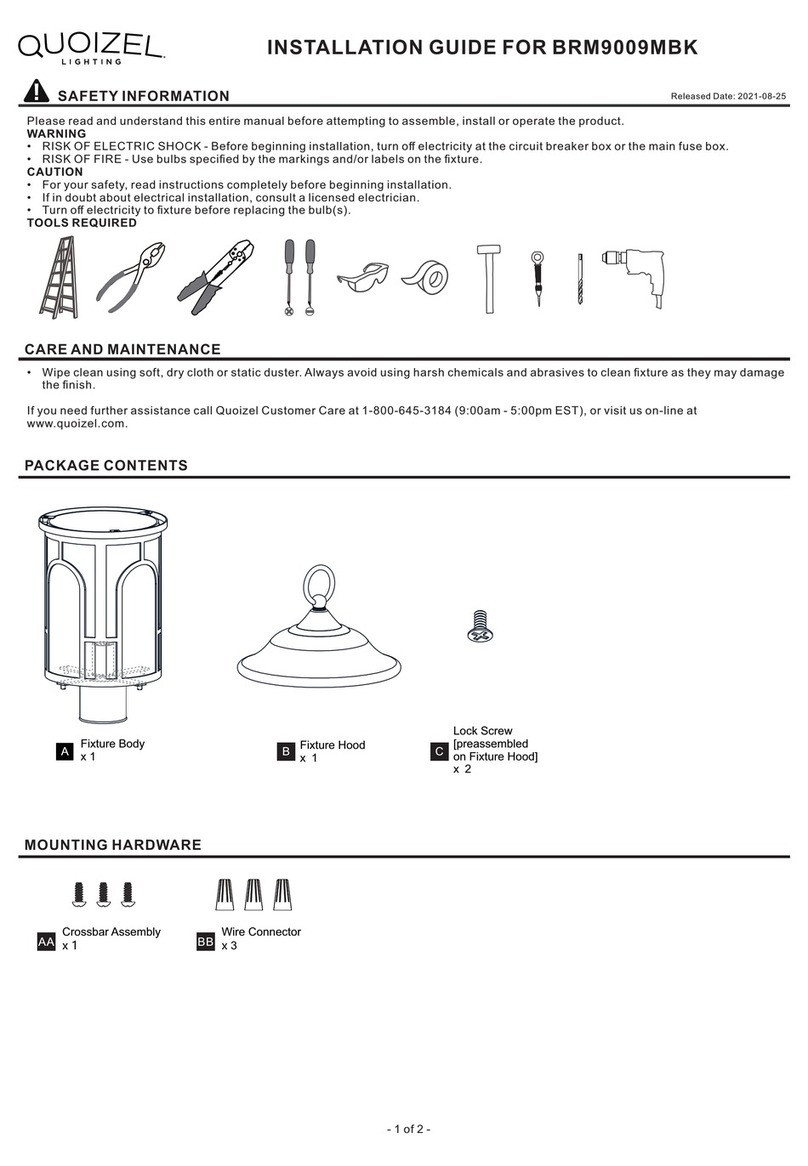
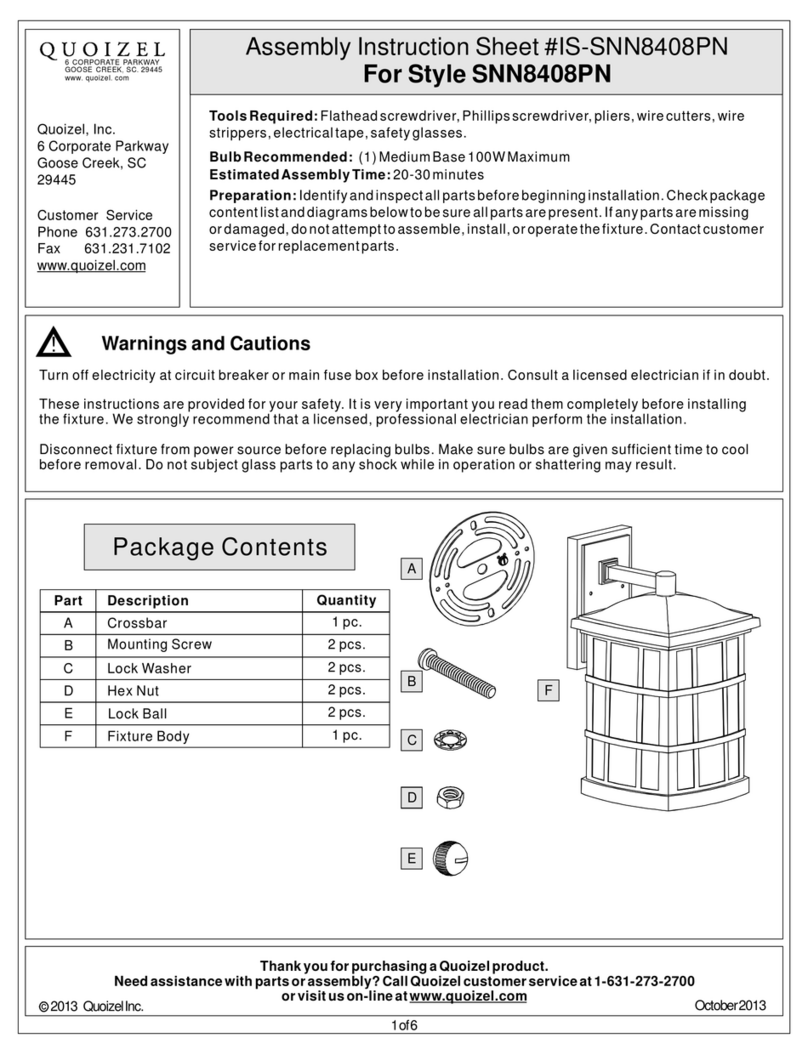
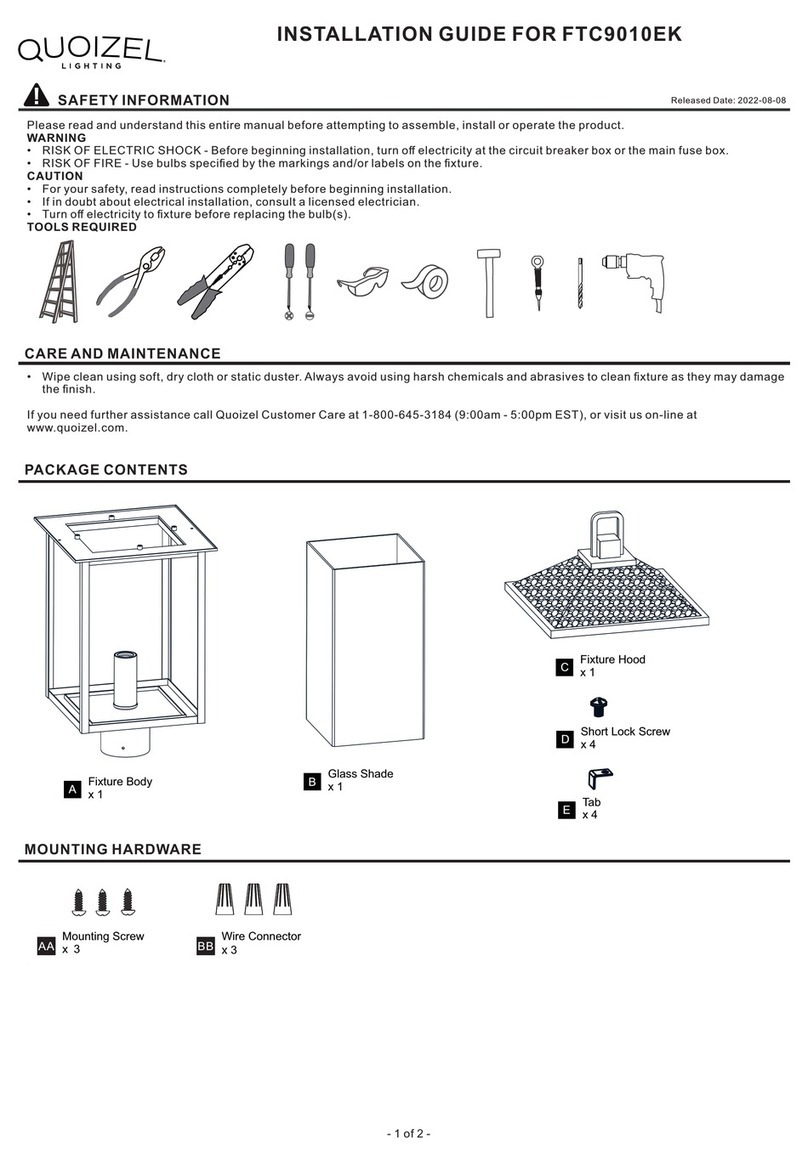
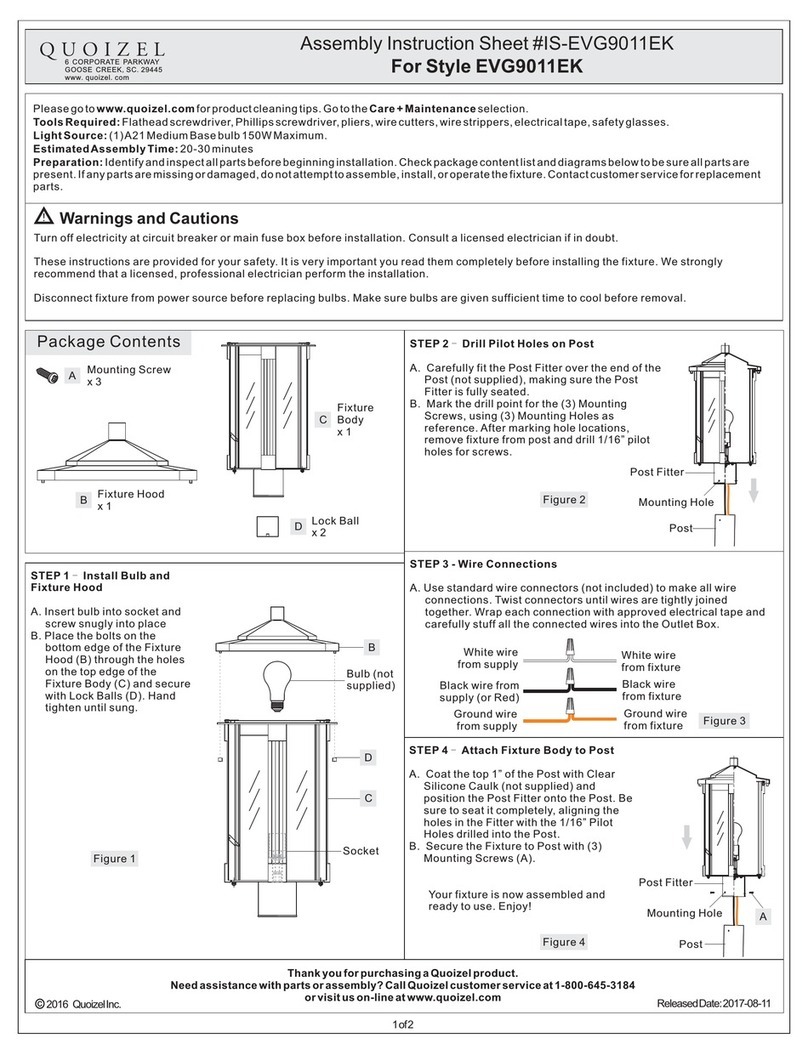
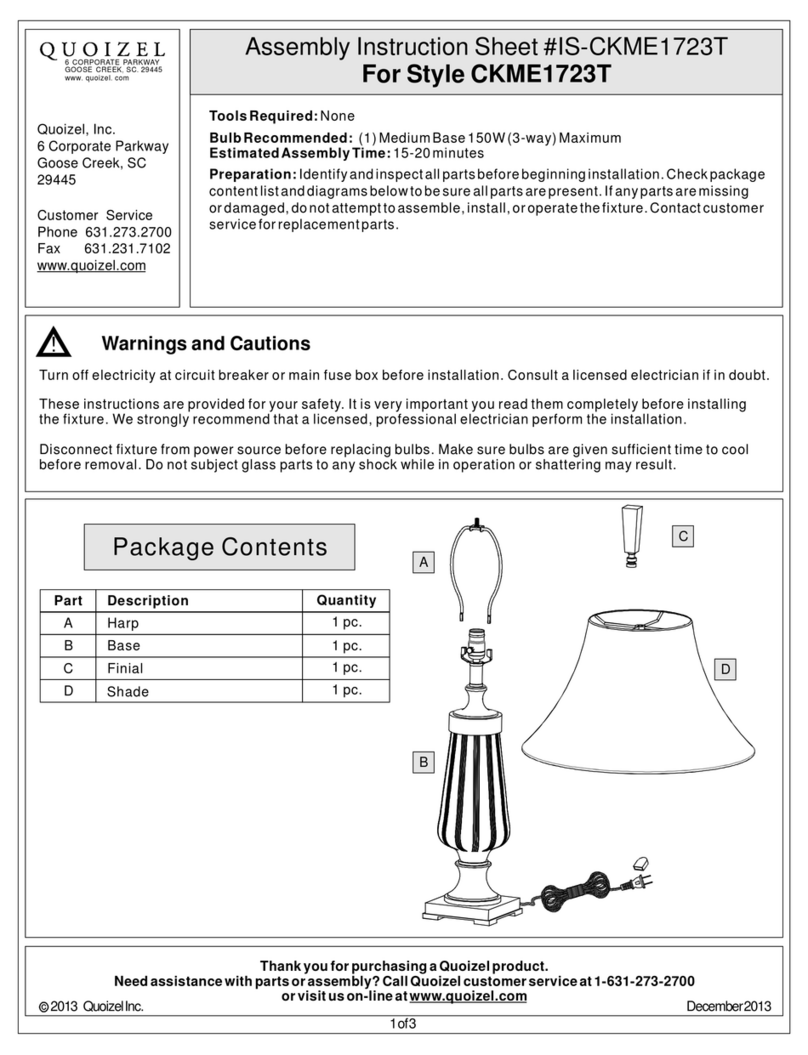
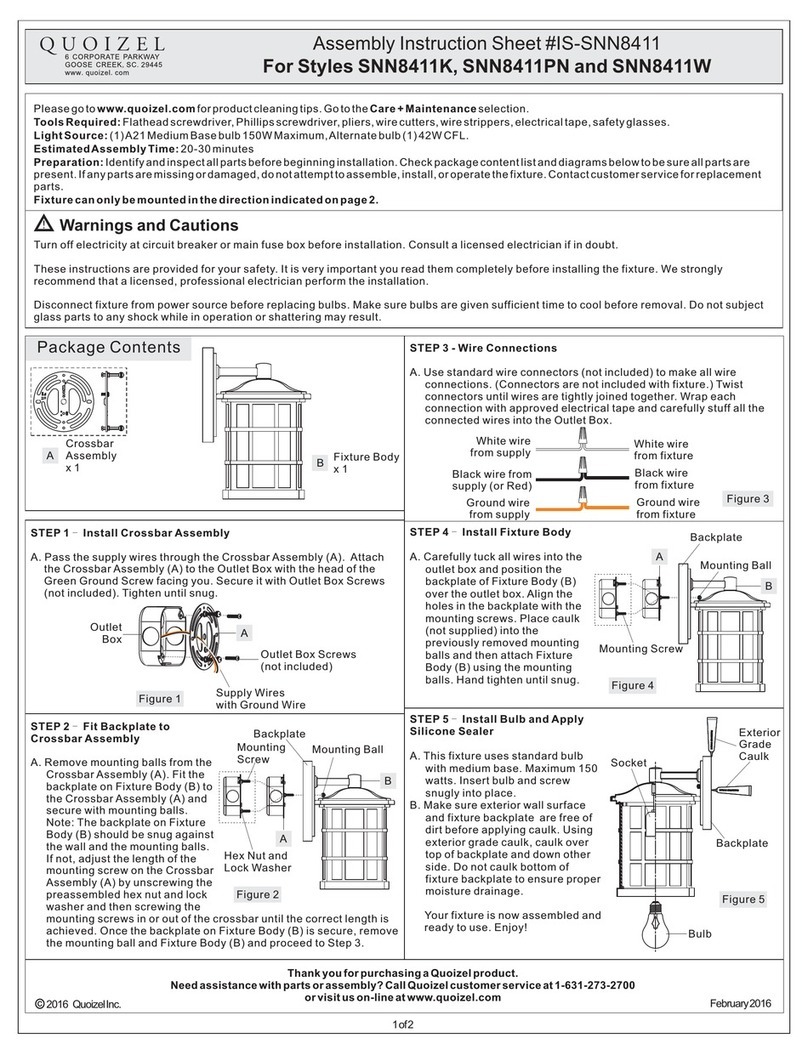
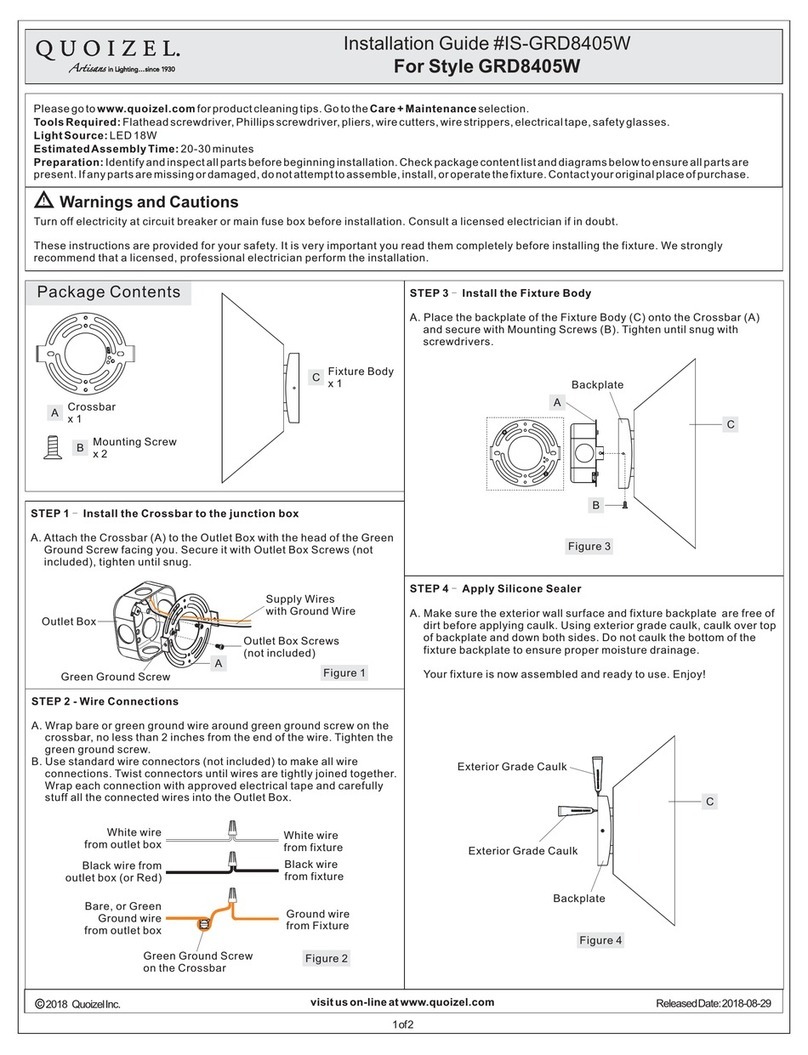
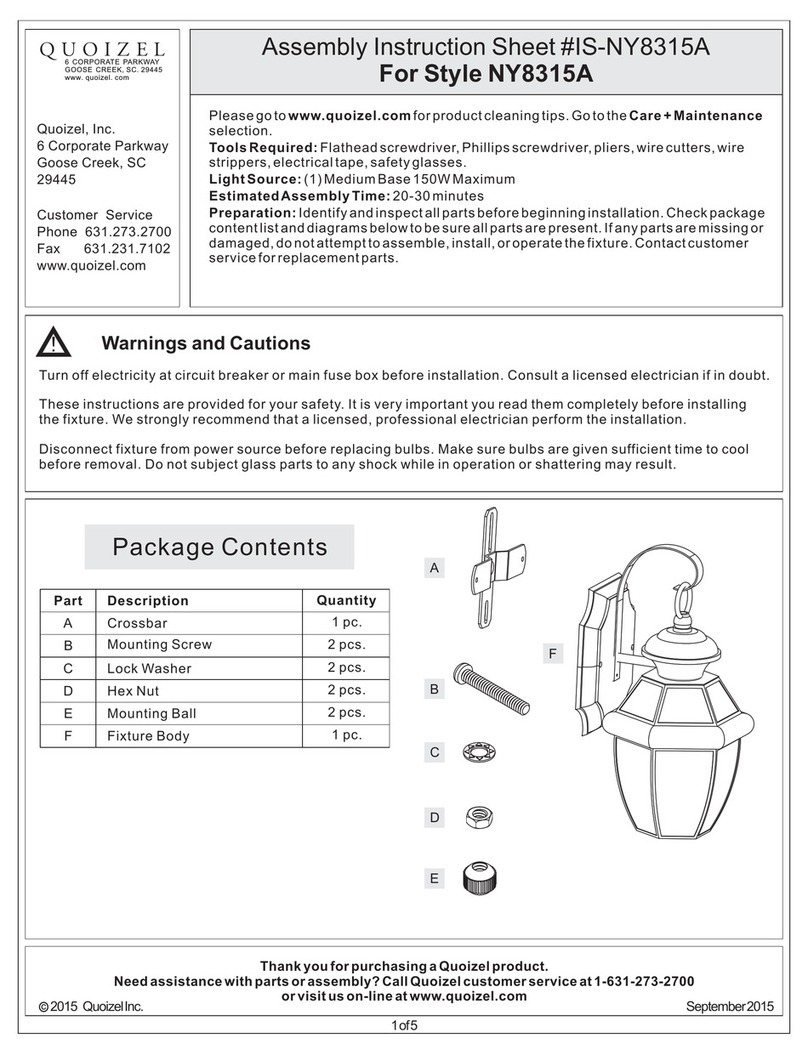
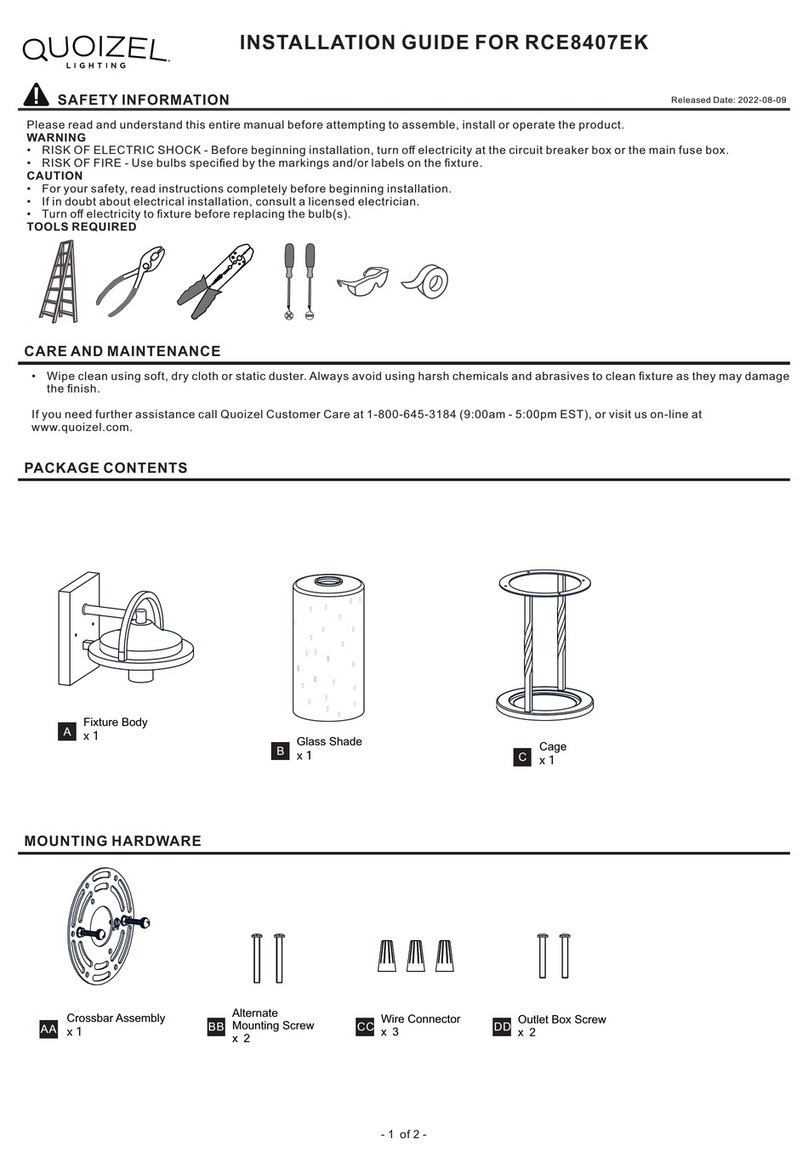
Package Contents
Warnings and Cautions
1of2
For Style WWD8408IB
Turn off electricity at circuit breaker or main fuse box before installation. Consult a licensed electrician if in doubt.
These instructions are provided for your safety. It is very important you read them completely before installing the fixture. We strongly
recommend that a licensed, professional electrician perform the installation.
Disconnect fixture from power source before replacing bulbs. Make sure bulbs are given sufficient time to cool before removal.
A
Crossbar
Assembly
x1
Pleasegoto forproductcleaningtips.Gotothe selection.
(1)A19MediumBasebulb100WMaximum,bulbnotincluded.
20-30minutes
Identifyandinspectallpartsbeforebeginninginstallation.Checkpackagecontentlistanddiagramsbelowtoensureallpartsare
present.Ifanypartsaremissingordamaged,donotattempttoassemble,install,oroperatethefixture.
www.quoizel.com Care + Maintenance
LightSource:
EstimatedAssembly Time:
Preparation:
Fixturecanonlybemountedinthedirectionindicatedonpage2.
ToolsRequired:Flatheadscrewdriver,Phillipsscrewdriver,pliers,wirecutters,wirestrippers,electricaltape,safetyglasses.
MissingParts?Contactyouroriginalplaceof
purchase.
Fixture Body
x1 B
STEP 4 - Wire Connections
A. Wrap bare or green ground wire around green ground screw on the
crossbar, no less than 2 inches from the end of the wire. Tighten the
green ground screw.
B. Use standard wire connectors (not included) to make all wire
connections. Twist connectors until wires are tightly joined together.
Wrap each connection with approved electrical tape and carefully
stuff all the connected wires into the Outlet Box.
Figure 4
Green Ground Screw
on the Crossbar
White wire
from outlet box White wire
from fixture
Black wire from
outlet box (or Red)
Black wire
from fixture
Bare, or Green
Ground wire
from outlet box
Ground wire
from Fixture
STEP 3 Test Fit the Backplate to the Crossbar Assembly-
A. Remove the mounting balls from the Crossbar Assembly (A). Place
the backplate and Fixture Body (B) onto the Crossbar Assembly
(A) and secure with mounting balls. Note: The backplate and
Fixture Body (B) should be snug against the wall and held tight
with the mounting balls. If it is not, adjust the length of the
mounting screws on the Crossbar Assembly (A) by unscrewing the
preassembled hex nut and lock washer and then screwing the
STEP 1 Remove Styrofoam inside
of the Cage
-
Styrofoam
(Remove)
Figure 1
STEP 2 Installing the Crossbar Assembly-
A. Pass the supply wires through the Crossbar Assembly (A). Attach
the Crossbar Assembly (A) to the Outlet Box with the head of the
Green Ground Screw facing you. Secure the Crossbar Assembly (A)
with Outlet Box Screws (not included). Tighten until snug.
Supply Wires
with Ground Wire
Outlet Box Screws
(not included)
Outlet Box
A
Figure 2
Mounting
Ball
A
Backplate
Hex Nut and
Lock Washer
Mounting Screw
B
Figure 3
mounting screws in or
out of the crossbar until
the correct length is
achieved. Once the
backplate and Fixture
Body (B) is secure,
remove the mounting
ball and Fixture Body (B)
and proceed to Step 4.
Cage
Installation Guide #IS-WWD8408IB
2018 QuoizelInc. ReleasedDate:2018-04-04
visit us on-line at www.quoizel.com
2of2
Socket
Bulb (not
included)
Exterior
Grade Caulk
Backplate
Exterior
Grade
Caulk
STEP 6 -Install the Bulb and
Apply Silicone Sealer
A. Insert the bulb onto socket
and screw snugly into place.
B. Make sure the exterior wall
surface and fixture backplate
are free of dirt before applying
caulk. Using exterior grade
caulk, caulk over top of
backplate and down both
sides. Do not caulk the bottom
of the fixture backplate to
ensure proper moisture
drainage.
Your fixture is now assembled
and ready to use. Enjoy!
WWD8408IB
FINISH: IMPERIAL BRONZE
NOTE: ALL DIMENSIONS ARE ROUNDED
UP TO THE NEAREST 1/4"
Figure 6
Fixture can
only be
mounted in
the direction
indicated
HOW TO REPLACE GLASS PANEL
A. Unscrew screws on the bottom edge of the cage and remove the
glass panel holder from the cage.
B. Replace glass panel carefully and secure with previously removed
glass panel holder and screws. Tighten screws until snug with
screwdrivers.
Screw
Glass Panel Holder
Glass Panel
Cage
6.5"
2.5"
8” 7.75” SQ.
4.75"
15"
STEP 5 -Install the Fixture
Body
A. Position the backplate and
Fixture Body (B) onto the
Crossbar Assembly (A).
Place the holes in the
backplate over the
mounting screws. Secure
the Fixture Body by using
the mounting balls and
hand tighten the mounting
balls until snug.
Mounting
Ball
A
Backplate
Mounting Screw
B
Figure 5
2018 QuoizelInc. ReleasedDate:2018-04-04
visit us on-line at www.quoizel.com

Other Quoizel Outdoor Light manuals

Quoizel Everglade EVG9011EK Mounting instructions
Quoizel

Quoizel Everglade EVG9011EK Mounting instructions

Quoizel NY8412K Mounting instructions

Quoizel

Quoizel NY8412K Mounting instructions

Quoizel BEC9009SBK Mounting instructions

Quoizel

Quoizel BEC9009SBK Mounting instructions

Quoizel Admiral AMR8410MB User manual

Quoizel

Quoizel Admiral AMR8410MB User manual
Quoizel UMA8407MBK User manual

Quoizel

Quoizel UMA8407MBK User manual

Quoizel CAT8407PN Mounting instructions

Quoizel

Quoizel CAT8407PN Mounting instructions

Quoizel MRL9009SU User manual

Quoizel

Quoizel MRL9009SU User manual

Quoizel SNNL9009K User manual

Quoizel

Quoizel SNNL9009K User manual

Quoizel BIM9008EK User manual

Quoizel

Quoizel BIM9008EK User manual

Quoizel HC8411IB Mounting instructions

Quoizel

Quoizel HC8411IB Mounting instructions

Quoizel ASH33894C0 User manual

Quoizel

Quoizel ASH33894C0 User manual

Quoizel Lasalle LLE8407WT Mounting instructions

Quoizel

Quoizel Lasalle LLE8407WT Mounting instructions

Quoizel CRN9009IA User manual

Quoizel

Quoizel CRN9009IA User manual

Quoizel WKF8409EK Mounting instructions

Quoizel

Quoizel WKF8409EK Mounting instructions

Quoizel MHE8410K Mounting instructions

Quoizel

Quoizel MHE8410K Mounting instructions

Quoizel ASH0092B1 User manual

Quoizel

Quoizel ASH0092B1 User manual

Quoizel Poplar Point PPT9010OZ User manual

Quoizel

Quoizel Poplar Point PPT9010OZ User manual

Quoizel Westover WVR8305EK User manual

Quoizel

Quoizel Westover WVR8305EK User manual

Quoizel BEC8406SBK User manual

Quoizel

Quoizel BEC8406SBK User manual

Quoizel SYN8406EK User manual

Quoizel

Quoizel SYN8406EK User manual

Quoizel CLI9009EK User manual

Quoizel

Quoizel CLI9009EK User manual

Quoizel WAR8407GZ User manual

Quoizel

Quoizel WAR8407GZ User manual

Quoizel INF8407EK User manual

Quoizel

Quoizel INF8407EK User manual

Quoizel SNN8406K Mounting instructions

Quoizel

Quoizel SNN8406K Mounting instructions

Popular Outdoor Light manuals by other brands

Kichler Lighting 16150AZT27 quick start guide

Kichler Lighting

Kichler Lighting 16150AZT27 quick start guide

Endon YG-7501 instruction manual

Endon

Endon YG-7501 instruction manual

XanLite SO1611 quick start guide

XanLite

XanLite SO1611 quick start guide

B-K lighting Precision 2 CO2 Series installation instructions

B-K lighting

B-K lighting Precision 2 CO2 Series installation instructions

Life 39.9FS0110N user manual

Life

Life 39.9FS0110N user manual

Light-Point LANTERN W1 instruction manual

Light-Point

Light-Point LANTERN W1 instruction manual

Pond Boss 52369 manual

Pond Boss

Pond Boss 52369 manual

Barco CLM installation manual

Barco

Barco CLM installation manual

Renkforce Bilbao operating instructions

Renkforce

Renkforce Bilbao operating instructions

Urbaco BPACED50 Installation and maintenance manual

Urbaco

Urbaco BPACED50 Installation and maintenance manual

LEDDOO CYLINDRA TL-1 user manual

LEDDOO

LEDDOO CYLINDRA TL-1 user manual

North Alfred quick start guide

North

North Alfred quick start guide

GLITZHOME GH20402 Assembly instruction

GLITZHOME

GLITZHOME GH20402 Assembly instruction

Philips Copenhagen LED and City gen2 Mounting instructions

Philips

Philips Copenhagen LED and City gen2 Mounting instructions

LIGMAN BENTON 6 installation manual

LIGMAN

LIGMAN BENTON 6 installation manual

MELINERA HG00163A Assembly, operating and safety instructions

MELINERA

MELINERA HG00163A Assembly, operating and safety instructions

ADEO Services Solar Assembly, Use, Maintenance Manual

ADEO Services

ADEO Services Solar Assembly, Use, Maintenance Manual

Gainsborough H243 Instructions for use

Gainsborough

Gainsborough H243 Instructions for use

manuals.online logo
manuals.online logoBrands
  • About & Mission
  • Contact us
  • Privacy Policy
  • Terms and Conditions

Copyright 2025 Manuals.Online. All Rights Reserved.