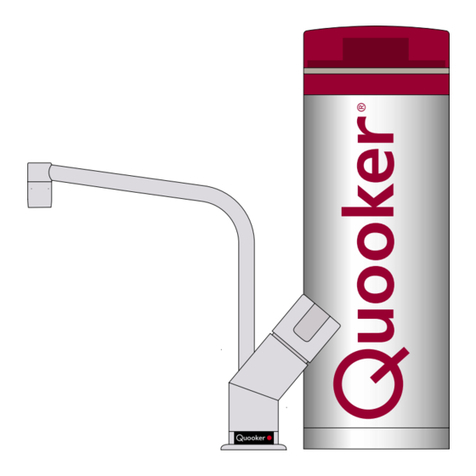
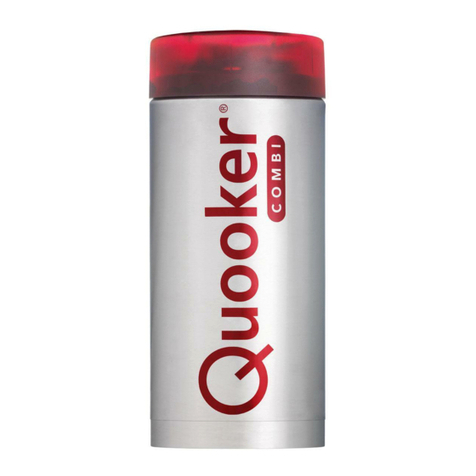
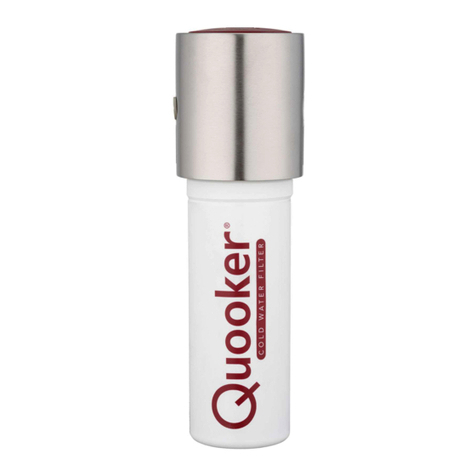
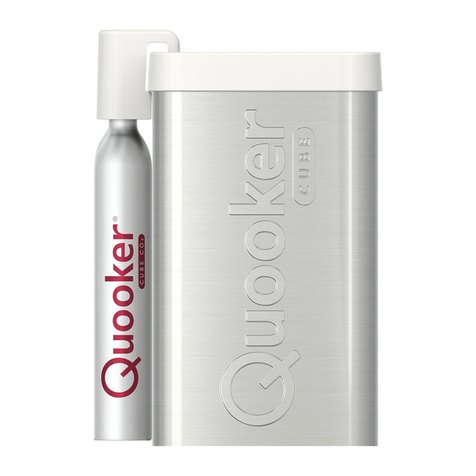
Quooker Scale Control Plus User manual

Installation guide Scale Control Plus
Read this guide before installation

Introduction
How does the Quooker Scale Control Plus work?
The Scale Control Plus reduces the hardness of the water in order to prevent limescale build-up
in the tank. This extends its lifespan and improves the taste of the water. The Scale Control Plus
consists of a lter head and a cartridge, which is inserted into the head. This cartridge softens
the water that ows through it by means of an ion exchanger. The cartridge must be replaced
after a certain period of time, which depends on the mains water hardness and how much
Quooker boiling water is used. Replace the cartridge before it becomes completely saturated.
Determining the tank type
The installation instructions of chapter D contain two sections. You will have to determine the type
of tank you have in order to choose the correct section.
• Type A In case the serial number starts with VBW, you have a type A tank.
• Type B In case the serial number starts with VCW, you have a type B tank.
When the Scale Control is to be replaced by a Scale Control Plus
Please note: in case of a Type B Tank, the Scale Control Plus should be installed before the inlet
combination valve. It is therefore important to follow the instructions as shown in this installation
manual.
Installing the Quooker system for the rst time
Using the installation manual, rst install the Quooker tank and connect it to the tap. Then use
this manual to install the Scale Control Plus.
Lifespan of the cartridge
The Scale Control Plus cartridge needs to be replaced regularly. The replacement frequency
depends on how hard the water is and how much water is used. Timely replacement of the
cartridge prevents the build-up of limescale in the Quooker system. For Quooker systems installed
after October 2017, the included Scale Control Plus Meter can be installed. The Scale Control
Plus Meter will sound an alarm signal when the cartridge needs to be replaced. Before mounting
the meter, use the Water Hardness Test Kit provided to determine the cold mains water hardness,
as described in Part A. After doing so, mount the Scale Control Plus Meter and connect it to the
Quooker tank, as described in Part E.
For Quooker systems installed before October 2017, it is not possible to use the Scale Control Plus
Meter supplied. The cartridge lifespan can be determined in a dierent way. Before installing the
Scale Control Plus, test the water hardness with the Water Hardness Test Kit provided. Part A of
this guide features detailed instructions on how to do this. With the help of this value, the service
life of the cartridge can then be determined on the basis of the hardness table supplied. See Part B.
Technical specications
Height 470 mm
Diameter 100 mm
Maximum operating pressure 8,7 bar

1 3
5
2
4
Package contents
1. Mounting bracket, head, cartridge, two plastic tubes
2. For the installation of a type A tank: coupling piece, adapter, two bre washers
For the installation of a type B tank: two long screws, mounting bracket
inlet combination, two inserts, allen key
3. Two push-ts, four short screws, two long screws
4. Total Hardness Test Kit
5. Scale Control Plus Meter, metal washer, screw and sticker
total hardness
test kit
Peteri b.v. Staalstraat 13 2984 AJ Ridderkerk (NL) www.quooker.com
Scale Control Plus
cartridge
Reduces limescale
Step 1 When alarm sounds, 0% blinks.
Step 2 Unscrew the old cartridge (counter
automatically.
Step 3 Screw in the new cartridge
(clockwise).
Step 4
The Scale Control meter is 100%.
Step 5 Run boiling water for 20 seconds.
Step 6 Check for leaks.
Operational data
Life span: 550L @ 15 dH
Max pressure: 8.6 bar
Temperature range: 2-38°C
Service and order: www.quooker.com
• Only to be connected to drinking water.
•
cartridge prior to use.
• Please dispose this cartridge with your
general waste.
Type B tank
Type A tank

1
3
2
AHardness testing
• Test your water hardness with the Total Hardness Test Kit, as described below, to determine
the expected cartridge lifespan.
• Ensure the Scale Control Plus is working optimally by comparing the water hardness of
the cold mains water to the hardness of the Quooker tank water. The second value should
be lower.
1. Filling test tube
Take the test tube out of its box. Take
a sample of water from the mains cold
water feed. Rinse out the test bottle with
this sample water then ll to the 5 ml mark.
2. Adding reagent
Slowly add the reagent drop by drop, all
the while swirling gently to mix the water.
Count the number of drops it takes to turn
the red colour of the solution to green.
3. Determining water hardness
One drop of the reagent is the equivalent
to 1.0°dH (degree of hardness) – For
example, if it takes 9 drops for the sample
to turn to green, this means your water has
a water hardness of 9°dH.
++…=
°dH
10
15
20
25
30
ml
5
10
15
20
25
30
ml
5
10
15
20
25
30
ml
5

BHardness table (for systems before October 2017)
• The left side of the table shows the reduced water hardness, derived from the mains water
hardness. The right side of the table shows the expected lifespan of the cartridge, derived
from the mains water hardness and the type of Quooker tank used. For continuous optimum
performance replace the cartridge at the end of the lifespan.
• Enter the replacement date for the cartridge in the table below. Keeping this table in a handy
place will remind you to order a new cartridge on time.
• For Quooker systems installed after October 2017, the life of the cartridge is determined
by the Scale Control Plus Meter. This sounds an alarm signal when the cartridge needs to
be replaced. Part E describes how to install this meter.
Cartridge 1
Lifespan
Installation date
Replacement date
Cartridge 2
* The cartridge lifespan is based on the
average consumption of Quooker water
for a Pro3 tank, of 3 litres per day.
Total hardness (°dH) * Cartridge lifespan (in weeks)
PRO3 (Type A and Type B)
18
17
19
20
22
23
25
27
29
31
34
Mains water
10
11
12
13
14
15
16
17
18
19
20

1
3
2
4
Mounting the Scale Control Plus
• When mounting the bracket, make sure to leave enough space for the cartridge to be replaced.
• For a type A and type B tank.
1. Mounting the bracket
Screw the bracket into the head of the
cartridge using the four short screws
provided.
2. Mounting the bracket
Screw the bracket onto the kitchen
cabinet wall using the two long screws
provided. Mount the bracket at least
50 cm high from the base of the cabinet.
3. Removing the cap
Remove the blue cap from the top of the
cartridge.
4. Aligning the cartridge
In order to insert the cartridge into
the head of the Scale Control Plus,
the protruding parts on the side of the
cartridge need to be aligned with the
notches in the head. When doing so, keep
in mind that there are two grooves on one
side of the cartridge and only one on the
other side.
C
2×2×
2×
Scale Control Plus
cartridge
Reduces limescale
Step 1 When alarm sounds, 0% blinks.
Step 2 Unscrew the old cartridge (counter
automatically.
Step 3 Screw in the new car tridge
(clockwise).
Step 4
The Scale Control meter is 100%.
Step 5 Run boiling water for 20 seconds.
Step 6 Check fo r leaks.
Operational data
Life span: 550L @ 15 dH
Max pressure: 8.6 bar
Temperature range: 2-38°C
Service and order: www.quooker.com
• Only to be connected to drinking water.
•
cartridge prior to use.
• Please dispose this cartridge with your
general waste.

5 6 5. Inserting the cartridge
Firmly push the cartridge into the head
of the Scale Control Plus until the groove
between the cartridge and the head is no
longer visible.
6. Securing the cartridge
Now rotate the cartridge a quarter turn
to the right to ensure that it is securely in
place.
(For installation with a type A tank,
continue to section D1. For installation with
a type B tank, continue to section D2.)
Scale Control Plus
cartridge
Reduces limescale
Step 1 When alarm sounds, 0% blinks.
Step 2 Unscrew the old cartridge (counter
automatically.
Step 3 Screw in the new car tridge
(clockwise).
Step 4
The Scale Control meter is 100%.
Step 5 Run boiling water for 20 seconds.
Step 6 Check fo r leaks.
Operational data
Life span: 550L @ 15 dH
Max pressure: 8.6 bar
Temperature range: 2-38°C
Service and order: www.quooker.com
• Only to be connected to drinking water.
•
cartridge prior to use.
• Please dispose this cartridge with your
general waste.

3
21
4
Scale Control Plus
cartridge
Reduces limescale
Step 1 When alarm sounds, 0% blinks.
Step 2 Unscrew the old cartridge (counter
automatically.
Step 3 Screw in the new cartridge
(clockwise).
Step 4
The Scale Control meter is 100%.
Step 5 Run boiling water for 20 seconds.
Step 6 Check for leaks.
Operational data
Life span: 550L @ 15 dH
Max pressure: 8.6 bar
Temperature range: 2-38°C
Service and order: www.quooker.com
• Only to be connected to drinking water.
•
cartridge prior to use.
• Please dispose this cartridge with your
general waste.
AB
A
B
1. Turning o the tank
Turn o the tank using the Q button, but
leave the plug in the socket with the power
switched on. Activate the boiling water tap
and let the water run cold. Also run the
cold water tap at the same time. Close
the isolation valve then stop the boiling
water tap.
2. Connecting the tube
Disconnect the tank's inlet hose from the
inlet valve. Now mount the coupling piece
on the inlet valve with a blue bre washer,
and screw the push-t coupling onto it.
Then connect one of the two plastic tubes
(A) to the push-t.
3. Connecting the Scale Control Plus
Now connect plastic tube A to the head
of the Scale Control Plus. Take note of the
connection direction (see the arrow on the
head). Now connect the second plastic
tube (B) to the other side of the head.
4. Mounting the inlet tube
Mount the push-t coupling on the wider
side of the adapter. Screw the inlet hose
of the tank onto the other side of the
adapter with a blue bre washer. Now
connect plastic tube B to the push-t.
Installation with a type A tank
• Follow the steps below to install the Scale Control Plus with a type A tank.
• The ‘Q’ on the hood of the tank is the on / o switch.D1

ScaleControl Plus
cartridge
Reduceslimescale
Step1 When alarm sou nds, 0% blinks.
Step2 Unscre w the old cartridg e (counter
automatically.
Step3 Screw in the n ew cartridge
(clockwise).
Step4
TheSc ale Control meter is 100%.
Step5 Run boil ing water for 20 seconds.
Step6 Check for le aks.
Operationald ata
Lifespan: 550L @ 15 d H
Maxpressure: 8.6 b ar
Temperaturerange: 2-38°C
Serviceand order : www.quooker.com
• On ly to be connected to drinking water.
•
cartridgepri or to use.
• Ple ase dispose this car tridge with y our
generalwaste.
AB
55. Flushing out the cartridge
Open the isolation valve. Ventilate the
system by activating the boiling water tap
and run for 20 seconds. Check for leaks.
Now activate the boiling function again
and let the water run for about 5 minutes,
until the water is once again clear. Turn
on the tank using the Q button. Once the
water has heated up again, the Quooker
system is ready to use (continue to section
E).

34
1 2 1. Turning o the tank
Turn o the tank using the Q button, but
leave the plug in the socket with the power
switched on. Activate the boiling water tap
and let the water run cold. Also run the
cold water tap at the same time. Close the
inlet combination isolation valve and then
stop the boiling tap. Turn o the mains
cold water supply.
2. Removing the copper pipe
Remove the copper pipe between the
T-piece and inlet combination valve,
including the nuts and clamping rings.
3. Mounting the inlet combination valve
Mount the push-t using the insert on
the pressure reducing valve. Then connect
one of the two plastic tubes (B) to the
push-t.
4. Mounting the bracket
Screw the bracket onto the kitchen
cabinet wall using the two long
screws provided.
Installation with a type B tank
• Follow the steps below to install the Scale Control Plus with a type B tank.
• The ‘Q’ on the top of the tank is the on / o switch.
COLD
COLD
COLD
B
D2

7
ScaleControl Plus
cartridge
Reduceslimescale
Step1 Whenalarmsounds,0%blinks.
Step2Unscrewtheold cartri dge(counter
automatically.
Step3Screwin thenewcartridge
(clockwise).
Step4
TheScaleControlm eteris100%.
Step5Runboilingwaterfor20seconds.
Step6Checkforleaks.
Operationaldata
Lifespan:550L@ 15dH
Maxpressure:8.6bar
Temperaturerange:2-38°C
Serviceandorder:www.quooker.com
• Onlytobeconnectedtodrinkingwater.
•
cartridgepriortouse.
• Pleasedisposethiscartrid gewithyour
generalwaste.
COLD
AB
A
5. Mounting the inlet combination
Insert the inlet combination into the
bracket. Turn the screw on the top of the
bracket clockwise using the supplied Allen
key until the inlet combination is securely
attached.
6. Connecting the tube
Mount the provided push t connection
using the insert on the T-piece. Then
connect plastic tube A to the push-t.
7. Connecting the Scale Control Plus
Now connect plastic tube (A) to the head
of the Scale Control Plus. Make sure that
this is done in the right direction (see
the arrow on the head). Now connect the
second plastic tube (B) to the other side
of the head.
8. Flushing out the cartridge
Open the isolation valve or mains water
supply. Ventilate the system by activating
the boiling water tap and run for
20 seconds. Check for leaks. Now activate
the boiling function again and let the
water run for about 5 minutes, until the
water is once again clear. Turn on the tank
using the Q button. Once the water has
heated up again, the Quooker system is
ready to use (continue to section E).
65
Scale Control Plus
cartridge
Reduces limescale
Step 1 When alarm sounds, 0% blinks.
Step 2 Unscrew the old cartridge (counter
automatically.
Step 3 Screw in the new cartridge
(clockwise).
Step 4
The Scale Control meter is 100%.
Step 5 Run boiling water for 20 seconds.
Step 6 Check for leaks.
Operational data
Life span: 550L @ 15 dH
Max pressure: 8.6 bar
Temperature range: 2-38°C
Service and order: www.quooker.com
• Only to be connected to drinking water.
•
cartridge prior to use.
• Please dispose this cartridge with your
general waste.
AB
8

1
3
2
4
E
1. Connecting the tap
Detach the tap's jack plug from the tank
and insert it into the jack plug socket
of the Scale Control Plus Meter.
2. Connecting the Scale Control
Plus Meter
Insert the jack plug of the Meter into the
inside port, closest to the centre of the
tank.
3. Mounting the metal washer
Screw the washer provided into the
kitchen cabinet using the screw provided.
4. Securing the Scale Control Plus Meter
Mount the Meter on the metal washer
using the magnet on the back of the
Meter. Ax the sticker provided next to
the Meter on the inside of the cabinet.
Installing the Scale Control Plus Meter (for systems after October 2017)

5
78
65. Activating Scale Control Plus Meter
Initially activate the Scale Control Plus
Meter by pressing the wheel until the
screen lights up.
6. Setting water hardness
Turn and press the wheel to input the
water hardness (found using the steps in
part D). Press the wheel again to conrm.
7. Setting tank type
Turn the wheel again to set the power
(in kW) in correspondence with the type
of tank you have (see table below).
Press the wheel when the correct value
is highlighted. Press again to conrm.
8. Using the Scale Control Plus Meter
After setting the meter, ‘100%’ will appear
on the screen. This percentage represents
the lifespan of the cartridge and will slowly
count down to ‘0%’. When this happens,
the meter sounds an alarm signal that
the cartridge needs replacing.
PRO3 1.6kW

1
3
2
4
Replacing the cartridge
• The cartridge must be replaced before it becomes completely saturated.
• The ‘Q’ on the top of the tank is the on / o switch.
• When installed with a Meter: If it is not possible to replace the cartridge when the alarm
sounds, you can temporarily snooze it (for 72 hours) by pressing the wheel on the Scale
Control Plus Meter.
Scale Control Plus
cartridge
Reduces limescale
Step 1 When alarm sounds, 0% blinks.
Step 2 Unscrew the old cartridge (counter
automatically.
Step 3 Screw in the new car tridge
(clockwise).
Step 4
The Scale Control meter is 100%.
Step 5 Run boiling water for 20 seconds.
Step 6 Check fo r leaks.
Operational data
Life span: 550L @ 15 dH
Max pressure: 8.6 bar
Temperature range: 2-38°C
Service and order: www.quooker.com
• Only to be connected to drinking water.
•
cartridge prior to use.
• Please dispose this cartridge with your
general waste.
1. Releasing the pressure
Turn o the tank using the Q button.
Activate boiling and cold water together
in order to release the pressure from the
system and then close it once again when
the water runs cold. Turn o the mains
water supply, or in case of a type B tank,
close the inlet combination isolation valve.
2. Replacing the cartridge
Detach the saturated cartridge by twisting
it out of the head and replace it with
a new one.
3. Flushing out the system
Turn on the mains water supply, or in
case of a type B tank, open the inlet
combination isolation valve. Ventilate the
system by activating the boiling water tap
and run for 20 seconds. Check for leaks.
Now activate the boiling function again and
let the water run for about 5 minutes, until
the water is once again clear. Turn on the
tank using the Q button. Once the water
has heated up again, the Quooker system
is ready to use.
4. When installed with a Meter: resetting
the Meter
Turn on the Meter by pressing the wheel
once. Turn the wheel to ‘reset’ and press
the wheel to conrm.


UKENG | 50.428.03 | V02
Quooker UK Ltd.
Beaumont Buildings
Great Ducie Street
Manchester M3 1PQ
+44 (0)207 923 3355
enquiries@quooker.co.uk
www.quooker.co.uk
Other manuals for Scale Control Plus
2
Table of contents
Other Quooker Water Filtration System manuals
Popular Water Filtration System manuals by other brands

Anchor
Anchor DigiPure AF-9000 Series user guide

Emco Tech
Emco Tech Delphi owner's manual

ULT
ULT LAS260.1 operating instructions

Insignia
Insignia NS-LGLT5531 Quick setup guide

Pentair
Pentair FLECK 9000 SXT Installer manual

ElectroMaax
ElectroMaax Marine Watermaker Series Installation, operation & maintenance manual