rada Pulse User manual

1
IMPORTANT
Installer: This manual is the property of the customer and
must be retained with the product for
maintenance and operational purposes.
PRODUCT MANUAL
ELECTRONIC CONTROL BOX
For latest prices and delivery to your door visit MyTub Ltd - www.mytub.co.uk - [email protected] 0844 556 1818

2
TABLE OF CONTENTS
page
INTRODUCTION 3
DESCRIPTION 3
PACK CONTENTS 4
DIMENSIONS 5
SPECIFICATION 5
INSTALLATION 6
FAULT DIAGNOSIS 8
MAINTENANCE
General 9
Preventative/Precautionary Maintenance 9
(Planned Maintenance Programmes)
Maintenance Procedure - Transformer 10
Maintenance Procedure - PCB 11
Maintenance Procedure - Transformer Fuse 13
SPARE PARTS
Rada Pulse Control Box Spare Parts List 12
CUSTOMER CARE Back Cover
For latest prices and delivery to your door visit MyTub Ltd - www.mytub.co.uk - [email protected] 0844 556 1818

3
INTRODUCTION
Sensors
There are two generic types:
- No-touch sensors where a transmitted infra-red beam of light is reflected back
to the sensor by the proximity of a hand, called active infra-red.
- No-touch sensors where the sensor receives infra-red heat from a person in the
detection area, called passive infra-red.
Printed Circuit Boards (PCB)
The PCB is mounted in the Rada Pulse control box. The purpose of the PCB is to:
- Supply power (via the transformer) to the remote mounted sensor.
- To operate a remote mounted solenoid valve.
- To allow the operating functions to be programmed in through the hand held
programmer.
- To provide a signal so as to allow operation of the auxillaries.
DESCRIPTION
The Rada Pulse range of electronic products combine together to produce a controlled
washroom environment offering a high degree of energy and water conservation.
Rada Pulse Control Box
- The system is an independently mounted electronic control.
- The system operates at 12 V AC, 50/60 Hz with a 230V supply with a range of
sensors and control interfaces to suit showering, handwashing, urinal flushing
and W.C applications.
- The core of the system is the Rada Pulse Control Box containing a transformer
and a PCB. One control box can control up to ten outlets in any configuration
e.g. 5 showers, 3 washbasins, 1 urinal and 1 W.C.
- External to the Rada Pulse Control Box are the sensors and the solenoid valves
to control the water flow. They are all wired into the box.
The appropriate sensor and solenoid valve are all available in a convenient
'Operating System' package (supplied seperately).
For latest prices and delivery to your door visit MyTub Ltd - www.mytub.co.uk - [email protected] 0844 556 1818

4
PACK CONTENTS
1 x Rada Pulse Control Box
4 x Fixing Screws(not illustrated)
4 x Wall Plugs (not illustrated)
1 x Product Manual
2. Documentation
1. Rada Pulse Control Box Pack Contents
1 x Installation Template
For latest prices and delivery to your door visit MyTub Ltd - www.mytub.co.uk - [email protected] 0844 556 1818

5
DIMENSIONS
300 mm 117 mm
230 mm
SPECIFICATION
Rada Pulse Control Box
Material - Plastic sealed to IP54.
Voltage - 230V AC, 50/60 Hz.
Rating - 120 VA.
Main Fuse - 1AT.
10 x Solenoid Outputs (5 fuses) - fused at 2A for each pair.
4 x Auxiliary Outputs (1 fuse) - fused at 200mA.
Transformer - 230V AC/14V AC.
Ambient Temperature Range - 0 - 40 °C.
Maximum Humidity - 80% at 25 °C.
For latest prices and delivery to your door visit MyTub Ltd - www.mytub.co.uk - [email protected] 0844 556 1818

6
INSTALLATION
General
The installation and maintenance of this unit must be carried out in
accordance with the instructions and information given in this Manual, and
must be conducted by designated, qualified and competent personnel.
1. Before commencing, ensure that the installation conditions comply with the
information given in the SPECIFICATION section.
2. Care must be taken during installation to prevent any risk of injury or damage.
3. All electrical connections should be in accordance with BS7671 and undertaken
by a competent person.
4. Isolate mains voltage supply before removing cover.
5. Installations must comply with all current Building and Electrical Regulations in
force, and relevant Guidelines.
6. The installation and usage environment of this product must not be subject to
extremes of moisture or temperature, unauthorised tampering or wilful abuse.
7. All solenoids must be approved to EN 60730-2-8.
Installation
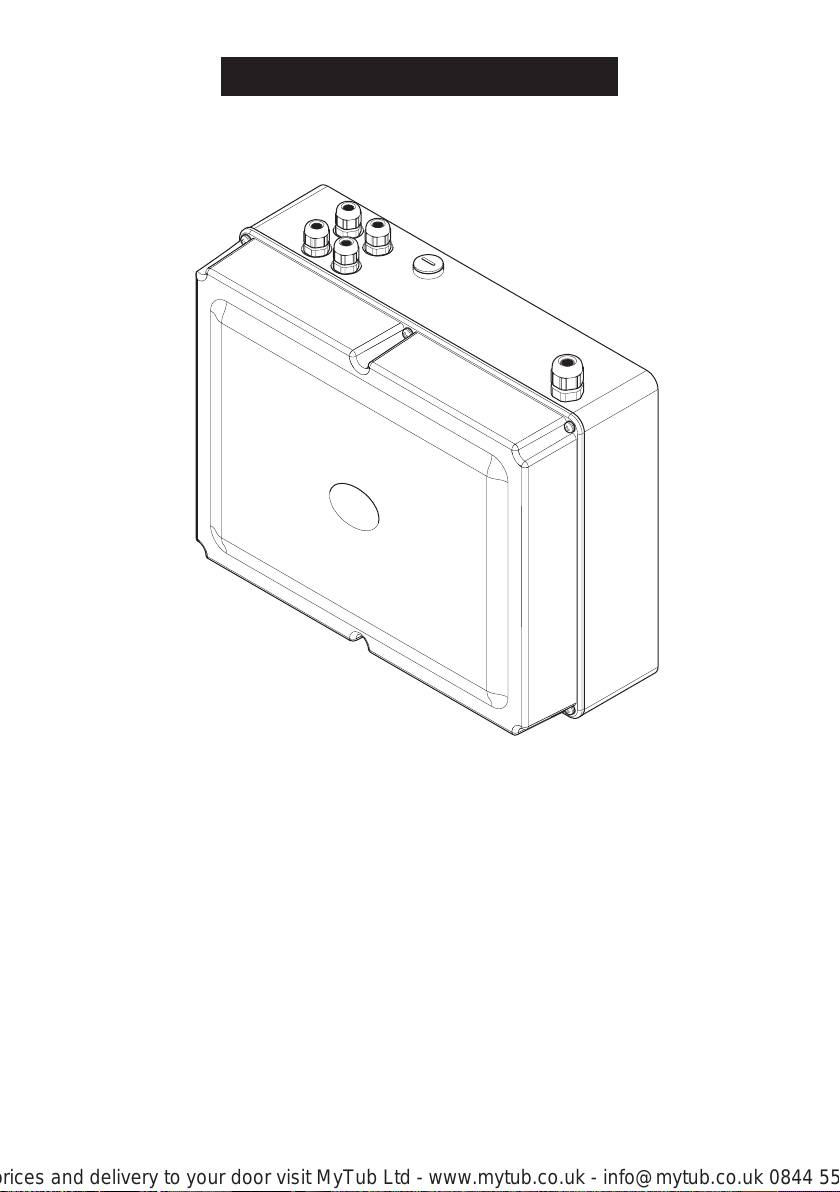
The Rada Pulse Control Box is designed to interface with Rada Pulse sensors and
Rada Pulse solenoid valves (refer to individual Product Manuals for information)
which control the system functions.
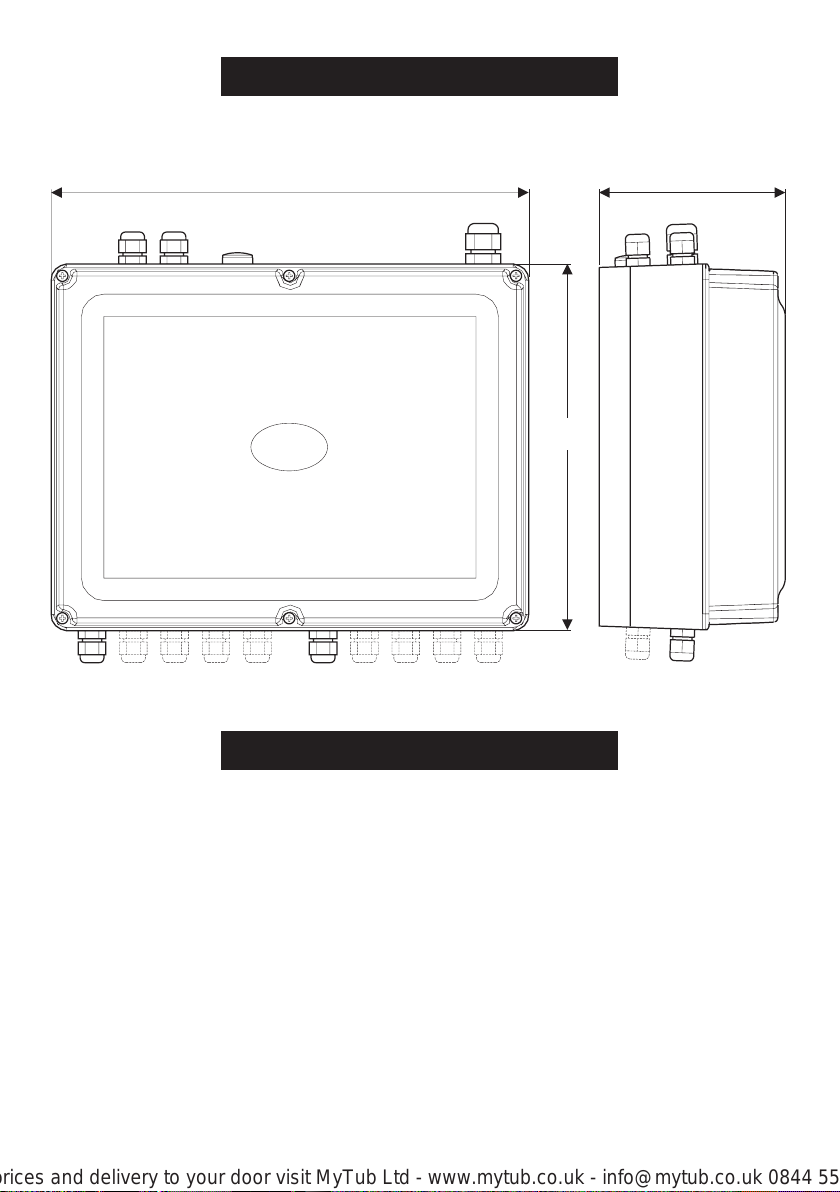
The enclosure is intended for wall-mounting to a suitable flat dry surface (fixing screws
are supplied), accessible for maintenance. Make sure that you fit the sealing washers
to the fixing screws before installation.
Note! An installation template is supplied so that the fixing positions can be marked
and drilled without putting the control box on the wall (If the wall is uneven it is
advisable to fit a board to ensure surface is flat and the control box does not become
distorted).
This appliance is intended for permanent connection to the fixed electrical wiring of
the mains electric system via a double pole switched connection unit fused at 3
amps, which has at least 3 mm contact separation.
A mains 230 V supply cable of 2 metre length is pre-connected, this must not be
removed; do not renew the cable inside the box if damaged.
For latest prices and delivery to your door visit MyTub Ltd - www.mytub.co.uk - [email protected] 0844 556 1818

7
Safe low-voltage 12 V AC output is fuse-protected internally. This appliance is IP54
protected, provided blanking caps are fitted to unused cable holes and the cover seal
is fitted correctly.
All AC cable used on the installation must be HAR approved (0.75 mm).
The PCB has four connections to enable auxiliary items to be used in conjunction
with the pulse system (e.g.pump, fan, lights and disinfection).
The connection of these auxiliaries must be through a 12V relay with a maximum coil
resistance of 160 ohms.
Maximum cable runs for solenoid connection are as follows:
Cable Lengths
Metres
Sq mm
2.00
1.00
0.75
0.50
104
53
40
27
1. Use the installation template (supplied) to mark the positions of the fixing holes
for the control box.
2. Drill and plug the fixing holes.
3. Remove the cover from the control box.
4. Hold the control box in position and secure with the fixing screws (supplied).
Note! On some wall surfaces or structures alternative fixings may be required
(not supplied).
Programming of all outlets is via the hand held programmer.
WARNING!
Under normal operating conditions the input water temperature to the unit
SHALL be regulated to less than 55OC
During the disinfection process high water temperatures can be discharged
from the shower heads or taps. During this process suitable safety
precautions SHALL be taken to ensure that persons are not exposed to the
risk of scalding.
For latest prices and delivery to your door visit MyTub Ltd - www.mytub.co.uk - [email protected] 0844 556 1818

8
Connections to
Solenoid Valves
Connections to
Pulse Sensors
Transformer
PCB
Cover
Screws
Cover
Installation of the Rada Pulse Control Box
Connections to Auxiliary Units
e.g. Fan, Light , Disinfection
Connection to Mains
Power Supply
Connection Point for
Hand Held Programmer
5. Connect the solenoid valve and sensors to the PCB with the two part connectors.
Make sure that the cables go through the cable glands (supplied with the sensor
and the solenoid valve).
Note! Sensor position identified No. 1 operates solenoid valve No. 1 etc. Inside
the cover of the control box is an information label to be completed by the installer.
The information on this label should identify the position in the building of individual
solenoids and sensors (refer to example on label).
6. Connect the transformer to the mains electrical supply.
7. The control box will now need programming with the hand held programmer (refer
to the Product Manual for the hand held programmer).
8. Fit the cover to the control box and secure with the screws (6 off).
For latest prices and delivery to your door visit MyTub Ltd - www.mytub.co.uk - [email protected] 0844 556 1818

9
FAULT DIAGNOSIS
Symptom Cause/Rectification
1. All outlets do not
operate
(e.g. washbasin,
shower, urinal,
W.C).
a. Check power to Pulse control box (power light illuminated
on PCB).
b. If there is power to the control box, check fuse in
transformer.
2. Individual outlets
do not operate.
3. Outlets continue
running or run for
excessive
periods
a. Plug in hand held programmer and check timing for
outlet. Reprogram if necessary.
b. Check solenoid valve. Maintain or replace parts if
required.
4. Outlets only run
for a short period
of time.
a. Check output fuse on PCB. Replace as necessary.
b. Plug in hand held controller and check that non operating
outlet is set up correctly.
c. Plug in hand held controller and complete a system info
'error' check. This will identify if the sensor or solenoid
is incorrectly installed or faulty. Replace parts or products
as required.
d. Check solenoid. Replace if necessary.
a. Plug in hand held programmer and check timing for
outlet. Reprogram if necessary.
For latest prices and delivery to your door visit MyTub Ltd - www.mytub.co.uk - [email protected] 0844 556 1818

10
MAINTENANCE
General
Rada products are precision-engineered and should give continued superior and safe
performance, provided:
1. They are installed, commissioned, operated and maintained in accordance with
our recommendations, and
2. Periodic attention is given as necessary to maintain the product in good functional
order. Guidelines for frequency are given below.
Rada Service Engineers/Agents will call by prior arrangement, if required. Service
Contracts may be undertaken, subject to survey - details upon request.
Preventative/Precautionary Maintenance
(Planned Maintenance Programmes)
The frequency and extent of attention required will vary according to prevailing site
and operational conditions.
Six-monthly
Visual: check internal component condition. Inspect for debris, scale deposition,
deformation, damage, corrosion, etc. Maintain or renew as necessary.
Maintenance Procedures
Maintenance must be carried out in accordance with these instructions, and
must be conducted by designated, qualified and competent personnel.
External surfaces may be wiped clean with a soft cloth, and if necessary, a mild
washing-up type detergent or soap solution can be used.
WARNING! Many household and industrial cleaning products contain mild
abrasives and chemical concentrates, and should not be used on this product.
Components are precision made, so care must be taken whilst servicing to avoid
damage.
When ordering spare parts, please state the product type, i.e. Rada Pulse, and
identify the part name and number (refer to the PARTS LIST).
For latest prices and delivery to your door visit MyTub Ltd - www.mytub.co.uk - [email protected] 0844 556 1818

11
Maintenance Procedure - Transformer
1. Isolate the electrical supply to the control box.
2. Remove the cover from the control box.
3. Disconnect the transformer from the mains electrical supply.
4. Disconnect the two part connector that connects the transformer to the PCB.
5. Remove the fixing screws (4 off) that secure the transformer to the control box.
6. Unscrew the cable gland and carefully pull the electrical cable through it.
7. Remove the transformer from the control box.
8. Refit the new transformer in reverse order.
Removal and Installation of the Transformer
Cable Gland
Fixing Screws
Transformer
Control Box
Mains Electrical
Cable
For latest prices and delivery to your door visit MyTub Ltd - www.mytub.co.uk - [email protected] 0844 556 1818

12
Maintenance Procedure - PCB
1. Isolate the electrical supply to the control box.
2. Remove the cover from the control box.
3. Disconnect the transformer from the PCB.
4. Make a note of the positions of the connections for the sensors and the solenoid
valves.
5. Disconnect the solenoid valves and the sensors connections from the PCB.
6. If necessary, disconnect any auxiliary connections from the PCB.
7. Remove the fixing screws (2 off) that secure the PCB to the control box.
8. Remove the PCB from the control box.
9. Refit the new PCB in reverse order.
10. The control box will now need programming with the hand held programmer (refer
to the Product Manual for the hand held programmer).
Removal and Installation of the PCB
Transformer
PCB
Auxiliary Connections
Sensor
Connections
Solenoid Valve
Connections
Fixing Screw
Fixing Screw
For latest prices and delivery to your door visit MyTub Ltd - www.mytub.co.uk - [email protected] 0844 556 1818

13
Maintenance Procedure - Transformer Fuse
1. Isolate the electrical supply to the control box.
2. Remove the cover from the control box.
3. Disconnect the transformer from the mains electrical supply.
4. Disconnect the two part connector that connects the transformer to the PCB.
5. Remove the fixing screws (4 off) that secure the transformer to the control box.
6. Unscrew the cable gland and carefully pull the electrical cable through it.
7. Remove the fuse in the side of the transformer.
8. Refit the new fuse in reverse order.
For latest prices and delivery to your door visit MyTub Ltd - www.mytub.co.uk - [email protected] 0844 556 1818

14
SPARE PARTS
Rada Pulse Control Box Spare Parts List
422 75 Cover Assembly
422 76 Base Assembly
422 77 Blanking Plugs (x10)
422 78 Cable Grommets (x10)
422 79 Mains Cable Grommet and Threaded Plug
422 80 Transformer
422 81 PCB
422 82 Fuse (output)
422 83 Supply Fuse (12 V)
422 84 Mains Input Fuse (located in transformer, not shown)
For latest prices and delivery to your door visit MyTub Ltd - www.mytub.co.uk - [email protected] 0844 556 1818

15
Rada Pulse Control Box Spare Parts Diagram
422 83
422 78
422 81
422 76
422 80
422 79
422 77
422 75
422 82
For latest prices and delivery to your door visit MyTub Ltd - www.mytub.co.uk - [email protected] 0844 556 1818

16
For latest prices and delivery to your door visit MyTub Ltd - www.mytub.co.uk - [email protected] 0844 556 1818

17
For latest prices and delivery to your door visit MyTub Ltd - www.mytub.co.uk - [email protected] 0844 556 1818

18
INSTALLATION AND MAINTENANCE
RECORD CARD
Control Box Ref: Location:
No. Of Outlets: Installation Date:
PROGRAM SETTINGS
Channel Type
(e.g. Manual,
automatic)
Flow Settings Duty Flush Auxiliary Functions
(fan, light, pump,
disinfection)
e.g.
Type of Outlet
(e.g. shower,
washbasin)
urinal Single auto. preflush 10 secs
(urinal and
W.C only)
flush time 15 secs
flush delay 5 min
Duty flush
1st 12 hrs
Fan and
disinfection
Activated
No.
1
5
4
3
2
8
7
6
10
9
For latest prices and delivery to your door visit MyTub Ltd - www.mytub.co.uk - [email protected] 0844 556 1818

19
H. G. Thornthwaite Pty Ltd.
Howthorne House, 79 Victoria Avenue,
Chatswood, Sydney,
New South Wales, 2067 AUSTRALIA
Tel: (02) 9417 4466 Fax: (02) 9417 5231
Klepp & Co.
Perfektastrasse 63, A-1230 Wien,
AUSTRIA
Tel: (43) 1 609 1737 Fax: (43) 1 609 1818
NV De Melker Belgium SA
Beukenlei 50, 2960 St. Job-in-'t-Goor,
BELGIUM
Tel: (03) 633 2150 Fax: (03) 633 2103
Rada Mechnical Products Ltd.
P.O. Box 148, Markham
Ontario, L3P 3J5, CANADA
Tel: (905) 471 2220 Fax: (905) 294 6280
Hans Teller A/S
Formervangen 6, DK-2600, Glostrup,
DENMARK
Tel: (45) 4345 8066 Fax: (45) 4345 2066
Pamtec Oy
Tuupakantie 4, 01740 Vantaa, FINLAND
Tel: (09) 895 5061 Fax: (09) 890 980
Les Robinets Presto
7 Rue Racine, B.P. 551, 92542 Montrouge
Cedex, FRANCE
Tel: (01) 4612 3456 Telex: 632 923F
Fax: (01) 4092 0012
Rada Armaturen GmbH
An der Trift 65d,
63303 Dreieich, GERMANY
Tel: (49) 6 103 9804-0
Fax: (49) 6 103 9804-90
James Wong & Co., Ltd.
1504 Westlands Centre,
20 Westlands Road,
Quarry Bay, HONG KONG
Tel: (852) 2811 5868 Fax: (852) 2811 5740
Bocchi S.r.l.
Corso Plebisciti 13, I 20129 Milano,
ITALY
Tel: (02) 7012 3756 Fax: (02) 7380 001
Japan Leonard Distributors
No. 10-3, Hama 2 Chome, Toyonaka City,
Osaka Pref. Postal Number 561, JAPAN
Tel: (06) 336 0321/2 Fax: (06) 336 1529
De Melker B.V.
De Schutterij 20, Postbus 65,
3900 AB - Veenendaal,
THE NETHERLANDS
Tel: (0318) 52 4800 Fax: (0318) 52 5035
A L Byrne & Son Ltd.
24 Gundry Street, Newton,
Auckland, NEW ZEALAND
Tel: (9) 379 6885 Fax: (9) 309 2720
Rada Teknikk A/S
Stavernsveien 15, Postboks 1241,
3254 Larvik, NORWAY
Tel: (47) 33 130180 Fax: (47) 33 130185
Walker Crosweller (Pty) Ltd.
P.O. Box 1018, Bromhof 2154
SOUTH AFRICA
Tel: (011) 793 1031 Fax: (011) 793 1092
Armstrong-Lynnwood Inc.
221 Armstrong Boulevard, Three Rivers,
Michigan 49093
USA
Tel: (1) (616) 278 1413 Fax: (1) (616) 279 3130
Peter Hiltpold AG
Tumigerstrasse 42, 8606 Greifensee,
SWITZERLAND
Tel: (01) 940 60 56 Fax: (01) 940 89 40
Heno AB
Box 50066, S 104 05 Stockholm,
SWEDEN
Tel: (08) 15 11 75 Fax: (08) 16 75 29
Presto Iberica S.A
Principie de Vergara,
13 - 28001 Madrid, SPAIN
Tel: 578 25 75 Fax: 578 35 22
CONTACTS
Fluid Control Systems Sp. z o.o.
ul. Dobrogniewa 1G,
01 - 438 Warszawa, POLAND
Tel: (48) 22 36 43 53 Fax: (48) 22 36 15 28
Koncept Limited
Letohradska 54,
170 00 PRAGUE 7
CZECH REPUBLIC
Tel: (420) 2376 143/477
Fax: (420) 2376 040
For latest prices and delivery to your door visit MyTub Ltd - www.mytub.co.uk - [email protected] 0844 556 1818

20
P3405a Kohler Mira Limited, July 2002
Rada Controls
Kohler Mira Ltd
Cromwell Road,
Cheltenham, England,
GL52 5EP, UK.
CUSTOMER CARE
Guarantee
This product is guaranteed against any defect of materials or workmanship for one year from the date of
purchase, provided that the product has been installed correctly and used in accordance with the
instructions supplied.
Any part found to be defective during the guarantee period will be replaced or repaired - at our option -
without charge, provided that the product has been properly used and maintained.
Routine cleaning and maintenance should be carried out in accordance with the instructions supplied.
The product should not be modified or repaired except by a person authorised by Rada.
Your statutory rights are in no way affected by this guarantee.
After Sales Service - how we can help you
We have a network of fully trained staff ready to provide assistance, should you experience any difficulty
operating your Rada equipment.
Spare Parts
All functional parts of Rada products are kept for up to ten years from the date of final manufacture.
If during that period, our stock of a particular part is exhausted we will, as an alternative, provide an
equivalent new product or part at a price equating to the cost of repair to the old, bearing in mind the age
of the product.
Customer Care Policy
If within a short time of installation the product does not function correctly, first check with the operation
and maintenance advice provided in this Manual to see if the difficulty can be overcome.
Failing this, contact your installer to ensure that the product has been installed and commissioned in full
accord with our detailed installation instructions.
If this does not resolve the difficulty, please ring your nearest Rada contact who will give every assistance
and, if appropriate, arrange for the local Service Engineer or Agent to call on a mutually agreeable date.
Contact:
Web site: www.rada-controls.co.uk
Tel.: + 44 (0)1242 221221
Fax.: + 44 (0)1242 221925
Rada is a registered trade mark of subsidiaries
of Kohler Mira Limited.
The company reserve the right to alter product
specifications without notice.
BS EN ISO 9001 : 199
4
Reg. No. FM 14648
For latest prices and delivery to your door visit MyTub Ltd - www.mytub.co.uk - [email protected] 0844 556 1818
Table of contents
Other rada Bathroom Fixture manuals
Popular Bathroom Fixture manuals by other brands

Graff
Graff ONDA E-7080-LM61N-T Instructions for assembly and use

Porcelanosa
Porcelanosa noken LAUS 100223927 N720000175 installation instructions

Kraus
Kraus Bolden FF-104 installation manual

BERNSTEIN
BERNSTEIN EX506 Assembly instructions

Kinedo
Kinedo Modulo DES1431ADG-1 installation instructions

Aqua elite
Aqua elite SF 009A Installation and maintenance instructions