manuals.online logo
Brands
  1. Home
  2. •
  3. Brands
  4. •
  5. Radio Shack
  6. •
  7. Accessories
  8. •
  9. Radio Shack XMODS Custom RC User manual

Radio Shack XMODS Custom RC User manual

www.xmodsRC.com 1
elbaTwercS
wercS
noitacoL raeRdnatnorF
srepmaD
reppUtnorF
)gnol(kceD
reppUtnorF
)trohs(kceD
thgiRdnatfeL
selkcunKtnorF
rewoLtnorF
kceD
reppUraeR
)trohs(kceD
reppUraeR
)gnol(kceD
rewoLraeR
kceD
rebmuN 42224424
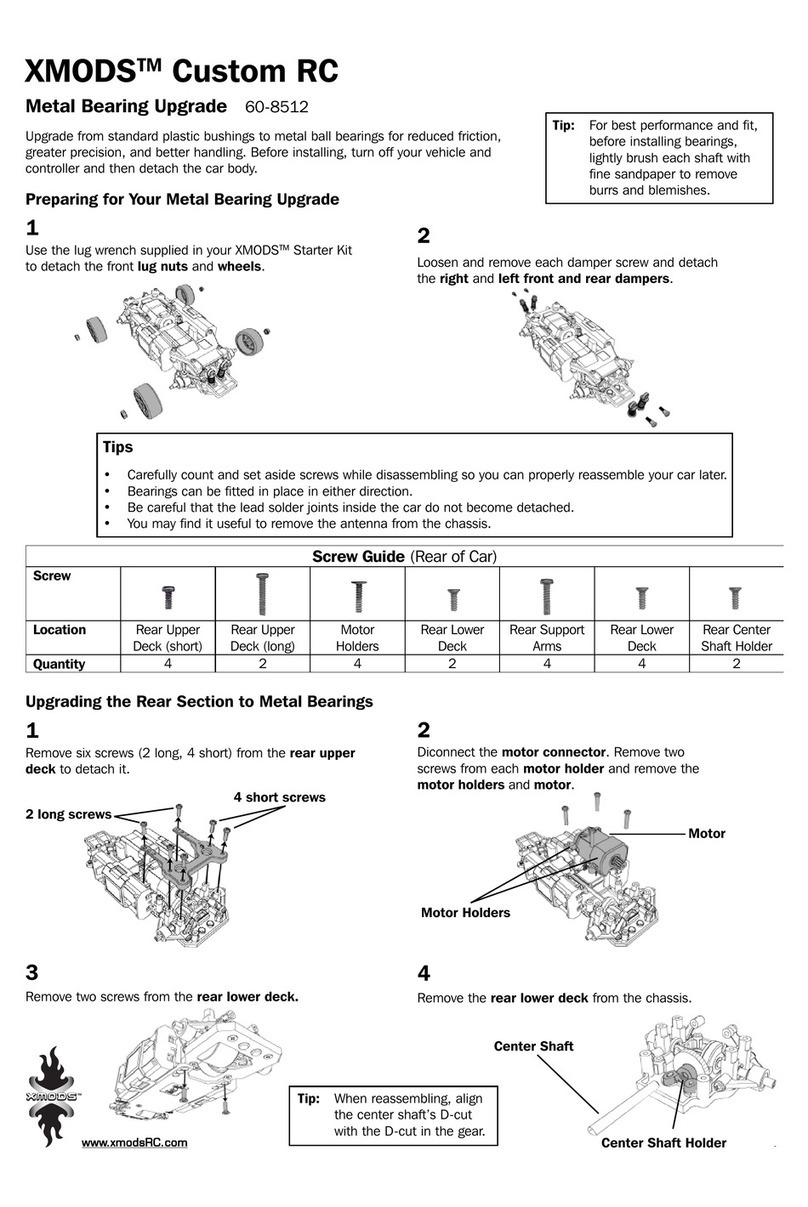
XMODSTM Custom RC
All Wheel Drive Kit 60-8506
Upgrade your XMODS custom RC from standard two-wheel drive to all-wheel drive for improved traction
and cornering. Before installing this kit, turn off your vehicle and controller, and detach the car body.
The All-Wheel Drive kit includes:
Rear differential gear
Drive shaft cone gear
Front left and right steering assembly w/differential gear
Left and right rear arms (optional installation)
Tube of grease
1
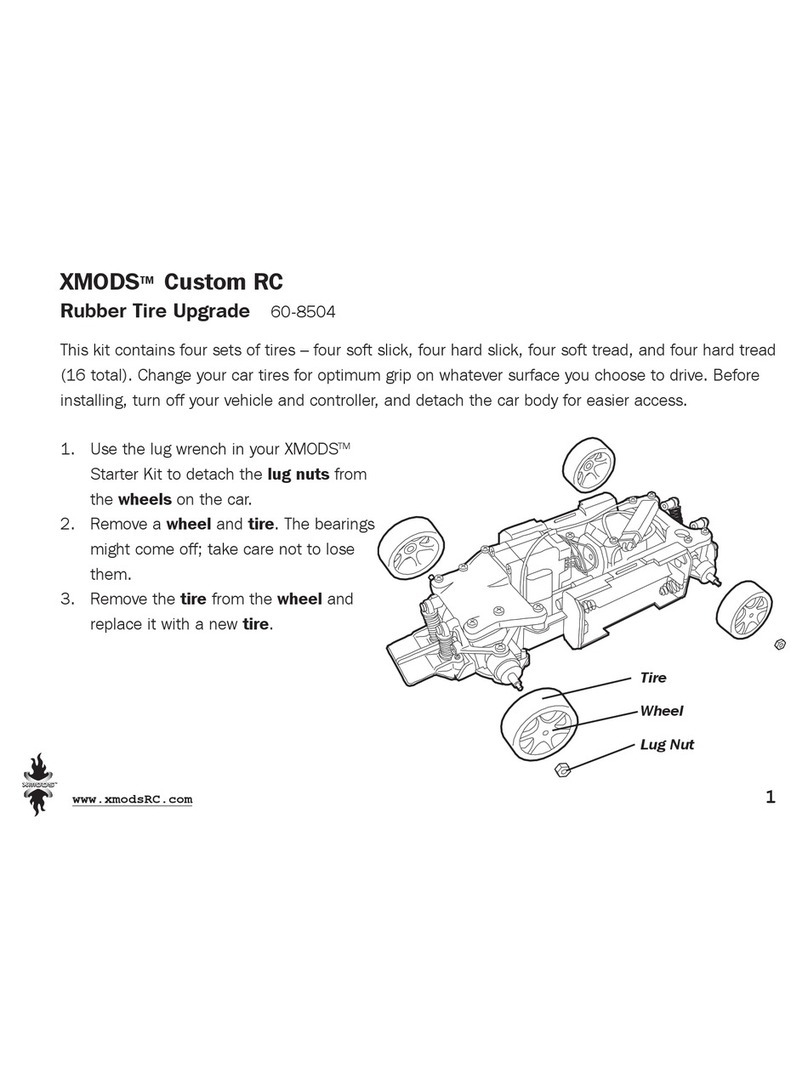
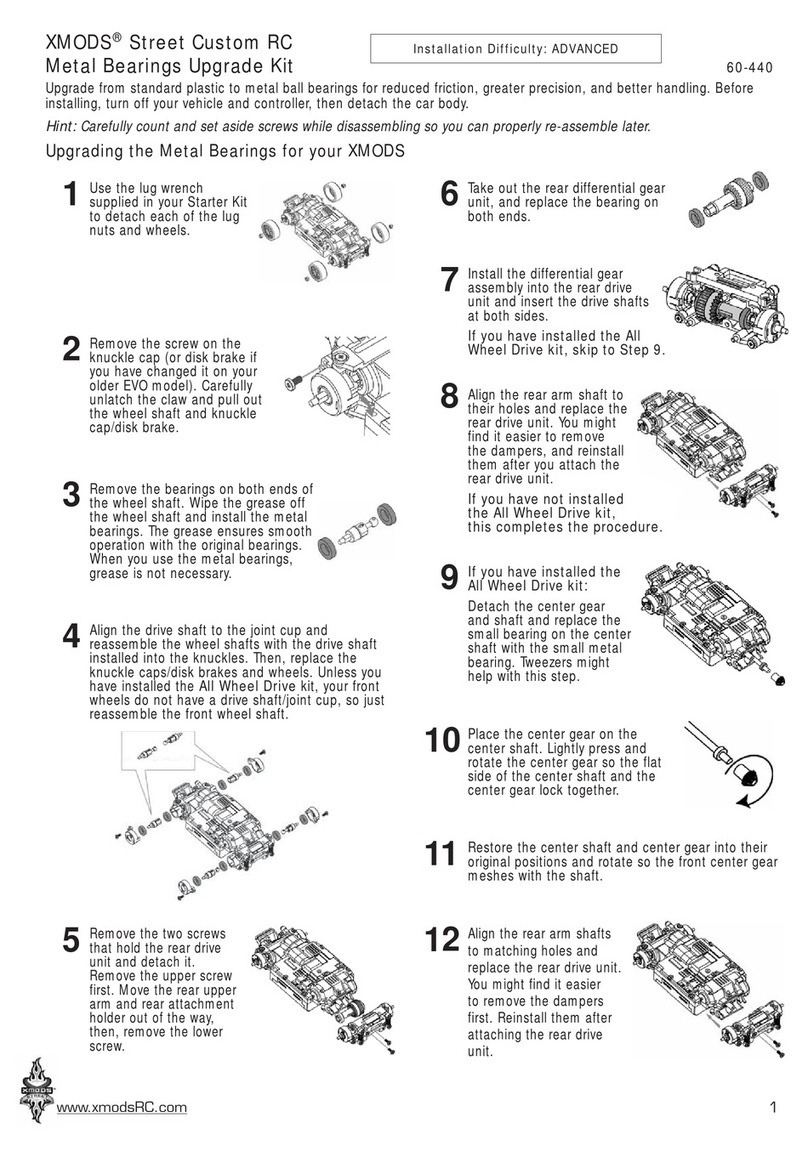
Use the lug wrench supplied in your XMODSTM Starter Kit to
detach the front lug nuts and wheels.
2
Loosen and remove each damper screw and detach the
right and left front and rear dampers.
Note: Although the front and rear differential gears appear similar,
they are not. DO NOT USE THEM INTERCHANGEABLY! In the
event of mix up, carefully unscrew one gear into two halves.
If the gear has metal bearings inside, this is the rear
differential. If not, the gear is the front differential.
1
Loosen and remove each screw beneath the right and left
front knuckles. Loosen and remove the four screws
beneath the front arm base.
2
Unscrew and remove the two rear screws on the front upper
deck. Lift up and remove the front upper deck along with
the left and right steering assemblies.
Preparing for Your All-Wheel Drive Upgrade
Front Section All-Wheel Drive Installation
Note: You will not need the front left and right steering
assemblies unless you encounter a need to remove
the all-wheel drive upgrade.
Tip: You may find it useful
to remove the antenna
from the chassis.
©2003 RadioShack Corporation
All Rights Reserved.
RadioShack and RadioShack.com are trademarks
used by RadioShack Corporation.
www.xmodsRC.com 2
3
Install the cone gear on the chassis’ drive shaft. Be sure to
align the shaft’s D-cut with the hole in the cone gear.
1
Loosen and remove the six screws in the rear upper deck.
6
Remove and discard the top shipping plate from the front
all-wheel drive steering assemblies and screw the front
upper deck back into place.
2
Remove the four screws in the rear lower deck and
then carefully lift and remove the rear axle assembly away
from the lower deck.
Rear Section All-Wheel Drive Installation
For longest life and optimum performance you must replace the rear differential with the all-wheel drive
differential; however, replacing the left and right suspension arms is not required.
4
Reassemble the rear section of your car in reverse order.
Reassemble the front and rear dampers and wheels.
5
Perform this step ONLY if your car will be driven indoors
exclusively, as the grease can collect dirt and dust!
Apply a dab of grease between the front bevel gears and
another dab between the rear bevel gears.
5
Insert the tie rod tips into the hole at the base of the left
and right turn knuckles. Screw the four front lower deck
screws into the all-wheel drive steering assemblies. Screw
the two turn knuckle screws into the front lower deck.
Note: Be sure the universal
joints have not disengaged
from the differential axles
before screwing the
assembly into place.
Long
screws
Exploded Front Drive Train View
Note: This view is provided
to assist you in assembling
the front drive train should
you need to reassemble it.
4
Discard the bottom shipping plate of the front all-wheel
drive steering assembly after unscrewing and removing all
bottom screws. Then, carefully place the steering assembly
on the front lower plate of the chassis.
CAUTION: KEEP GREASE OUT OF REACH OF SMALL CHILDREN.
Grease contains White Mineral Oil and Li-Ca complex soap. Avoid prolonged and/or repeated skin contact. May cause skin
irritation/dermatitis. Remove soiled or soaked clothing immediately.
FIRST AID
EYES: Flush with plenty of water. Call physician or poison center immediately.
SKIN: Wash with soap and plenty of water; apply skin cream. If irritation persists, get immediate medical attention.
INGESTION: If swallowed do not induce vomiting unless directed by a physician. Call physician or poison center immediately.
For Medical Emergencies, call Poison Center (303) 623-5716.
3
Carefully separate the rear axle at the differential and
replace it with the new rear differential gear.
Printed in China
Other manuals for XMODS Custom RC

3

This manual suits for next models

2

Other Radio Shack Accessories manuals

Radio Shack XMODS User manual

Radio Shack

Radio Shack XMODS User manual

Radio Shack Extra remote sensor User manual

Radio Shack

Radio Shack Extra remote sensor User manual

Radio Shack XMODS 60-439 User manual

Radio Shack

Radio Shack XMODS 60-439 User manual

Radio Shack XMODS Custom RC User manual

Radio Shack

Radio Shack XMODS Custom RC User manual

Radio Shack XMODS Custom RC User manual

Radio Shack

Radio Shack XMODS Custom RC User manual

Radio Shack 2302019 User manual

Radio Shack

Radio Shack 2302019 User manual

Radio Shack 61-140 User manual

Radio Shack

Radio Shack 61-140 User manual

Radio Shack 270-258 User manual

Radio Shack

Radio Shack 270-258 User manual

Radio Shack 63-1064 User manual

Radio Shack

Radio Shack 63-1064 User manual

Radio Shack XMODS 60-440 User manual

Radio Shack

Radio Shack XMODS 60-440 User manual

Radio Shack 63-1123 User manual

Radio Shack

Radio Shack 63-1123 User manual

Radio Shack LX-3100 User manual

Radio Shack

Radio Shack LX-3100 User manual

Popular Accessories manuals by other brands

ASTECH LDM301-302 user manual

ASTECH

ASTECH LDM301-302 user manual

GAMERON WIRELESS SENSOR BAR FOR WII manual

GAMERON

GAMERON WIRELESS SENSOR BAR FOR WII manual

opticis M1-2R2H-TR user manual

opticis

opticis M1-2R2H-TR user manual

Philips DLA66004D brochure

Philips

Philips DLA66004D brochure

NEO SHORTY user manual

NEO

NEO SHORTY user manual

Stobag VENTOSOL VS5100 Operating instructions for end users

Stobag

Stobag VENTOSOL VS5100 Operating instructions for end users

FrSky FAS100 ADV instruction manual

FrSky

FrSky FAS100 ADV instruction manual

VDO Triducer-Through-hull Owner's guide & installation instructions

VDO

VDO Triducer-Through-hull Owner's guide & installation instructions

IFM LK 022 Series operating instructions

IFM

IFM LK 022 Series operating instructions

BioLite Charge 20 PD Instruction and use

BioLite

BioLite Charge 20 PD Instruction and use

American Standard Acrylux 6032Y1.SW Specifications

American Standard

American Standard Acrylux 6032Y1.SW Specifications

Keating Of Chicago Flame Switch Service instructions

Keating Of Chicago

Keating Of Chicago Flame Switch Service instructions

KWC DESIGNO K.28.H5.20.000.99 Specifications

KWC

KWC DESIGNO K.28.H5.20.000.99 Specifications

Verano DROP-ARM AWNING V120 NAPOLI installation manual

Verano

Verano DROP-ARM AWNING V120 NAPOLI installation manual

Lightolier Lytecaster 1920LV Instructions for maintenance reference

Lightolier

Lightolier Lytecaster 1920LV Instructions for maintenance reference

Utilitech UT-81 quick start guide

Utilitech

Utilitech UT-81 quick start guide

ADEO CONTROL SP-C4-1 Installation and use manual

ADEO CONTROL

ADEO CONTROL SP-C4-1 Installation and use manual

Compur Statox 501 Operation & instruction manual

Compur

Compur Statox 501 Operation & instruction manual

manuals.online logo
manuals.online logoBrands
  • About & Mission
  • Contact us
  • Privacy Policy
  • Terms and Conditions

Copyright 2025 Manuals.Online. All Rights Reserved.