Battery Notes
Limited Ninety-Day Warranty
Helpful Hints
This product is warranted by RadioShack against manufacturing defects in material and workmanship under
normal use for ninety (90) days from the date of purchasefrom RadioShack company-owned stores and
authorized RadioShack franchisees and dealers. EXCEPT AS PROVIDED HEREIN, RadioShack MAKES
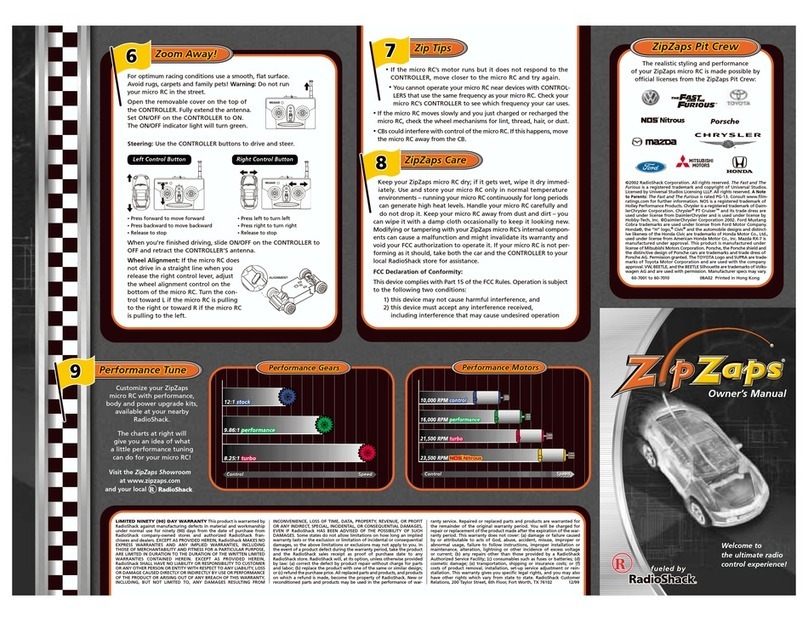
NO EXPRESS WARRANTIES AND ANY IMPLIED WARRANTIES, INCLUDING THOSE OF MERCHANT-
ABILITY AND FITNESS FOR A PARTICULAR PURPOSE, ARE LIMITED IN DURATION TO THE DURA-
TION OF THE WRITTEN LIMITED WARRANTIES CONTAINED HEREIN. EXCEPT AS PROVIDED
HEREIN, RadioShack SHALL HAVE NO LIABILITY OR RESPONSIBILITY TO CUSTOMER OR ANY
OTHER PERSON OR ENTITY WITH RESPECT TO ANY LIABILITY, LOSS OR DAMAGE CAUSED
DIRECTLY OR INDIRECTLY BY USE OR PERFORMANCE OF THE PRODUCT OR ARISING OUT OF
ANY BREACH OF THIS WARRANTY, INCLUDING, BUT NOT LIMITED TO, ANY DAMAGES RESULTING
FROM INCONVENIENCE, LOSS OF TIME, DATA, PROPERTY, REVENUE, OR PROFIT OR ANY INDI-
RECT, SPECIAL, INCIDENTAL, OR CONSEQUENTIAL DAMAGES, EVEN IF RadioShack HAS BEEN
ADVISED OF THE POSSIBILITY OF SUCH DAMAGES.
Some states do not allow limitations on how long an implied warranty lasts or the exclusion or limitation of
incidental or consequential damages, so the above limitations or exclusions may not apply to you.
In the event of a product defect during the warranty period, take the product and the RadioShack sales
receipt as proof of purchase date to any RadioShack store. RadioShack will, at its option, unless otherwise
provided by law: (a) correct the defect by product repair without charge for parts and labor; (b) replace the
product with one of the same or similar design; or (c) refund the purchase price. All replaced parts and prod-
ucts, and products on whicha refund is made, become the property of RadioShack. New or reconditioned
parts and products may be used in the performance of warranty service. Repaired or replaced parts and
products are warranted for the remainder of the original warranty period. You will be charged for repair or
replacement of the product made after the expiration of the warranty period.
This warranty does not cover: (a) damage or failure caused by or attributable to acts of God, abuse, acci-
dent, misuse, improper or abnormal usage, failure to follow instructions, improper installation or mainte-
nance, alteration, lightning or other incidence of excess voltage or current; (b) any repairs other than those
provided by a RadioShack Authorized Service Facility; (c) consumables such as fuses or batteries; (d) cos-
metic damage; (e) transportation, shipping or insurance costs; or (f) costs of product removal, installation,
set-up service adjustment or reinstallation.
This warranty gives you specific legal rights, and you may also have other rights which vary from state to
state
RadioShack Customer Relations, 200 Taylor Street, 6th Floor, Fort Worth, TX 76102 12/99
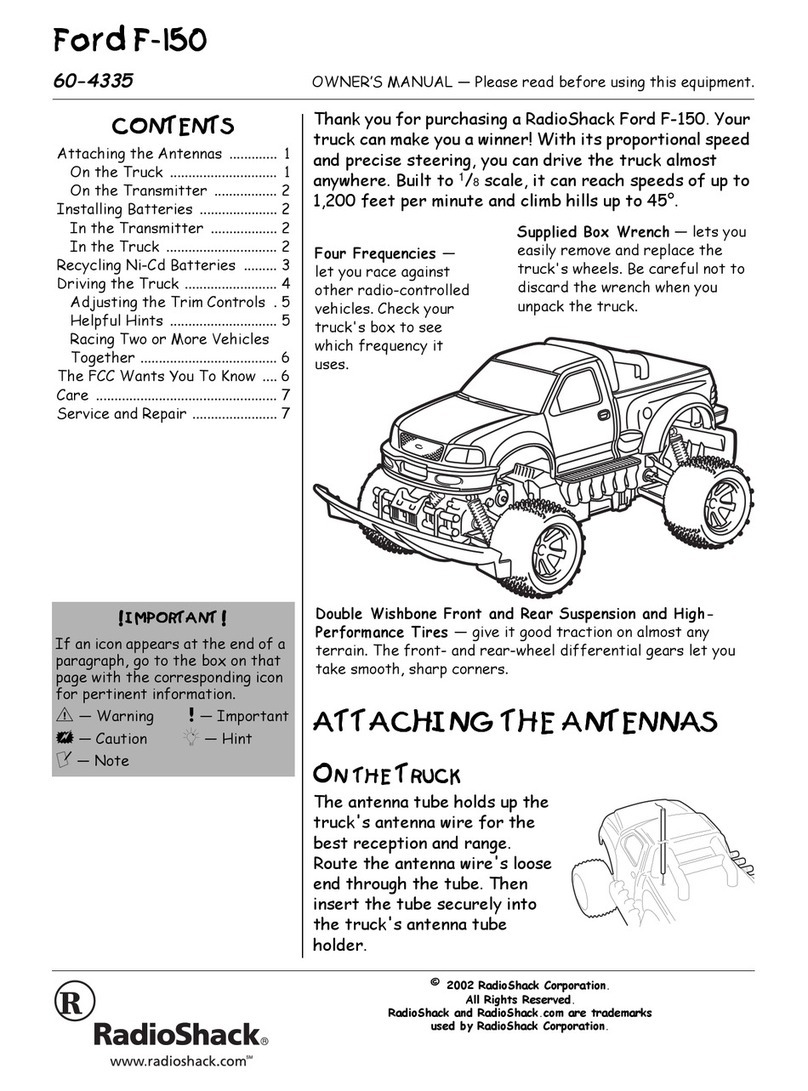
• Use extreme care when running the
Hummer H2. It can reachmuch higher
speeds (up to 1200 feet per minute)
than most remote-controlled cars.
• Avoid high-impact collisions with peo-
ple or objects when you drive the
Hummer H2.
• Do not touch the motor immediately
afterusingtheHummerH2,asitmight
become hot during use.
• Do not play with your Hummer H2 in
the street.
• If your Hummer H2 gets stuck under
an object, immediately release the
transmitter’s control levers and
retrieve the Hummer H2.
• Keep the Hummer H2 dry. If it gets
wet, dry it immediately. Use and store
theHummerH2innormaltemperature
environments.
• Wipe the Hummer H2 with a damp
cloth to keep it looking new. Keep it
away from dust and dirt.
Care & Use
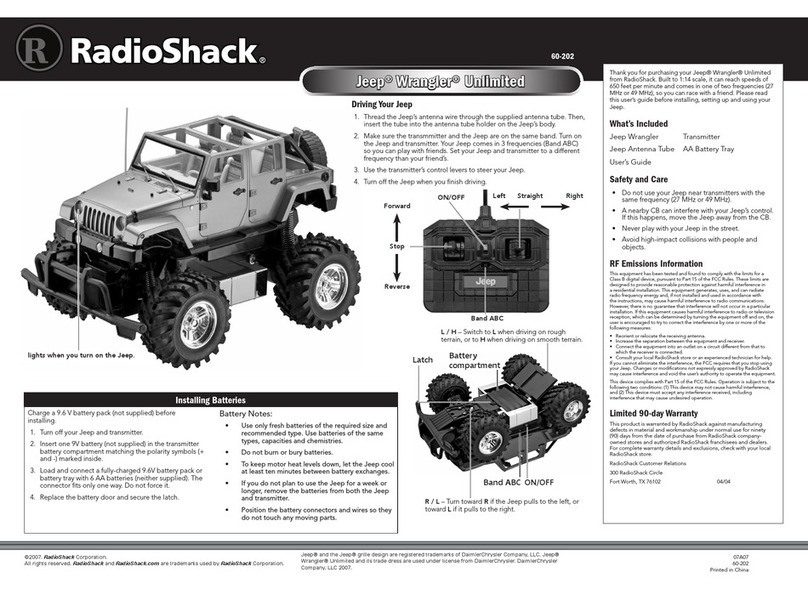
• Use only fresh batteries of the required size and recom-
mended type.
• Do not mix old and new batteries, different types of batteries
(standard, alkaline, or rechargeable), orrechargeable batter-
ies of different capacities.
• If you do not plan to use your Hummer H2 for a week or
more, remove the battery from the transmitter and the bat-
tery pack from the Hummer H2. Batteries can leak chemi-
cals that may destroy electronic parts.
• Never leave dead or weak batteries in the Hummer H2 or
transmitter.
• Be sure the battery pack’s connectors and wires do not
touch any of the Hummer H2’s moving parts.
• Use the recommended battery pack and charger only.
• If your Hummer H2 does not respond to the transmitter,
replace the 9V batteries in the Hummer H2 and the transmit-
ter. If the Hummer H2 loses power, replace or recharge the
battery pack.
• After you charge the battery pack, disconnect it from the
charger. Overcharging the battery pack could damage it.
• Whenyou disconnnectthebatterypackfromthe charger,do
not pull on the connector’s wires. You might damage the bat-
tery pack.
• Dispose of batteries promptly and properly. Do not burn or
bury them.
• Your Hummer H2 comes in three frequencies so you and your friends can play together. If you race other
remote-controlled cars, be sure to setyour Hummer H2 and transmitter to a different frequency than your
playmate.
• Drivingyour Hummer H2 for longperiodsof time can causea high heatlevel, which causes wearand tearon
the motor. To help keep heat levels down, let your vehicle cool for 10 minutes before installing a new battery
pack.
• Ifyouwantto run your Hummer H2 forextended periods, we suggest you buy an extrabattery pack. You can
charge one while you use the other.
• If the Hummer H2 moves slowly or not at all, and you have installed a fresh battery pack, check the wheel
mechanisms for lint, hair, dust or thread.
• If the Hummer H2’s motor runs, but does not respond to the transmitter, move closer to the Hummer H2 and
try again.
• If someone uses a CB nearby, it might interfere
with control of your Hummer H2. If this hap-
pens, move your Hummer H2 away from the
CB.
• You cannot operate the Hummer H2 near
devices with transmitters that use the same fre-
quencyasyourHummerH2(27MHzwiththree
bands).
• If the Hummer H2 does not drive in a straight
line, adjust the wheel alighment control on the
side of the Hummer H2. If itpulls to the right,
slide the control toward L. If it pulls to the left,
slide the control toward R.©2003. RadioShack Corporation. 60-4358
All Rights Reserved. Printed in China
RadioShack and RadioShack.com are trademarks 05A03
used by RadioShack Corporation.
The FCC Wants You to Know
Your Hummer H2 might cause TV or radio interference even
when it is operating properly. To determine whether your
Hummer H2 is causing the interference, turn off your Hummer
H2. If the interference goes away, your Hummer H2 is causing
it. Try to eliminate the interference by:
• moving your Hummer H2 away from the receiver
• contacting your local RadioShack store for help
If you cannot eliminate the interference, the FCC requires that
you stop using your Hummer H2.
This device complies with Part 15 of the FCC Rules. Operation
is subject to the followingtwo conditions: (1) this device may not
cause harmful interference, and (2) this device must accept any
interference received, including interference that may cause
undesired operation. Changes or modifications to this product
not expressly approved by RadioShack, or operation of this
product in any way other than as detailed by the Owner's
Manual, could void your authority to operate the product.
Important: The EPA certified RBRC®Battery
Recycling Seal on the nickel-cadmium (Ni-Cd)
battery indicates RadioShack is voluntarily
participating in an industry program tocollect and
recycle these batteries at the end of their useful
life, when taken out of service in the United
States or Canada. The RBRC program provides a convenient
alternative to placing used Ni-Cd batteries into the trash or the
municipal waste stream, which may be illegal in your area.
Please call 1-800-THE-SHACK (1-800-843-7422) for
information on Ni-Cd battery recycling and disposal bans/
restrictions in your area. RadioShack’s involvement in this
program is part of the company’s commitment to preserving our
environment and conserving our natural resources.
Taillight
Front View of Hummer H2 Rear View of Hummer H2
Headlight
Wheel Alignment Control
