Radio Shack 22-812 User manual

Owner’s Manual
Please read before using this equipment.
46-Range Digital Multimeter
with PC Interface

2Contents
ˆ
Contents
Features ........................................................................................................... 4
Meter Features .......................................................................................... 4
Software Features ...................................................................................... 5
System Requirements ................................................................................ 5
A Word About Safety .................................................................................. 6
Special Panel Markings .............................................................................. 7
Specifications .................................................................................................. 8
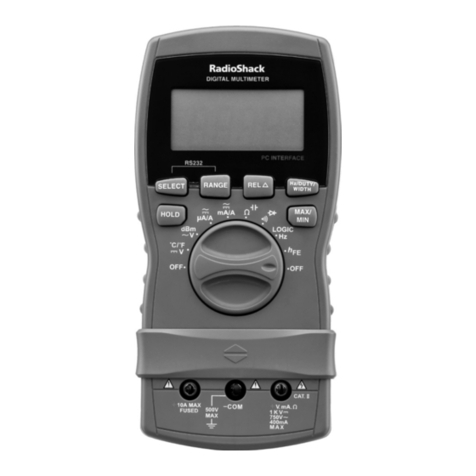
A Quick Look at Your Meter ......................................................................... 11
Preparation .................................................................................................... 13
Installing a Battery .................................................................................... 13
Connecting the Test Leads ...................................................................... 13
Using the Stand ....................................................................................... 14
Using the Rubber Boot ............................................................................. 14
Using the Meter ............................................................................................. 14
Turning the Meter On/Off/Testing the Display .......................................... 14
Before You Start ...................................................................................... 15
Holding a Measurement ........................................................................... 17
Using Relative Measurement ................................................................... 17
Automatic Power Off ................................................................................ 18
Using Power Lock ............................................................................. 18
Using Monitor ........................................................................................... 18
Making Measurements .................................................................................. 19
Measuring DC Voltage ............................................................................. 19
Displaying Temperature ........................................................................... 20
Measuring AC Voltage ............................................................................. 20
Measuring AC Voltage Riding on a DC Source Bias ........................ 21
Measuring Three-Phase AC Voltage ................................................ 21
Measuring DC/AC Current ....................................................................... 22
Measuring Resistance .............................................................................. 23
Measuring Capacitance ........................................................................... 24
Checking Continuity ................................................................................. 25
Checking Diodes ...................................................................................... 25
Checking Diode Polarity .................................................................... 26
Measuring Logic ....................................................................................... 26
©2001 RadioShack Corporation.
All Rights Reserved.
RadioShack and RadioShack.com are trademarks used by RadioShack Corporation.

3
Contents
Measuring Frequency/Duty Cycle/Pulse Width ........................................ 26
Measuring AC Voltage Frequency ..................................................... 27
Measuring AC Current Frequency ..................................................... 28
Measuring
h
FE ......................................................................................... 28
Using the Meter With a Computer ................................................................ 28
Installing the Meter’s Software/Hardware ................................................. 29
Configuring/Using the Meter and Software ............................................... 30
Care and Maintenance ................................................................................... 30
Cleaning ................................................................................................... 30
Replacing the Fuses ................................................................................. 31

4Features
ˆ
Features
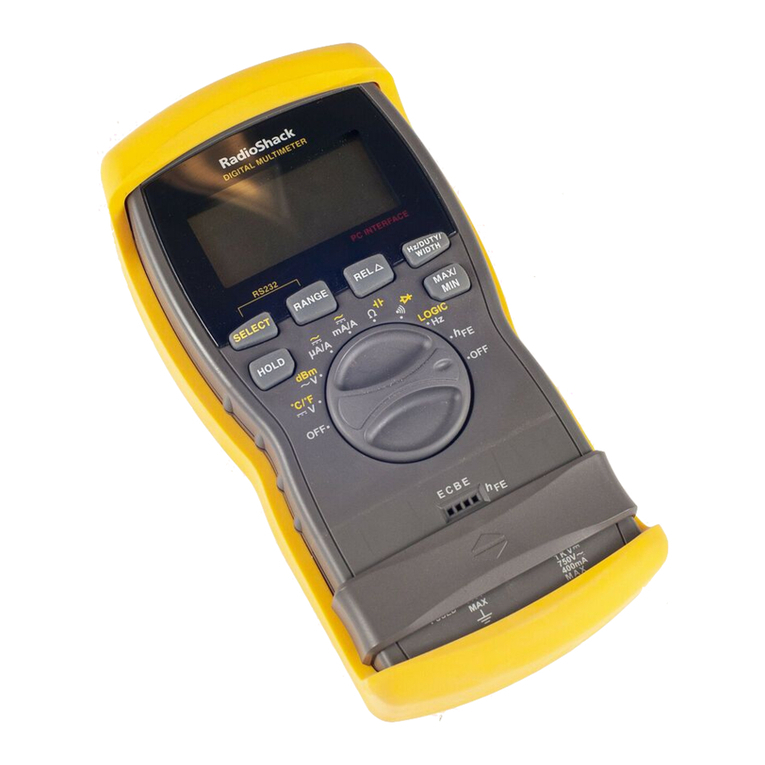
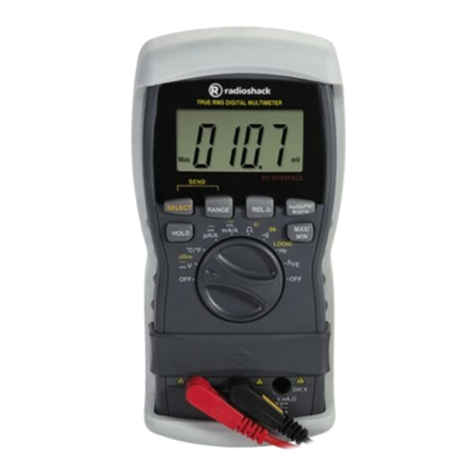
Your RadioShack 46-Range Digital
Multimeter is a portable, compact,
auto-ranging, digital multimeter. It is
ideally suited for field, lab, shop, and
home applications. The multimeter
provides precise measurements and
is built to provide the highest possible
reliability. The meter measures volt-
age up to 1000V DC and 750V AC,
DC and AC current up to 10A, resis-
tance up to 40MΩ, capacitance from
0.5nF to 40µF, and frequency from
10Hz to 4MHz. Its 33/4-digit digital
display can display up to 4,000 units.
Important:
• Completely read this manual
before you use this meter.
• If you are not familiar with meters
and testing procedures, we sug-
gest you read
Using Your Meter
(Cat. No. 62-2039, not supplied)
before you use this meter.
METER FEATURES
Auto-Ranging with Manual-Ranging
Override — automatically selects a
range when you measure voltage,
current, resistance, capacitance, and
frequency. You can also manually set
the range when measuring values
you know are within a certain range.
Computer Interface with Supplied
Software — you can connect the
meter to your computer and use the
supplied software to log and graph
measurements.
Diode Check Function — safely
checks semiconductor junctions for
open, short, or normal.
h
FE Check Function — measures
the gain (
h
FE) of small-signal, bipolar
transistors.
Logic Function — you can use the
meter to test HI and LO logic levels.
Auto-Polarity Operation — protects
your meter and gives valid measure-
ments when you connect the leads in
reverse polarity.
Data Hold Function — holds the dis-
played value, so you can see the
reading even after you disconnect the
probes.
Low Battery Indicator — shows
when you need to replace the battery.
Auto Power Off — the meter turns
itself off after about 30 minutes if you
do not change any setting, helping
conserve battery power.
Note: The meter does not turn itself
off if you set it to use with a computer.
See “Using the Meter With a Comput-
er” on Page 28.
High-Speed Sampling — ensures
quick, reliable measurements.
Protective Rubber Boot — protects
the meter from damage.
5
Features
UL Listed — your meter has passed
the stringent safety tests required by
Underwriters Laboratories.
Note: The UL mark does not indicate
that this product has been evaluated
by Underwriters Laboratories for the
accuracy of its readings.
Latest IC and Display Technology
— ensures reliability, accuracy, stabil-
ity, and ease of operation.
Overload and Transient Protection
— helps protect the meter from acci-
dental overload in most ranges.
Volts or dBm Voltage Display —
lets you select the unit measurement
that suits your application.
MAX/MIN Monitor Function — lets
you easily monitor maximum and
minimum value.
Note: Your multimeter requires one
9V battery (not supplied).
SOFTWARE FEATURES
Large Display — the information
shown on your computer’s monitor is
updated 4 times per second, virtually
matching what appears on your
meter’s display.
Analog Meter — lets you easily see
trends in monitored data.
Automatic Data Logging — the soft-
ware works with your meter and com-
puter to select the correct sampling
rate for your application, then capture
and store data. The software logs the
time for each reading, helping you
keep track of each sample. You can
also save logged data in your hard
drive for future reference.
Sampling Rate Selection — by de-
fault, the meter takes a sample once
every second. To save memory
space if you want to take a sample
over a long period, use the pull down
menu to reduce the sampling rate.
Digital Oscilloscope — plots your
data reading at the same rate as your
sampling rate selection. You can use
the scope to monitor changes in the
data over time. The cursor function
helps you to easily measure the dif-
ference in amplitude or time between
two samples.
SYSTEM
REQUIREMENTS
You can use your meter either with or
without a computer. Before connect-
ing the meter to your computer, be
sure it is an IBM
PC with a Pentium
133 MHz processor or compatible,
running Windows 95, Windows 98,
Windows ME, or Windows 2000, with
all of the following:
• VGA or SVGA video adapter
• at least 32 MB RAM
• Microsoft-compatible mouse
Note: You cannot use the meter with
Microsoft Windows 3.1.

6Features
A WORD ABOUT SAFETY
We have taken every precaution in
designing this meter to ensure that it
is as safe as we can make it. But safe
operation depends on you, the opera-
tor. We recommend that you follow
these simple safety rules:
• Never apply voltages to the
meter that exceed the limits
given in the specifications. Never
apply more than 1000V DC or
750V RMS AC between the input
jacks and ground.
• Use extreme caution when work-
ing with voltages above 100V.
Always disconnect power from
the circuit you are measuring
before you connect test leads to
high-voltage points.
• Never connect the test leads to a
voltage source when you set the
meter’s function selector to
–
––
–/„
„„
„, •
••
•, LOGIC/Hz, / µ
µµ
µA/A,
or / mA/A.
• Always discharge any capacitors
of the circuit under test before
you attach test leads.
• Always turn off power and dis-
connect the test leads from the
circuit you are testing before you
replace the meter’s battery or
fuse.
• Never operate the meter unless
its back cover and battery cover
are in place and fully closed.
• This equipment is rated for instal-
lation category II (maximum
3600VA).
• Because many AC/DC sets have
a potentially hot chassis, be sure
the top of your workbench and
the floor underneath it are made
of non-conductive materials.
This meter is fully calibrated and test-
ed. Under normal use, no further ad-
justment should be necessary except
as noted in this Owner’s Manual. If
the meter requires repair, do not try to
adjust it yourself. Take it to your local
RadioShack store.
WARNINGS:
• USE EXTREME CAUTION IN
THE USE OF THIS DEVICE.
IMPROPER USE OF THIS
DEVICE CAN RESULT IN
INJURY OR DEATH. FOLLOW
ALL SAFEGUARDS SUG-
GESTED IN THIS OWNER’S
MANUAL, IN ADDITION TO
NORMAL SAFETY PRECAU-
TIONS, IN DEALING WITH
ELECTRICAL CIRCUITS. DO
NOT USE THIS DEVICE IF YOU
ARE UNFAMILIAR WITH ELEC-
TRICAL CIRCUITS AND TEST-
ING PROCEDURES.
• NEVER TRY TO PROBE WITH
BOTH TEST LEADS AT THE
SAME TIME OR HOLD BOTH
TEST LEADS IN ONE HAND.
• USE EXTREME CARE WHILE
USING THE METER TO MEA-

7
Features
SURE CURRENT AND VOLT-
AGE IN COMMERCIAL
ELECTRICAL PANELS.
UNLIKE A HOME AC OUTLET,
A COMMERCIAL ELECTRI-
CAL PANEL HAS TREMEN-
DOUS CURRENT SURGE
POTENTIAL. THIS IS ESPE-
CIALLY TRUE FOR THREE-
PHASE INDUSTRIAL ELECTRI-
CAL PANELS. A SMALL
SPARK FROM ONE OF THESE
PANELS CAN CAUSE A
PLASMA EXPLOSION AND
FIRE THAT CAN SEVERELY
BURN YOU. DO NOT HOLD
THE METER WHILE USING IT.
• ALWAYS WEAR PROTECTIVE
LEATHER GLOVES, A FACE
SHIELD, AND FIREPROOF
ARM AND UPPER BODY PRO-
TECTION WHILE USING THE
METER TO MEASURE CUR-
RENT AND VOLTAGE IN COM-
MERCIAL ELECTRICAL
PANELS.
• IF THIS EQUIPMENT IS USED
IN A MANNER NOT SPECIFIED
BY THE MANUFACTURER,
THE PROTECTION PROVIDED
BY THE EQUIPMENT MAY BE
IMPAIRED.
• TO REDUCE THE RISK OF
FIRE OR SHOCK HAZARD, DO
NOT EXPOSE THIS PRODUCT
TO RAIN OR MOISTURE.
• FOR INDOOR USE ONLY.
SPECIAL PANEL
MARKINGS
For your safety, we have added spe-
cial markings to the meter’s panel to
remind you of the measurement limi-
tations.
The maximum voltage that
this meter can measure is
1000V DC or 750V AC. The
maximum current that this ter-
minal can measure is 400mA
DC and AC.
Caution: Be extremely care-
ful when making high-voltage
measurements; DO NOT
TOUCH TERMINALS OR
PROBE ENDS.
Caution: Risk of electric
shock! Refer to the complete
operating instructions.
The meter is protected by
double insulation.
CAT II This equipment is rated for
INSTALLATION CATEGORY
II (3600VA max.).
To avoid electrical shock or
instrument damage, do not
connect the common input
terminal (– COM jack) to any
sourcethatexceeds500volts
with respect to earth/ground.
+10A MAX
FUSED The maximum current you
can measure at this jack is 10
amps DC/AC. This jack is
fuse-protected.
WARNING:
Shock
Hazard if
guard not
installed.
The sliding guard on the front
of the meter protects against
electrical shock. Do not
remove the guard.
!

8Specifications
ˆ
Specifications
(Accuracies at 73.4°F (23°C) ±5°, <75% RH)
DC VOLTS (Maximum Measurement:
1000V)
400mV ...................... ± 0.3% of Reading,
± 4 in Last Digit
4V to 40V .................. ± 0.3% of Reading,
± 3 in Last Digit
400V ......................... ± 0.5% of Reading,
± 3 in Last Digit
1000V ....................... ± 0.5% of Reading,
± 4 in Last Digit
AC VOLTS (Maximum Measurement:
750Vrms at 50/60 Hz, Average Responds,
RMS Calibrated, AC Coupled)
400mV....................... ± 0.5% of Reading,
± 4 in Last Digit
4V to 40V .................. ± 0.5% of Reading,
± 3 in Last Digit
400V ........................ ± 0.6 % of Reading,
± 3 in Last Digit
750V ......................... ± 0.8% of Reading,
± 4 in Last Digit
dBm Accuracy (20.0mV to 750Vrms
at 50/60 Hz): .............................± 0.3dBm,
± 2 in Last Digit
DC CURRENT (Maximum Measurement:
10A)
400µA ....................... ± 0.8% of Reading,
± 5 in Last Digit
4mA .......................... ± 0.6% of Reading,
± 3 in Last Digit
40mA ........................ ± 0.8% of Reading,
± 5 in Last Digit
400mA ...................... ± 0.6% of Reading,
± 3 in Last Digit
4A ............................. ± 0.8% of Reading,
± 5 in Last Digit
10A ........................... ± 1.0% of Reading,
± 5 in Last Digit
AC CURRENT (Average Responds, RMS
Calibrated, 10A Maximum, DC Coupled)
400µA ....................... ± 1.0% of Reading,
± 5 in Last Digit
4mA .......................... ± 0.8% of Reading,
± 3 in Last Digit
40mA ........................ ± 1.0% of Reading,
± 5 in Last Digit
400mA ...................... ± 0.8% of Reading,
± 3 in Last Digit
4A ............................. ± 1.0% of Reading,
± 5 in Last Digit
10A ........................... ± 1.2% of Reading,
± 5 in Last Digit
RESISTANCE
400Ω......................... ± 0.4% of Reading,
± 5 in Last Digit
4kΩ– 40kΩ– 400kΩ± 0.3% of Reading,
± 3 in Last Digit
4.0MΩ........................ ± 0.6% of Reading,
± 3 in Last Digit
40MΩ........................ ± 1.5% of Reading,
± 5 in Last Digit
CAPACITANCE
4nF ............................ ± 3.0% of Reading,
± 40 in Last Digits
40nF .......................... ± 3.0% of Reading,
± 10 in Last Digits
400nF – 4µF – 40µF ................ ± 2.0% of
Reading, ± 4 in Last Digit

9
Specifications
Note: Accuracy with film capacitor or bet-
ter, specified from 9.5% of full scale to full
scale except 4.0nF range from 0.5nF to
full scale.
PULSE WIDTHS (Frequency Range: 10Hz to
100kHz)
1µS to 90mS (at +5/–0V square wave):
± 5% of Reading,
±2 in Last Digit
K-TEMPERATURE MODE
This is a special voltage mode, to be
used with an optional thermocouple
module that can be attached to the
meter. This mode automatically con-
verts the 1mV per °C or °F voltage
into a readout that appears as a tem-
perature. In these modes, the unit can
show up to ± 999°C or °F.
The accuracy of these modes is de-
termined by the external device and
the accuracy of the DC volt mode.
The temperature range of the newer
1mV per degree C probes are gen-
erally between –50°C and 1000°C.
FREQUENCY (with function selector set to
LOGIC/Hz)
400Hz – 4k–40k–400kHz–4MHz:
± 0.1% of Reading, ± 4 in Last Digit
Sensitivity (10 Hz –4 MHz)
400Hz–4k–40kHz .................... 50 mVrms
400kHz .................................. 100 mVrms
4MHz ..................................... 250 mVrms
(AC voltage frequency, with function selector
set to °
°°
°C/°
°°
°F / V and maximum measuring
frequency 1 kHz for signal above 40V)
10Hz to 1 kHz .......................... 70 mVrms
1kHz to 10 kHz ...................... 400 mVrms
(AC voltage frequency, with function selector
set to dBm / ~ V and maximum measuring
frequency 1 kHz for signal above 40V)
10 Hz to 200 Hz .................... 300 mVrms
200 Hz to 1 kHz ........................ 0.4 Vrms
1 kHz to 10 kHz ........................... 4 Vrms
(AC current frequency)
400µA/4mA ................... 10 Hz to 30 kHz:
250µArms
40mA/400mA ................ 10 Hz to 30 kHz:
25mArms
4A/10A .......................... 10 Hz to 10 kHz:
2.5Arms
DUTY CYCLE (Frequency Range: 10 Hz to
100 kHz)
10% – 90% (at +5V/-0V Square wave)
± 2 digits/kHz, ± 2 in last digit
Note: Duty cycle accuracy depends on input
signal frequency.
DIODE MODE
Open Circuit Voltage ................. < 2.8Vdc
Test Current ........................ 1 mA Typical
LOGIC MODE
Min. High-Level Voltage: ....... 2.0V ± 0.2V
Max. Low-Level Voltage: ....... 1.0V ± 0.2V
CONTINUITY BEEPER
Continuity (short) ........... ≤ 50 ± 30 Ohms
Open .............................. > 50 ± 30 Ohms
Open Circuit ............................ < 2.8 Volts
Short Circuit Current ................. < 2.0 mA
Beeper Volume (at 5cm) ......... 65dB Min.
(audio scale)
GENERAL
Maximum Common
Mode Voltage .......... 500VDC or RMS AC

10 Specifications
Battery Life at 30 minutes
use per day ...... About 200 days, Alkaline
Sleep Mode Timing ........ 30 ± 10 Minutes
Range Up Detect Value ............. Overflow
(>4000 Counts)
Range Down Detect Value .... 380 Counts
Low Battery Indication ......... 6.3V ± 0.3 V
Sleep Mode Current ......... 10 µA Normal,
20µA Max.
Input Impedance ..... DCV/ACV: 10Mohm
Power Source .................. One 9V battery
(not supplied)
Operating Temperature ..... 41°F to 104°F
(5°C to + 40°C)
Storage Temperature ........ – 4°F to 140°F
(– 20°C to + 60°C)
Humidity:Maximum Relative Humidity 80%
for temperatures up to 87°F (31°C),
decreasing linearity to 50% relative
humidity at 104°F (40°C)
Dimensions (HWD):7 ×37/16 ×111/16 Inches
(178 mm ×88 mm ×43 mm)
Weight ............... Approx 10.44 oz (296 g)
Accessories ............. Fuse F500mA/250V
Fuse F12A/250V
2 shrouded test leads red/black
Rubber boot, RS-232C cable, CD-ROM
Specifications are typical; individual units
might vary. Specifications are subject to
change and improvement without notice.

11
A Quick Look at Your Meter
ˆ
A Quick Look at Your Meter
•
••
•—mea-
sures ohms and
capacitance.
–
––
–/„
„„
„—
checks
continuity
and diodes.
/ mA/A —
measures
current.
/ µ
µµ
µA/A —
measures
current.
Guard
WARNING:
THE GUARD
PROTECTS
AGAINST ELEC-
TRIC SHOCK.
DO NOT
REMOVE IT.
h
FE — lets you
measure the gain
of small-signal,
bipolar transistors.
LOGIC/Hz —mea
-
sures frequenc
y
and logic.

12 A Quick Look at Your Meter
°
°°
°C/°
°°
°F / V —
displays
temperature and
measures
DC volts.
OFF — turns the meter off.
MAX/MIN — lets
you store maxi-
mum and mini-
mum readings.
Hz/DUTY/WIDTH
— measures
frequency, duty
cycle, and pulse
width.
REL€— lets you
work with relative
measurements.
RANGE — se-
lects auto or
manual rang-
ing.
SELECT —
selects options.
HOLD — holds
a measurement
value.
dBm / ~ V —
selects AC voltage
measurement in
dBm or volts.
h
FE Socket — lets
you insert a tran-
sistor so you can
check its gain.

13
Preparation
ˆ
Preparation
INSTALLING A BATTERY
Your meter requires one 9-volt bat-
tery (not supplied) for power. For the
best performance and longest life, we
recommend a RadioShack alkaline
battery.
WARNINGS:
• To avoid electrical shock, discon-
nect all of the meter’s test leads
from any equipment before you
install or replace the meter’s bat-
tery.
• Do not use your meter until the
battery is properly installed and
the battery cover is in place and
secured.
Caution: Use only a fresh battery of
the required size and recommended
type.
1. If the rubber boot is attached to
the meter, simply pull it off to
remove it (see “Using the Rubber
Boot” on Page 14).
2. If the meter is on, rotate the func-
tion selector to OFF to turn it off.
Then disconnect the test leads if
they are connected.
3. Use a Phillips screwdriver to
loosen the battery cover’s screw,
then lift off the battery cover.
4. Snap a fresh 9V battery onto the
terminals of the battery clip in the
battery compartment.
5. Replace the battery cover and
secure it with the screw.
When ~appears on the left side of
the display or the meter stops operat-
ing properly, replace the battery.
Warning: Dispose of an old battery
promptly and properly. Do not burn or
bury it.
Caution: If you do not plan to use the
meter for a month or more, remove
the battery. Batteries can leak chemi-
cals that can destroy electronic parts.
CONNECTING THE TEST
LEADS
The test leads (black and red) sup-
plied with your meter are rated for
1000 volts. Use only test leads of the
same rating with the meter. You can
order replacement leads from your lo-
cal RadioShack store.
WARNING: ALTHOUGH THE TEST
LEADS ARE RATED FOR 1000
VOLTS, THE MAXIMUM RATING OF
THIS METER IS 1000 VOLTS DC/
750 VOLTS RMS AC. DO NOT TRY
TO MEASURE VOLTAGE GREATER
THAN 1000 VOLTS DC/750 VOLTS
RMS AC.

14 Using the Meter
If necessary, slide up the guard on
the front of the meter. Plug the black
test lead’s right-angled end into –COM
(common) on the front of the meter,
then plug the red test lead’s right-
angled end into + V.mA.Ω
ΩΩ
Ω. If you want
to measure current higher than
400mA, plug the red test lead’s
right-angled end into +10A MAX
instead of + V.mA.Ω
ΩΩ
Ω.
Note: The meter sounds a warning
tone when you set it to measure any-
thing except current and you connect
a test lead to +10A MAX. This reminds
you not to touch the circuit with the
test leads.
USING THE STAND
The stand on the back of the meter
lets you place it upright on a flat sur-
face for easier viewing. To use the
stand, simply fold it out.
USING THE RUBBER
BOOT
The rubber boot supplied with the
meter helps protect the meter from
damage. The keyhole on the back of
the rubber boot lets you hang the
meter on a wall.
Simply slide the meter onto the boot,
or pull down on the bottom of the boot
to remove it from the meter. Use the
clips on the back of the rubber boot to
store the test leads while you are not
using them.
ˆ
Using the Meter
Caution: When the meter is not in
use, always leave the function selec-
tor set to OFF.
For the most accurate reading, the
temperature should be between 65°
and 83°F (18°and 28°C), with a max-
imum of 75% relative humidity.
TURNING THE METER
ON/OFF/TESTING THE
DISPLAY
To turn on the meter, rotate the func-
tion selector to any function except
OFF.To turn off the meter, rotate the
function selector to OFF.
Note: If the function selector is not
set to OFF and nothing appears on
the display, the meter might be in its
auto power shut-off mode. Press any
button to turn on the meter. If the
meter remains off, rotate the function
selector to OFF, then to any function
except OFF.If the meter still remains
off, replace the battery (see “Installing
a Battery” on Page 13).
To test the meter’s display, turn off
the meter, then hold down HOLD
while turning on the meter. The meter
turns on and all segments on the dis-
play appear. Release HOLD to turn off
the test.

15
Using the Meter
BEFORE YOU START
Follow these steps to familiarize your-
self with the meter’s operation before
you use it for the first time.
Warning: Always turn off power to
the circuit you are about to measure
before you probe the test leads into
high-voltage points.
Caution: Be sure to select the correct
function before you touch the test
leads to the circuit or component to
be tested.
1. Rotate the function selector to
select one of the following func-
tions, then repeatedly press
SELECT to select the function
you want.
For example, to measure a
diode, rotate the function selector
to –
––
–/„
„„
„, then press SELECT. „
„„
„
appears.
2. Your meter automatically enters
the auto range mode when you
turn on the meter. In the auto
range mode, appears and
the meter automatically selects
the next higher or lower range (if
available) when the measure-
ment causes the display to over-
flow (the meter tries to display
4001 or more units) or underflow
(the meter tries to display 379 or
fewer units).
Position Description
°
°°
°C/°
°°
°F /
V• Displays
temperature
(°C or °F).
• Measures DC
voltage.
dBm /
~ V • Measures AC
voltage in dBm.
• Measures AC
voltage in volts.
/ µ
µµ
µA/A • Measures current,
DC 0.4/4 mA
and AC 0.4/4 mA
• Measures current,
DC 4/10 A and
AC 4/10 A
/ mA/A • Measures current,
DC 40/400 mA
and AC 40/400 mA
• Measures current,
DC 4/10 A
and AC 4/10 A
•
••
•• Measures ohms.
• Measures
capacitance.
–
––
–/„
„„
„• Checks continuity.
• Checks diodes.
LOGIC/
Hz • Measures logic
(HI/LO).
• Measures frequency.
hFE Measures the gain of
small-signal bipolar tran-
sistors (using the
h
FE
jack on the front of the
meter).
Position Description
AUTO

16 Using the Meter
3. To select manual range mode,
press RANGE.disap-
pears. Then repeatedly press
RANGE until the range you want
appears. The decimal point shifts
each time you press RANGE.
4. Hold down RANGE for about 2
seconds. The meter exits manual
range mode and returns to its
auto range mode.
5. To select the temperature range
you want to display (°C or °F),
rotate the function selector to
°
°°
°C/°
°°
°F / V, press SELECT once,
then repeatedly press RANGE
until
9
99
9or <
<<
<appears.
6. Set the meter to the different
measurement ranges. The unit of
measure that appears on the dis-
play shows you the currently set
range. For example, cL
cLcL
cL appears
in the 400 mV range. Also, note
the position of the decimal. For
example, if &$&&&ý L
&$&&&ý L&$&&&ý L
&$&&&ý L appears, the
meter is set to measure less than
4 volts. If &&&&L
&&&&L&&&&L
&&&&L appears, the
meter is set to measure up to
1000 volts.
Read the range in volts, ohms,
capacitance, or amps as indi-
cated by the position of the deci-
mal point.
Note: The display might show a
phantom reading in some DC
and AC voltage ranges when the
test leads are not connected to a
circuit. This is normal. The high
input sensitivity produces a “wan-
dering” effect. When you connect
the test leads to a circuit, the
measurement appears.
7. Connect the test leads to the cir-
cuit you want to measure. To
measure different circuits, see
Range Display
400 mV ZZZ$ZýcL
ZZZ$ZýcLZZZ$ZýcL
ZZZ$ZýcL
4 V Z$ZZZýL
Z$ZZZýLZ$ZZZýL
Z$ZZZýL
40 V ZZ$ZZýL
ZZ$ZZýLZZ$ZZýL
ZZ$ZZýL
AUTO
400 V ZZZ$ZýL
ZZZ$ZýLZZZ$ZýL
ZZZ$ZýL
1000 V DC/750 V AC ZZZZýL
ZZZZýLZZZZýL
ZZZZýL
400 µAZZZ$Zý
ZZZ$ZýZZZ$Zý
ZZZ$Zýµ
µµ
µ7
77
7
4 mA Z$ZZZýc7
Z$ZZZýc7Z$ZZZýc7
Z$ZZZýc7
40 mA ZZ$ZZýc7
ZZ$ZZýc7ZZ$ZZýc7
ZZ$ZZýc7
400 mA ZZZ$Zýc7
ZZZ$Zýc7ZZZ$Zýc7
ZZZ$Zýc7
4 A Z$ZZZý7
Z$ZZZý7Z$ZZZý7
Z$ZZZý7
10 A ZZ$ZZý7
ZZ$ZZý7ZZ$ZZý7
ZZ$ZZý7
400 ΩZZZ$Zý
ZZZ$ZýZZZ$Zý
ZZZ$ZýΩ
ΩΩ
Ω
4 kΩZ$ZZZýa
Z$ZZZýaZ$ZZZýa
Z$ZZZýaΩ
ΩΩ
Ω
40 kΩZZ$ZZýa
ZZ$ZZýaZZ$ZZýa
ZZ$ZZýaΩ
ΩΩ
Ω
400 kΩZZZ$Zýa
ZZZ$ZýaZZZ$Zýa
ZZZ$ZýaΩ
ΩΩ
Ω
4 MΩZ$ZZZýC
Z$ZZZýCZ$ZZZýC
Z$ZZZýCΩ
ΩΩ
Ω
40 MΩZZ$ZZýC
ZZ$ZZýCZZ$ZZýC
ZZ$ZZýCΩ
ΩΩ
Ω
4 nF Z$ZZZýd<
Z$ZZZýd<Z$ZZZýd<
Z$ZZZýd<
40 nF ZZ$ZZýd<
ZZ$ZZýd<ZZ$ZZýd<
ZZ$ZZýd<
400 nF ZZZ$Zýd<
ZZZ$Zýd<ZZZ$Zýd<
ZZZ$Zýd<
4 µFZ$ZZZý
Z$ZZZýZ$ZZZý
Z$ZZZýµ
µµ
µ<
<<
<
40 µFZZ$ZZý
ZZ$ZZýZZ$ZZý
ZZ$ZZýµ
µµ
µ<
<<
<
Range Display

17
Using the Meter
“Making Measurements” on
Page 19.
Caution: If E
EE
Eý <
ý<ý<
ý<
(overflow) appears,
the value you are measuring exceeds
the range for the setting you selected.
This is normal when you measure re-
sistance or a diode, or do not have
the leads connected to a component.
If you are measuring voltage or cur-
rent when E
EE
Eý<
ý<ý<
ý< appears, however, im-
mediately disconnect both probes
from the circuit, then touch the probes
together or choose another range.
HOLDING A
MEASUREMENT
Press HOLD to hold all indications on
the display. Hold appears and the
meter holds the measured value on
the display even if you remove the
probes from the circuit.
To cancel hold, press HOLD again or
set the selector to another setting or
press SELECT. Hold disappears.
USING RELATIVE
MEASUREMENT
You can set the meter to have it not
show an unwanted value that might
appear as a result of internal or other
factors. For example, the meter al-
ways shows a small value when you
set the selector to •
••
•to measure
capacitance, even when you have not
connected the test leads to a compo-
nent. (This happens because the
meter measures its own internal ca-
pacitance, which is normal). If you set
the meter in relative mode with the
small value as reference, it does not
display this value when you measure
a component.
You can also set the meter to a base-
line reference value. For example, if
you are measuring a power source
that is supposed to be exactly 5 volts
AC or DC, you can set the meter to a
baseline reference value of 5 volts.
Then, the meter displays the amount
of voltage above or below 5 volts that
the power source actually emits.
1. Set the meter to any function
except °
°°
°C/°
°°
°F,dBm,–
––
–,„
„„
„,
LOGIC, or hFE.
2. Measure the zero offset (discon-
nect test leads for capacitance,
or touch the test leads together
for other functions) if you want to
remove the zero offset from a
reading, or connect the test leads
to the component whose mea-
surement you want to use as a
reference value.
3. While measuring the zero offset
or with the test leads connected
to a component, hold down
REL€. Rel €
€€
€appears. The meter
is set to manual range mode.
4. Use the meter to make a mea-
surement.
Notes:
• If the reference value you mea-
sured in Step 2 is greater than
the value of the measurement
you made in Step 4, the meter

18 Using the Meter
shows a negative value. This is
not a malfunction.
•E
EE
Eý<
ý<ý<
ý<
appears if you measure val-
ues outside the meter’s currently
set range. If E
EE
Eý<
ý<ý<
ý< appears, immedi-
ately disconnect both probes
from the circuit, then touch the
probes together or choose
another range.
• The meter displays values
greater than 4000 counts as long
as the range used is not an over-
flow range. (A count is the small-
est unit of measure that the
meter can measure). For exam-
ple, if you store –3.500 volts as a
reference, then measure +3.500
volts, the meter displays 7.000
volts.
• You can not set E
EE
Eý <
ý<ý<
ý<
as a refer-
ence value.
To reset a relative measurement,
press
REL€again or set the function
selector to another setting.
AUTOMATIC POWER OFF
Your meter conserves power by auto-
matically turning off about 30 minutes
after the last time you changed a set-
ting (even if you are making measure-
ments).
Note: The meter does not automati-
cally turn off while appears on
the display (see “Configuring/Using
the Meter and Software” on Page 30)
or if you turn off automatic power off
(see “Using Power Lock”).
To turn the meter back on after it au-
tomatically turns off, press any but-
ton.
Using Power Lock
To set the meter so it does not turn off
automatically, set the function selec-
tor to OFF to turn it off. Hold down
HOLD and SELECT at the same time,
then turn on the meter. FBeY
FBeYFBeY
FBeY appears
until you release HOLD and SELECT.
The meter sets itself to its normal test
mode and does not automatically turn
itself off.
Note: The meter automatically sets it-
self to its power lock mode while you
use it to monitor (see “Using Monitor”
on Page 18).
To reset the meter so it automatically
turns itself off, turn off the meter then
turn it back on. The meter automati-
cally turns itself off after about 30
minutes.
USING MONITOR
You can use the meter to monitor
maximum and minimum readings in a
circuit, saving both readings for you to
check.
As the meter monitors, it displays the
minimum or maximum value it mea-
sured and stores those values. If the
meter measures a value higher than
the stored maximum value or lower
than the stored minimum value, it up-
dates the value it stored with the new
value.
RS232

19
Making Measurements
Note: The meter automatically sets it-
self to manual mode when you use it
to monitor.
1. Set the meter to any function
except °
°°
°C/°
°°
°F,dBm,–
––
–,„
„„
„,
LOGIC, or hFE.
2. Connect the test leads to the cir-
cuit you want to measure. To
measure different circuits, see
“Making Measurements” on
Page 19.
3. Press RANGE.disap-
pears. Then repeatedly press
RANGE until the range you want
appears.
4. Press MAX/MIN until CWn
CWnCWn
CWn appears
on the left side of the display (to
set the meter to record the maxi-
mum and minimum values).
Then repeatedly press MAX/MIN
to read the currently selected
maximum value (if CWn
CWnCWn
CWn appears)
or the currently selected mini-
mum value (if C_d
C_dC_d
C_d appears).
5. To pause monitoring, press
HOLD . Hold appears. To continue
monitoring, press HOLD again.
Hold disappears.
Note: When the meter is set to its
voltage or current function and the in-
put is out of the setting’s range, Eý <
Eý <Eý <
Eý <
appears on the display and CWn
CWnCWn
CWn or
C
CC
C_d
_d_d
_d flashes on the left side of the dis-
play.
To exit the monitor mode, press MAX/
MIN for more than 2 seconds. CWn
CWnCWn
CWn or
C_d
C_dC_d
C_d disappears.
ˆ
Making Measurements
MEASURING DC
VOLTAGE
WARNINGS:
• Never clamp a test lead to a hot
wire (usually red, black, or blue in
AC wiring circuits). If one lead is
clamped to a hot wire and you
touch the meter’s other probe.
you could receive an electric
shock.
• The maximum input limit for DC
voltage measurement is 1000 V
DC. To avoid electrical shock and
damage to the meter, never try to
measure a DC voltage above
1000 volts.
1. Set the function selector to
°
°°
°C/°
°°
°F / V.
2. If necessary, press SELECT to
select DC voltage measurement.
3. If the meter is set to automatic
range control, the meter auto-
matically moves to the range that
gives the best reading.
AUTO

20 Making Measurements
4. To set manual range control,
press
RANGE. disappears.
Repeatedly press RANGE to
change the range.
5. Touch the probes to the circuit
you want to test.
Notes:
• In the 400 V and 400mV ranges,
the decimal point appears in the
same position (one place to the
left). To distinguish between the
two ranges, mV appears in the
400mV range and V appears in
the 400 V range.
• When the meter is set to the
400mV range, Eý <
Eý <Eý <
Eý < continues to
appear even if you remove an
over-range input signal. This is
not a malfunction. To clear the
display, simply touch the test
leads together or connect them
to a circuit. Eý<
Eý<Eý<
Eý< disappears.
DISPLAYING
TEMPERATURE
You can use an optional thermocou-
ple module to measure temperature
with your meter. The thermocouple
module you use must output 1mV per
measured °C or °F. The meter can
display temperatures up to 999°C or
999°F.
WARNING: The thermocouple mod-
ule has not been evaluated by Under-
writers Laboratories. Do not use the
thermocouple to measure objects
when the voltage is above 30 V RMS
and 42.4 V peak or 60V DC.
1. Set the function selector to
°
°°
°C/°
°°
°F / V.
2. Unplug both test leads from the
meter, plug the thermocouple’s
common plug into –COM (com-
mon) on the front of the meter,
then plug the thermocouple’s +V
plug into + V.mA.Ω
ΩΩ
Ω.
3. Press SELECT once to select
temperature measurement.
4. To select the temperature range
you want to display (°C or °F),
repeatedly press RANGE until 9
99
9
or <
<<
<appears.
5. Touch the thermocouple’s sensor
head to the object you want to
test.
MEASURING AC
VOLTAGE
WARNINGS:
• Never clamp a test lead to a hot
wire (usually red, black, or blue in
AC wiring circuits). If one lead is
clamped to a hot wire and you
touch the meter’s other probe,
you could receive an electric
shock.
• The maximum input limit for AC
voltage measurement is 750 V
AC (RMS). To avoid electrical
shock and damage to the meter,
AUTO
Other manuals for 22-812
2
Table of contents
Other Radio Shack Multimeter manuals

Radio Shack
Radio Shack 2200813 User manual

Radio Shack
Radio Shack 22-168A User manual

Radio Shack
Radio Shack 22-218 User manual

Radio Shack
Radio Shack 22-178 User manual

Radio Shack
Radio Shack 22-812 User manual

Radio Shack
Radio Shack 2200087 User manual

Radio Shack
Radio Shack 22-812A User manual

Radio Shack
Radio Shack 22-602 User manual

Radio Shack
Radio Shack 22-813 User manual

Radio Shack
Radio Shack 22-812 User manual