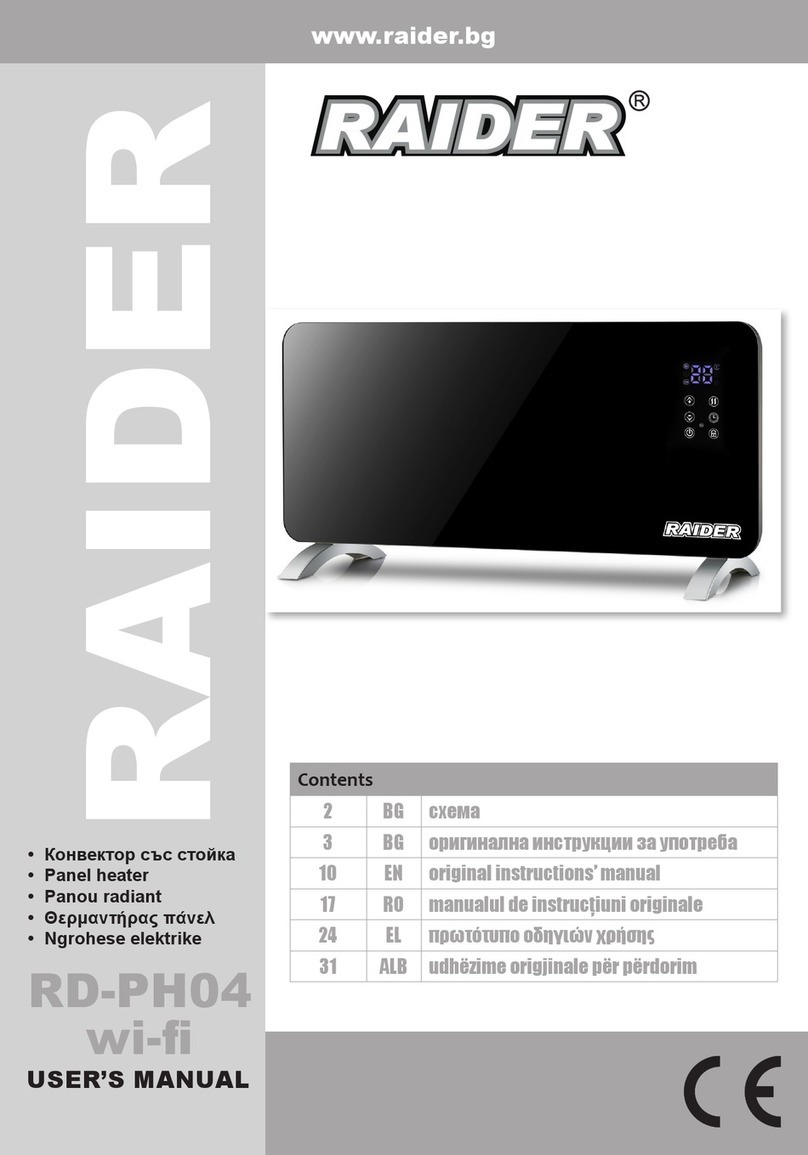
Raider RD-PH01 User manual

USER’S MANUAL
• Конвектор със стойка
• Panel heater
• Panou radiant
• Θερμαντήρας πάνελ
• Ngrohese elektrike
www.raider.bg
RAIDER
Contents
2 BG схема
3 BG инструкция за употреба
10 EN instructions’ manual
16 RO manualul de instrucțiuni
22 EL πρωτότυπο οδηγιών χρήσης
29 ALB udhëzime për përdorim
RD-PH01

2www.raider.bg
Прочетете ръководството преди употреба!
Refer to instruction manual booklet!
BG Снимките са с илюстративна цел. Изобразеният модел може да не е напълно идентичен със закупената от вас машина.
EN The pictures are for illustration purpose. The pattern shown may not be exactly the same as the machine you purchased.
BG
1.Колело
2.Крак
3.Тяло
4. Контролен панел
EN
1.Wheel
2.Plate
3.Body
4. Control panel
BG Този продукт е подходящ само за добре изолирани помещения или за рядка употреба.
EN This product is only suitable for well insulated spaces or occasional use.
4
1
2
3

3
Оригинална инструкция за употреба
Уважаеми потребители,
Поздравления за покупката на машина от най-бързо развиващата се марка за електрически,
бензинови и пневматични машини - RAIDER. При правилно инсталиране и експлоатация, RAIDER са
сигурни и надеждни машини и работата с тях ще Ви достави истинско удоволствие. За Вашето удобство
е изградена и отлична сервизна мрежа с 45 сервиза в цялата страна.
Преди да използвате тази машина, моля, внимателно се запознайте с настоящата “Инструкция за
употреба”.
В интерес на Вашата безопасност и с цел осигуряване на правилната й употреба, прочетете
настоящите инструкции внимателно, включително препоръките и предупрежденията в тях. За избягване
на ненужни грешки и инциденти, важно е тези инструкции да останат на разположение за бъдещи
справки на всички, които ще ползват машината. Ако я продадете на нов собственик то “Инструкцията
за употреба” трябва да се предаде заедно с нея, за да може новия ползвател да се запознае със
съответните мерки за безопасност и инструкциите за работа.
“Евромастер Импорт Експорт” ООД е упълномощен представител на производителя и собственик на
търговската марка RAIDER. Адресът на управление на фирмата е гр. София 1231, бул. “Ломско шосе”
246, тел. 02 934 33 33, 934 10 10, www.raider.bg; www.euromasterbg.com; e-mail: info@ euromasterbg.com.
От 2006 година във фирмата е въведена системата за управление на качеството ISO 9001:2008 с
обхват на сертификацията: Търговия, внос, износ и сервиз на професионални и хоби електрически,
пневматични и механични инструменти и обща железария. Сертификатът е издаден от Moody
International Certication Ltd, England.
Технически данни
Параметър Мерна
единица Стойност
Модел -RD-PH01
Напрежение: V230
Честота Hz 50
Мощност W1000-2000
BG

4www.raider.bg
ИНСТРУКЦИЯ
Благодарим ви, че закупихте нашия панелен конвектор, всеки модул е произведен, за да гарантира
безопасност и надеждност. Преди първа употреба, моля, прочетете внимателно инструкциите и ги
запазете за допълнителна справка.
СПЕЦИАЛНИ ИНСТРУКЦИИ ЗА БЕЗОПАСНОСТ ЗА ВАШИЯ Конвектор
1. За вашата безопасност този уред е снабден с термичен прекъсвач. В случай, че продуктът прегрее
по някаква причина, прекъсвачът предотвратява прекомерните температури на продукта, като
прекъсва захранването на конвектора временно. След като конвекторат се охлади, той ще се нулира
автоматично.
2. Не използвайте на открито.
3. Не поставяйте конвектора непосредствено под фиксиран контакт или съединителна кутия.
4. Не поставяйте материали или дрехи върху конвектора и не възпрепятствайте циркулацията на
въздуха около конвектора, например чрез завеси или бутане на мебели срещу конвектора, тъй като
това може да причини прегряване и риск от пожар.
5. Никога не покривайте и не препречвайте по никакъв начин отворите за изход на топлина в горната
част на конвектора или отворите за входящи въздух в основата на конвектора.
6. Повърхностите на този конвектор могат да бъдат горещи. Моментният контакт с която и да е част
от конвектора не трябва да причинява наранявания. Въпреки това възрастни или немощни хора или
малки деца не трябва да се оставят без надзор в близост до конвектора, освен ако не е монтиран
подходящ предпазител.
7. Този уред не е предназначен за използване от деца или други лица без помощ или надзор, ако
техните физически, сетивни или умствени способности не им позволяват да го използват безопасно.
Децата трябва да бъдат наблюдавани, за да се гарантира, че не си играят с уреда.
8. Обърнете внимание, че трябва да се внимава, когато се използва този конвектор последователно
с терморегулатор, програмен контролер, таймер или всяко друго устройство, което автоматично
включва отоплението, тъй като съществува риск от пожар, когато конвекторат бъде случайно покрит
или изместен.
9. Ако захранващият кабел е повреден, той трябва да бъде заменен от производителя или сервизен
агент или лице с подобна квалификация, за да се избегне опасност.
10. Уредът не трябва да се използва:
а. В зони, които са изложени на риск от пожар или експлозия поради химикали, прах, газове или
изпарения;
b. В непосредствена близост до тръби или контейнери, които съдържат запалими или потенциално
експлозивни вещества.
11. Изходът за въздух не трябва да бъде запушен. От съображения за безопасност горната и
долната въздушна решетка никога не трябва да се покриват с предмети, намиращи се твърде близо.
Предметите не трябва да се подпират на уреда, нито да се поставят между уреда и стената. Никога
не оставяйте запалими материали като дърво, хартия, текстил или запалими предмети като восък,
бензин, аерозолни кутии и т.н. в близост до изпускателния отвор за топъл въздух. Както при всички
подобни конвектори, потокът от издигащ се въздух може да причини обезцветяване на стената.
12. Преди да използвате материали, които отделят запалими газове или пари, напр. полагане или
запечатване или запечатване на паркет или PVC подови настилки, или когато използвате лакове за
спрей, спирт и подобни материали, уверете се, че конвекторат е изключен.
13.Този конвектор не е предназначен за използване от лица (включително деца) с намалени
физически, сетивни или умствени способности или липса на опит и познания, освен ако не са били
наблюдавани или инструктирани относно използването на конвектора от лице, отговорно за техните
безопасност. Децата трябва да бъдат наблюдавани, за да се гарантира, че не си играят с конвектора

5
ИНСТРУКЦИЯ ЗА СГЛОБЯВАНЕ
Свободно стоящ
1. Извадете конвектора, поставете го върху гладък твърд плот или земя;
2. Извадете колелата и краката;
3. Подравнете два отвора между краката и дъното на конвектора, за да монтирате краката, уверете
се, че винтовете са затегнати напълно;
Стенен монтаж
Внимание: - Моля, обърнете внимание, че продуктът трябва да бъде монтиран на поне 15 см от пода и
50 см от тавана. Крачетата трябва да се отстранят, преди да монтирате уреда на стената.
Пробийте четири дупки в стената, като диаметърът на дупката съдържа само напомпаната пластмасова
тръба. Разстоянието между четирите дупки, както е показано по-долу:
След като пъхнете надутата пластмасова тръба, фиксирайте винта, не завивайте цялата дължина
в стената, оставете поне 3-5 mm извън стената. Уверете се, че винтът е здраво закрепен и окачва
уреда. Винтът трябва да бъде поставен в долната част на уреда.

6www.raider.bg
ЕКСПЛОАТАЦИЯ НА ВАШИЯ Конвектор
1. Контролен панел
2. Указания за употреба
1. Натиснете бутона за превключване , когато чуете звука на зумера, дисплеят светва, показвайки
текущата температура на околната среда.
2. Регулиране на мощността: натиснете отново бутона за настройка . Включете режим на отопление,
продължете да натискате . За превключване между пълна мощност и половин мощност, в този
момент пълна мощност . Червеният индикатор е изключен и червеният индикатор на половин
мощност светва.
3. Регулиране на температурата: натиснете бутоните нагоре и надолу , това е регулирането
на температурата, температурата по подразбиране е 35 градуса, а диапазонът на регулиране на
температурата е 5-50 градуса. (Няма операция мига за 5 секунди и автоматично превключва към
околна температура)
4. Настройка на времето: натиснете клавиша за време , дисплеят показва 00, индикаторът за време
мига, 00 означава, че когато не е фиксиран, натиснете клавишите нагоре и надолу , времето за
отчитане може да се регулира, диапазонът от време е 1-24 часа. В състояние на тайминг индикаторът
за тайминг свети в червено.
5. Функция за заключване за деца: натиснете продължително превключвателя три секунди,
функцията за заключване за деца е активирана, червеният индикатор за заключване за деца
светва. В случай на заключване за деца, натиснете продължително превключвателя три секунди,
функцията за заключване за деца се освобождава и червеният светлинен индикатор е изключен.
6. Функция за отваряне на прозорец: Във всички режими на отопление, когато прозорецът на
помещението се отвори и температурата в помещението спадне с 15°C или повече в рамките на 2
минути, продуктът автоматично ще спре отоплението, а режимът на отваряне на прозореца има червен
светлинен индикатор свети. След 5 минути продуктът автоматично ще се върне към текущия

7
работен режим и червеният индикатор ще отвори прозореца. изключено или натиснете и задръжте
клавишите нагоре и надолу в рамките на десет минути и три секунди, можете също да възстановите
текущия работен режим.
1. Натиснете бутона за дневен режим в свободен режим . Конвекторат ще работи според режима на
работа в Понеделник по подразбиране и зеленият индикатор ще светне в дневен режим. Натиснете
отново клавиша за дневен режим зелената светлина е изключена означава затваряне. Когато
дневният режим работи, натиснете отново клавиша за нощен режим , показва, че работата в нощен
режим е активирана и зеленият индикатор за нощен режим светва , индикаторът за дневен режим
става червен, за да покаже режим на готовност.
Забележка: Стандартната дневна температура е 30 градуса, а работното време е 8 часа.
Стандартната седмична нощна температура е 35 градуса, а работното време е 10 часа.
2. Натиснете продължително бутона на таймера 3 секунди, дисплеят ще покаже 1 и ще мига,
натиснете бутоните нагоре и надолу , за да изберете текущата правилна дата. Този продукт ще
работи според текущото време.
1.Настройка за седмица на дневния режим
Натиснете дълго бутона за дневен режим за 3 секунди, дисплеят се показва и мига, а
червеният индикатор за дневен режим мига. Натиснете бутона за настройка и ще се покаже
мигащо 1, което показва Понеделник. Натиснете бутоните нагоре и надолу , за да изберете деня от
седмицата, който да зададете. Изберете диапазона 1-7 дни.
2. Настройка на температурата в дневен режим
След като зададете седмицата, натиснете бутона за настройка , показва OK, дисплеят ще покаже
отново мигащ и червеният индикатор за дневен режим продължава да мига, натиснете отново
клавиша за настройка, той ще покаже 30 мигащи, натиснете бутоните нагоре и надолу , за да
изберете температурата, която искате искате през деня. Диапазонът на регулиране на температурата
е 5-50 градуса. (Няма операция мига за 5 секунди, автоматично запазва и превключва към околна
температура).
3.Настройка на часа в дневния режим
След като зададете настройката на температурата, натиснете отново бутона за настройка , показва
OK и дисплеят показва и мига. Червеният индикатор за дневен режим продължава да мига.
Натиснете отново бутона за настройка . Дисплеят показва 8 мигащи, натиснете бутоните нагоре и
надолу, за да изберете часа от деня, за да работите. Диапазонът на регулиране на времето е 0-12 часа,

8www.raider.bg
0 означава режим на готовност. След като зададете работното време, натиснете бутона за настройка
. Показва OK (или изчакайте 5 секунди, за да покаже OK), и индикаторът за нощен режим
изгасва.
4.Настройка на времето за нощен режим
Натиснете дълго бутона за нощен режим 3 секунди, дисплеят се показва и мига, а червеният
индикатор за нощен режим мига. Натиснете клавиша за настройка , ще се покаже 1 мигане
(Натискането на бутоните нагоре и надолу директно ще покаже 1 мигане). Показва Понеделник.
Натиснете бутоните нагоре и надолу, за да изберете деня от седмицата, който да зададете.
5. Настройка на температурата в нощен режим
След като зададете седмицата, натиснете бутона за настройка , показващ OK и дисплеят показва
мигане, а червената светлина в нощен режим продължава да мига, след това натиснете бутона
за настройка 35 ще се покаже и ще мига, натиснете бутоните нагоре и надолу , за да изберете
желаната температура. Диапазонът на регулиране на температурата е 5-50 градуса.(Без действие,
мигане за 5 секунди, автоматично запазване и предизвиква температура на околната среда)
6.Настройка на времето за нощен режим
След като зададете настройката на температурата, натиснете отново бутона за настройка. Показва
OK и дисплеят показва и мига. Червеният индикатор за дневен режим продължава да мига.
Натиснете отново бутона за настройка , дисплеят показва, че 10 мига, натиснете бутоните нагоре
и надолу, за да изберете времето, което трябва да работите през нощта. Диапазонът на регулиране на
времето е 0-12 часа, 0 означава режим на готовност. След като зададете работното време, натиснете
бутона за настройка , което показва OK (или изчакайте 5 секунди, за да покаже OK), а индикаторът
за нощен режим е изключен.
Следвайте горните стъпки, за да зададете режима на работа на продукта през деня и нощта, 7
дни в седмицата.
Функция за отваряне на прозорец: Във всички режими на отопление, когато прозорецът на
помещението се отвори и температурата в помещението спадне с 15°C или повече в рамките на 2
минути, продуктът автоматично ще спре отоплението и червеният индикатор за режим на прозорец
светва. След 5 минути конвекторат автоматично ще се върне към текущия режим на отопление и
червеният светлинен индикатор ще светне при отваряне на прозореца изключено. Или натиснете
продължително бутоните нагоре и надолу в рамките на десет минути за три секунди, текущият
режим на отопление също може да бъде възстановен.
Този продукт има функция за памет. След като зададете работния режим за една седмица, той ще се
върне към предишната настройка, когато бъде включен следващия път. Трябва само да коригирате
текущия правилен ден от седмицата.

9
ПОЧИСТВАНЕ НА ВАШИЯ Конвектор
Винаги изключвайте конвектора от стенния контакт и го оставяйте да изстине преди почистване.
Почистете външната част на конвектора, като избършете с влажна кърпа и полирате със суха кърпа.
Не използвайте почистващи препарати или абразиви и не позволявайте вода да навлезе в конвектора.
СЪХРАНЕНИЕ НА ВАШИЯ Конвектор
Когато конвекторат не се използва за дълги периоди от време, той трябва да се пази от прах и да се
съхранява на чисто и сухо място.
Опазване на околната среда. С оглед опазване на околната среда електроинструментът, допълнителните
приспособления и опаковката трябва да бъдат подложени на подходяща преработка за повторното използване на
съдържащите се в тях суровини.Не изхвърляйте електроинструменти при битовите отпадъци! Съгласно Директивата на ЕС
2012/19/EC относно излезлите от употреба електрическ и и електронни устройства и утвърждаването и като национален
закон електроинструментите, които не могат да се използват повече, трябва да се събират отделно и да бъдат подлагани на
подходяща преработка за оползотворяване на съдържащите се в тях вторични суровини.

10 www.raider.bg
Original instructions’ manual
Dear Customer,
Congratulations on the purchase of machinery from the fastest growing brand of electric, gasoline and
pneumatic tools - RAIDER. When properly installed and operating, RAIDER are safe and reliable machines
and work with them will deliver a real pleasure. For your convenience has been built and excellent service
network of 45 service stations across the country.
Before using this machine, please carefully acquainted with these “instructions’ manual”.
In the interest of your safety and to ensure proper use and read these instructions carefully, including
the recommendations and warnings in them. To avoid unnecessary errors and accidents, it is important that
these instructions will remain available for future reference to all who will use the machine. If you sell it to a
new owner “Instructions’ manual” must be submitted along with it to enable new users to become familiar with
relevant safety and operating instructions.
Euromaster Import Export Ltd. is an authorized representative of the manufacturer and owner of the
trademark RAIDER.
Address: Soa City 1231, Bulgaria “Lomsko shausse” Blvd. 246, tel 02 934 33 33, 934 10 10, www.raider.
bg; www.euromasterbg.com; e-mail: [email protected].
Since 2006 the company introduced the system of quality management ISO 9001:2008 with scope of
certication: Trade, import, export and servicing of hobby and professional electrical, mechanical and
pneumatic tools and general hardware. The certicate was issued by Moody International Certication Ltd,
England.
Technical Data
parameter unit value
Model -RD-PH01
Voltage V230
Frequency Hz 50
Power W1000-2000
EN

11
INSTRUCTION
Thank you for purchasing our panel heater, each unit has been manufactured to ensure safety and reliability,
Before rst use, please read the instruction carefully and keep for further reference.
SPECIAL SAFETY INSTRUCTION FOR YOUR HEATER
1. For your safety this appliance is tted with a thermal cut-out. In the event that the product overheats for
some reason, the cut-out prevents excessive temperatures on the product by cutting the power to the heater
temporarily. Once the heater has cooled down, it will reset automatically.
2. Do not use outdoors.
3. Do not locate the heater immediately below a xed socket outlet or connection box.
4. Do not place material or garments on the heater, or obstruct the air circulation around the heater, for
instance by curtains or pushing furniture up against the heater, as this could cause overheating and a re
risk.
5. Never cover or obstruct in any way the heat outlet slots at the top of the heater or the air inlet slots in the
base of the heater.
6. The surfaces of this heater can be hot. Momentary contact with any part of the heater should not cause
injury. However, aged or inrm persons or young children should not be left unsupervised in the vicinity of the
heater unless a suitable guard is tted.
7. This appliance is not intended for use by children or other persons without assistance or supervision if
their physical, sensory or mental capabilities prevent them from using it safely. Children should be supervised
to ensure that they do not play with the appliance.
8. Note that due care and consideration must be taken when using this heater in series with a thermal
control, a program controller, a timer or any other device that switches on the heat automatically, since a re
risk exists when the heater is accidentally covered or displaced.
9. If the supply cord is damaged it must be replaced by the manufacturer or service agent or a similarly
qualied person in order to avoid a hazard.
10. The appliance must not be operated:
a. In areas which are subject to the risk of re or explosion due to chemicals, dust, gases or vapors;
b. In the immediate vicinity of pipes or containers which carry of contain combustible or potentially explosive
substances.
11. The air outlet must not be obstructed. For safety reasons the upper and lower air grilles must never be
covered with items in too close proximity. Objects should not be leant against the unit nor placed between
the unit and the wall. Never leave combustible materials, such as wood, paper, textiles or ammable items
such as wax, petrol, aerosol cans etc. in the vicinity of the warm air outlet. As with all similar heaters, the ow
of rising air may cause discoloration of the wall.
12. Before using any materials which produce ammable gases or vapors, e.g. laying or sealing or sealing
parquet or PVC ooring, or when using spray polishes, spirits and similar materials, ensure the heater is
switched o.
13.This heater is not intend for use by persons(including children)with reduced physical, sensory or mental
capabilities, or lack of experience and knowledge, unless they have been given supervision or instruction
concerning use of the heater by a person responsible for their safety. Children should be supervised to
ensure that they do not play with the heater
ASSEMBLE INSTRUCTION
Free standing
1. Take out the heater, put it on a smooth solid tabletop or ground;
2. Take out the wheel and plate;
3. Alignment two holes between plate and bottom of heater to install the plate, make sure the screw are
tightened fully;

12 www.raider.bg
Wall mounting
Caution: - Please note that the product must be installed at least 15 cm from the oor and 50 cm from the
ceiling.
-the feet must be removed before mounting the appliance on the wall.
Drill four holes in wall, the diameter of the hole just contained the inated plastic pipe. The distance between
the four holes as below:
After tucking the inated plastic pipe, x screw, do not screw the entire length into the wall, leave at least
3-5mm out of the wall. Make sure screw is xed rmly and hangs the appliance. The screw should be
inserted rabbet of the appliance bottom.

13
OPERTAION YOUR HEATER
1.Control part
2.Instructions for use
1.Press the switch button , when you hear the buzzer sound, the display lights up, showing the current
ambient temperature.
2.Power adjustment: press the setting key again Turn on heating mode, keep pressing . For switching
between full power and half power, at this time full power The red indicator light is o, and the half power
red indicator light lights up.
3.Temperature adjustment: press the up and down keys it is the temperature adjustment, the default
temperature is 35 degrees, and the temperature adjustment range is 5-50 degrees. (No operation ashes for
5 seconds and automatically switches to ambient temperature)
4.Timing setting: press the timing key display shows 00, timing indicator ash, 00 means that when it is
not xed, press the up and down keys timing time can be adjusted, the timing range is 1-24 hours. In the
timing state, the timing indicator red lights up.
5.Child lock function: long press the switch three seconds, the child lock function is enabled, the child
lock red indicator light lights up. In the case of child lock lock, long press the switch three seconds,
the child lock function is released, and the red indicator light is o.
6.Window opening function: In all heating modes, when the room window is opened and the room temperature
drops by 15°C or above within 2 minutes, the product will automatically stop heating, and the window-opening
mode has a red indicator light lights up. After 5 minutes, the product will automatically return to the current
working mode, and the red indicator light will open the window o, or press and hold the up and down keys
within ten minutes three seconds, you can also restore the current working mode.

14 www.raider.bg
1. Press the day mode key in free mode , The heater will work according to the default Monday working
mode, and the green indicator light will be in the day mode lights up. Press the day mode key again
green light o means close. When the day mode is working, press the night mode key again Indicates
that the night mode work is activated, and the night mode green indicator lights up The day mode indicator
turns red to indicate standby.
Note: The default daytime temperature is 30 degrees, and the working time is 8 hours
The default week night temperature is 35 degrees, and the working time is 10 hours
2. Long press the timer button 3 seconds, the display will show 1 and ash, press the up and down keys
to select the current correct date. This product will run according to the current time.
1. Day mode week setting
long press day mode key for 3 seconds, the display shows and ashes, and the day mode red
indicator ashing. Press the set key a ashing 1 will be displayed, indicating Monday. Press the up
and down keys to select the day of the week to be set. Select the range 1-7 days.
2. Day mode temperature setting
After setting the week, press the set button Indicates OK, the display will show again ashing and
day mode red indicator continue to ash, press the setting key again, it will display 30 ashing, press
the up and down keys to choose the temperature you want during the day. The temperature adjustable
range is 5-50 degrees. (No operation ashes for 5 seconds, automatically saves and switches to ambient
temperature).
3. Day mode time setting
After setting the temperature setting, press the set button again Indicates OK and the display shows
and ashes. Day mode red indicator continue to blink. Press the set button again The display shows 8
ashing, press the up and down keys to select the time of day to work. The time adjustable range is 0-12 hours,
0 means standby. After setting the working time, press the set button Indicates OK (or wait 5 seconds to
indicate OK), and the night mode indicator o.
4. Night mode time setting
Long press the night mode key 3 seconds, the display shows and ashes, and the night mode red
indicator ashing. Press the set key will show 1 ashing (Press the up and down keys directly
will show 1 ashing). Indicates Monday. Press the up and down keys to select the day of the week to be set.

15
5.Night mode temperature setting
After setting the week, press the set button indicates OK and the display shows blinking and night
mode red light continue to ash, then press the set key 35 will be displayed and ashing, press the
up and down keys to choose the temperature you need. Temperature adjustable range is 5-50 degrees.
(No action, strobe for 5 seconds, automatically save and cause ambient temperature)
6.Night mode time setting
After setting the temperature setting, press the set button again Indicates OK and the display shows
and ashes. Day mode red indicator continue to blink. Press the set button again the display shows
10 is ashing, press the up and down keys to select the time you need to work at night. The time adjustable
range is 0-12 hours, 0 means standby. After setting the working time, press the set button indicates OK
(or wait 5 seconds to indicate OK), and the night mode indicator o.
Follow the above steps to set the working mode of the product during the day and night, 7 days a week
Window opening function: In all heating modes, when the room window is opened and the room temperature
drops by 15°C or above within 2 minutes, the product will automatically stop heating, and the window mode red
indicator light lights up. After 5 minutes, the heater will automatically return to the current heating mode,
and the red indicator light will be opened when the window is opened o. Or long press the up and down
keys within ten minutes for three seconds, the current heating mode can also be restored.
This product has a memory function. After setting the working mode for a week, it will default to the previous
setting when it is turned on next time. You only need to adjust the current correct day of the week.
CLEANING YOUR HEATER
Always unplug the heater from the wall socket and allow it to cool down before cleaning.
Clean the outside of the heater by wiping with a damp cloth and bu with a dry cloth.
Do not use any detergents or abrasives and do not allow any water to enter the heater.
STORING YOUR HEATER
When the heater is not used for long periods of time it should be protected from dust and stored in a clean dry
place.
Environmental protection. In order to protect the environment, the power tool, accessories and packaging
must undergo appropriate processing for the reuse of the raw materials contained in them. Do not dispose
of power tools with household waste! According to the EU Directive 2012/19/EC on end-of-life electrical and
electronic equipment and the approval and as a national law, power tools that can no longer be used must be
collected separately and subjected to appropriate processing to recover the contents are in them secondary
raw materials.

16 www.raider.bg
Stimate prieten,
Felicitări pentru achiziţionarea unui ciocan rotopercutor de la marca cu cea mai rapidă creştere pe scule
electrice si pneumatice - Raider. Cu o instalare si operare corecta, produsele Raider sunt echipamente sigure,
abile şi lucrul cu ele vă va oferi o adevarata placere. Pentru confort si servicii excelente am construit o reţea de
service-uri pe întreg teritoriul ţării.
Înainte de a utiliza acest produs, vă rugăm să citiţi cu atenţie “manualul de utilizare”. În interesul siguranţei
şi pentru a asigura utilizarea corectă, citiţi cu atenţie aceste instrucţiuni, inclusiv recomandările şi avertismentele
pentru ele. Pentru a evita greşelile inutile şi accidentele, este important ca aceste instrucţiuni să rămână disponi-
bile pentru referinţe viitoare tuturor celor care vor utiliza aparatul. Daca vindeti produsul “manualul de utilizare”
trebuie predat noului proprietar, astfel incat acesta sa e familiarizat cu masurile de siguranta si instructiunile de
utilizare. “Euromaster Import Export” SRL este un reprezentant autorizat al producătorului şi proprietar al marcii
Raider. Adresa companiei este Soa 1231, B-dul “Lom Road” 246, tel 02 934 33 33 934 10 10, www.raider.bg;
www.euromasterbg.com, e-mail: info @ euromasterbg. com
Începând cu anul 2006, compania a introdus un sistem de management al calităţii ISO 9001:2008 de certi-
care cu domeniul de aplicare: instrumente de comerţ, import, export şi de servicii profesionale si hobby elec-
trice, pneumatice şi de putere şi hardware-ul general. Certicatul a fost emis de catre Moody International de
Certicare Ltd, Anglia.
Date tehnice
parametru unitate valoare
Model -RD-PH01
Voltaj V230
Frecvență Hz 50
Putere W1000-2000
1. Roata
2. Placă
3. Corpul
4. Panou de control
RO

17
INSTRUCȚIUNE
Vă mulțumim că ați achiziționat panoul de încălzire, ecare unitate a fost fabricată pentru a asigura siguranța și
abilitatea. Înainte de prima utilizare, vă rugăm să citiți cu atenție instrucțiunile și să le păstrați pentru referințe
ulterioare.
INSTRUCȚIUNI SPECIALE DE SIGURANȚĂ PENTRU încălzitorul DVS
1. Pentru siguranța dumneavoastră, acest aparat este echipat cu un întrerupător termic. În cazul în care
produsul se supraîncălzește dintr-un motiv oarecare, întreruperea previne temperaturile excesive pe produs
prin întreruperea temporară a alimentării încălzitorului. Odată ce încălzitorul s-a răcit, acesta se va reseta
automat.
2. Nu utilizați în aer liber.
3. Nu amplasați încălzitorul imediat sub o priză xă sau cu o cutie de conectare.
4. Nu așezați materiale sau articole de îmbrăcăminte pe încălzitor și nu împiedicați circulația aerului în jurul
încălzitorului, de exemplu prin perdele sau împingând mobila spre încălzitor, deoarece acest lucru ar putea
cauza supraîncălzirea și riscul de incendiu.
5. Nu acoperiți și nu obstrucționați în niciun fel fantele de evacuare a căldurii din partea superioară a
încălzitorului sau fantele de intrare a aerului de la baza încălzitorului.
6. Suprafețele acestui încălzitor pot erbinți. Contactul momentan cu orice parte a încălzitorului nu ar
trebui să provoace răniri. Cu toate acestea, persoanele în vârstă sau inrme sau copiii mici nu trebuie lăsați
nesupravegheați în vecinătatea încălzitorului decât dacă este montat o protecție adecvată.
7. Acest aparat nu este destinat utilizării de către copii sau alte persoane fără asistență sau supraveghere
dacă capacitățile lor zice, senzoriale sau mentale îi împiedică să îl utilizeze în siguranță. Copiii trebuie
supravegheați pentru a se asigura că nu se joacă cu aparatul.
8. Rețineți că trebuie luate atenția și atenția cuvenită atunci când utilizați acest încălzitor în serie cu un control
termic, un controler de program, un temporizator sau orice alt dispozitiv care pornește automat căldura,
deoarece există risc de incendiu atunci când încălzitorul este acoperit accidental. sau deplasat.
9. Dacă cablul de alimentare este deteriorat, acesta trebuie înlocuit de către producător sau agentul de service
sau o persoană calicată similar pentru a evita un pericol.
10. Aparatul nu trebuie operat:
A. În zonele care sunt supuse riscului de incendiu sau explozie din cauza substanțelor chimice, prafului,
gazelor sau vaporilor;
b. În imediata apropiere a conductelor sau a recipientelor care transportă substanțe combustibile sau potențial
explozive.
11. Oriciul de evacuare a aerului nu trebuie obturat. Din motive de siguranță, grilajele de aer superioare
și inferioare nu trebuie să e niciodată acoperite cu articole prea apropiate. Obiectele nu trebuie sprijinite
de unitate și nici plasate între unitate și perete. Nu lăsați niciodată materiale combustibile, cum ar lemn,
hârtie, textile sau articole inamabile, cum ar ceară, benzină, cutii de aerosoli etc. în apropierea oriciului de
evacuare a aerului cald. Ca și în cazul tuturor încălzitoarelor similare, uxul de aer în creștere poate provoca
decolorarea peretelui.
12. Înainte de a utiliza orice materiale care produc gaze sau vapori inamabili, de ex. la așezarea sau
etanșarea sau etanșarea parchetului sau a pardoselilor din PVC, sau atunci când utilizați produse de lustruire,
spirt și materiale similare, asigurați-vă că încălzitorul este oprit.
13. Acest încălzitor nu este destinat utilizării de către persoane (inclusiv copii) cu capacități zice, senzoriale
sau mentale reduse sau cu lipsă de experiență și cunoștințe, cu excepția cazului în care acestea au fost
supravegheate sau instruite cu privire la utilizarea încălzitorului de către o persoană responsabilă pentru
Siguranță. Copiii trebuie supravegheați pentru a se asigura că nu se joacă cu încălzitorul
INSTRUCȚIUNI DE MONTAJ
Liber în picioare
1. Scoateți încălzitorul, puneți-l pe o masă netedă și solidă sau pe pământ;
2. Scoateți roata și placa;
3. Aliniați două oricii între placă și partea inferioară a încălzitorului pentru a instala placa, asigurați-vă că
șurubul este strâns complet;

18 www.raider.bg
Montare pe perete
Atenție: - Vă rugăm să rețineți că produsul trebuie instalat la cel puțin 15 cm de podea și 50 cm de tavan.
-picioarele trebuie îndepărtate înainte de a monta aparatul pe perete.
Găuriți patru găuri în perete, diametrul găurii doar conținea țeava de plastic umată. Distanța dintre cele
patru găuri, după cum urmează:

19
UTILIZAȚI ÎNCĂLZITORUL
1.Piesă de control
2.Instrucțiuni de utilizare
Mod liber
1. Apăsați butonul comutator , când auziți sunetul soneriei, așajul se aprinde, indicând temperatura
ambientală curentă.
2. Reglarea puterii: apăsați din nou tasta de setare Porniți modul de încălzire, apăsați în continuare
Pentru comutarea între putere maximă și putere jumătate, în acest moment putere maximă Indicatorul
luminos roșu este stins și indicatorul luminos roșu se aprinde.
3. Reglarea temperaturii: apăsați tastele sus și jos , este reglarea temperaturii, temperatura implicită este
de 35 de grade, iar intervalul de reglare a temperaturii este de 5-50 de grade. (Nici o operațiune nu clipește
timp de 5 secunde și trece automat la temperatura ambiantă)
4.Setare de sincronizare: apăsați pe așajul tastei de sincronizare așează 00, indicatorul de temporizare
clipește, 00 înseamnă că atunci când nu este x, apăsați tastele sus și jos , timpul de sincronizare poate
ajustat, intervalul de sincronizare este de 1-24 de ore. În starea de sincronizare, indicatorul de sincronizare
se aprinde roșu.
5. Funcția de blocare pentru copii: apăsați lung comutatorul trei secunde, funcția de blocare pentru copii
este activată, indicatorul luminos roșu de blocare pentru copii se aprinde. În cazul blocării pentru copii,
apăsați lung comutatorul trei secunde, funcția de blocare pentru copii este eliberată și indicatorul luminos
roșu este stins.
6. Funcția de deschidere a ferestrei: în toate modurile de încălzire, când fereastra camerei este deschisă și
temperatura camerei scade cu 15°C sau mai mult în 2 minute, produsul se va opri automat încălzirea, iar
modul de deschidere a ferestrei are un indicator luminos roșu lumina aprinsa. După 5 minute, produsul
va reveni automat la modul de lucru curent, iar indicatorul luminos roșu va deschide fereastra stinsă sau
apăsați și mențineți apăsate tastele sus și jos în zece minute și trei secunde, puteți, de asemenea, să
restabiliți modul de lucru actual.

20 www.raider.bg
1. Apăsați tasta mod de zi în modul liber , încălzitorul va funcționa conform modului de lucru implicit de
luni, iar indicatorul luminos verde se va aprinde în modul de zi. Apăsați din nou tasta pentru modul zi
lumina verde stinsă înseamnă închidere. Când funcționează modul de zi, apăsați din nou tasta pentru
modul de noapte Indică faptul că modul de lucru pe timp de noapte este activat, iar indicatorul pentru modul
de noapte se aprinde în verde Indicatorul pentru modul de zi devine roșu pentru a indica starea
de așteptare.
Notă: Temperatura implicită în timpul zilei este de 30 de grade, iar timpul de lucru este de 8 ore
Temperatura implicită de noapte a săptămânii este de 35 de grade, iar timpul de lucru este de 10 ore
2. Apăsați lung butonul temporizatorului timp de 3 secunde, așajul va așa 1 și va clipi, apăsați tastele
sus și jos pentru a selecta data corectă curentă. Acest produs va funcționa în funcție de ora curentă.
1. Setarea săptămânii în modul zi
apăsați lung tasta mod zi timp de 3 secunde, așajul arată și clipește, iar indicatorul roșu al
modului zi clipește. Apăsați tasta setare va așat un 1 intermitent, indicând ziua de luni. Apăsați tastele
sus și jos pentru a selecta ziua săptămânii care urmează să e setată. Selectați intervalul 1-7 zile.
2. Setarea temperaturii în modul zi
După setarea săptămânii, apăsați butonul de setare Indică OK, așajul va așa din nou intermitent
și indicatorul roșu al modului de zi continuă să clipească, apăsați din nou tasta de setare, va așa 30
intermitent, apăsați tastele sus și jos pentru a alege temperatura dorită. doresc în timpul zilei. Intervalul
de reglare a temperaturii este de 5-50 de grade. (Nici o operațiune nu clipește timp de 5 secunde, salvează
automat și comută la temperatura ambiantă).
3. Setarea orei modului de zi
După setarea temperaturii, apăsați din nou butonul de setare Indică OK și așajul arată și clipește.
Indicatorul roșu al modului de zi continuă să clipească. Apăsați din nou butonul de setare. Așajul
arată 8 intermitent, apăsați tastele sus și jos pentru a selecta ora din zi pentru a lucra. Intervalul de timp reglabil
este 0-12 ore, 0 înseamnă standby. După setarea timpului de lucru, apăsați butonul de setare Indică OK
(sau așteptați 5 secunde pentru a indica OK), iar indicatorul modului de noapte este oprit.
4. Setarea orei modului de noapte
Apăsați lung tasta pentru modul de noapte timp de 3 secunde, așajul arată și clipește, iar
indicatorul roșu pentru modul de noapte clipește. Apăsați tasta de setare va așa 1 intermitent
(apăsați direct tastele sus și jos va așa 1 intermitent). Indică ziua de luni. Apăsați tastele sus și jos
Table of contents
Languages:
Other Raider Heater manuals

Raider
Raider RD-EFH05 User guide

Raider
Raider RD-EFH11 User manual

Raider
Raider RD-DSH20 User manual

Raider
Raider RD-EFH07 User guide

Raider
Raider RD-DSH50 User manual

Raider
Raider RD-EFH08 User manual

Raider
Raider RD-PH04 wi-fi User manual

Raider
Raider Power Tools RD-EFH03 User manual

Raider
Raider RD-EFH09 User manual

Raider
Raider RD-EFH02 User manual