Rain Bird RMX-1T User manual

START
PROG
END
SESSION
SET
STA#
1/A 2/B 3/C
4/D 5/E 6/F
7/G 8/H 9/J
CLEAR O/TEST STOP
START
PROG
END
SESSION
SET
STA#
1/A 2/B 3/C
4/D 5/E 6/F
7/G 8/H 9/J
CLEAR O/TEST STOP
SET
TIME
SET
PROG
ON
ADV
© 2000 Rain Bird Sprinkler Mfg. Corp. 3/00
Contents
DESCRIPTION ............................................................. 2
INSTALLING THE BATTERY ......................................... 4
BEFORE REGISTERING THE ACCESS CODE ............... 5
REGISTERING AN ACCESS CODE IN A RECEIVER ...... 6
TESTING THE SYSTEM ............................................... 7
USING THE RMX-1T TRANSMITTER ............................ 8
REMOTE SEQUENCE ................................................ 10
CONTROLLER PROGRAM ......................................... 12
SPECIAL COMMANDS (RMX-1R only) ..................... 13
OTHER FUNCTIONS .................................................. 17
RMX-1T Keypad Transmitter
(with STX Security)
RMX-1Tsande.p65 3/7/00, 10:13 AM1

Page 2 RMX-1T Keypad Transmitter
START
PROG
END
SESSION
SET
STA#
1/A 2/B 3/C
4/D 5/E 6/F
7/G 8/H 9/J
CLEAR O/TEST STOP
START
PROG
END
SESSION
SET
STA#
1/A 2/B 3/C
4/D 5/E 6/F
7/G 8/H 9/J
CLEAR O/TEST STOP
SET
TIME
SET
PROG
ON
ADV
DESCRIPTION
The Rain Bird RMX-1T Keypad Transmitter is a
battery-powered transmitter designed for use with
any Rain Bird remote receiver (sold separately).
The transmitter sends a radio-frequency (RF) signal to
the receiver, which then sends commands to a Rain Bird
remote-ready irrigation controller. The transmitter can
operate at a range of up to 700 feet (214 m).
Registering Access Codes
To use an RMX-1T transmitter with a receiver, you
need to register an access code in the receivers
memory. Registering allows the receiver to recognize
commands sent by the transmitter.
The transmitters STX protocol prevents the
transmitter from responding to random RF signals.
(For example, the neighbors garage door opener will
not start a watering cycle.)
RMX-1Tsande.p65 3/7/00, 10:13 AM2

RMX-1T Keypad Transmitter Page 3
Each transmitter can operate multiple receivers,
and multiple transmitters can operate the same
receiver.
Example: In this illustration, transmitter ➊has
an access code registered in receiver A, while
transmitter ➋has access codes registered in
receivers A, B, and C.
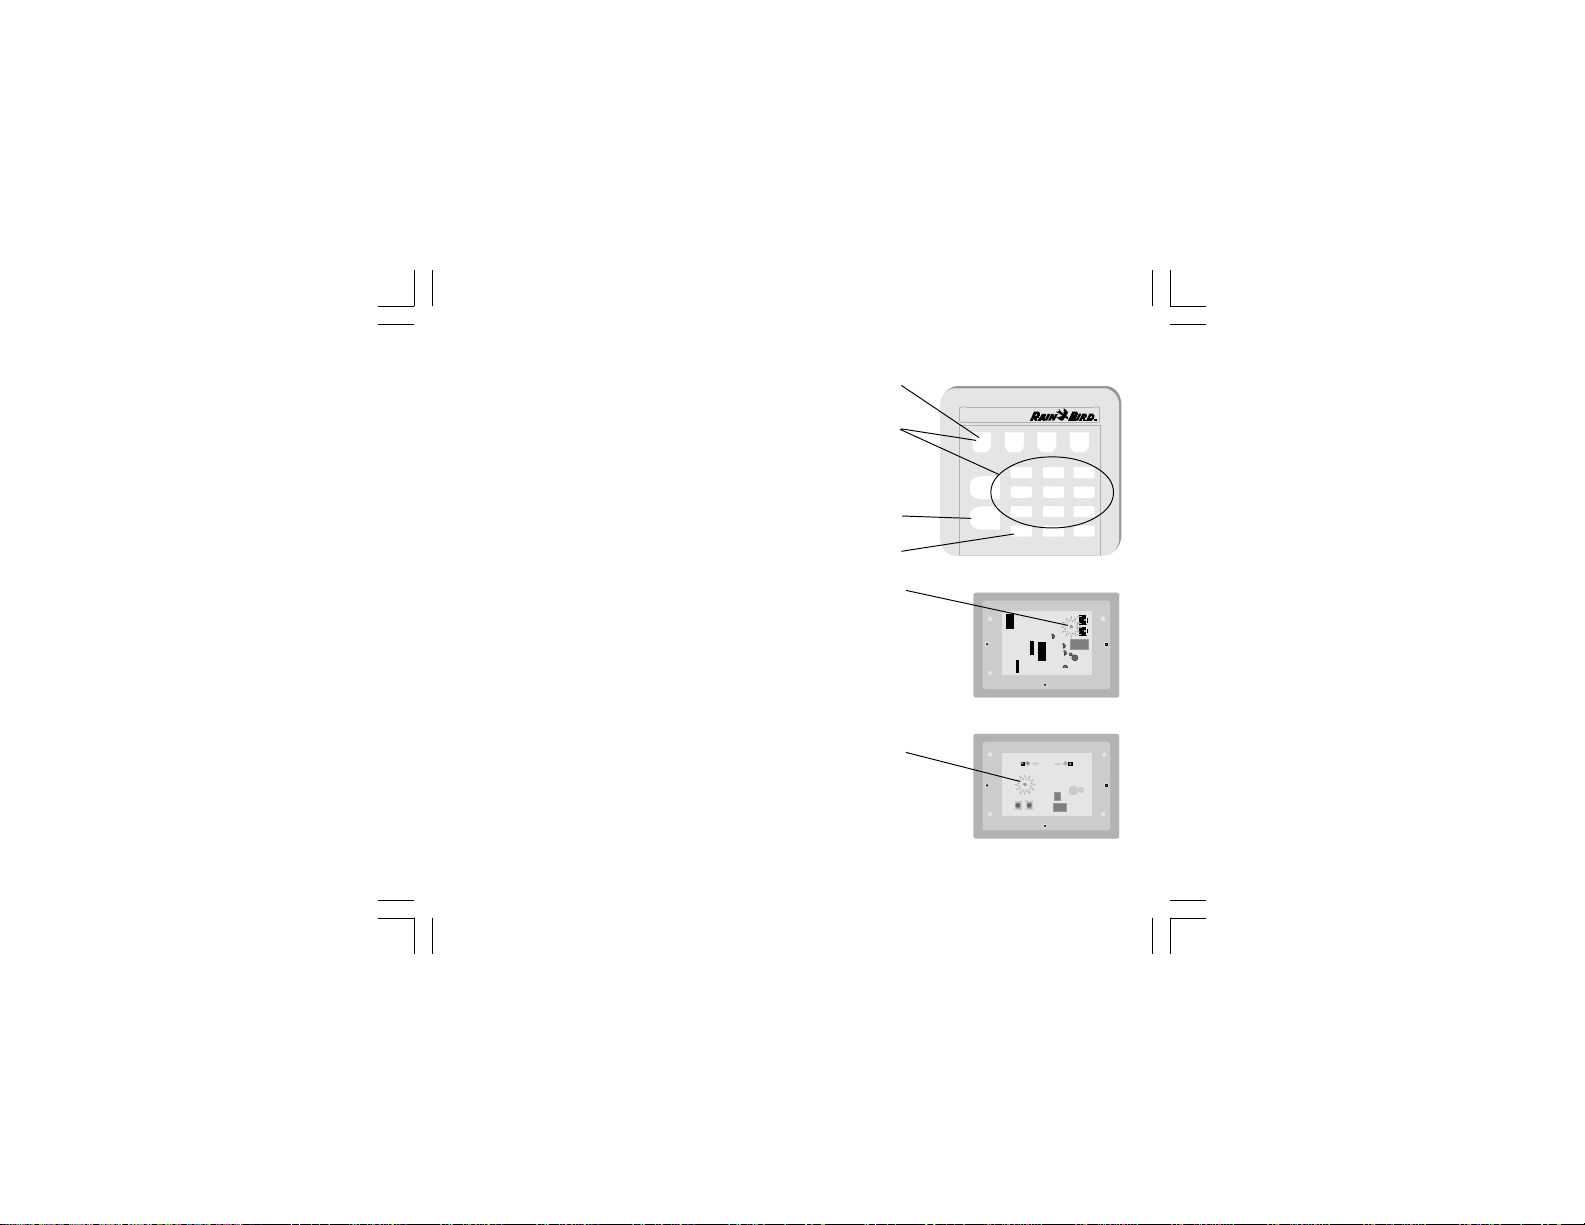
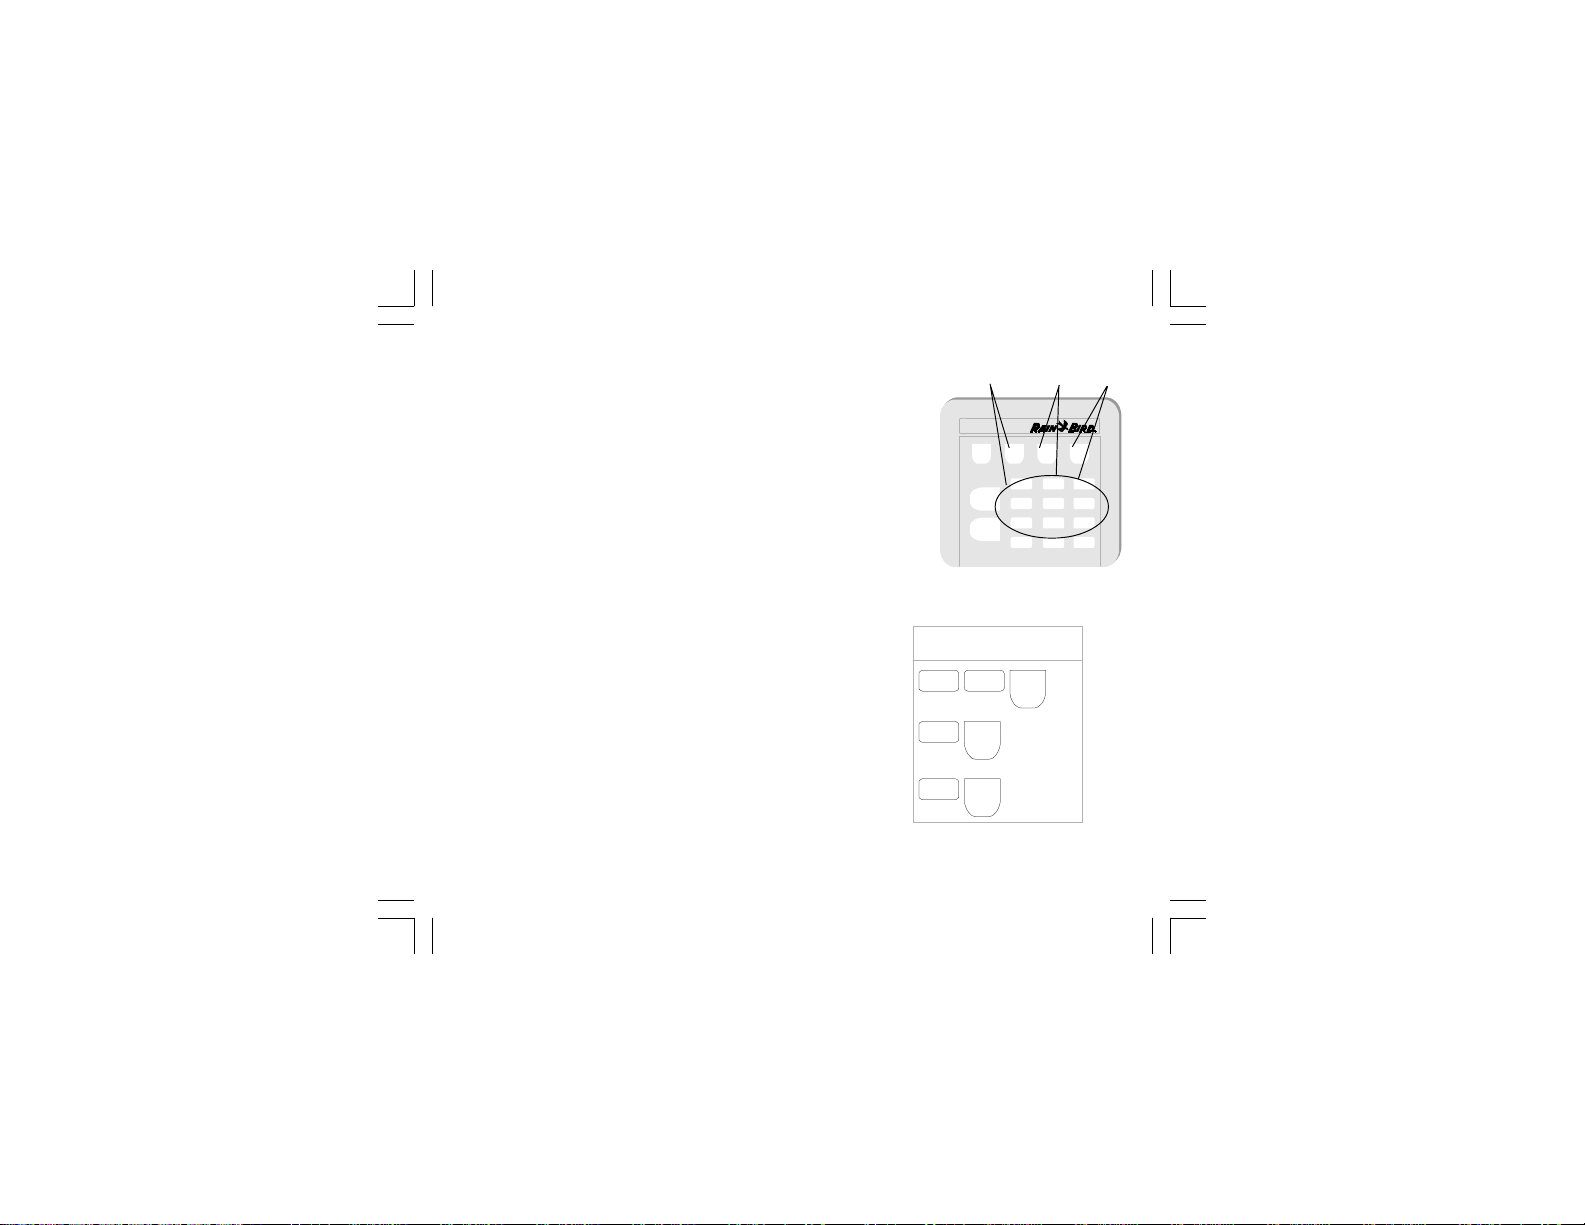
Buttons and Indicators
The keypad contains function buttons and
alphanumeric buttons. An audio indicator
beeps to confirm that a button has been
pressed.
RMX-1Tsande.p65 3/7/00, 10:13 AM3

Page 4 RMX-1T Keypad Transmitter
9-volt battery
INSTALLING THE BATTERY
➊Open the keypads case by gently
twisting a flat-head screwdriver
between the two access slots on
the top of the case.
➋For new transmitters, remove the
seal or wrap from the 9-volt
battery (included). If you are
replacing the battery, remove
the old battery and discard it
appropriately.
➌Attach the new battery to the
battery connector.
➍Close the case by hooking the
bottom edges together and then
snapping the top of the case
shut.
REAR VIEW
Access slots
Battery connector
INTERIOR VIEW
RMX-1Tsande.p65 3/7/00, 10:13 AM4

RMX-1T Keypad Transmitter Page 5
9 9 9
BEFORE REGISTERING THE ACCESS CODE
Choose an Access Code
An access code is like a password that allows a
transmitter to talk to a specific receiver. The code
ensures you do not activate other nearby receivers
when you send commands.
The code can be any number between 0 and 999.
Make a note of the code you create for each receiver.
Should you lose your code, you can register a new
one in the receivers memory. For more information,
see Check Receiver Memory.
Check Receiver Memory
There is a limit to the number of access codes that a
receiver can store in memory. Before registering, you
may want to determine the number of access codes in
the receivers memory.
If necessary, you can erase the receivers memory and
then register new access codes. For instructions, see the
manual supplied with your receiver.
Sample
Receiver I.D. Access Code
RMX-1Tsande.p65 3/7/00, 10:13 AM5

Page 6 RMX-1T Keypad Transmitter
➊
➌
➍
➎
➍
➎
➏
➐
➐
➋
RM-1R
RMX-1R
START
PROG
END
SESSION
SET
STA#
1/A 2/B 3/C
4/D 5/E 6/F
7/G 8/H 9/J
CLEAR
O/TEST
STOP
START
PROG
END
SESSION
SET
STA#
1/A 2/B 3/C
4/D 5/E 6/F
7/G 8/H 9/J
CLEAR
O/TEST
STOP
SET
TIME
SET
PROG
ON
ADV
REGISTERING AN ACCESS CODE IN A
RECEIVER
➊Press the CLEAR button.
➋Press the END SESSION button.
➌Enter the access code and press the ON/ADV button.
➍Press the receivers Channel 1 button.
➎The receivers indicator LED will light for 5 seconds.
➏Before the LED goes out, hold down the ON/ADV
button for a count of 1.
➐The receivers LED will flicker and go out, confirming
that the signal was received.
If the LED goes out without flickering, repeat steps
4 - 7.
RMX-1Tsande.p65 3/7/00, 10:13 AM6
RMX-1T Keypad Transmitter Page 7
RMX-1R
RM-1R
➎
➎
➌
➍
START
PROG
END
SESSION
SET
STA#
1/A 2/B 3/C
4/D 5/E 6/F
7/G 8/H 9/J
CLEAR
O/TEST
STOP
START
PROG
END
SESSION
SET
STA#
1/A 2/B 3/C
4/D 5/E 6/F
7/G 8/H 9/J
CLEAR
O/TEST
STOP
SET
TIME
SET
PROG
ON
ADV
➋
➊
TESTING THE SYSTEM
NOTE: Testing the system will start a watering sequence.
Read Stopping a Remote Sequence before you run
this test.
➊Press the CLEAR button.
➋Press the END SESSION button.
➌Enter the access code for the receiver and press the
ON/ADV button. Release the ON/ADV button and
pause a moment.
➍Hold down the ON/ADV button for a count of 1.
➎The LED on the receiver will light, indicating that the
signal was received. You may also hear a click,
which is normal.
➏You can complete the system test by using the
transmitter to sequence through the stations and
stop, as described in Advance in Remote
Sequence. Or you can end the test at any time by
holding down the ON/ADV button until all watering
stops (about 4 seconds).
RMX-1Tsande.p65 3/7/00, 10:13 AM7

Page 8 RMX-1T Keypad Transmitter
USING THE RMX-1T TRANSMITTER
The RMX-1T Keypad Transmitter allows you to run a
remote sequence, advance or stop a controller program,
and use special commands.
A remote sequence operates all stations that have run
time scheduled in any program. During a remote
sequence, each station runs for 10 minutes. This
function can be useful for:
System checkout after installation
Winterizing a system
Conducting a walk-through inspection
Station testing after maintenance
Advancing or stopping a normal controller program
while it is running can be useful if you need to:
Bypass a station
Immediately stop all watering
RMX-1Tsande.p65 3/7/00, 10:13 AM8

RMX-1T Keypad Transmitter Page 9
Special commands give you more control over the
irrigation system while in the field. These commands
work only with the RMX-1R Multi-Function Remote
Control Receiver and a remote-ready ESP-LX+
controller.
Special commands include:
Start an individual station to run for up to 99 minutes
(30 minute default)
Change a stations run time in a program
Start a controllers program
Start a controllers test program
These functions can be useful for:
Spot watering
Off-day watering
RMX-1Tsande.p65 3/7/00, 10:13 AM9

Page 10 RMX-1T Keypad Transmitter
➍
START
PROG
END
SESSION
SET
STA#
1/A 2/B 3/C
4/D 5/E 6/F
7/G 8/H 9/J
CLEAR
O/TEST
STOP
START
PROG
END
SESSION
SET
STA#
1/A 2/B 3/C
4/D 5/E 6/F
7/G 8/H 9/J
CLEAR
O/TEST
STOP
SET
TIME
SET
PROG
ON
ADV
➊
REMOTE SEQUENCE
Start Remote Sequence
➊Press and hold down the ON/ADV button for a count
of 1. Release the button.
➋Each station that has a programmed run time (in any
program) will operate automatically for a maximum of
10 minutes.
➌The remote sequence always begins with the lowest-
numbered station. The rest of the stations will operate
in numerical order, from lowest to highest.
➍The controller will display the station number
currently operating, along with its 10-minute run
time.
Advance Remote Sequence
➊Press the ON/ADV button and hold it down for a
count of 1.
➋Release the button.
➌The next station in sequence will begin operating,
and the station previously running will stop.
RMX-1Tsande.p65 3/7/00, 10:13 AM10

RMX-1T Keypad Transmitter Page 11
➍The controller will display the station number
currently operating, along with its 10-minute run
time.
Stop Remote Sequence
➊Press the ON/ADV button and hold it down until all
watering stops (about 4 seconds).
➋While you are holding the button down, the
controller will temporarily advance to the next
station.
➌The remote sequence will end.
➍The controller will return to the mode it was in before
the remote sequence started.
RMX-1Tsande.p65 3/7/00, 10:13 AM11

Page 12 RMX-1T Keypad Transmitter
START
PROG
END
SESSION
SET
STA#
1/A 2/B 3/C
4/D 5/E 6/F
7/G 8/H 9/J
CLEAR
O/TEST
STOP
START
PROG
END
SESSION
SET
STA#
1/A 2/B 3/C
4/D 5/E 6/F
7/G 8/H 9/J
CLEAR
O/TEST
STOP
SET
TIME
SET
PROG
ON
ADV
➊
CONTROLLER PROGRAM
Advance Program
➊To advance through a controller program already
running, press the ON/ADV button and hold it
down for a count of 1. Release the button.
➋The next station in the programs sequence will
begin operating, and the previous station will end.
➌The controller will display the station number
currently operating, along with its run time in that
program.
Stop Program
➊To stop a controller program that is currently
running, press and hold the ON/ADV button until
all watering stops (about 4 seconds).
➋While you are holding the button down, the
controller will temporarily advance to the next
station. Then the program will end.
➌The controller will return to the mode it was in before
the program started.
RMX-1Tsande.p65 3/7/00, 10:13 AM12

RMX-1T Keypad Transmitter Page 13
START
PROG
END
SESSION
SET
STA#
1/A 2/B 3/C
4/D 5/E 6/F
7/G 8/H 9/J
CLEAR
O/TEST
STOP
START
PROG
END
SESSION
SET
STA#
1/A 2/B 3/C
4/D 5/E 6/F
7/G 8/H 9/J
CLEAR
O/TEST
STOP
SET
TIME
SET
PROG
ON
ADV
2/B
ON
ADV
Start Station
➊
➌
SPECIAL COMMANDS
NOTE: Special commands are available only with the
RMX-1R Multi-Function Receiver and a remote-ready
ESP-LX+ controller.
Start Station
This command will start any station, even if it is not
scheduled in any program, and run it for 30 minutes.
➊Enter the station number and press the ON/ADV
button.
Example: To start Station 2, press the buttons as
shown in the Start Station box at right.
➋Any other activity will stop, and the station will run
for 30 minutes.
➌To stop the station at any time, press the STOP
button.
RMX-1Tsande.p65 3/7/00, 10:13 AM13

Page 14 RMX-1T Keypad Transmitter
START
PROG
END
SESSION
SET
STA#
1/A 2/B 3/C
4/D 5/E 6/F
7/G 8/H 9/J
CLEAR
O/TEST
STOP
START
PROG
END
SESSION
SET
STA#
1/A 2/B 3/C
4/D 5/E 6/F
7/G 8/H 9/J
CLEAR
O/TEST
STOP
SET
TIME
SET
PROG
ON
ADV
➊
➋
➍
3/C3/C
ON
ADV
1/A 5/E
SET
TIME
Pa u s e
Specify Run Time &
Start Station
Specify Run Time and Start Station
This command will start any station, and run it for a
specific amount of time, up to 99 minutes. This is a
one-time command that will not affect the controllers
programming.
➊Enter the run time (in minutes, up to 99) and press
the SET TIME button. Pause for 1 second.
➋Enter the station number and press the ON/ADV
button.
Example: To run Station 3 for 15 minutes, press
the buttons as shown in the Specify Run Time and
Start Station box at right.
➌Any other activity will stop, and the station will run
for the specified time.
➍To stop the station at any time, press the STOP
button.
RMX-1Tsande.p65 3/7/00, 10:13 AM14
RMX-1T Keypad Transmitter Page 15
START
PROG
END
SESSION
SET
STA#
1/A 2/B 3/C
4/D 5/E 6/F
7/G 8/H 9/J
CLEAR
O/TEST
STOP
START
PROG
END
SESSION
SET
STA#
1/A 2/B 3/C
4/D 5/E 6/F
7/G 8/H 9/J
CLEAR
O/TEST
STOP
SET
TIME
SET
PROG
ON
ADV
2/B
SET
PROG
1/A 5/E
SET
TIME
Pa u s e
SET
STA#
3/C2/B
Pa u s e
Reprogram
Station Run Time
➊➌ ➋
Reprogram Station Run Time
This command will change the run time setting in the
controller for the station and program you select. The
command will not start the station.
NOTE: Set the ESP-LX+ controller dial to AUTO.
➊Enter the run time (in minutes, up to 99) and press
the SET TIME button. Pause for 1 second.
➋Enter the station number and press the SET STA#
button. Pause for 1 second.
➌Enter the program letter and press the SET PROG
button.
Example: To reprogram the run time to 15 minutes
for Station 2 in Program B, press the buttons as
shown in the Reprogram Station Run Time box
at right.
➍The new station run time is programmed into the
controller.
RMX-1Tsande.p65 3/7/00, 10:14 AM15

Page 16 RMX-1T Keypad Transmitter
START
PROG
3/C2/B
Start Program
Start Test Program
START
PROG
1/A
O/TEST
START
PROG
END
SESSION
SET
STA#
1/A 2/B 3/C
4/D 5/E 6/F
7/G 8/H 9/J
CLEAR
O/TEST
STOP
START
PROG
END
SESSION
SET
STA#
1/A 2/B 3/C
4/D 5/E 6/F
7/G 8/H 9/J
CLEAR
O/TEST
STOP
SET
TIME
SET
PROG
ON
ADV
➋
➊
Start Program
This command will start any controller program.
➊Enter the program letter and press the START PROG
button.
Example: To start program B, press the buttons as
shown in the Start Program box at right.
➋To stop the program at any time, press the STOP
button.
Start Test Program
This command is similar to the Start Program
command, except it starts the controllers preset test
program.
➊Press the A button, the TEST button, and the
START PROG button.
Example: To start the test program, press the buttons
as shown in the Start Test Program box at right.
➋To stop the test program at any time, press the STOP
button.
RMX-1Tsande.p65 3/7/00, 10:14 AM16

RMX-1T Keypad Transmitter Page 17
START
PROG
END
SESSION
SET
STA#
1/A 2/B 3/C
4/D 5/E 6/F
7/G 8/H 9/J
CLEAR
O/TEST
STOP
START
PROG
END
SESSION
SET
STA#
1/A 2/B 3/C
4/D 5/E 6/F
7/G 8/H 9/J
CLEAR
O/TEST
STOP
SET
TIME
SET
PROG
ON
ADV
➊
➋
OTHER FUNCTIONS
Clearing a Mistake
The CLEAR button (➊) will remove any partially
completed commands from the keypad. If you make a
mistake while entering a command, press the CLEAR
button and start over.
NOTE: Controllers will ignore commands that exceed
their capacity. For example, an ESP-16LX+ will
ignore a command to start Station 20 or to run
Program F.
Ending a Session
When you are finished sending commands to a
particular receiver, press the END SESSION button
(➋). This will prevent sending unwanted commands if
you inadvertently press more buttons afterward.
NOTE: Once you press END SESSION, you will have to
re-enter the access code before the receiver will respond.
RMX-1Tsande.p65 3/7/00, 10:14 AM17

Page 18 RMX-1T Keypad Transmitter
START
PROG
END
SESSION
SET
STA#
1/A 2/B 3/C
4/D 5/E 6/F
7/G 8/H 9/J
CLEAR
O/TEST
STOP
START
PROG
END
SESSION
SET
STA#
1/A 2/B 3/C
4/D 5/E 6/F
7/G 8/H 9/J
CLEAR
O/TEST
STOP
SET
TIME
SET
PROG
ON
ADV
➊
➋
Clearing Transmitter Memory
The transmitter retains the access code until you clear
its memory, even if several days go by between uses.
Before entering the access code for a second
receiver, you must clear the transmitters memory.
Press the CLEAR (➊) and END SESSION (➋) buttons to
clear the transmitters memory.
If the receiver is not responding to commands, the
problem could be in the transmitters memory. To
check, clear the transmitters memory, re-enter the
access code, and repeat the command.
Sensor Override
If the controller has a sensor connected to its internal
sensor terminals, commands from the transmitter will
override the sensor for 30 minutes. This allows you to
control the system remotely even if the sensor has the
system shut off.
RMX-1Tsande.p65 3/7/00, 10:14 AM18

RMX-1T Keypad Transmitter Page 19
FCC ID: EF4 SNT00406
CANADA, IC: RSS/CNR210 1078 102 1857 5 3
After 30 minutes, the override ends, and the sensor
retakes control of the system. This means that you will
not be able to water for more than 30 minutes with any
command if the sensor is active.
To cancel the sensor override at any time, press the END
SESSION button.
This device complies with FCC Part 15 and IC Rules and
Regulations. Operation is subject to the following two
conditions: (1) This device may not cause harmful
interference, and (2) This device must accept any
interference received, including interference that may
cause undesired operation.
RMX-1Tsande.p65 3/7/00, 10:14 AM19

P/N 634261A
RAIN BIRD SALES, INC. Contractor Division
145 North Grand Avenue, Glendora, California 91740, U.S.A. 626-963-9311
© 2000 Rain Bird Sprinkler Mfg. Corp.
® Registered trademark of Rain Bird Sprinkler Mfg. Corp.
Technical Services: 800-247-3782
http://www.rainbird.com
RMX-1Tsande.p65 3/7/00, 10:14 AM20
Other Rain Bird Transmitter manuals

Rain Bird
Rain Bird TBOS-II User manual

Rain Bird
Rain Bird TBOS SYSTEM 6LR61 User manual

Rain Bird
Rain Bird TBOS User manual

Rain Bird
Rain Bird UNIK Field Transmitter Instruction sheet

Rain Bird
Rain Bird PT3002 Technical specifications

Rain Bird
Rain Bird TBOS-II User manual

Rain Bird
Rain Bird TBOS-II User manual

Rain Bird
Rain Bird TBOS-II User manual

Rain Bird
Rain Bird CYCLIK Micro Operating instructions

Rain Bird
Rain Bird TBOS 635098 User manual


