RainMaster RME EAGLE EG Series User manual

™


Rain Master Eagle User Manual Table of Contents
- i -
Table of Contents
Notes iv
1.0 Introduction 1
2.0 Specications 3
2.1 PROGRAMMING CAPABILITY 3
2.1.1 Water Conservation Features 4
2.1.2 Convenience Features 4
2.1.3 Diagnostic and Fault Detection 5
2.2 FLOW CAPABILITIES 6
2.2.1 Flow Rate Monitoring 6
2.3 EVAPOTRANSPIRATION (ET)
FEATURES 7
2.4 AVAILABLE RAIN MASTER
EAGLE OPTIONS 7
2.5 CERTIFICATION AND
WARRANTY 8
2.6 ELECTRICAL SPECIFICATIONS 8
2.7 MECHANICAL SPECIFICATIONS 9
2.8 DOCUMENTATION 9
3.0 Mounting and Installation 11
3.1 CONTROLLER PLACEMENT 11
3.1.1 Mounting the Controller 12
3.1.2 Electrical Power to the
Controller Connections 13
3.1.3 Electrical Grounding of
the Controller 13
3.1.4 Grounding Instructions 13
3.2 FIELD WIRING CONNECTIONS TO
THE CONTROLLER 14
3.2.1 Master Valve and Pump Wiring
Options 15
3.2.1.1 Electrical Connections for a
Master Valve 16
3.2.1.2 Normally Closed Master Valve
Operation 16
3.2.1.2.1 Simultaneous Use - Normally Closed
Master Valve and Pump 17
3.2.1.2.2 Independent Use - Normally Closed
Master Valve and Pump 18
3.2.1.3 Normally Open Master Valve 20
3.2.1.3.1 Simultaneous Use - Normally Open
Master Valve and Pump 21
3.2.2 Flow Sensor Installation 21
3.2.3 Sensor Wiring 22
3.2.4 Valve Wiring 23
3.2.4.1 Locating Valves in the Field 23
3.3 GETTING STARTED – POWERING-
UP THE CONTROLLER 24
3.3.1 Set Time and Date 24
3.4 AC POWER FAILURES 25
3.5 CONNECTION WITH A
REMOTE CONTROL DEVICE 25
4.0 Operation 27
4.1 CONTROLLER OPERATIONAL
MODES 27
4.1.1 Automatic Mode 27
4.1.2 Rain Modes 28
4.1.2.1 Manually Activated Rain Mode 28
4.1.2.2 Programmable Rain Mode 28
4.1.3 Programmable Operations Mode 29
4.1.4 Programming Mode 29
4.2 KEYBOARD OPERATIONS 30
4.2.1 Function and Setup Keys 30
4.2.2 Data Entry Keys 30
4.2.3 Command Execution Keys 30
5.0 FUNCTION AND EXECUTION
KEY OPERATIONS 31
5.1 PROGRAM FUNCTION KEY 31
5.1.1 PROGRAM Clear 32
5.2 WATER DAYS FUNCTION KEY 32
5.3 STATIONS FUNCTION KEY 34
5.3.1 Stations and Watering Length 34
5.3.1.1 Conventional Stn. Programming 34
5.3.1.2 Cycle and Soak Programming 36
5.3.1.3 Cycle and Soak Stn. Programming 37
5.4 START TIMES FUNCTION KEY 39
5.4.1 Start Times and Automatic Program
Overlap Protection 39
5.5 QUICK STATIONS
FUNCTION KEY 41
5.5.1 Conventional Quick Station
Programming 41
5.5.2 Cycle and Soak Quick Station
Programming 42
5.6 WATER % BUDGET
FUNCTION KEY 43
5.7 MANUALLY ACTIVATED
FUNCTIONS 45
5.7.1 MANUAL Program 45
5.7.2 MANUAL Station 46
5.7.3 MANUAL Master Valve 46
5.7.4 MANUAL System Check/

Table of Contents Rain Master Eagle User Manual
- ii -
Syringe Cycle 47
5.8 SKIP DAYS FUNTION KEY 48
5.9 REVIEW FUNCTION KEY 50
5.10 CLEAR EXECUTION KEY 52
5.11 QUIT EXECUTION KEY 52
5.12 ENTER EXECUTION KEY 52
6.0 Setup Key Operations 53
6.1 SET TIME OF DAY/DATE 54
6.2 MASTER VALVE (MV) 55
6.3 TYPE OF MASTER VALVE 55
6.4 PUMP 56
6.5 STACK OR NO STACK 57
6.6 DELAY 58
6.7 SECURITY CODE 59
6.7.1 Enabling Security Code 59
6.7.2 Disabling Security Code
(LOCKED Controller) 59
6.7.3 Eliminating Security Code 60
6.8 SENSOR 61
6.9 ALARM 63
6.10 CYCLE AND SOAK 63
6.11 ODD/EVEN
WATERING CONTROL 64
6.12 COMMUNICATIONS
(ENABLING) 65
6.13 FLOW SENSOR 65
6.13.1 Pipe 66
6.13.2 Main Line Flow Limit 66
6.13.3 Unscheduled Flow Limit 67
6.13.4 Flow Check Delay 67
6.13.5 Totalizer 68
6.13.6 Flow Percentage 69
6.13.7 Limits 69
6.13.7.1 Station Limits Using Learn Mode 70
6.13.7.2 Setting Station Limits 71
7.0 ET KEY OPERATIONS 74
7.1 ET DATA SOURCE DISPLAY 74
7.1.1 Historical Data 74
7.1.2 Operator Entered Data 75
7.1.3 Weather Sensor Data 75
7.1.4 Internet Interface Data 75
7.2 ET MODE 76
7.3 ENTERING THE ET REFERENCE
VALUE 76
7.4 ENTERING HISTORICAL ET
MONTHLY VALUES 77
7.5 WEATHER STATION 78
7.51 Weather Station Status Display 78
7.6 MANUAL ET DATA 79
7.6.1 Clearing Manual ET Data 80
8.0 ET PROGRAMMING 81
8.1 INTRODUCTION 81
8.1.1 ET Scheduling Overview 82
8.2 OBTAINING THE HISTORICAL
ET DATA 82
8.3 GENERATE THE REFERENCE
PROGRAM 83
8.4 ESTABLISH THE ET
REFERENCE VALUE 84
8.5 ENABLING PROGRAMS FOR
ET OPERATION 84
8.6 SELECTING THE ET
DATA SOURCE 85
8.6.1 Historical ET 85
8.6.2 Manually Entered ET 86
8.6.3 Weather Station generated ET 86
8.6.4 ET Data from the Internet 86
9.0 TROUBLESHOOTING 87
9.1 MONITORING STATION FLOW 87
9.2 FAULT DETECTION OVERVIEW 87
9.2.1 Wiring Fault 88
9.2.2 Main Flow Limit Fault 88
9.2.3 Flow Unscheduled Fault 89
9.2.4 Flow Station Fault 89
9.2.5 No Flow Station Fault 90
APPENDIX A –
CONTROLLER DISPLAYS 93
A.1 MESSAGE AND PROMPT DISPLAY93
A.1.1 HELLO Mode 93
A.1.2 Automatic Mode Display 93
A.1.3 ET Prompts and Displays 93
A.1.4 PROGRAM Prompts and Displays 94
A.1.5 WATER DAYS Prompts
and Displays 95
A.1.6 STATIONS Prompts
and Displays 95
A.1.7 START TIMES Prompts
and Displays 95
A.1.8 QUICK STATIONS Prompts
and Displays 96
A.1.9 WATER % BUDGET Prompts
and Displays 96

Rain Master Eagle User Manual List of Tables
- iii -
List of Tables
Table 1 - Electrical Calculations 8
Table 2 - Master Valve and Pump
Wiring Options 15
Table 3 - Sensor Connections 23
Table 4 - Valve Color Code 23
Table 5 - Cycle and Soak Parameters 36
Table 6 - Setup Options and Controller
Defaults 53
Table 7 - ET Data Entry 82
Table 8 - Program Data Entry 83
Table 9 - Troubleshooting Assistant 91
Table 10 - ET Troubleshooting Assistant 92
Table 11 - Flow Sensor Part Numbers 102
Table 12- Water Demand 114
Table 13 – 30-Day Water Usage 114
Table 14 – 30-Day ET Adjusted Water Usage 117
List of Figures
Figure 1 - RM EAGLE
Advanced ET Controller 2
Figure 2 - RM EAGLE RME36EG-B 10
Figure 3 – Controller Mounting 12
Figure 4 - Power and Grounding
Connections 14
Figure 5 - Master Valve Electrical
Connection 16
Figure 6 – Master Valve and Pump
Electrical Connections 17
Figure 7 – MV&P Electrical Connections
with Isolation Relay 18
Figure 8 - Independent Control of MV&P
using Isolation Relay 19
Figure 9 - Normally Open MV&P 20
Figure 10 - Flow Sensor Electrical
Connections 21
Figure 11 – Sensor Interface Electrical
Connections 22
Figure 12 - RM EAGLE Keyboard
Conguration 26
A.1.10 REVIEW Prompts and Displays 96
A.1.11 SETUP Prompts and Displays 98
A.1.12 MANUAL Prompts and Displays 100
A.1.13 SKIP DAYS Prompts and Displays 100
A.1.14 CLEAR Prompts and Displays 100
A.1.15 Flow Sensor Prompts and Displays 100
A.1.16 Misc. Prompts and Displays 101
A.2 DAYS/STN. NUMBER DISPLAY 102
B APPENDIX – FLOW SENSOR
PART LIST 102
B.1 RAIN MASTER FLOW SENSOR
PART NUMBERS 103
C Appendix – Programming Examples 104
C.1 Basic Programming Example –
Public Park 104
C.2 Flow Monitor Programming –
Public Park 115
C.3 ET Programming Example –
Public Park 119

Notes Rain Master Eagle User Manual
- iv -
Notes

Rain Master Eagle User Manual 1.0 Introduction
- 1 -
1.0 Introduction
Congratulations! You have selected one of the most advanced irrigation controllers available.
Rain Master has taken great pride and patience in developing and building the most trouble-free
controllers in the irrigation industry. Your Rain Master EAGLE has many high-quality features
including:
• Economical ow sensing
• Cycle and soak programming
• Complete independent control of Pumps and Master Valves
• Evapotranspiration adjusted water cycles
• e ability to interface to a weather station and rain sensors
• Internet communication option
To take full advantage of the many features available in your Rain Master EAGLE controller,
please take a few minutes and read through your User’s Manual. For those who do not have the
time, a Quick Reference sheet is provided. is sheet will allow you to perform some of the basic
functions required in programming and operating your Rain Master EAGLE controller.

Notes Rain Master Eagle User Manual
- 2 -
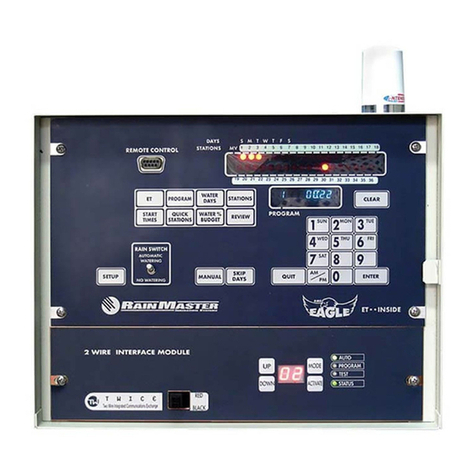
Figure 1 - Rain Master Eagle Advanced ET Controller
SETUP
ET PROGRAM
START
TIMES
QUICK
STATIONS
WATER%
BUDGET REVIEW
WATER
DAYS STATIONS
MANUAL QUIT
SKIP
DAYS ENTER
1
SUN
2
MON
3
TUE
8
0
9
4
WED
7
SAT
5
THU
6
FRI
CLEAR
RAIN SWITCH
AUTO WATER
NO WATER
AM
PM
8.8.8.8.8.8.8.8.
MV
DAYS
STATIONS
S M T W T F S
1 2 3 4 5 6 7 8 9 10 11 12 13 14 15 16 17 18
PRO MAX
REMOTE
19 20 21 22 23 24

Rain Master Eagle User Manual 2.0 Specications
- 3 -
2.0 Specications
2.1 PROGRAMMING CAPABILITY
• Four (4) independently controllable irrigation programs, with ve (5) selectable start times,
for a total of 20 possible irrigation cycles per day.
• Runtime(s) for each station can be set from 1 minute to 9 hours 59 minutes per station,
in one-minute increments.
• Quick Station(s) programming to allow rapid programming of an entire block of stations,
all with the same runtime.
• Water Days for each program can be based on a seven-day cycle or a skip-by-day cycle,
which allows a program to skip from 1 to 30 days between watering cycles.
e water days can be further restricted with the selection of ODD/EVEN calendar days.
• Manually activated system Check/Syringe Cycle to sequentially run each station for
a user selectable time, with a range from one minute up to nine minutes.
• Manually activated program cycle to execute a program independently of its programmed start
time and water days.
• Manually activated station cycle to operate a single station for a selectable period of time
from 1 minute to 9 hours 59 minutes.
• Programmable Master Valve to utilize and control a Master Valve on a per program basis.
• Congurable Master Valve Type to select either a Normally Open Master Valve or a
Normally Closed Master Valve.
• Programmable pump independent of the Master Valve on a per program basis.
• Programmable stacking or non-stacking operation of the programs.
In the event that programmed start times either within a program or between programs should
overlap, or coincide, the controller can either be programmed to sequentially execute one
program after the other program has completed (Stack Mode) or to simultaneously execute all
programs as their programmed start times occur (No Stack Mode).
• Programmable delay time between station executions.
e programmed delay time can be between 0 to 255 seconds (4 minutes 15 seconds). is
capability allows slow-closing valves to completely shut o, before the next valve turns on.

2.0 Specications Rain Master Eagle User Manual
- 4 -
2.1.1 Water Conservation Features
• Flow sensing and control.
• Evapotranspiration (ET) based scheduling.
• Percentage adjustment on a per program basis to allow an increase or decrease of all station
runtimes within that program. e percentage will allow adjustment from 0 to 300% in 1%
increments.
Programmable rain shut o in order to delay the start of irrigation after a rain storm. e
controller will not water during the programmed shut o period (from one to seven days). After
the shut o period has expired the controller will return to the Automatic Mode of operation.
• Manual Rain Switch (Automatic Watering – No Watering) provides a means of quickly turning
o all irrigation programs without disturbing the stored program(s). When the switch is placed
in the No Watering position the display will show “RAIN OFF”.
• Connectivity for any one of the following: rain, moisture, or freeze sensor device. e
enabling of these devices can be performed on a per program basis. When the sensor is “active”
irrigation will stop and the display will indicate that the sensor is active. is feature allows
non-irrigation programs to execute independent of these devices.
• e ability to select either ODD or EVEN day watering on a per program basis. (When either
of these features is selected, the controller will not water on the 31st day of the month.)
• Selectable Cycle and Soak irrigation programming or conventional programming on a
preprogram basis.
• Programmable cycle runtime, Max Cycle Time, and Soak time on a per station basis.
• Automatic minimization of the water window by intelligently scheduling station starts when
other stations are satisfying their SOAK TIMES.
• Controller supports Quick Station programming in the Cycle and Soak programming mode.
• e controller provides a display of the total runtime of the program using the REVIEW
feature of the controller. e Cycle and Soak feature intelligently displays the total runtime of
the program, the controller considers all soak delays, optimized program features, water budget
percentage and inter-station delays.
• Optimized water savings, all station run times are calculated and executed to the nearest
second.
2.1.2 Convenience Features
• Easy to understand and use keyboard layout, provides ease of use during programming and
review.
• Multiple displays provide a simple way of programming and information review.
• During program execution, the controller will display the executing program number, the ow
in GPM, and the station runtime countdown in hours, minutes and seconds.
• Programmable Controller Security Access code to prevent unauthorized use or modications to
be made of the controller’s programs. is feature is enabled by entering a security access code
from 1 to 4 digits in length.
• Review key to display all program parameters on a per program basis. Successive invocation of
the key will display program parameters one by one. Depression and subsequent hold of this
key will allow rapid review of program parameters.

Rain Master Eagle User Manual 2.0 Specications
- 5 -
2.1.3 Diagnostic and Fault Detection
• Programmable audible alarm. When enabled this alarm will “chirp” once every six seconds for
either an electrical eld wire fault or any ow fault condition. e alarm will continue until
reset by the user.
• Automatic eld wire fault detection enables the controller to sense a short in the eld wire
and instantly turn o that station. e display will report the fault condition any time a
eld wire fault occurs. Additionally an audible alarm will “chirp” (if enabled, once every six
seconds) until it is reset. e controller will automatically advance the fault station to the next
programmed station.
• Built-in self-test allows you to test various internal circuitries utilizing built-in test capability.
• Non-volatile memory to retain the program(s) and controller information during power
outages or seasonal shut downs. is information is maintained indenitely.
• A “real time” clock with non-volatile backup to maintain the actual date and time during
power outages without the need of batteries. is eliminates the need to reprogram the
controller every time there is a power outage.
• Advanced circuitry to automatically monitor internal voltages and reset on-board
microprocessor circuitry during power “brown-out” or error conditions.
• Automatic electronic fuse which resets intelligently based upon need. (No user fuses or circuit
breakers to reset or fail.)
• Intelligent resumption of program execution after power outages to ensure that program starts
are not lost. e controller intelligently schedules irrigation after any outage while preserving
the original water window.
• Automatic detection of main line water breaks. Upon detection the controller will shutdown
all active irrigation, energize a Normally Open Master Valve (if selected), condemn any future
start times, and trigger audible and visual alarm indicators.
• Automatic detection of unscheduled water ow. Upon detection the controller will activate the
Normally Open Master Valve (if selected), condemn any future start times, and trigger audible
and visual alarm indicators.
• Automatic detection of upper stations ow limit. Upon detection the controller will turn
o the fault station, advance the program to the next station, condemn the station from any
future watering times, and trigger audible and visual alarm indicators.
• Automatic detection of no water ow to a station (“No Flow”). Upon detection the controller
will turn o the fault station, advance the program to the next station, condemn the station
from any future watering times, and trigger audible and visual alarm indicators.

2.0 Specications Rain Master Eagle User Manual
- 6 -
2.2 FLOW CAPABILITIES
2.2.1 Flow Rate Monitoring
• Programmable ow to enable or disable the ow sensor features.
• Programmable ow sensor pipe sizes for standard Rain Master ow sensors (10, 125, 15, 20,
30, and 40 inch). Non-standard pipe sizes are also programmable.
• Inputs for connectivity to a ow sensor. e controller will read the frequency of the sensor by
sensing each time a contact closure appears at the input. e controller will source +8 VDC to
the sensor.
• Programmable main line ow limit from 1-999 GPM denes the maximum allowable ow
during scheduled irrigation.
• Automatic detection of main line water breaks. Upon detection the controller will shutdown
all active irrigation, energize a Normally Open Master Valve (if selected), condemn any future
start times, trigger audible and visual alarm indicators.
• Programmable unscheduled ow limit from 0-999 GPM denes the maximum amount of ow
which will be tolerated during unscheduled irrigation periods.
• Automatic detection of unscheduled water ow. Upon detection the controller will energize
the Normally Open Master Valve (if selected), condemn any future start times, and trigger
audible and visual alarm indicators.
• Automatic detection of no water ow (“No Flow”) on a per station basis. Upon detection the
controller will turn o the fault station, advance the program to the next station, condemn the
station from any future watering times, and trigger audible and visual alarm indicators.
• Programmable station upper ow limits from 0-500 GPM.
• Automatic detection of upper station ow limit. Upon detection the controller will turn o the
fault station, advance the program to the next station, condemn the station from any future
watering times, and trigger audible and visual alarm indicators.
• Programmable ow check delays between one and six minutes (one minute increments).
• is delay allows stations to stabilize each time a station is turned on/o before limit checks are
applied.
• Automatic monitoring and display of measured station ow in Gallons-Per-Minute (GPM)
from 0 to 999 GPM.
• Controller utilizes automatic LEARN mode for setting individual station ow limits for the
entire controller. A global percentage adjustment from 5% to 80% is used to automatically
factor upper ow limits for all stations once the nominal values have been measured.
• Single station ow limits can be setup based upon the measured nominal ow or a manually
entered value (0-500 GPM).
• Intelligent upper-limit processing for concurrent station operation.
• A water usage meter indicates total water used by the controller. e water usage meter can be
reset at any time.

Rain Master Eagle User Manual 2.0 Specications
- 7 -
2.3 EVAPOTRANSPIRATION (ET) FEATURES
• Ability to enable or disable ET processing on a per program basis.
• e ability to use any one of four dierent ET sources as the basis for its ET calculations:
1. Historical ET data
2. Manually entered ET data
3. Rain Master ET measurement device or compatible equivalent
4. Downloaded ET data from the Internet (requires optional hardware)
• e ability to input and store Historical ET data on a monthly basis (12 months); the data is
based on a daily average, at the geographic location of the controller.
• e ability to store an ET reference value. is value is used during the adjusted station
runtime ET calculations.
• e ability to automatically re-compute the user entered station runtime, at the moment of
irrigation, utilizing the current ET information. e station runtime is evaluated and adjusted
based on days since last irrigation. e controller automatically compensates for changes in
weather patterns between irrigation days.
• Accept a manual operator entered weekly ET value. e manual entry will override previously
entered or accumulated ET data. At the end of the seven day period the controller will
automatic revert to utilizing Historical, Weather Station device, or Internet provided daily ET
data.
• Connectivity to an ET measuring device such as a Rain Master Weather Station. e controller
will record .01 of an inch (ET) each time a contact closure appears at the input.
• e controller will source +5 VDC to the device.
• e ability to display the last ET daily value including the data source (Historical, measured,
manually entered, or Internet provided).
• Ability to display the current adjusted runtime as a percent of the base runtime for all ET
enabled programs.
2.4 AVAILABLE RAIN MASTER EAGLE OPTIONS
• Ability to connect to a Rain Master Communications card (iCentral) to provide connectivity
to the Internet.
• Ability to interface to a Rain Master Weather Station for direct ET measurements.
• Ability to connect to a Rain Master Flow sensor or other ow sensor device.
• Built-in remote control capability for compatibility with all Rain Master remote control
systems.
• Connectivity for a number of sensor types, including: rain, freeze, or moisture sensor device.
e device can be enabled on a per program basis. is allows non-irrigation programs to
execute independent of the sensor device.
• Availability in a variety of enclosure types including: standard cold roll steel enclosure with
powder coat paint, extended size cold roll steel enclosure with station screw terminals,
extended size stainless steel enclosure with station screw terminals.
• All extended size enclosures are available with optional heavy duty lightning protection.

2.0 Specications Rain Master Eagle User Manual
- 8 -
2.5 CERTIFICATION AND WARRANTY
• Underwriters and FCC approved
• Manufacturer’s limited 5-year warranty
2.6 ELECTRICAL SPECIFICATIONS
• Input power: 105-130 VAC, 50/60 Hz, ½ Ampere maximum, 0.1 Ampere idle
• Output power: 24 VAC, 1.5 Amperes maximum total output or 36 VA maximum total output
1.0 Ampere per station or Master Valve
Table 1 - Electrical Calculations
Valve solenoids are rated in either Amperes or VA. e term VA stands for Volt-Amps,
which is obtained by multiplying the Amperes required by the 24 VAC operating voltage.
Most modern solenoids require approximately .25 Ampere, which is equivalent to 6 VA.
is allows up to six solenoids to be energized at the same time.
EXAMPLE: You are using a Master Valve and Pump; you have congured the system
to use the NO STACK option. is conguration would allow all four programs to run
simultaneously, as depicted in Figure 6 – Master Valve and Pump Electrical Connections.
Four programs (.25 A times 4) 1.00 Ampere
Master Valve (.25 A times 1) .25 Ampere
Pump using Rain Master RLY1 (.20 Amps) .20 Ampere
Total Current 1.45 Amperes
is conguration would not exceed the 1.5 Amperes maximum allowable limit.
If higher current solenoids are used or if more than one solenoid is connected to any one
station output, caution should be used when operating in the NO STACK conguration
mode.

Rain Master Eagle User Manual 2.0 Specications
- 9 -
2.7 MECHANICAL SPECIFICATIONS
• Heavy duty 18-gauge steel enclosure jet coated and powder coated to protect it for indoor and
outdoor environments.
• Outdoor pedestal mount available for all models.
• Two convenient sized enclosures for easy installation of eld wires.
• Outdoor pedestal mount available for all models.
• Extra heavy-duty lightning and surge protected models available for areas where lightning is a
concern.
Shipping Weight: 14 pounds
Dimensions: 13.25 inches Wide x 12.1 inches High x 4.3 inches Deep
2.8 DOCUMENTATION
• Rain Master Eagle User Manual - Part Number 500042
• Rain Master Eagle Quick Reference Guide – Part Number 500045
• Rain Master Eagle Historical ET Data Tables – Part Number 500018
• Grounding Instructions (Option)
• Multiple Controller Installation Instructions - Technical Bulletin 018 (Option)

2.0 Specications Rain Master Eagle User Manual
- 10 -
Figure 2 - Rain Master Eagle RME24EG-B
1
2
3
4
5
6
7
8
9
10
11
12
13
14
15
16
17
18
24
23
22
21
20
19
30
29
28
27
26
25
36
35
34
33
32
31
SETUP
ET PROGRAM
START
TIMES
QUICK
STATIONS
WATER%
BUDGET REVIEW
WATER
DAYS STATIONS
MANUAL QUIT
SKIP
DAYS ENTER
1
SUN
2
MON
3
TUE
8
0
9
4
WED
7
SAT
5
THU
6
FRI
CLEAR
RAIN SWITCH
AUTO WATER
NO WATER
AM
PM
8.8.8.8.8.8.8.8.
MV
DAYS
STATIONS
S M T W T F S
1 2 3 4 5 6 7 8 9 10 11 12 13 14 15 16 17 18
PRO MAX
REMOTE
19 20 21 22 23 24

Rain Master Eagle User Manual 3.0 Mounting and Installation
- 11 -
3.0 Mounting and Installation
3.1 CONTROLLER PLACEMENT
e Rain Master Eagle controller is suitable for indoor or outdoor environment. It is lockable,
dust and rain resistant. Outdoors the controller should be placed in a shaded and dry
environment. Do not subject the controller to direct sprinkler spray or continuous heavy moisture.
A free standing pedestal mounting (PED 1) is available for outdoor controllers; contact your Rain
Master distributor.
!
Do not drill holes in the controller’s case. It has all the holes necessary for mounting
it on a wall or to a pedestal. Drilling holes in the unit will cause metal chips to mix
with the electronics and this will cause the unit to malfunction. If, for some reason,
it is absolutely necessary to drill additional holes in the unit, carefully remove all the
electronics prior to doing so.

3.0 Mounting and Installation Rain Master Eagle User Manual
- 12 -
Figure 3 – Controller Mounting
3.1.1 Mounting the Controller
1. Locate a at vertical surface, place the mounting bracket at eye level and fasten securely using
the appropriate fastener hardware.
2. Mate the bracket on the back of the controller to the mounting bracket on the wall and hang
the controller.
3. Secure the bottom of the controller by placing a screw through the hole, located in the
center, towards the bottom of the controller cabinet.
Side View
Wall
Back Mounting
Bracket
Fastener
Hardware
Install Retaining Screw

Rain Master Eagle User Manual 3.0 Mounting and Installation
- 13 -
3.1.2 Electrical Power to the Controller Connections
4. Refer to Figure 4 - Power and Grounding Connections.
5. Place Rain Switch in “No Watering” position.
6. Remove lower panel.
7. Refer to paragraph 313 Electrical Grounding of the Controller.
8. read the provided Conduit Body onto the transformers threaded connector.
9. Connect the supply line grounded conduit to the Conduit Body.
10. Connect the 120 VAC 50/60Hz supply line to the transformer wires within the Conduit
Body.
11. Install the gasket and cover onto Conduit Body and secure with the two provided screws.
12. Be sure to follow all local electrical wiring codes.
13. Replace the lower panel and move the Rain Switch to the “Automatic Watering” position
after the installation of the eld valve wiring is complete.
3.1.3 Electrical Grounding of the Controller
Proper electrical grounding is required to ensure safety to you, as well as to protect the controller
electronics in the event of electrical line surges, such as lightning. In areas where lightning is a
common occurrence; it is strongly recommended to use the Rain Master Eagle model EG-T.
3.1.4 Grounding Instructions
1. Mount the controller as close as possible to the grounding rod, using 10 AWG grounding
wire, attach one end of the wire to the controller ground lug and the other end to the ground
rod. e wire should be as short as possible. Ensure the grounding wire is free of any nicks or
sharp bends.
2. Use a ground rod clamp to secure the ground wire to the ground rod. Be sure all surfaces are
clean of oxides and dirt, and that all connections are solid and secure.
3. In areas of very dry soil or sand, it may be necessary to “Dope” the grounding rod. Contact
your local Rain Master distributor or Rain Master Irrigation Systems for a pamphlet on
grounding techniques titled “RMIS Grounding”.
4. It is important that the ground rod be a full 8 feet into the ground, with only enough of the
rod exposed to clamp the ground wire. e 8 foot ground rod should completely penetrate
the soil at a right angle. If this is not possible, it is acceptable to put the ground rod into the
soil at a slight angle (slightly less than 90 degrees).
5. Should other grounding installation requirements be necessary, contact your local distributor
or Rain Master Irrigation Systems.
It is important to periodically check the ground resistance to ensure it is not greater
than 10 ohms. Contact your local Rain Master Distributor for details.

3.0 Mounting and Installation Rain Master Eagle User Manual
- 14 -
Figure 4 - Power and Grounding Connections
3.2 FIELD WIRING CONNECTIONS TO THE CONTROLLER
e controller utilizes a quick connect/disconnect style of connector. Each wiring harness is 24
inches long and color coded. To use the harness the non-connector end must be stripped back and
attached to the corresponding eld wire using a wire nut or soldered together, then taped o.
Rain Master Eagle EG series controllers come equipped with terminals to which the eld wires are
directly connected. Unused wires should be taped o to prevent shorting.
Behind the lower panel of the controller, the station numbers are labeled next to each connector.
Simply match the station wire to the appropriate eld wire.
!
ALWAYS TURN-OFF POWER before changing or modifying eld, sensor or power
wiring within the controller. Dangerous voltage and current exist within the controller
which may damage the controller if improperly connected or shorted.
e controller’s COMMON wire is WHITE and the MASTER VALVE/PUMP is
BLACK.
If it becomes necessary to remove the Quick Connector blocks from the printed circuit board,
Transformer
Condulet
Green
Black
White
To AC Power Source
Black to
Master Valve /
Pump
White to
Valve
Common
Wires
If the transformer has
a ground wire (green),
then connect as
shown.
10 AWG (or larger)
Ground Wire
8’ Ground Rod
Ground
This manual suits for next models
1
Table of contents
Other RainMaster Controllers manuals
Popular Controllers manuals by other brands

Elsner
Elsner KNX eTR Sunblind manual

Roberts Gorden
Roberts Gorden bzc 700 Operation manual

Eaton
Eaton MMX11 Series installation instructions

Omron
Omron CK5M Series Connection guide

URC
URC Total Control 2.0 TDC-9100 owner's manual

Guardian Controls International
Guardian Controls International RCC-50 OPERATION AND SETUP MANUAL